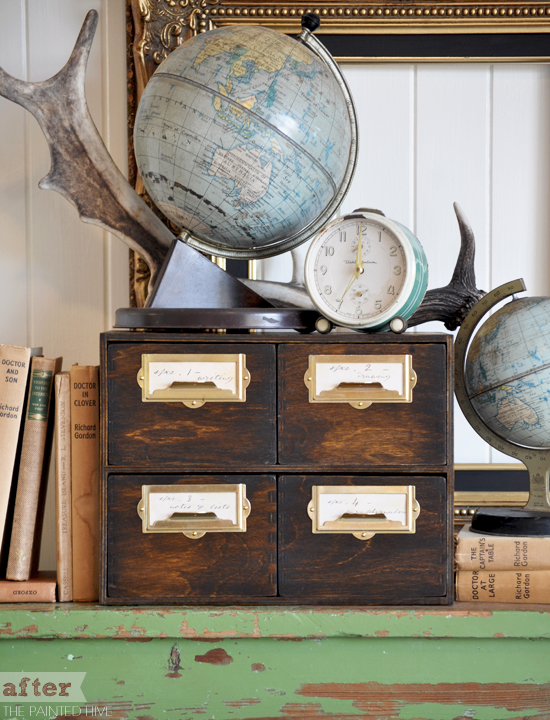
Firstly, thanks so much to everyone for the lovely comments about my map cabinet makeover. I was seriously surprised and overwhelmed – you guys are just the best.
There was a lot of interest in the compass knobs I created and some of you wanted to see a more in-depth tutorial on how to make them, so here goes…
You will need….

Plain Timber Knob/s

Image/s to Apply

Printer and Standard Paper

Spray or Craft Paint
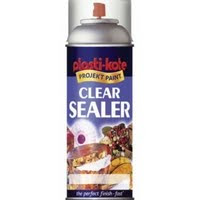
Clear Matte Spray Sealer

Scissors or a Craft Knife

Paint Brush

Adhesive
(such as PVA, Craft Glue or Mod Podge)
1. Using your computer, create or find an image you’d like to use and scale it to an appropriate size for your knob.
2. Print out your image onto regular copy paper.
3. Colour match the background of your image then paint your knob to co-ordinate.

4. Lightly spray your image with clear matte sealer. Allow to dry and then repeat the process.
This gives your image a protective coating and stiffens it slightly to help prevent ink run and paper bubbling during the gluing process.
5. Once completely dry, cut closely around your image using sharp scissors or a craft knife.
6. Apply a thin coat of adhesive to your knob using a paint brush.
7. While the glue is still wet, position your image in place. Press down firmly and smooth it all over, paying special attention to any edges.
8. Once dry, give your knob two or three coats of clear spray sealer.
For extra protection I like to finish with a few coats of brushed-on clear acrylic poly too.
9. Fini! Admire your new custom knobs (oh yeah, and find some furniture to put them on!).



I’m putting your amazing knobs in the PoPP Spotlight on Saturday… LOVE them!
Awesome! Great tut too. ;)
Thanks for the tutorial. Looks great!
I wanted to let you know about Atticmag’s new linky party – Giveaway Friday! It’s a convenient place for bloggers to link their giveaways each week. We’ve kicked it off with a fantastic giveaway of our own. Five lucky winners will win material to do a backsplash in their homes. Hope to see you there!
Allison
Atticmag
I found you on Transformation Thursday. These are great, you could even do this on dresser knobs too!I am your newest follower!
Definitely going to try this one. It’s amazing.
What a neat idea! Thanks for sharing.
belle
http://beautifulnest.blogspot.com/
adorable! i love these! come on over and link up to MMM :)
Sooooo awesome! I just adore them! Thanks for sharing your secret!
Thank you for the tutorial! I have to make some for my son, we moved some of his sister’s furniture in his room and now he has some girly knobs!
I’m your new follower!
http://lifeinthethriftylane.blogspot.com/
WOW, such an awesome idea!!! Can’t wait to try this!! :)
I am new to your blog and I just think you are a creative genius(if that even makes sense!)I love ALL of your projects, your very inspiring!!! I can’t wait for your next project.
I never thought to pre-spray an image with sealer to prevent it from running. What a great tip! And these are so cute… but the compass knob is still my favorite.
They are absolutely fabulous – thanks for the tutorial!
So awesome! Thank you for sharing this!! Definitely going to try this out!!
My husband has been rolling his eyes at my slow conversion to a coastal theme in our living room. Until he saw that cabinet. His jaw dropped (as did mine). He said that I could glue seashells over every surface for all he cared so long as he got a cabinet like that, along with the map and knobs. Now I know how to make the knobs.
Your work is absolutely incredible! Thank you so much for sharing it as well as the how to’s. You really are an inspiration!
I realize this is over a year old, but hoping you can answer this for me still! I’m loving the images you chose… can you tell me where you found them? This is AMAZING – you did such a great job, it doesn’t even look like the same piece of furniture! You’re super inspirational!
Hi Sara
I didn’t have an email address to reply to your question so also left a comment on your blog so hopefully you find one of them!
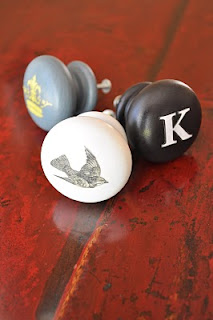
The K I simply made myself in Word, the bird is from The Graphics Fairy and the crown I found through a Google image search for “crown graphics”. The compass graphic is also from a Google image search though you can copy it from my blog if you’d like to use it (I published the picture in the cabinet makeover post).
I usually customise any images I find online by editing them in Photoshop before I use them.
Kristine
I love the crown and the bird! Great tutorial and fantastic idea! Sharing over on my FB for all to see :)
Great idea! I love this
Great idea! Thanks for sharing. I look forward to checking out your other projects. :)
Have you used mod podge or a method like this on ceramic knobs? I’m having a hard time finding cheap knobs for a cabinet I’m refinishing. I’ve never used modpodge or the clear sealer before. Do you have any tips or suggestions? Would the method of adhering the design on clear white cermic work? Thanks!
Hi Michele
I haven’t découpaged onto ceramic before though in principle it should work fine.
Just ensure you trim closely around your design so there is a minimal paper border, spray it with the sealer to protect the ink (if necessary) before application and use a sparing amount of adhesive applied with a flat brush.
I guess it’s possible that the sheen of the ceramic might contrast with the matte finish of the paper, even once sprayed with a gloss sealer, though it’s something you’ll need to experiment with.
Good luck!
Kristine
I love it!!! Thanks for sharing!!
Wonderful stuff….Thank you
Hello, I’m interested in doing something like this for my girls. I was wondering if you know the size that I should be using for the knobs?
Hi Emile
Any size knob that suits the scale of your piece of furniture should be totally fine.
Kristine