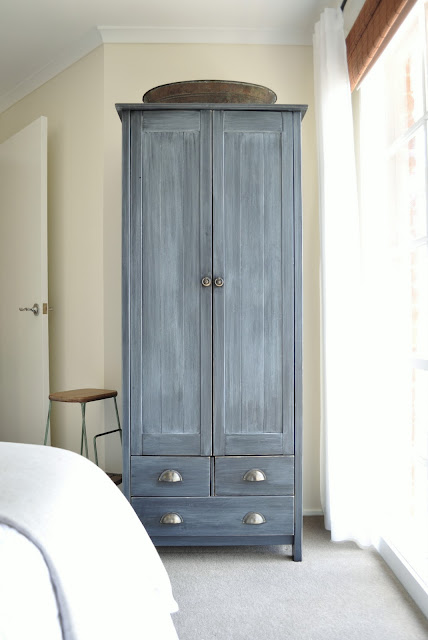
I found this cute little cupboard in the gutter.

Needless to say within a few minutes it had magically teleported itself to the back of my car.
I knew that with a little love someone would eventually prefer this little guy inside their home so got to work painting the body in rich ebony before distressing and sealing it.
Well, that was the easy part though because here’s the main reason I imagine it was on the curb to begin with….
Someone had been waaay too zealous with an electric sander.
Not only is there chipboard showing through the veneer, those lines you can probably make out are actually deep ridges!
Sure I coulda just filled, sanded and painted the whole top though I wanted to make a bit more of a statement than that.
Enter….my good friend gift wrap.
I adore gorgeous paper and for some reason have always been drawn to vintage maps – which I thought would be just perfect for this project.
The sheet of gift wrap I bought wasn’t quite big enough to cover the whole top of the cabinet so I took it to my local printer who scanned, enlarged and printed a new copy for just $20.
I created an accurate template using baking paper which I could use as a guide when cutting it out.
Once cut to size, I gave the map a few light coats of clear matte spray.
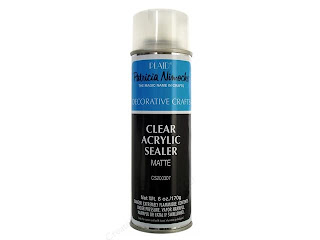
This just helps protect the ink and stops it from running if the paper becomes too damp during the gluing or final sealing process. It also helps to stiffen the paper and avoid bubbling.
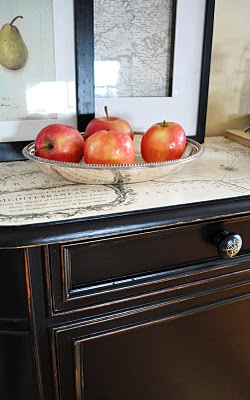
To attach the paper I applied a pretty thick coat of slightly diluted PVA to the cabinet (you could use Mod Podge – I just didn’t have any) then smoodged (hey, it’s a word) my map into place.
I then applied about five coats of satin clear sealer using a paint brush making sure to cover all of the edges really well.
To tie-in with the map theme I also created these cute little compass knobs using basic DIY decals. Anyone with a printer and standard copy paper can do this at home! You can check out my full tutorial here (or read-on below for a summary).
Simply paint a plain timber knob any colour you like then find or create a design on your computer and print it out onto normal paper.
Here’s my compass design if anyone wants to use it. Just re-scale it to the size you need.

The process of attaching it to the knob is basically the same as that I used for adhering my map to the cabinet top.
Give your image a few light coats of clear matte spray, cut around it closely and then glue and smoodge it into place on your knob. Finish with a few coats of satin sealer to protect it and voila!
Making these was easy and the possibilities are practically endless – you could use letters, numbers, symbols, little clock faces, nursery rhyme characters for a kids room, sweet little birds…anything!
Anyways, a few final before and afters just for comparisons sake….

I hope you enjoyed this little project.
I know it can be tempting just to scroll down and check out all the photos though if you have time give it a read too cause I tried packing it with a few handy hints.



I am totally amazed. I love that piece, and what you did to it is amazing. Great job.
Brooke
I LOVE it!!! You did a fab job. I never would have thought that something so not pretty could turn out so great! I’m gonna be lookin’ for more great finds of my own.
Shannon
http://www.akadesign.ca
I love what you’ve done…looks wonderful :)
Wow…that’s amazing! I love your “new” cabinet!!! Nice work!!!
http://www.inspired2cook.com/
Wow lucky and amazing you!
Great hints and thanks for sharing the compass. You did an amazing job on giving that piece a new life. It looks wonderful.
That is incredible. You did a magnificent job on that. You are very creative. ~~Sherry~~
That looks soooooo good. I love it and what a great tutorial, too.
Awesome makeover !! I’m always amazed how with a little effort some items can get a brand new lease on life
Thanks for sharing
Caroline
http://ateliercaroline.blogspot.com/
This cabinet looks great. Thank you for sharing. I look forward to the tutorial.
Always, Teresa
Holy Cow!! This is a completely amazing transformation… I LOVE this piece of furniture:)
Visiting from justsewsassy.com
I have a super fun giveaway going on right now, come check it out!!
http://justsewsassy.com/2010/08/10/tuesday-tutorial-anthro-inspired-headband/
Holy Crow, this is amazing!
Kristine, I’m repeating myself, but you are one amazingly creative woman!
I love all of your pieces, but somehow the ebony ones are always my favourite, and this one tops them all. Just gorgeous!
xx
Maja
Verrry nice! I found you through The Shabby Nest!
This is just FANTABULOUS! I, too, would love to know where you got that marvelous map wrapping paper. I love maps also. I subscribed to National Geographic magazine just to get the maps! :o)
The map is amazing – we would love it around here! You are a genius!
Wow.. What a great idea. Then you have extra storage space..
This is just to-die-for!! What a unique piece…what you did is ten times better than the original!
It looks so great! I LOVE the map paper on top!
The knobs are so creative, I love them! Excellent job, it’s amazing!
That cabinet is amazing! The new look for it is absolutely perfect! You did such a great job….as always. :)
Beyond believable!
Another friday’s favorite :-)
Are you kidding me? that is unbelievably gorgeous! Love the top!
That is absolutely gorgeous! I love the extra detail in the knobs too. Just the perfect touch to bring the theme together. Thanks for sharing!
This is simply amazing!
WOW is all I can say. IT’s A-mazing! You’ve inspired me to do something close to this. Once again truely amazing.
This was the best completed project I’ve seen this month. Love it.
That is GORGEOUS! Older pieces have so much character..I love the feet on this cupboard and you completely transformed it. Bravo!!!
This is soooooooo gorgeous!! Do you mind telling me how you “distress” it after painting it ebony? And what kind of paint did you use? A semi-gloss? I have a project in mind and I love what you did with this one. Did you have to sand for very long for the rest of the dresser? Im a beginner…
Thanks!
Deborah :)
I love the top, what a good a idea using the wrapping paper. I will have to try that on my next project.
Whoever discarded this baby would be kicking themselves in the head if they saw what you did to it, but then again either you have the talent or you don’t and it’s very obvious that they couldn’t handle the job and you probably took it further than they envisioned.
Great job!
What an amazing transformation! You did a superb job! Thanks for taking the time to give instructions. I love the knob too. I have a boring bedside table in my guest room that I am going to try this on.
So many wonderful comments…I can’t find any other adjective to use for such an awesome job!
Thanks for sharing! You are an inspiration to many…of course, that includes me.
I almost didn’t comment since there was already 82! But I just had to add how fabulous this looks and that it should be in a Restoration Hardware catalog!
Gorgeous, I am so impressed and inspired. Thanks for sharing!
Oh my this is great! Handsome, beautiful and do-able! My 3 year old is outgrowing his ‘jungle’ room and wants a pirate theme so this will be in the design for sure! His changing table is a dresser but got all scratched/gouged from the changing pad on top…you’ve inspired a great solution that can ‘fix’ the furniture and grow with him! thanks so much!
It looks wonderful. Thanks for the tip about spraying the sealer on the paper first. The last time I tried to put paper on a piece of furniture it bubbled and I had to take it off and I used fabric instead.
I totally love it! The top is just fabulous.
It looks wonderful. I’m so glad you rescued it from an untimely demise!
Wow, like everyone else, I am very impressed with the transformation you have done for that piece. Wonderful that you saw the great bones of the cabinet and used your skills to make a beautiful piece. Really top notch creativity and style!
Wow this is gorgeous! You did a great job with the curb side find.
It’s just wonderful! I love the paper on top, such an unexpected twist on the usual paint and distress project. Bravo!
http://www.thatredheadedstepchild.com
oh tell me you are keeping this gorgeous piece!
What did you do re the top-ll to even it out, or does the modge pdge fill in the crevices you mentioned? wondering how to get it really smooth- I’ve got a small table that I need to do this do!
at least I can show hubby your pix and he wont think me crazy anymore! (I’m using scrapbook paper for the same look!)
Hi, hope it’s OK to contact you here. We would love to include your blog on our giveaway search engine: Giveaway Scout (http://www.giveawayscout.com). Have a look and if interested, use our online form to add your blog (http://www.giveawayscout.com/addblog/ ). thanks, Josh
this is amazing! i LOVE LOVE LOVE it!!!
thanks for sharing!
That is too cute!! And to think someone was just going to throw that thing away!
I missed this post last week, and I’m so glad I had a chance to read it this week! You are so clever, and I absolutely love it to bits!! I have a ‘thing’ for vintage maps too, and what you have done suits this piece perfectly! Love it…well done!!
It’s gorgeous! Nice work!
Fantastic makeover Kristine!!
If I send you my address will you ship this to me???? L.O.V.E. IT! Thanks for sharing your project at Anything Related! ~Bridgette
Hi Kristine! Happy Met Monday to you! I AM LOVING your re-purposed cabinet! What an awesome job you did on it! I never would’ave thought of applying a map to the top NOR the knobs! Wow!! Really, seriously……incredible….. :)
xoxo laurie@heavens-walk