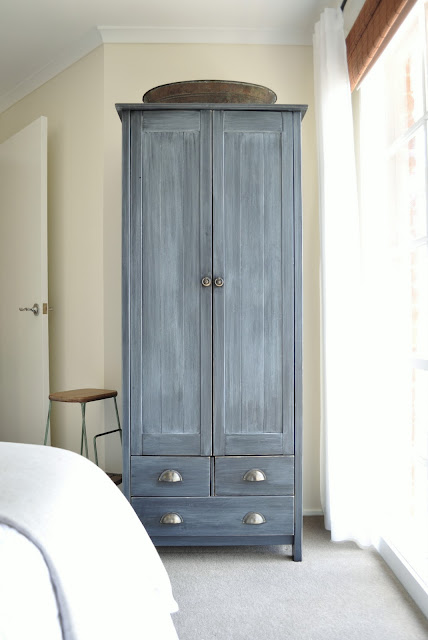
I found this cute little cupboard in the gutter.

Needless to say within a few minutes it had magically teleported itself to the back of my car.
I knew that with a little love someone would eventually prefer this little guy inside their home so got to work painting the body in rich ebony before distressing and sealing it.
Well, that was the easy part though because here’s the main reason I imagine it was on the curb to begin with….
Someone had been waaay too zealous with an electric sander.
Not only is there chipboard showing through the veneer, those lines you can probably make out are actually deep ridges!
Sure I coulda just filled, sanded and painted the whole top though I wanted to make a bit more of a statement than that.
Enter….my good friend gift wrap.
I adore gorgeous paper and for some reason have always been drawn to vintage maps – which I thought would be just perfect for this project.
The sheet of gift wrap I bought wasn’t quite big enough to cover the whole top of the cabinet so I took it to my local printer who scanned, enlarged and printed a new copy for just $20.
I created an accurate template using baking paper which I could use as a guide when cutting it out.
Once cut to size, I gave the map a few light coats of clear matte spray.
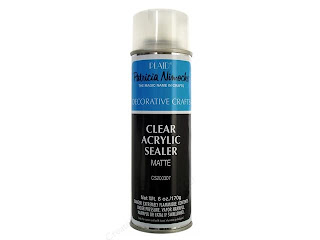
This just helps protect the ink and stops it from running if the paper becomes too damp during the gluing or final sealing process. It also helps to stiffen the paper and avoid bubbling.
To attach the paper I applied a pretty thick coat of slightly diluted PVA to the cabinet (you could use Mod Podge – I just didn’t have any) then smoodged (hey, it’s a word) my map into place.
I then applied about five coats of satin clear sealer using a paint brush making sure to cover all of the edges really well.
To tie-in with the map theme I also created these cute little compass knobs using basic DIY decals. Anyone with a printer and standard copy paper can do this at home! You can check out my full tutorial here (or read-on below for a summary).
Simply paint a plain timber knob any colour you like then find or create a design on your computer and print it out onto normal paper.
Here’s my compass design if anyone wants to use it. Just re-scale it to the size you need.

The process of attaching it to the knob is basically the same as that I used for adhering my map to the cabinet top.
Give your image a few light coats of clear matte spray, cut around it closely and then glue and smoodge it into place on your knob. Finish with a few coats of satin sealer to protect it and voila!
Making these was easy and the possibilities are practically endless – you could use letters, numbers, symbols, little clock faces, nursery rhyme characters for a kids room, sweet little birds…anything!
Anyways, a few final before and afters just for comparisons sake….

I hope you enjoyed this little project.
I know it can be tempting just to scroll down and check out all the photos though if you have time give it a read too cause I tried packing it with a few handy hints.



people just don’t get what they throw away!!! you did great
This could be a cabinet right out of Ballards or Horchows costing hundreds of dollars! It looks absolutely fantastic! Love the map top and that you also accessorized with a framed map. Beautiful! Hugs, Sherry
This turned out stunning! I love the map idea. I can’t believe you got such a beautiful piece for free! It’s amazing what people toss.
What a fabulous find. I love to work with painted furniture so I was pulled in by your thumbnail picture via BNOTP. Love what you have done here.
Pam
OM goodness, this is simply beautiful, thanks so much for sharing!
Wow! Oh, I love it!
It really came out nice!
Thank you for sharing!
Leticia
what kind of gutters do you hang out in?? amazing!
Wow!!! What an amazing transformation!
This is the best makeover ever!!! I am so impressed and inspired. I love the idea for the knobs. I’m going to paint my kitchen cabinets but I don’t want to replace the hinges… which means I need a knob to match…. and I’m not finding anything. The current knob matches but now I’m thinking I could just “alter” it a bit. Thanks for the great pictures!!!
Wow! Eddie Ross get out of town! I had to scroll down for umm…like, 5 minutes, but you deserve each and every hearty slap on the back–beautiful and inspiring. I’m pirating the windrose, wonderful detail.
Holy Cow is all I can say. I want it. Love.
Sherry
I really need to close my mouth now! This is one of the best trash to treasure makeovers I have ever seen! Your tutorial was fantastic too! I want this piece!
Londen
Stunning!!! Love the vintage map top… I’m Spotlighting you at the PoPP on Saturday!
Beautiful little dresser! I love what you’ve done with the top – I’m refinishing an old desk that has some top issues, so will have to keep this in mind! Stunning!
Awesome cabinet redo. I also love the map paper!
Jennifer S.
This is gorgeous. I need one of these for my travel-themed library. Thanks for sharing your knob design as well!
Wow! Amazing! This is a fabulous transformation and i LOVE the map top! I just stumbled upon your blog & really enjoy it! If you have a time, I just started one at http://homelifestyledesign.blogspot.com
Thanks! Can’t wait to see more before & afters!
This is the best transformation I have ever seen, so clever, so polished, and it looks *expensive*.
So generous of you to give the decal, it’s on my desktop right now!
If you like, I will gladly send you the pattern for my cross-stitched bee (which would fit your theme) : see it on my post http://cabinonthewater.blogspot.com/2010/08/heritage.html
I saw your cabinet makeover at Completely Coastal and had to come by to see more — Wow, you really did a fantastic job giving the cabinet a new nautical life!! I’m also drawn to vintage maps, and love how you used a map on the top. And the compass knobs are adorable!!
Love your word of the day, by the way — just so happens that hubby called me “Smoodgie” one day, and it stuck :-)
Kelly (aka Smoodgie)
Loved this post and linked to it in my blog today.
Best, Lynn from Decor Arts Now http://www.decorartsnow.com.
Genius!! Pure and simple! Love, love, love, love (how long can I type….) LOVE IT!!!
Cath
http://tigswhitecanvas.blogspot.com/
Ahhhhh maaaaayy ZIIING!
Tell me, how do you get your paint so smooth? It looks thin and flawless, not thick and goopy with brush marks.. Tell me your secret Yoda. :D
I have just found your blog and I am so impressed. I really enjoyed this post. I repurpose furniture now and then and what you did is just fabulous. Really, very impressive.
Thanks for all the “how-to’s”.
Just wanted to let you know I featured you today on FTF! You can take a featured button if you would like! Thanks for joining in the party!
I just have to know what process you used to distress the chest! And point me to a tutorial if you know where one might be? I have a dresser that is begging for that treatment!
It’s my 1st time to your blog, I dont even know how I got here. I was hopping probably. lol You are a girl after my own heart, I would have so picked that cabinet up too! I love the idea of maps…I have some map covered luggage but have been dying to do this on a queen anne table I “recently acquired” lol. Well Im hooked, Im your newest follower now. Hope you will come and visit me too
MJ
Lucky 7 Design
I love what you have done!! I have painted a lot of furniture and then crackled different parts to that it isn’t boring. Can you tell me what sort of paint you used on the chest…latex, flat, stain, what? And how did you take the paint off of certain parts. Very very nice~
That is phenominal. Would love to know your method of finishing that darling cabinet too :) I see you have quite a following!! No wonder. Delighted to have discovered your blog.
I happened upon this old post today. You did a lovely rescue of the cupboard. Love your choice of the map on the top, and the map details on the knobs!
That came out amazing…love that map top!
That’s so beautiful, it inspired me to make this:
http://madeinmorningside.blogspot.com/2012/01/side-table-revamp.html
with an old IKEA lack table and an atlas. Thanks so much xox
Can you tell me what color you painted the cabinet? I love the whole look!
Anon
It’s is just plain black.
Cheers
Kristine
I love it. I’m redoing a dresser for my daughters 1st apartment. I found a dresser for $5. Had planned on painting chocolate brown and spray painting the handles. Started with the drawers, no problems. When I started on the dresser itself was disappointed to find the top was in really bad shape, couldn’t figure out what I was going to do…now i have some great inspiration….Thanks!!!
Wow! I don’t think I have ever really commented on anything on the Internet but this whole blog is great! Can you please tell me the technique to add the distressed/worn look of the edges?
Thank you!
Andrew
Hi Andrew
Thanks so much for your comment. I hope you get my reply here as I couldn’t see another way of contacting you.
Achieving the distressed look on the edges was easy…I simply used a sanding block and some medium grit sandpaper and did it by hand, sanding back the black paint in a random manner. The original colour of the timber and stain teamed with the decorative beading helped enhance the end result.
Hope this helps.
Kristine
Kristine,
I have been reading quite a lot of furniture blogs lately and wanted to tell you how good this one is. The process is described in a very clear manner; the photos are really good; and the project is quite beautiful… I learned a lot by reading it and appreciate the time and effort you put into it.
Also you have a great eye and great taste!!
Thanks, Patti
Thanks so much Patti.
I really appreciate you taking the time to let me know you enjoyed reading my blog :-)
Kristine
What were the painting steps? I really like the black finish.
Hi Linda
I simply sanded the timber lightly then applied two coats of black acrylic paint using a brush. I then distressed some of the edges by hand using a sanding block and finished by brushing on one coat of satin acrylic sealer. A pretty quick and easy job.
Kristine
xoxo
Looks like I’m not the only one who thinks this was an awesome project. I’m an interior designer and I’d put this in one of my interiors. You definitley have an eye and I love your creativity. Kat :)
First of all…you’re not “just” a mom…name me a man that would willingly do our job and do it well lol. I tend to “find” lots of stuff by the sidewalk and next to the apartment dumpster. I love painting most of them black for some odd reason. I admire the finish on your beautiful rounded cornered cabinet. Do you give instructions on how to get the distress finish?
Hi again…I just the post a few posts before mine!
No worries Tee. I was about to reply anyways though am glad you already found your answer :-)
Thanks for your comment.
Just stumbled across this makeover from waaaay back & I love it. Sharing it on the blog Friday. XOXO
Stopping in from Three Mango Seeds to pin your cabinet. It’s fantastic!
Bliss
I love your idea.!!! you are so clever and creative. I was looking for something else and I found your page which gave me an idea to fix the top of my drawer chest. I am just afraid to do it, I don’t think it will turn as nice as yours. Thank you very much for your idea. I really like it.
Of course your drawer chest will turn out beautifully! Just be a little fearless and give it a go :-)
I love the neologism ‘smoodged’ almost as much as I love the transformation. I found this page by lying on my Kindlefire when I fell asleep reading. I will view it as serendipity and get crafting. Thank you for posting it four years ago and leaving it up.