
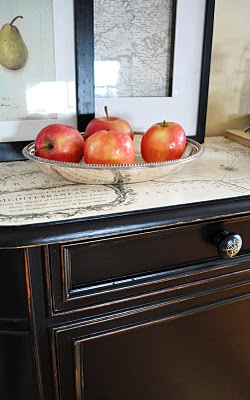
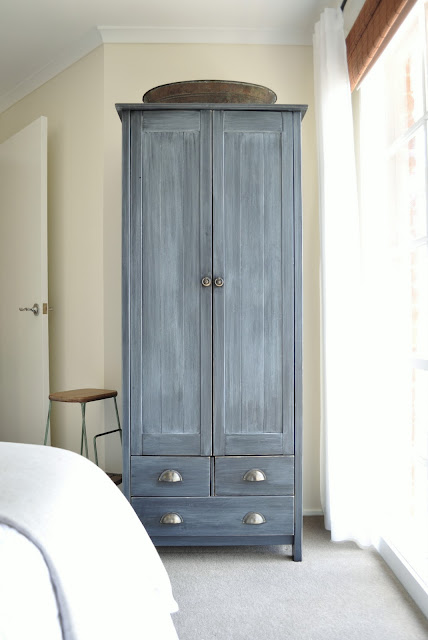
I found this cute little cupboard in the gutter.

Needless to say within a few minutes it had magically teleported itself to the back of my car.
I knew that with a little love someone would eventually prefer this little guy inside their home so got to work painting the body in rich ebony before distressing and sealing it.
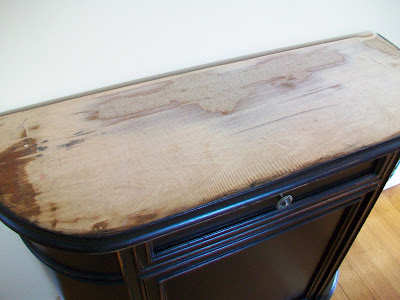
Well, that was the easy part though because here’s the main reason I imagine it was on the curb to begin with….

Someone had been waaay too zealous with an electric sander.
Not only is there chipboard showing through the veneer, those lines you can probably make out are actually deep ridges!
Sure I coulda just filled, sanded and painted the whole top though I wanted to make a bit more of a statement than that.
Enter….my good friend gift wrap.
.JPG)
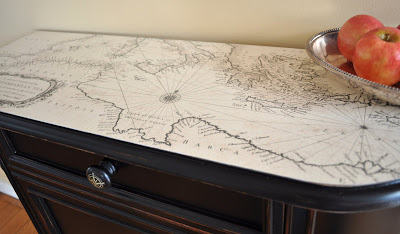
I adore gorgeous paper and for some reason have always been drawn to vintage maps – which I thought would be just perfect for this project.
The sheet of gift wrap I bought wasn’t quite big enough to cover the whole top of the cabinet so I took it to my local printer who scanned, enlarged and printed a new copy for just $20.
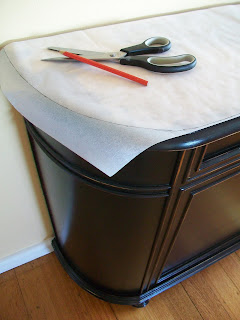
I created an accurate template using baking paper which I could use as a guide when cutting it out.
Once cut to size, I gave the map a few light coats of clear matte spray.
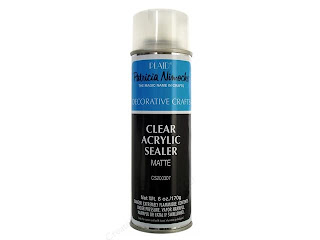
This just helps protect the ink and stops it from running if the paper becomes too damp during the gluing or final sealing process. It also helps to stiffen the paper and avoid bubbling.
To attach the paper I applied a pretty thick coat of slightly diluted PVA to the cabinet (you could use Mod Podge – I just didn’t have any) then smoodged (hey, it’s a word) my map into place.
I then applied about five coats of satin clear sealer using a paint brush making sure to cover all of the edges really well.
.JPG)
.JPG)
.JPG)
To tie-in with the map theme I also created these cute little compass knobs using basic DIY decals. Anyone with a printer and standard copy paper can do this at home! You can check out my full tutorial here (or read-on below for a summary).
.JPG)
Simply paint a plain timber knob any colour you like then find or create a design on your computer and print it out onto normal paper.
Here’s my compass design if anyone wants to use it. Just re-scale it to the size you need.

The process of attaching it to the knob is basically the same as that I used for adhering my map to the cabinet top.
Give your image a few light coats of clear matte spray, cut around it closely and then glue and smoodge it into place on your knob. Finish with a few coats of satin sealer to protect it and voila!
Making these was easy and the possibilities are practically endless – you could use letters, numbers, symbols, little clock faces, nursery rhyme characters for a kids room, sweet little birds…anything!
Anyways, a few final before and afters just for comparisons sake….

.JPG)
.JPG)
I hope you enjoyed this little project.
I know it can be tempting just to scroll down and check out all the photos though if you have time give it a read too cause I tried packing it with a few handy hints.


I love it!!!! What a wonderful job. Can you tell me where you got the wonderful map wrapping paper?
Penny
Oh this is such a great idea! Thanks for sharing. I would also like to know where you purchased the wrapping paper?
Nicole
http://www.sobeautifullyinspired.blogspot.com
Wow! What a difference, turned out gorgeous!
Kristine-I absolutely LOVE it! I have used marbelized wallpaper for a “top” covering before too. What a great job you did. I LOVE the rounded lines of the piece. Great vision you had! Diana
I am stunned that you actually did all of that yourself! I love the extra details like the knobs and map/paper top. Very clever!
I love everything about it, top to bottom, inside & out. You did a great job. Lisa~
GORGEOUS!!! And again, you’re styling is flawless! -shaunna :)
This is really cool. The paint finish by itself is great, but the map on the top~holy cow! It looks amazing! Like it should have been there all along.
I love it.
Oh my gosh, I can’t believe someone left that by the curb! What a treasure! I love the look the sealer gives it. I will have to remember that next time!
Minha querida, tem uma postagem muito especial hj la no meu cantinho. Ajude a divulgar o bem.
Bjs
Beautiful redo! You did a fantastic job and I love it! Love the map, love the knobs, love it all. SCORE!!!
Wow! amazing! It looks beautiful!! I love the finish. Looks like it cost a fortune!
I just love the cabinet. I need one exactly like this one. It is so perfect, good job!
That is amazing! Great job!!!
Wow, that is one nice cabinet. Simple yet stunning. I love the unique look of the top, it isn’t over done, it is just beautiful. Great post!
Amazing! I especially love those knobs. Thanks for all the tips!
I love this piece!! You did an amazing job! You made the piece extra special with the map top and the compass knob. So great!!
Wow! What an awesome idea and great, great job! I love it!
Thanks so much for sharing! You did a fabulous job!! What a treasure ;)
Oh I just love this! What a great idea for covering a less than perfect top of almost any piece of furniture. I love the knobs too…thank you for sharing the pattern. I definitely see compass knobs in my future!
It’s absolutely stunning! You did such a great job on it. Wow!!
Nancy
Wowza! I’m in love with a curbside find lol. Love the lanterns where did you find those?
seriously you are scary smart and talented…love this…i am especially fond of black painted furniture…olive
Wow !! Great job, I love it !
Wow – what an amazing transformation. I love the whole look but the map is genius – and stunning!
~Sam
Magnificent!!
saw it on remodelaholic the other day and commented there- love it as usualy! love the knob and top- fabulous!
incredible, really!!! I love it…you have such a good eye for potential!
Oh, my! That is beautiful! The compass knobs are such a GREAT finishing touch!
Great job!
gorg!!!! -denise
Beautiful! Can I ask what type of paint you like to use for painting furniture black>
That’s so awesome that you rescued such a lovely little cabinet from the dump! And I’m definitely going to have to try your technique for creating custom knobs- what a neat idea!!
WoW! Amazing transformation. I just love the way you tied in the map with the drawer knobs. You are too clever!!
Cheers, Pam
Yep…sensational!
what a fantastic transformation..Love it, the map idea was brilliant!!
Wow, is all I can say. I love the fact that you topped it with a map. That is so very cool. thanks for sharing the hints on how to make our own DIY decals like you did on the knobs. I have never heard of that. I would actually love to see a step-by-step on how to do that. That little attention to detail really finishes off the cabinet.
Thanks for the sweetest of sweet comments ladies. Now, to answer a few questions:
I found the map gift wrap at a local paper specialty store though I’m sure you could find something similar if you searched on-line. You could even use a real map or poster.
I used black acrylic paint to refinish the base before sealing it with clear acrylic poly.
I’m gonna do a step-by-step tutorial on how I made the knobs just so it’s clear for everyone (plus I kinda wanna show you all just how cool and easy it is!).
Kristine
xxx
Awesome job! I love it. The details of the knobs and inspired top are perfect. If you don’t end up keeping it, I’m sure you’ll find someone more than willing to take it off your hands.
Hi Kristine, I saw this on remodelaholic and what a fantastic job you have done. So clever to think of doing the top like that. Thanks also for the ‘how to’. I would love to try this one day.
Just beautiful…wonderful job on it!
Rondell
Absolutely gorgeous! You did an amazing job :)
Genius! I love your blog!
The cabinet is LOVELY! You stated above that you used black acrylic paint–i am new to painting furniture so would you tell me–just plain ol’ black or does it have a brand and name?? Thanks!!
Just Beautiful! I love the map on the top. I found your blog from Tools are for Women too.
Hi Merry. It’s just plain ol’ black paint (just like wall paint).
Kristine
xxx
WoW!! Love Love Love it!
You are so darn clever! This is amazing!!!
I am a big fan of curbside finds and this one takes the cake!! Love your vision for this piece, the knob and map is perfect!
it’s inspiring..
and I really appreciate the spray varnish trick..
=9
atalet
I just wanted to stop by and let you know that I will be linked to this post on Sunday (going out of town, trying to get ahead!) from the new Home & Garden channel at Craft Gossip. :) My hope is to share many of the fabulous projects I see everyday with the vast CG audience. I hope you will not only stop by and subscribe to CG, but will tell your friends about the new category! Hope you see some traffic from it!
Your feature will appear in the main Craft Gossip RSS feed, on the main home page. While it’s not live yet (scheduled for Sunday) and can be found directly here
http://homeandgarden.craftgossip.com/cabinet-makeover/
If you would like a “featured by” button, you can grab one here!
http://homeandgarden.craftgossip.com/grab-a-craft-gossip-button/