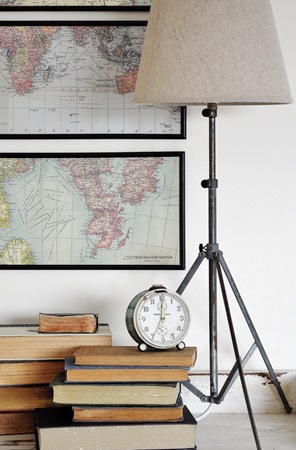
Don’t get me wrong, I love the fact I get to call Australia home, though a word of warning to anyone thinking of moving here (particularly if you’re a home DIY-aholic accustomed to a seemingly endless array of affordable and easily attainable supplies). Sure, we might have lovely weather (most of the time), beautiful beaches (almost exclusively) and kangaroos frolicking about (nearly everywhere) though you can pretty much kiss good-bye to affordable and easily obtainable tinted wax sealers, oil-rubbed bronze spray paint and Hershey’s Bars (whatever they are) amongst many other wonderful things :-(
So why the rant? Well, I’ve seen a tonne of DIY lamp kits readily available from a heap of international sources though do you think I could find any here in Oz?
Course not, though never fear, there’s always a longer, frustrating, more expensive way around these things.
Anyways, enough venting and on with the actual project.
There are many different ways you can create your own custom lamp so for the purposes of this tutorial I’ll focus on how I did it.
Of course, depending on which country you’re in electrical components may vary and I do have to say that technically any wiring should be undertaken by a qualified electrician – technically :-)
Anyhoo, you will need….
Something to form your lamp base.
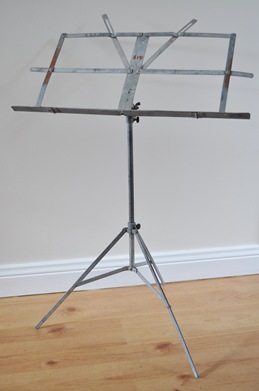
On a recent thrifting adventure I found this really cool old music stand for just $5 and knew straight away I wanted to try a lamp conversion. It has a wonderfully grungy patina with crud and rust in all the right places.
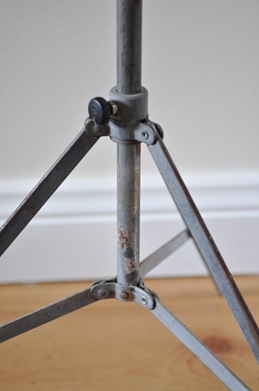
And the following items (all available from pretty much any hardware store)….
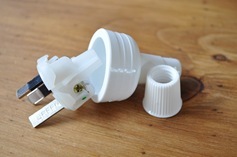
A lamp switch.
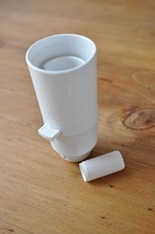
A power outlet head.
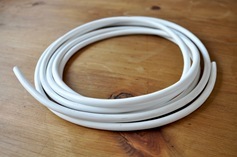
A length of power cable.
And the steps….
1. I removed the sheet music holder from the top of the tripod which left a nice hollow shaft perfect for housing the power cable.
2. To securely attach the lamp switch to the tripod, I first inserted the plastic thread (which comes with the lamp switch as shown above) into the top of the shaft and glued it firmly in place (you can see what I mean by this in one of the following pics).
If your lamp base won’t easily accommodate the plastic thread then put your thinking cap on for a way to make it work.
When faced with a conundrum like this, I usually just browse the hardware store isles til I find something I can adapt.
3. Once the glue dried, I inserted the power cable into the hollow shaft so it protruded from both ends.
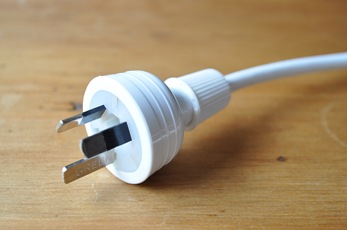
4. I wired and attached the power outlet head to the rear end of the cable as per the packet instructions. If you’re lucky enough to have a lamp kit this step is already done for you.
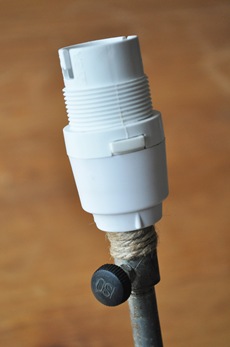
5. I wired and attached the lamp switch to the top end of the cable as per the packet instructions and screwed it onto the glued-in thread.

Because the thread would only fit into the fat section at the top of the shaft, half of it was still visible once the head was attached (as can be seen above). I could have cut it down though instead decided to keep the extra length for greater stability and simply wrapped it in some twine as a camouflage.
6. I inserted a globe, plugged in the power cord, flipped the switch and crossed my fingers…it actually worked! I was momentarily blinded by light – mental note, do not stare at bulb in anticipation during testing!
7. To finish I simply added a budget K-mart linen shade.
Course, if you are lucky enough to have a DIY lamp kit then this project gets a whole lot easier.
Sooo, from this….
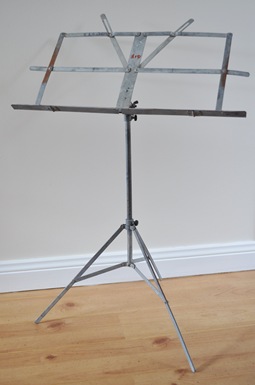
To this….
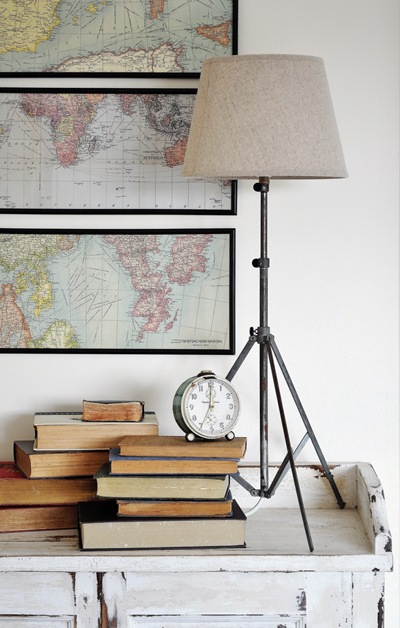
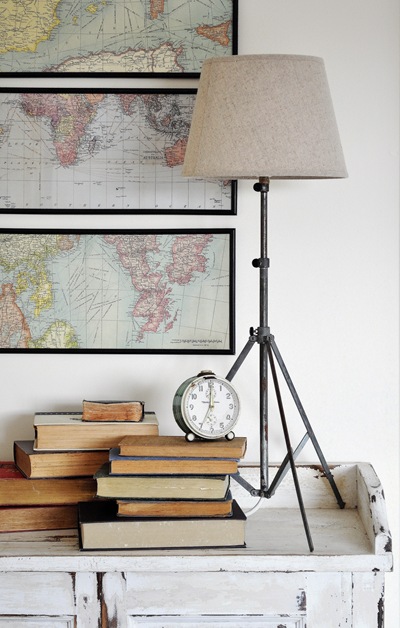
I love this lamp…even though I don’t really have anywhere to put it at the moment :-(
I especially like that the upper shaft and tripod base are both adjustable so the height and splay can be easily altered to best suit its chosen location. I’ve rarely seen industrial style tripod lamps like this selling for under $150 so for around $30 I’m pretty chuffed with my little re-invention – if I do say so myself.
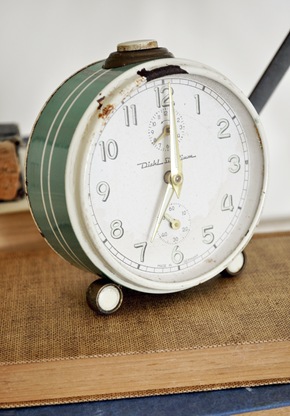
Oh, and I’m also loving this new (to me) green enamel alarm clock I picked up on the same thrifting adventure for just $5.



kristine,
this is SO very COOL!!!! great idea and tutorial. i love the shade with it. it’s the perfect touch to an already awesome lamp base.
the clock is pretty amazing too, great color.
judi ;)
So great! I have an old music stand sitting under my bed that my son pretends is a gun that was my MIL’s. Now I know exactly what to do with it! Thanks so much for the inspiration!
Absolutely brilliant, Kristine!!! You are so resourceful! I love it!!
i love that! ive seen old wooden camera tripod but this ones so cool.
thanks for the tuut.
I *love* that lamp! Way to have a vision!!
Is there nothing you can’t do! Just brilliant :)
BRILLIANT!!! I love your creativity, it’s amazing. This lamp is way cool and so is that clock :)
x
great lamp!!!!!
I agree with what you are saying about living in OZ but
chalkboard spray paint should be easily available at your local Bunnings, and although I don’t know what a Hershey Bar is either I have been told that our chocolate in Australia is much better than US chocolate any day!
LOVE the lamp! what a great idea!
Great- now I have to hunt down a cruddy old music stand so I can make one of these for MY HOUSE! I love it! You just never cease to amaze. ;)
too cool for school! love it!
This is awesome! I pinned it on Pinterest. Hopefully, I’ll come across something I can use soon!
Ok…this is awesome! I’ll be on the hunt for a music stand now.
Good golly Miss Molly. That is fabulous. That’s a better looking lamp than anything you could purchase.
What a fantastic idea! I love tripod lamps but they are ridiculously expensive (if you can even find one to buy – there is such a lack of choice in Aus!). Just wanted to say that I absolutely love your style, and it’s so inspirational to read a great blog by a fellow Aussie.
This is fabulous! I squeeled when I saw it and had to just laugh at how simple your solution to an expensive looking lamp was. The lamp seems to have been made just to go with the maps in your picture. Way to go, Aussie!
I love the little clock, but love is too weak a word to describe how I feel about your lamp transformation!!! Wowee!! It’s awesome!! So industrial chic! WTG!
Very clever! Necessity is the mother of invention. We certainly do need to be more creative down here, don’t we.
Suzy xxx
Ok I am 100% copying this one x
You are so creative! I love this idea, first you recycled something and then you knocked off a perfect
lamp look alike!!! Genius!
Very impressive Kristine! I love the K Mart linen lampshade (I have two of those myself).
You’ll be pleased to know that after months of collecting bits and pieces, this week we finally ordered a new couch for the family room. So in a few weeks I’ll have some “after” pics for you. :)
HOLY CRAP. Must find music stand–immediately!
It’s simply perfect! Beautiful!
This is a brilliant idea! Until I saw that you made this from a music stand, I thought it was a tripod. So creative!
As for no Hershey’s in Australia. WOW! My bf has always wanted to go there, but knowing this, he might have to reconsider. No Hersheys? unbelievable!
so awesome!!!!!
Oh I LOVE it!! I LOVE making lamps!!
Making one as we speak…out of my glass insulators:-)
New follower!
That is such a great looking lamp! And YAY for you for figuring out a way to make it work, even without a lamp kit.
Love this idea Kristine! I just featured you, this lamp and your basket lamp shade! http://www.thriftyandchic.com
hugs,
Alicia
wow! found you at chiconashoestring.
Love it, you are amazing, really, a true inspiration and a bright spot for me on an otherwise cloudy, down day!
This is SO cool! I have many of these music stands being that I play the violin and collect them when I see them at thrift stores. I’ll have to see though if mine are hollow – I am not sure, but it looks like you would have to have it hollow to string your cable through. Once again, a job VERY well done! My inlaws just got back from 2 months in Australia and they did comment how expensive stuff was! Although they loved it there!!!!
Terrific! I actually thought that the picture of the finished lamp was your inspiration photo! Bravo!
This comment has been removed by the author.
Thats the coolest lamp I’ver ever seen! I need to find a tripod!
Not only is a great re-use of something old, but it is so beautiful regardless. I never would have known that is what it was!
Well done,
Laura
Excellent job Kristine, well done.
P.S I have room for it in my house if you can’t find a spot for it! Lol :)
This lamp is incredibly cool! I want to make one. But first I need to find me an old music stand.
Very, very cool Kristine. I love it. I must go to Kmart to look for a lampshade like that!
Well, now you know that every time I’m thrifting, my eyes will be PEELED for a music stand.
Apartment Therapy recently featured my little tripod plant stand that I intended to turn into a lamp. But I like your music stand way better! I’m going to leave a comment on the Apartment Therapy post linking to this post, if it’s ok.
http://www.apartmenttherapy.com/dc/shelving-storage/creative-new-uses-for-plant-stands-145325
GREAT IDEA.. LOOKS BEAUTIFUL.
VERY CREATIVE
FAN-tastic!!
As in I am a new fan!!!
You are one creative gal! I too thought the finished lamp was your inspiration piece. Wonderful looking lamp and so versatile the way it moves up and down! Genius.
That’s awesome – thanks for the tutorial. It looks great with the nautical maps behind it…and the clock is adorable, even if it doesn’t work ;o)
came from Centsational Girl – very nice! I love your map art in the background too – details?
Seriously want to copy this project now! It looks great and the staging is fabulous to! I am in love with it!
brilliant! what a lovely frame for a lamp – you such a smartie pants!
What a fabulous transformation! Thanks for sharing.
I’ve been interested in getting a tripod lamp, but I never thought of making one myself. I guess most tripods aren’t well suited to that, but the base of that music stand sure is! So creative, and it turned out wonderfully!
PS – How can you miss Hershey’s chocolate when you’re probably surrounded by Cadbury chocolate and Tim Tams? I sure miss those Tim Tams (especially biting off two opposite corners, sucking coffee through one like a straw, and popping the whole melty thing in my mouth! YUM!).
eat your heart out, pottery barn! this is an amazing idea!!
This is so darn cool! Better than any tripod lamp I’ve seen in person.
So inspired. Linked up to this post today on our blog.