
If you’ve read this blog more than once then you’d probably know I like the creative challenge of making the most of what’s already there, so rather than replace the lights completely (which, let’s face it, could probably have been done relatively cheaply and easily) I decided to flex some inventive muscle and see what I could come up with. That said, without my magic wand the frilly glass shades were a certain loss. Luckily, I already had an idea….
A while back I had stumbled across these plastic bulb cages.

(If you’re in the US then there are products like this everywhere – just Google ‘lamp cage’ or ‘lamp guard’ – though here down-under they are elusive so I was pretty pleased with finding them – even if $16.90 is a bit pricey if you ask me).
They are just standard lamp guards intended for industrial use (such as on building sites, in work shops etc.) though I thought they had definite adaptability potential so I tucked them somewhere in the back of my brain. Luckily, they stayed put in there, and when I was pondering a solution for Mum’s new sconce shades they jumped out from hiding.
“Hmmm, they could maybe work”, I thought to myself, and after checking some dimensions I ordered my cages.
Now, if you’re a ‘safety yellow’ kinda gal you could leave them as is though I wanted a more natural look so it was always my intention to use a paint-based disguise. The trouble, however, with painting plastic is that sometimes it can look like, well, painted plastic, so I thought I’d try this amazing metal effects paint.

(I bought mine from my local Bristol paint specialty store. See my ‘At a Glance’ quick guide at the end of the post for some helpful links).
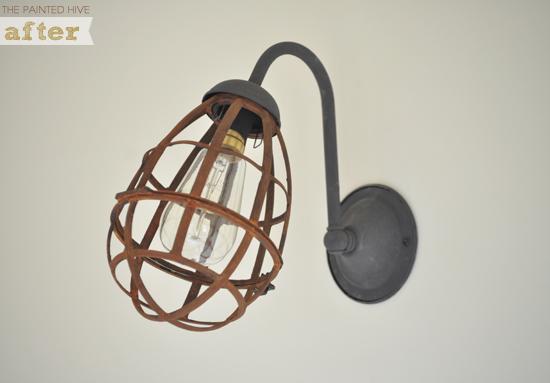
The reactive iron paint contains real metal pigments and the rust activator generates real rust, so rather than a faux finish it is actually real (okay, so have you got my point about it being real?). This is high quality paint which sticks to just about anything and is a cinch to use. Just apply two coats of iron paint, allow to dry for at least an hour then use an atomiser to spray on the rust activator (you can go here to view a really clear and easy-to-follow manufacturer video tutorial). This paint is kinda pricey, though it’s so good only a small amount is needed to give ample coverage.So, after just a little bit of craftin’ here’s Mum’s new sconce….

For contrast, I only used the rust activator on the cages and simply left the sconce arms coated with the iron paint alone, which has an awesome textural graphite appearance. I swear, if it wasn’t quite so dear I might paint an entire room with it!

The clasp, which hinges the cages to allow for changing light bulbs, is incredibly tight to open and close so inevitably the paint does rub off from this small section when it is used. So, to combat the bright yellow which was peeking through I simply coloured the clasp area with a permanent brown marker – easy. The marker ink blends in seamlessly with the rusted iron and has so far stayed put so there is no longer any visible yellow plastic where the clasp pushes in and out.
To complete the look I used reproduction Edison bulbs. I contemplated painting the brass bulb capping black (to match the sconce sleeves) though I think I like the hint of tarnished gold.
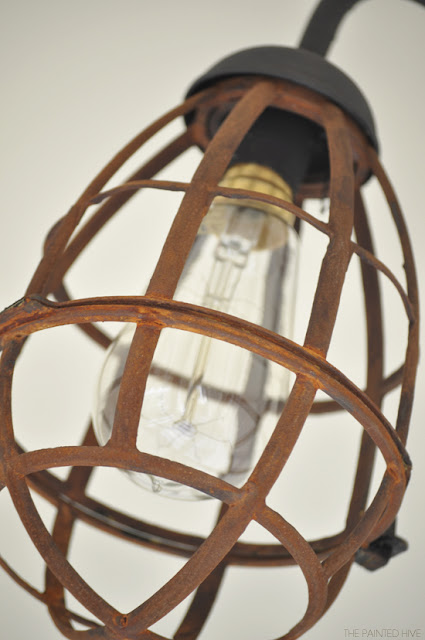
For all my Aussie readers I finally found some bayonet cap Edison bulbs here in Oz – where else but on eBay of course (find the link in my ‘At a Glance’ list below). They’re not as ample or affordable as the ones in the US though I’m learning to live with it :-)
I’m happy to admit this style is not everyone’s cup of tea though I’m really pleased with how it turned out.
I reckon Mum’s lights would thank me if they could, plus it was a fun, fast, easy and cheap (about $20 per light – excluding the globes) way to burn off some creative tension and get a good DIY decorating fix!

Wouldn’t even know it was the same light, huh?
SOURCES
Cages: Online Lighting, Amazon
Rust Effects Paint: Modern Masters, Dulux
Edison Bulbs: eBay, Amazon

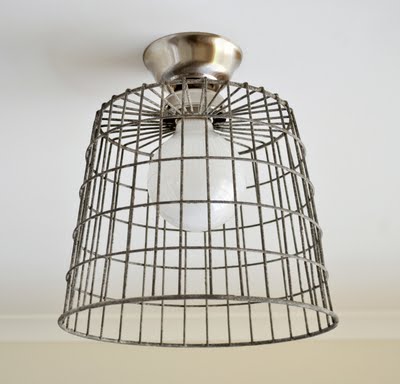


Very cool! I did something similar except covered ceiling lights with metal baskets. Home Depot carries plastic guards for around $3.
Very very cute! Great idea!
Samm
http://www.LittleHouseintheBigD.com
Marti
Yep, I think you could definitely paint your brass bed with iron paint.
Another alternative might be chalkboard paint. Not that you would want to draw on the bed with chalk though the paint has a nice texture.
Kristine
Take a bow~ perfection!
Brilliant! Love it!
I love this!! I looked all through Home Depot tonight, just wanting something new, but not wanting to spend money on it! :)
Now that is just fantastic! You did a super job!
Smiles, alice
Absolutely gorgeous. Amazing job!
Melody
One Chatty Chic
I absolutely love these!!! Thanks for sharing. I’m your newest follower!
genius!
Pure genius!
Kristine. Could you talk about the bush and technique for painting the sconce arm?
Chiun
I painted the arm whilst still attached to the wall.
I simply loosened the screws a bit and slotted in some scrap paper between the base of the arm and the wall to protect the wall.
I just used a small paint brush (craft brush) and painted the iron paint straight on – easy. No real technique required.
Hope this helps.
Kristine
I love this sconce.
I love your blog.
And your living room.
And…and…and.
Definitely your newest follower! = )
ummmmmm. that is like totally genius!
kill me now. drooling and longing to make this for my fam!
come visit anytime–great giveaway right here: http://hellolovelyinc.blogspot.com/2012/04/april-giveaway.html
smiles.
michele
This is awesome, Kristine! So clever! Congratulations on your feature too! So excited for you! Must go buy it! :)
This idea is fabulous! I can’t wait to find some iron paint and test out a few pieces of my own. Great post – Thanks!!
Hi Kristine, I just found your blog and I have to say I love it! I especially love all your DIYs and make-overs. Seeing your gorgeous vintage fan and this post got me really wanting to try this tecnique on my unbeliveably ugly plastic fan. Do you think it would work? Or does the paint weaken the pastic somehow? I don’t know why it would, but thinking of old rusty metal that thought automatically popped in my head… :D
Jenny
I don’t think the paint would have any effect on plastic (though I can’t be certain so maybe contact the manufacturer if you need reassurance). Plastic doesn’t rust so I imagine it would be fine.
Kristine
Most impressive – would never know it was the same fixture.
I think I am in love with your blog. I am pinning this light to make my own when I get the stuff, lol. You have me walking through my house looking at the light fixtures to see what I can hack :)
Hi Kristine
I’m new to your blog but I instantly became a fan!!! Being especially interested in industrial furniture and lighting and up-cycling, I loved the way you updated this sconce! Can’t wait for your new posts…
That is utterly righteous. You have a real genius for design–I totally love the steampunkiness going on with the finished product, and I’m amazed at your creative use of materials with which you pulled it off!!
wow love this! Well done!
Hello! I just discovered this site and I’m besotted with your posts! I love your style! x
I’ve been doing lots of research on this reactive paint and wondered when do you ABSOLUTELY HAVE TO use the primer? If I’m going to paint on mixed media…paper, plastic, wood and metal all in one project, would I need the primer? If so, why? Thanks. LOVE your project!
Hi Eleanor
The manufacturer recommends using the primer in all circumstances for the best possible results though I have never used it and don’t think it’s necessary in most cases.
I would use the primer if my substrate was likely to be badly affected by the activating solution. As the activator creates real rust, there is the potential that a metal substrate could itself become rusted and eventually decay.
The manufacturer also mentions that without the primer unwanted surface discolouration may occur though in my experience I’ve not had any problems with this.
You can read some additional information here:
http://www.modernmasters.com/products.asp?mode=group&gid=67
If you’re still unsure I recommend contacting Modern Masters directly with your question.
Hope this helps.
Kristine
Thank you! Looks like I can at least do some trials without the primer. The projects are small and not expensive so it wouldn’t be a disaster if something went wrong.
So glad you posted this project. It has given me the courage to move forward with my idea.
It looks awesome!
By the way, I have been looking for these paints here in Sydney and still couldn’t find it. Had a llok online and they don’t ship to Aus. Where did u buy it from?
Thanks!
Hi Michelle
Thanks :-)
I bought my Modern Masters rust effects paint from a Bristol Paint Centre a few years ago. My local Bristol store still stocks it though there are also quite a few alternative brands available now too. You can find rust effects paint in many speciality paint/decorator stores, craft and hobby shops and even some of the major hardware chains. Check out these links for some further info:
Bar Lovers
Dulux
Porters
Unique Garden Products
FX Australia
Murobond
Otherwise, try a Google search. I’m sure you’ll find some. Good luck!
Kristine
Where did you buy the new neat shapes lightbulb?
Hi Mysti
As mentioned in the post, I found the Edison filament bulb on eBay though they can now be found at many lighting/home improvement stores, as well as lots of places online. Just try Googling “vintage filament bulb” or “Edison light globe” (or similar). You will find heaps.
Kristine
I love what you’ve done. I was looking for DIY inspiration for transforming my open plan kitchen-living-dining into an industrial style. Thanks!!!
What an amazing transformation!! I have got to figure out a place I can use an industrial style light! It looks completely authentic!
Thanks Bridget. Transforming this light was a fun creative release!
Hi..just found your website through Miss MustardSeed…it’s awesome! You have such a great style and awesome DIY’s. I’m having fun lining up some projects for myself. I wish you continued success!!
Debbie
Thanks so much Debbie :-)
I love your tutorial, I featured it on my blog in a roundup on DIY home decoration.
I hope it’s okay with you. (:
http://thisblackbirdsnest.blogspot.nl/2013/11/home-decoration-diy-roundup-2-style.html
This is incredible!! Love, love, love it! You are so creative! :)
I’m so in love with these lights! You did an awesome job! I am definitely saving this for when I have my own place <3
My jaw is still open as I write this!!!! Truly the best light makeover I have seen.
Thanks so much Michelle. It’s was kinda an experiment and is perhaps now a little too industrial for the room it’s actually in though it was a fun and rewarding DIY.
Fantabulous! This is probably the best DIY / Refab / Reuse projector, yet. – Joanne
He, he, thanks so much Joanne. You’ve just made my day!
Thank you for that idea, I have similar 4 Lamp holders at our old appartment but it was hard to find a similar bulb, after a long search over internet I find its name Carbon Filament lamp. I purchased one last week from https://www.lightonline.com.au/gls-bulbs/carbon-filamen-lamp-25w-edison
Later I find you have done an amazing job with it.
you have done a magnificent job… cheers!
Oh my goodness this is amazing! Love it! I know I’m a little late to the light making game but I just started! Its quite addictive! I recently made a sconce which I’m particularly proud of! http://www.mayaathome.com/2016/06/29/diy-light-kitchen-sconce/
Thanks Cheryl. I LOVE your sconce :)