Flat-Pack. Knock-Down. Ready-To-Assemble. Whatever you wanna call it, there’s no denying the practicality, affordability, versatility and accessibility of this very basic form of ‘boxed’ furniture. Unfortunately though, often times there’s also no denying the generic, cheap and mass-produced appearance – luckily, however, there is always hiding it!
A little bit of elbow grease along with some head-cocked, squinty-eyed imagination can see any dime-a-dozen piece transformed into something that looks a million bucks (well, kinda). And anyone can do it!
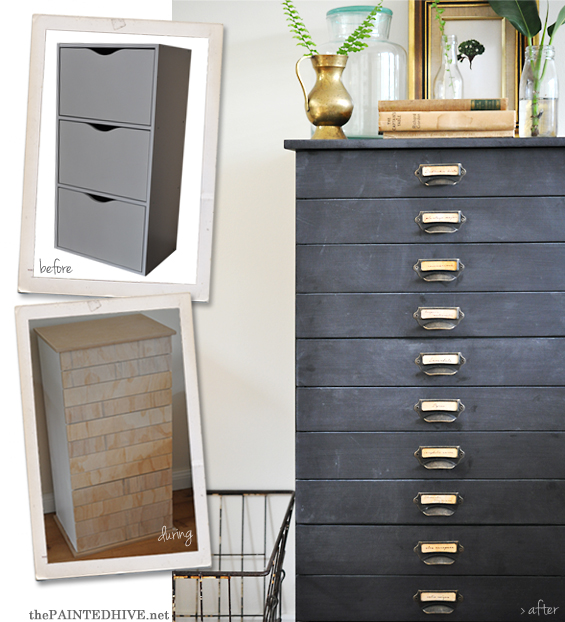
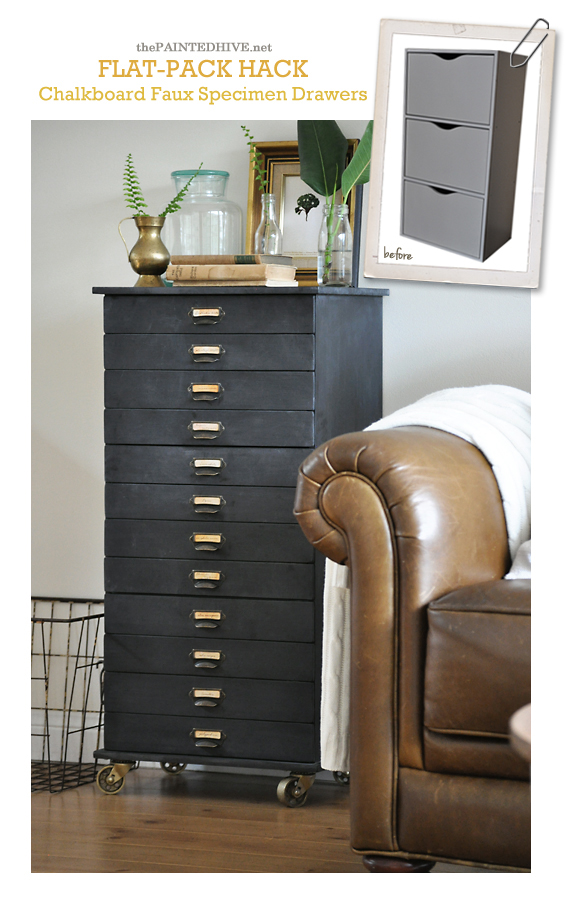
If you read my blog from time to time, you may have seen this recent post outlining my plan(ish) for reinventing a very basic melamine storage unit from The Reject Shop with the help of some White Knight paint products (amongst other things). I was unsure how achievable my initial vision was so the whole idea was disclosed in a pretty ambiguous way (so there was plenty of wiggle room to pretend I always intended for it to turn out just the way it did – though surprisingly it ended up pretty much as I had planned – maybe even better!).
I’ve had this idea in my head for years. There’s a lot to love about multi-drawer cabinets, though the commonly exorbitant price tag isn’t one of them. Also, whilst lots of little drawers are great if you have heaps of small knick-knacks or flat stuff to store, they can be a bit impractical for the more general sorta stuff…like toys, and toys, and maybe even toys (do you kinda get the feeling I’m drowning in toys at the mo’?). Of course, if you’re fortunate enough not to have to swim through toys, you can store other paraphernalia :-)
Anyhoo, here’s how the whole makeover thing went down…
1 Storage Unit
As mentioned above, I used a very basic melamine set of drawers from The Reject Shop ($40).
2 Timber
I used a sheet of 900mm long x 60omm wide x 12mm deep MDF for the top and base (which I cut to size – $12) and a sheet of 900mm long x 40omm wide x 7mm deep ply for the faux drawer fronts (which I cut to size – $14).
Note: I used panels of timber which I could custom cut myself to save some cashola (around $60). If you’re not confident cutting timber, or if you don’t have the right tools, (or if you simply want to make the whole project quicker and easier), you can find more ‘ready-to-use’ alternatives or have your pieces cut to size at the hardware store.
3 Adhesive
I used Liquid Nails.
4 Caulk
I used Spak Filla.
5 Paint
I used White Knight Chalkboard Paint in Black for the entire storage unit and White Knight Metal Guard in Brass for the castors.
Whilst the intended use for chalkboard paint (that of creating a functional surface which can be easily written/drawn on with chalk) is obvious, the value of it as a stand-alone texture is often overlooked. For this project I actually chose to use chalkboard paint, not to create a functional surface to write/draw on (although this is of course a possibility), though primarily to produce a beautifully rustic graphite-like appearance – love!
6 Handles
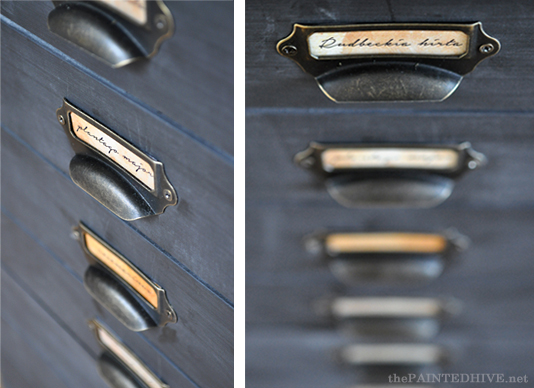
I used antique brass card holder pulls from eBay ($14 for 10). LOVE these!
Note: Slightly different from the one pictured above in the supplies collage.
7 Castor Wheels
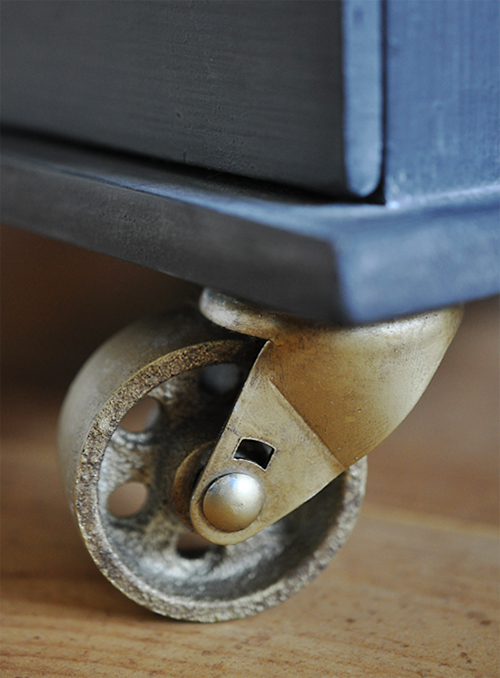
I used 50mm industrial swivel castors from Bunnings ($3.95 each). Bargain!
1 Measure and cut timber.
Top & Base: Measure the overall width and depth of your storage unit. Mine was 40cm wide x 29cm deep (29.7cm deep including the faux drawer fronts). Decide on your overhang (I went with 1.5cm) then add it onto the original dimensions (this made my top and base pieces 43cm wide x 31.2cm deep – remember to double the overhang when adding to the width to allow for protrusion at both ends!). I cut my MDF using our awesome plunge track saw which produces perfect lines. You could also use a circular saw, hand saw or jigsaw (if you have a steady hand!), or have it cut by the hardware store (do note however that due to health and safety regulations most hardware stores will not cut MDF – you could use an alternate material though, like ply or solid pine). Once cut, I lightly sanded the edges to smooth and round them slightly.
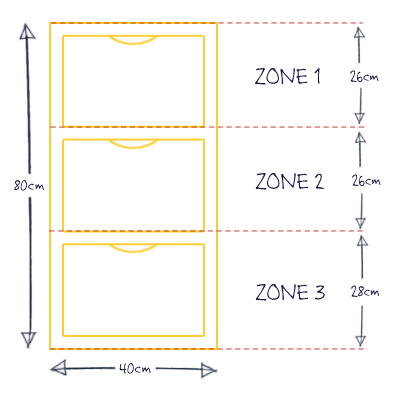
Faux Drawer Fronts: Decide on the number of faux drawer fronts you want (I went for four per original drawer – so twelve in total) and the approximate gap you’d like between each (I went for around 3mm). To determine the heights of my faux drawer fronts, I could have divided the total height of my storage unit (minus the cumulative gaps) by twelve, though for accuracy I decided to ‘zone’ the existing drawers (to give me optimal control over the placement of the faux fronts, particularly in relation to the horizontal ‘dividers’ to ensure they were neatly covered). Hopefully this diagram helps explain…
Zones 1 and 2 are identical, each incorporating one horizontal. Zone 3 is slightly larger, incorporating two horizontals.
Taking gaps into account, my eight upper fronts (for Zones 1 and 2) worked out to be 62mm high each. My four lower fronts (Zone 3) worked out to be 66mm high each. Again, I cut my fronts using our plunge track saw. I was really fortunate not to have to make any vertical cuts because my sheet of ply was the same width as my unit (40cm). Once cut, I lightly sanded each faux front to smooth any roughness, concentrating on slightly rounding each corner to help give the ‘drawers’ a subtle look of age.
Note: As mentioned in the ‘Supplies’ section above, I used panels of timber which I could custom cut myself to save some cashola (around $60). If you’re not confident cutting timber, or if you don’t have the right tools, (or if you simply want to make the whole project quicker and easier), you can find more ‘ready-to-use’ alternatives or have your pieces cut to size at the hardware store.
2 Attach timber.
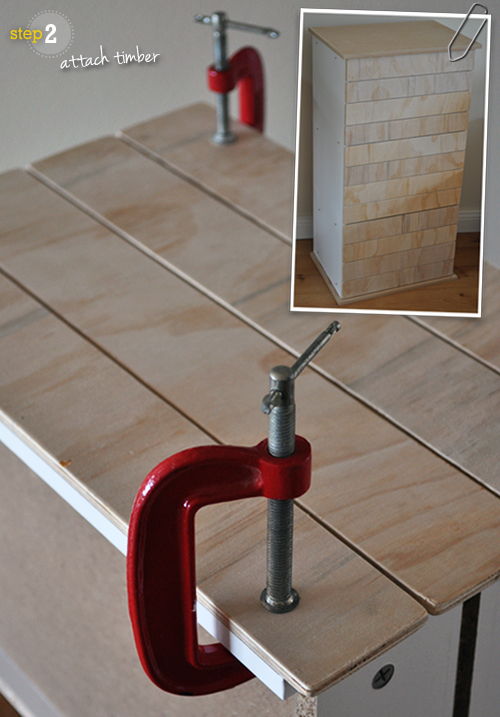
Using liquid nails, I first attached my MDF top. Once set (overnight), I flipped the unit over and attached the MDF base – easy.
For the faux fronts, I worked with one drawer at a time (or one ‘Zone’ at a time). For Zone 1, I first held up the top faux front in position against the unit, marked the base of it on the actual drawer then measured and marked the center (of both the actual drawer and all four faux fronts) before removing the drawer from the unit, laying out the faux fronts in position on top (the top front in accordance with my markings and the bottom front in line with the base of the actual drawer – with the two middle fronts evenly spaced between) and adhering them one-by-one using liquid nails. To create a strong bond and eliminate any bowing, I clamped each faux front until the glue was completely set (around 12 hours). I then popped the drawer back into the unit and repeated the process for Zone 2. For Zone 3 I needed to mark positions for both the top and bottom faux fronts before removing the drawer from the unit (as, unlike with Zones 1 and 2, the bottom front in Zone 3 overhangs the base of the drawer – to conceal the horizontal). This whole step sounds much more complicated in theory than in practice!
3 Counter-sink visible screws and fill holes.
I know visible screws can look industrially awesome on the right piece, though I don’t think my $40 flat pack is one of those! In fact, to me, visible screw heads are usually one of the dead-set giveaways of cheap production-line furniture. To conceal my screw heads, I simply drove them in a couple of millimetres using some good ol’ fashioned brute force. I then filled the depressions with caulk and sanded to a smooth finish once dry. If brute force isn’t enough to recess your screws, you may need to drill out a shallow depression first.
4 Paint!
To give my melamine some ‘tooth’ to grip the paint, I first sanded it using medium grit paper before making sure it was thoroughly clean. White Knight recommends an undercoat of Grip Lock Primer on melamine though I’m a bit of a rebel so I went straight for the chalkboard paint (if you’re a stickler, feel free to use primer). I applied two coats of White Knight chalkboard paint by hand using a brush, allowing drying time between applications.
At this stage I also spray painted my castor wheels using White Knight Metal Guard. To age the perfect new finish, so the wheels better tied-in with my pulls, I also dry brushed them sparingly with some brown acrylic paint to give them a slightly tarnished appearance.
5 Season with chalk then attach hardware.
The fun part! It might feel a little daunting to scribble all over your perfect black paintwork, though the results are totally worth it. Seasoning the paint produces a distressed slate-like appearance with subtle contrast and natural imperfections that, in my opinion, is just lovely! I simply coated my entire unit with a fine layer of chalk (using the side of a fat stick) then wiped it away in a haphazard fashion using a felt duster. I also experimented with randomly flicking the unit with a damp cloth to create extra areas of tonal variation for a more grungy look.
Note: I seasoned my unit prior to attaching the pulls so they wouldn’t obstruct the process.
Once the unit was seasoned and the pulls were attached, I ummed and ahhed over using the castor wheels. I thought they might detract from the vintage-style simplicity and increase the already masculine feel too much. Though I decided to attach them knowing they can always be easily removed. I like them, though I’m not 100% convinced. For a boy’s room they are ideal. Maybe in the future, depending where I choose to use the unit, I might switch them out for something a little less industrial and more refined, like porcelain castors.
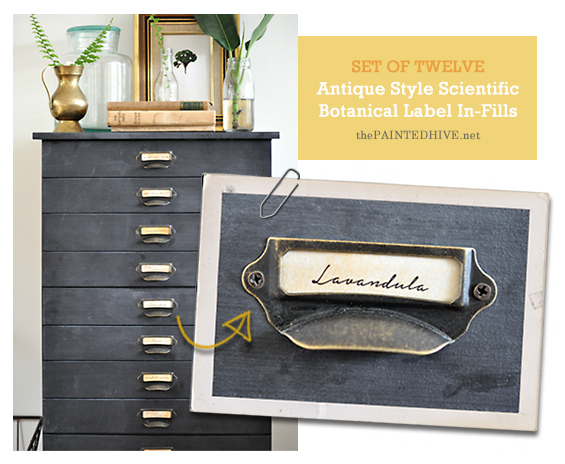
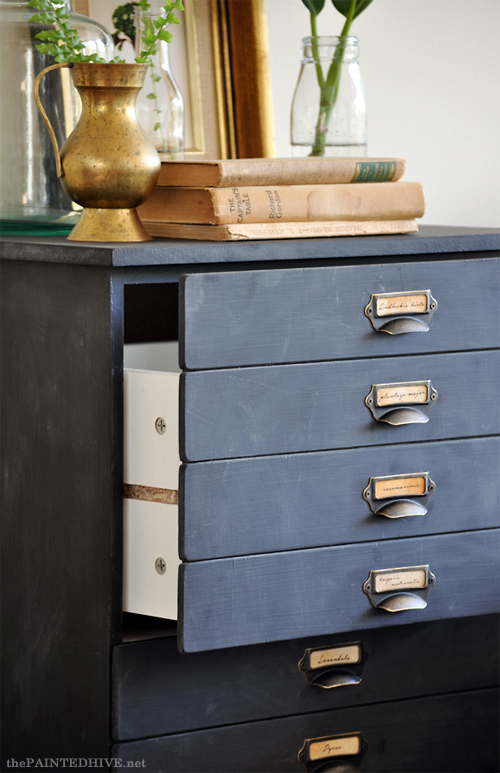
To finish off the pulls, I created some tab in-fills using a digital antique paper texture and handwritten script font (Notera). Because my unit has the appearance of specimen drawers, I decided to use scientific botanical names on my labels. I have attached my file as a downloadable printable if you’d like to use them too :-)
Twelve Antique Style Labels with Scientific Botanical Names
DOWNLOAD HERE
6 Finished!
Style it up, stand back and admire your awesomness :-)
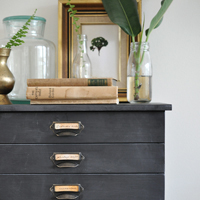
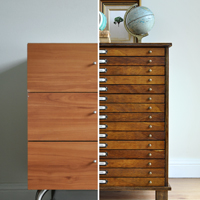
It’s hard to believe this is truly that same melamine storage unit. Maybe the tag line for step six should actually be “Hocus Pocus Alakazam!”.
I am super happy with how this little hack turned out! I think it’s easy for imagined outcomes to fall short in reality, though the result of this project actually exceeded my expectations – gotta love that!
As you can see, I failed to ‘fancy-up’ the drawer interiors. I’m good at neglecting stuff like that. I think a nice spearmint colour would look pretty on the drawer sides (and would probably make my photo much more Pinnable – we Pinners do seem to be suckers for a good jazzed-up drawer interior :-) Perhaps one day that’ll happen. Perhaps.
As mentioned in my first post about this project (covering my plan for the hack), recently I’ve been going kinda crazy due to a build-up of creative energy (it’s hard to dedicate time to personal projects with four cute and persistent hands clutching at your track pants). So now, not only do I have a pretty cool, and completely unique, piece of custom furniture, though also affirmed faith in the therapeutic power of DIY and a renewed sense of excitement about actually getting stuff done – maybe even half decent stuff!
This post is sponsored by White Knight Paints.
All ideas and opinions are my own.










How resourceful and beautiful!
What a fun & creative project! I’ve been meaning to give this a try…. I just might with your comprehensive instructions!!
This is the most genius thing I’ve seen in a long time. Great work. Thank you for the inspiration!
Thanks so much! You’re welcome Jenna Sue.
Absolutely amazing. Love it!
Thanks so much Tania :-)
You have such good ideas!! And your instructions are so detailed that I think I could even make this. I am going to keep an eye out for a set of drawers like this. Thank you for the tutorial!
Have just stumbled across your blog and I’m loving it! This project is incredible – love the end result! Fiona x
Thanks so much Fiona. I’m planning on doing something similar-ish for an upcoming project.
Loving your fun modern craft projects. Especially that licorice all-sort garland (seriously, if they were real all-sorts that garland would be mouth-bound pronto – treat of choice in this household!).
What a fantastic idea and a top job done! Looks great. Another admirer from over the Pacific here in Australia. Love following your blog. Cheers, Mark :)
Such a cool idea with amazing results! A great tool to try for a project like this would be Bondic! It’s a liquid plastic welder and a great DIY tool! Check it out: http://www.notaglue.com
Oh my goodness, this is seriously genius!
I love your blog & am really blown away by this transformation. It’s not new to see furniture hacks, but you have taken it to a whole new level.
Meanwhile, regarding your response to Kylie above, I think this Watson’s collaboration will really get you out there. I haven’t seen anybody else’s projects yet, but I think yours will be easily the best!
Thanks so much Belinda.
Am loving your typographic printables too. The floral letters and wreaths are so cute.
Hi. love this project as well as your latest one…..on your link to the handles under sources the measurements given on the ebay site seemed very small. (not even 2 inches long) I live in Canada and am not very good at metric how long in inches are the handles on this project. I liked the size you used and from your picture they seemed way longer than 2 inches. Many thanks
Hi Dorelle
The link should direct you to the exact handles I used. They are 69mm x 29mm. This is 6.9cm (or 2.7″) long x 2.9cm (1.1″) high. Not sure how you were converting the metric measurements though they are almost 3″ long.
Hope this helps.
Hi Kristine,
Very nice idea. I have a blog in Brazil and I shared it there –
http://acasaehsua.blogspot.com.br/2014/08/como-personalizar-um-movel-basico.html.
Congratulations!
Rgds, Mariana.
Very cool! I really love the style of this piece.
Hi Kristine, what a great tutorial and what a beautiful idea! So very inspiring, I really like your blog! Will definitely try to upcycle a similar piece :-) Thanks for this great idea!
What a beautiful transformation! You did such a great job turning an ordinary file cabinet into something so unique and eye catching. Thanks so much for the inspiration!
Thanks Katie :-)
That storage cabinet is so genius! Who else would have thought to create mock drawer fronts. I don’t think I could resist writing on those chalk surfaces, however. Mine would be full of today’s ramblings. I like to read your blog to discover bits of your Aussie vocabulary. Track pants (sweats), Timber (wood). etc. It’s fun for this California gal.
Thanks Ann.
He, he, believe it or not, I’m actually pretty cautious about using my Aussie vocabulary given the vast majority of my readership is US based. It’s funny though because having been in this US dominated blogland for a while now I often find myself using American variations of words in my everyday speech. Just yesterday I was talking to a friend about some ideas I had for changing my countertops (benchtops) and embellishing some of my closet (wardrobe) doors!
Love this idea. You mentioned you weren’t totally sold on the casters. Why not try to make an apron around the bottom to cover them. I’m sure the heavy duty casters make it easy to move and that is a plus for me when trying to clean behind heavy pieces of furniture.
Thanks for the suggestion Barbara :-)
That’s definitely an option though the castors have kinda grown on me now, plus I do like the fact they raise it off the ground. Not sure why, though I generally tend to prefer furniture on feet. A great idea for others who are looking to conceal wheels though. I’m actually about to build some rolling storage boxes with hidden castors.
Found this on Pinterest, and can I just say, this is AH-MAZING!! The best DIY hack I’ve ever seen, and so cute and looks super attainable and easy to do, thanks to your great tutorial and pictures! I can’t wait to see more of your craft-ness :)
Thanks Vanessa :-)
You are genius!
I think this is fabulous and really enjoyed the witty instructions. Great fun and wonderful tutorial. I am inspired by your projects and find you truly talented.
Great tutorial and a grand idea. Love the witty instructions, made me smile. Gotta admire such ingenuity and determination when caring for little ones along with all the other chores. You are a real inspiration and am going to get right to duplicating this one.
Thank you Lee. What a lovely comment :-)
AMAZING hack!! Love the finish and hardware, pinning for sure!
I’ll make this my first DIY project. Seems easy to make, but I bet it will not be so easy.
Oh my gosh!!!!!!! I am really swooning over this project like no DIY I have ever seen. I HAVE to make this! Thank you for sharing! xoxo Karen June
Thanks so much and thanks for sharing on your Facebook page :)
Love it
Can be so useful on other pieces ! Great inspiration
Thanks Joyce :)
Hi Kristine can you tell me if the four faux panels per draw are four pieces or one piece that is cut to look like 4??? If so how did you cut one piece to look like 4, a special template or just crazy good cutting? Thanks
Ps I just love this piece and really enjoy reading and catching up with your incredible work
Hi Eliza
Thanks! The four faux fronts are individual pieces. However, it wouldn’t be too difficult to cut deep grooves in one piece of thicker timber. You could do it easily enough with a circular saw set to the right depth though a plunge track saw (like we used to cut our individual pieces – you can see it in the image for Step 1) would be ideal.
Kristine
So, you’re a double level genius and I love the way you write! Subscribing pronto!
Ha, ha. Don’t know about the genius part Tracey though thanks so much :)
This looks amazing – fantastic craftsmanship and beautifully presented article!
Thank you for sharing. I look forward to seeing others…
This is stunning and completely unrecognizable from the basic way it looked before. I love this! Thanks for sharing.
Thanks so much Robyn :)
Do you need to wax or seal the paint at all? I’m in the process of doing this to my 3year olds dresser! So any tips you have would be awesome! I LOVE what you did!
Hi Britt
Nope, no need to seal or wax Chalkboard Paint. In fact, coating it would actually repel the chalk and spoil the worn, graphite look.
Have fun with your project!
Cheers
Very cleaver idea!
You. Are. AMAZING! Where have you been all my life?!? LOL…I love your ideas. You have great taste and the fact that you find everyday things and turn them into something stunning. WOW! Plus, your husband seem pretty handy :-) I wish mine was that handy when it came to simple woodwork. Thanks for sharing your wonderful ideas!
LOL! Thanks. Hubby is reasonably handy though I’m proud to say I have surpassed him in some aspects of wood-working. Yay! It can seem daunting at first though you really just need to give it a go. Carefully, of course :)