I was gonna write this post in conjunction with the ‘before and after’ reveal of Charlotte’s new table (which was going to have a natural timber finish), though I kinda changed my mind about the look I was going for there, so instead I decided to write it with a more general focus (I’m still working on Charlotte’s table so will share it in an upcoming post).
Of course there are endless ways to approach timber finishes, this is simply one of my common methods. It’s a process I use often because 1) it produces good results, and 2) it is pretty fast and super easy.
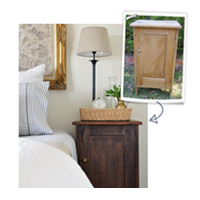
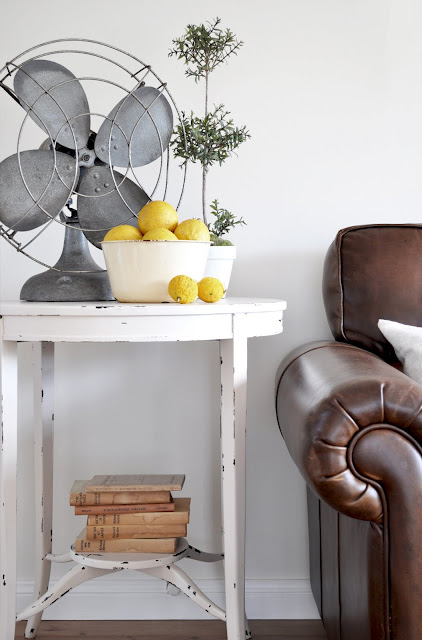
It’s how I finished all these pieces…
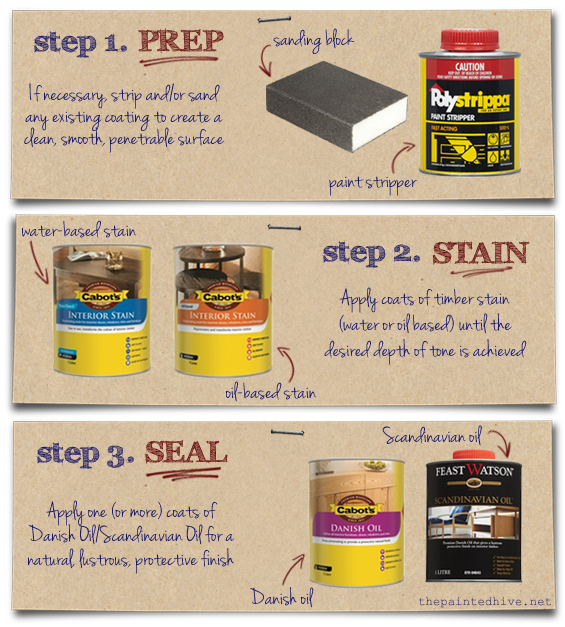
It’s a simple process which can be broken into three basic steps…
STEP 1 PREP
The amount of preparatory work needed will depend on the particular piece you are working with (new/old) and the type of look you want to achieve (rustic/clean).
Some items will require paint stripper (there are loads of different paint strippers available – always read the manufacturer’s instructions and, if possible, choose something natural) or heavy sanding (I usually use a belt sander, palm sander or sanding block – or a combination of all three), other pieces may simply need a good rub with steel wool.
Ideally, timber should be uniformly smooth and raw for the penetrating stain to look consistent, though for a more rustic, uneven appearance some residual stain or varnish is usually okay.
Remove any dust and grime prior to staining by wiping the timber with a clean cloth dampened with methylated spirits.
STEP 2 STAIN
Timber stain is a penetrating tint available with either an oil or water base, and in a myriad of different colours. I don’t personally find there’s much difference between oil and water based varieties, and usually just use whatever I have on hand. One of my favourite colours is Walnut, which I sometimes blend with black for a rich, dark hue.
Of course, refer to the manufacturer’s notes of your particular stain for precise application directions, though as a general guide; I usually apply stain by sweeping a dipped cloth in the direction of the timber grain, then, if necessary, sweeping again with a clean cloth to remove any excess. I keep strokes long and continuous to avoid uneven colouration (short, stuttered strokes can leave noticeable ‘lines’). I apply as many coats as necessary to achieve my desired depth of tone, allowing drying time between applications.
Keep in mind that the colour of your timber substrate may effect the hue of the stain and that your seal coat may enrich any dullness.
STEP 3 SEAL
Danish oil (also know as Scandinavian oil) is a blend of oil (usually tung or linseed) and varnish. Unlike oil it is hard drying, long lasting and durable. Unlike varnish it is super easy to apply and produces a natural, mellow sheen, rather than a glossy shine. It is one of my absolute favourite sealers. I first mentioned it on my blog a few years back (in one of my very early posts) and received a surprisingly appreciate response from many of my readers who, after having tried it, were super glad to have been introduced to it!
Of course, refer to the manufacturer’s notes of your particular oil for precise application directions, though as a general guide; I usually apply Danish oil with a brush or cloth in long continuous strokes in the direction of the timber grain. Around twenty minutes following application, if necessary, I wipe off any excess with a clean cloth (thick coats can look quite glossy). I usually apply around two – three coats, allowing ample drying time between applications.
Hopefully this post has been helpful or enlightening for some of you guys :-) And next time I actually finish a piece using this method I’ll be sure to write a detailed tutorial with photos.
At the mo’ I’m still slowly chipping away at Charlotte’s room and will try to publish a progress post next week!




I love this post, thanks for sharing! I have 2 projects just waiting for me to get started which were inspired by all of the things I have seen on your blog. I have put the dining table hunt on hold, pending the successful completion of the other projects (thought I’d better keep the hubby happy ;) )
He, he. Thanks Kristy.
BTW, you did motivate me to make Lolly Cake on the weekend! I couldn’t find any fruit puffs though so I modified the recipe and am calling my version Candy Crumb Cake. I soooo love this sweet treat. So many different variations I now want to try.
Haha glad to hear it! What did you used instead? The possibilities are endless I guess… I’m sure this will fast become a fave treat at Charlotte’s birthday parties in years to come!
Sure will! Easy to make and easy to eat!
I used mini marshmallows and licorice allsorts. Super sweet though I cut the rounds into smaller portions. I wanna try M&M’s, Maltesers and maybe a more grown-up version with toffee and nuts, oh, and maybe one with Peppermint Crisp…and so on, and so on!
Oh yum! All of those ideas sous delicious. I wouldn’t mind trying something chewy to make it a little like rocky road… Mini marshmallows would be super cute for kids though!
Great post! I have three projects that involve lots of staining. This will help greatly!
I love the natural finish the oils give… been itching to sand back some furniture and get oiling.. you may have just re ignited my passion x
Oh yay! You must be superwoman – refurbishing furniture between being an amazing mum and running a wonderful business, go girl!
Thanks for the info on Danish Oil, I did not realize that it is oil AND varnish. I just thought it was just an oil and couldn’t work out how it would finish any thing properly, it all make sense now!
He, he. My Dad introduced me to Danish oil and at that time I had no idea what it was either, I just knew it produced the type of finish I wanted. Plus, it was sooo much easier to use than poly and standard varnish. Instant love!
Fantastic post Kristine! So helpful. I just finished my hutch…and used Danish oil for it. xx Rani
Ooh, can’t wait to see it.
Reading your comments made be smile Kristine, my dad also introduced me to Danish Oil. I just love the finish Danish Oil gives when you apply it as you instructed – a lovely soft natural glow. I’ve been surprised at how durable it is too, we’ve used it many times on our kitchen island bench top which is solid jarrah. It’s weathered 3 teenage boys preparing breakfast and lunches on it over 11 years and still looks good and only needs a re-coat about every two years. By the way have you found a little chair for Charlotte yet?
Hi Linda
Chair for Charlotte…tick! It’s a bit taller than what I wanted though is a genuine antique and is full of character (plus it was only $20 from eBay – score!). It does need a bit of love so I’ll be sure to post about it when I get around to working on it.
It sounds like if anyone ever needed proof of the power of Danish oil they need look no further than your island bench!
Thanks for this info. I have never ever considered Danish oil before and now I’m excited to try it. You always have the best advice and info.
Awesome Kristine! Thanks for this post. I have six, yes SIX, dressers waiting for ‘new’ tops and this method sounds perfect for them. I have never used Danish oil though it sounds great. Will let you know how I go :)
Awesome Holly. Hope it works out for you. Just remember to let the oil absorb completely between coats to avoid excessive shine :-)
Fantastic, thank you for the info.
Ooh, Danish oil huh? Must try. Thanks for the tutorial. Your pieces look great.
Very informative, and lovely work!
Thanks Tracy. You have made-over some lovely pieces yourself :-)
Love all of these! We are big fans of Danish Oil! We have used it on several of our pieces :) I Love your Blog :) Seriously! Top Notch! How on earth do you have time to create such beautiful things AND create these awesome blog posts?!?! Love your work :)
Thanks so much Meg. Seriously thrilled with your lovely comment. You are too sweet!
The only way I manage to publish blog posts between; running a household, caring for two little kids, full-filling shop orders and decorating (then re-decorating) my hive (and my friends and families too!), is to post only once every week or two. I just can’t manage more than that at the moment!
I love the photographs on your blog. The perspective and depth of field images are great.
xoxo
Continue the good work; keep posting more n more n more.
Yay! You did a great job in remodeling those stuffs.
nice ideas and amazing results
Love this but how did you replace drawer handles?
Thanks Maria. The original timber handles were simply screwed and glued on. I unscrewed them then prized them off. I made sure my new handles were large enough to conceal the majority of the slightly discoloured area where the original handles had been.
Hi Kristine! I absolutely love your blog. I know this is an older post, but I stumbled upon it thru Pinterest….hoping you might answer a question: I love how you refinished the chest with the new handles. It looks like there was a little wood piece on the back of the top that you removed. It really updates the piece. I’ve seen several pieces that are similar and can’t seem to figure out how to remove it. A jigsaw perhaps? And more importantly–how to hide the damage or the raw wood edge that is left if you cut it off? I can see how some caulk and paint would hide it, but if you stain, as with your piece here–does the damage show? Thanks so much. you did a beautiful job!
Hi Melissa
Believe it or not, that piece of wood is actually still there (you can see it through the glass jar). I did remove the mirror that was attached to it though.
I honestly don’t mind the little backboard on this piece. In fact, I think I kinda like it. It helps support any art I lean up against it and adds a little extra character.
If you do want to remove them though, try a heat gun. They may simply be glued on and the heat will soften the glue. You can also try to prise them off with a slender chisel – even if they are nailed/screwed this might work. Otherwise, have a good look at the underside (inside) for any visible screws (you’ve probably already done this).
If you do need to resort to cutting them off, there will probably always be some differentiation in the tone of the wood, even with staining, though if the piece is aged this might blend in okay. I guess it depends on how perfect you want it to look, and remember, if you’re not happy, you can always replace it.
Kristine
Thank you so much for the quick reply! I can see it now in the pictures. You’re right about it helping to support things. You did such a wonderful job on the piece, I agree, it’s kind of cute. I think for me, I see so many pieces here (I’m in the U.S.–Maryland) that I could pick up at yard sales that I would plan to paint (I’m not so great yet with the staining) but sometimes the little back pieces are a bit “gingerbread-y” and just look dated. The piece on your chest has nice, clean lines. I would have kept it too :). Thank you so much for the advice! I absolutely love your blog. So many great ideas and inspiration. Just started following you on Pinterest!
I totally get how little backboards can make pieces look out-dated and old-fashioned and maybe even overly quaint. Sometimes they work, sometimes they don’t – especially if you are going for a more contemporary, painted look. I completely understand where you were coming from Melissa.
xoxo
I love the little nightstand and want to paint my bathroom cabinets that color please let me know the process for that particular piece I have regular builder grade oak cabinets.
Thank you
Miriam
Hi Miriam
Thanks. The basic process is detailed in the blog post.
From memory that particular piece was already bare so no real prep was required. If your cabinets have any kind of top coat (sealer/varnish/hard oil) you will need to completely remove it for best results as otherwise the stain won’t penetrate. I mixed some walnut stain with a tad of black stain to create a really dense colour. I then applied it liberally with a rag, wiping with the direction of the grain. I think I did two coats.
The stain was more heavily absorbed by the open grained areas in the wood which is what has created the rustic, two-tone look you can see. As my little night stand was also quite old it had lots of dents, scratches and chips which also absorb more stain and add to the character.
Hope this helps.
Kristine
Very useful post. I found new ideas in this and it will help me to do best in my projects.
Thanks for sharing