
Phew, it has been a busy few weeks around here!
Aside from all the regular hoo-hah, I spent a few whirlwind days updating, cleaning, styling and shooting a few of my rooms for inclusion in an upcoming home blogger’s book! I don’t want to say too much yet, just in case something falls through, though will be sure to divulge more details when things are a little more concrete (however, I should clarify that the book is not by me or all about me – by no means am I important or interesting enough for that – I’m simply contributing). In the mean time at least I now have some some tizzied-up spaces, complete with spanking new photos, which I can share over the coming weeks.
In other news, I finally finished refurbishing a set of six chairs I bought waaaay back in the Cretaceous period. Okay, so maybe not quite that long ago, though you get the idea.
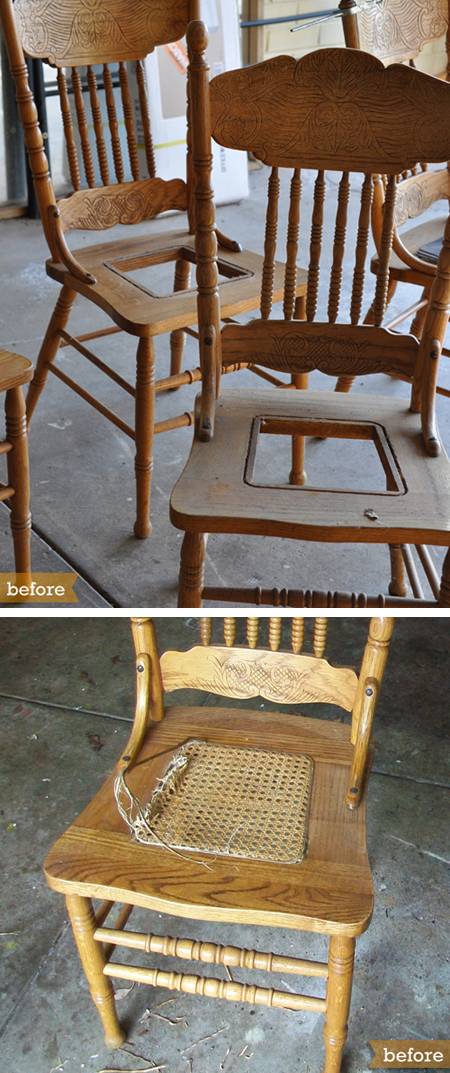
I originally found these chairs on eBay and picked them up for just $5.50! Yes, for ALL of them! They were in pretty rough shape, many of them with missing or loose dowel supports and most of them with badly broken or sagging rattan seat inserts.
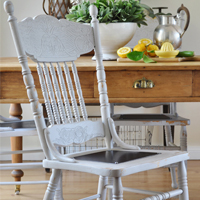
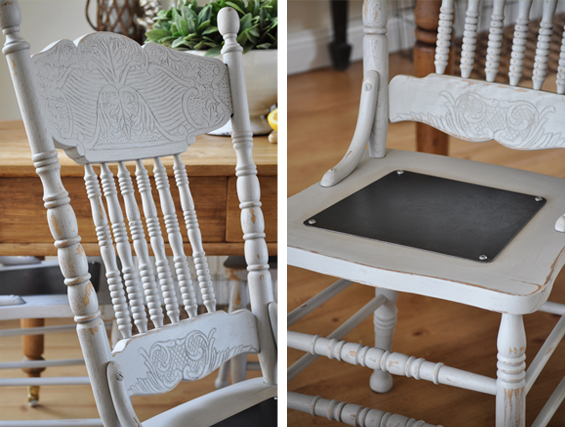
Being completely ill-equipped in the (to me, complex) art of re-caning, I decided to remove all of the rattan and cover the inevitable holes with padded seats instead. Though then, me being me, I had an idea (don’t worry, it didn’t hurt too much :-) What if, instead of conventional upholstered pads, I used metal plates? They could off-set some of the sweet cottage style with a subtle industrial edge and give the chairs that little point of distinction. Sure, they might not be as plush as cushioned pads, though we have some metal chairs and they are surprisingly comfy, plus they are super easy to clean (and the addition of topical seat pads is still always an option).
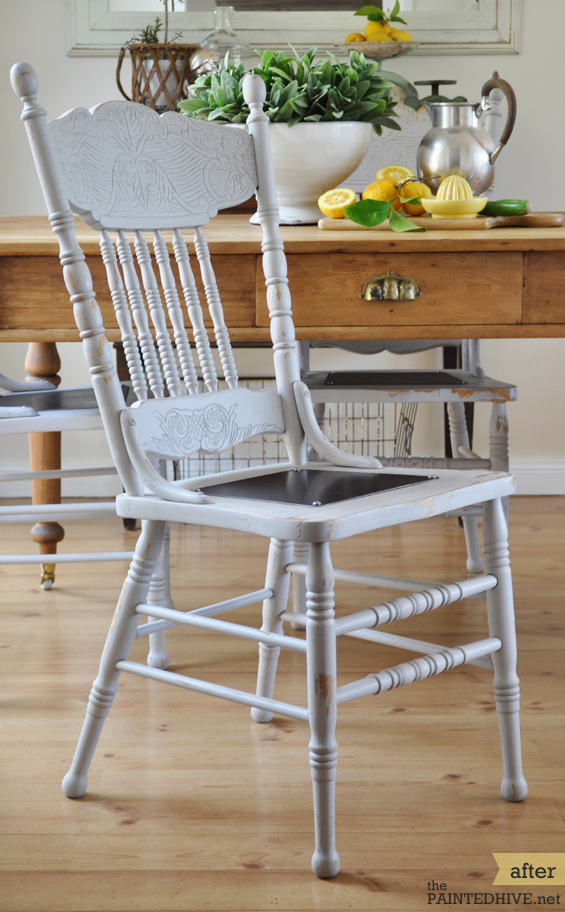
Anyhoo, firstly I re-glued and braced any loose joints. This included replacing a few of the missing and broken horizontal leg dowels completely. Once set, I gave the chairs a light all-over sand (I wanted to distress the chairs once painted so didn’t worry about sanding too thoroughly). I did kinda like the original timber finish though considering I had to replace some of the dowels the wood was no longer completely consistent so I decided to paint the chairs in a soft blue-grey (sorry, though as usual I made the colour up using paint remnants so can’t disclose an actual colour). With all their intricate spindles, to save time and frustration, I sprayed the chairs using my trusty air compressor.
I’m lucky to have a brother-in-law in the metal industry so he machined the seat plates for me (thanks Joshy!) though I could have purchased some metal sheeting and cut them myself easily enough. I attached them to the chairs using simple little dome head screws. I then distressed the frames, rather heavily, by hand using a medium grit hard sanding block. I contemplated glazing the chairs to bring out some extra detail in the carvings though decided they were just right as is.
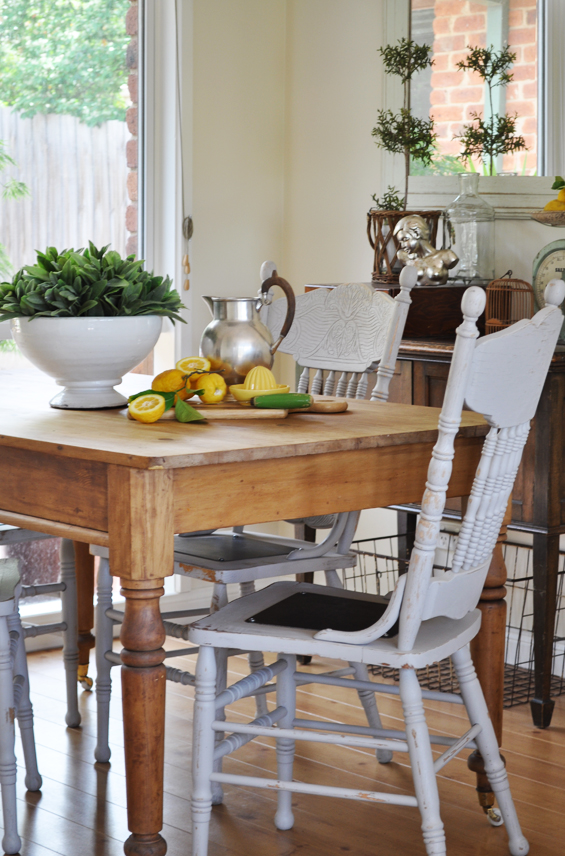
I have the chairs in my dining room temporarily and do really love them though will probably end up on-selling them. After all, how many sets of six dining chairs does a small family with one four seater dining table really need?

![]()


These are just lovely. The amount of distressing is perfect and so is the color. I never would have thought to use metal plates for the seats…adorable, and you’re right, no fabric to clean!
Love, love, love these chairs. Thanks for sharing.
Wow! I adore these seats. Great job. Also, where did you get your kitchen table? I have been looking for one just like that. Thanks
Hi Jamie. Thanks!
It’s an antique table I found on eBay. If you’re looking for something similar try scouring second-hand stores and furniture auctions. You should be able to find one for a good price. Good luck.
I love them, especially since I am on the hunt for press back chairs like these on my metro craigslist. I even intend to paint them. Are you sure you want to let these go? They are lovely!
Hi Linden
Actually, no, I’m not entirely sure I want to part with them!
Though like I mentioned, it’s a set of six and we only have space for a four seater table and no-where to store the other two. I guess something’s gotta give – unfortunately :-)
What a great idea! Love them.
Such a neat idea! I never would have thought!!
What a spectaculare change! :)
Not only cute, but a brilliant idea. I just love the chairs in white. Great job!
Fantastic Idea with the seats of these cool looking chairs!
These are awesome chairs. In fact, your whole dining room is just gorgeous. Actually, make that your whole house :)
What a clever idea and so much sturdier than the original cane seat & more attractive than pieces of wood that I’ve seen.
Thanks Beth :-)
You’re right, cane seats can look great though they aren’t particularly sturdy – which is why I assume they were all damaged in the first place.
Thanks for the comment.
this is very cool and has a european modern sense to it! bravo.
hope you’ll have a moment to stop by where i have a giveaway today
http://hellolovelyinc.blogspot.com/2012/12/swedish-style-katrin-cargill.html
peace to you.
michele
Wow! The chairs are beautiful and your staging is absolutely gorgeous! So glad I found your blog!
Allison
Thanks so much Allison.
And I really appreciate your compliment about the staging. It’s so fun to play dress-ups (even though I do think that perhaps I use lemons far too frequently!).
:-)
You have got the eye for taking great photos. I love it. i was just introduced to a photographer and she has shown me a few tricks–your chair pictures are lovely.
Hi Lynda
That’s more of a compliment than you know. Thank you :-)
To be honest, cameras are still a bit of a mystery to me though I do like playing with compositions and photography. I’m learning more each day.
Kristine
Love it! What a cool idea! Pitty I don’t have such a handy brother! ;-)
Thanks Suzanne :-)
Yep, it was sure easier to have him cut them for me though it is still a do-able DIY.
I love what you’ve done with your chairs!
I have similar reproduction ones I would love to paint.
Great idea!
I love the white and the twist you added with the metal. If you get a chance come link up at my Pin Party.
http://sarahdawndesigns.blogspot.com/2012/12/pintastic-monday-20.html#.UMYpFazxxgg
I love your beautiful chair makeover – inspiring! I have a few items that I need to refinish and I think just getting started is half the battle!
Hi Laurie
You’re right, getting started is half the battle. And for me getting finished is the other half :-)
Kristine,
Your chairs are adorable. You have done a great job restoring them. I have passed up many a cane chair because I didn’t know what to do with the hole. And wobbly chairs I sometimes just wonder how to go about getting everything sturdied up again. I would love a walk through the process if you ever do this again to chairs. No more passed up cain chairs for me…. Now I just need a metal worker who can help me :) This is my first time here visiting. I will be following along. I look forward to getting to know you. Janita
Hi Janita
Thanks for your comment :-)
From experience I’ve found that sometimes re-bracing chair frames is easy, and sometimes it feels like more trouble than it’s worth, though it’s hard to know which one it will be until you actually get started! I’ll be sure to post about the process when I next do it.
Kristine
Wow. I am just amazed. Just when you think you have seen all there is to see in these type of chairs. I so love this look and I am definitely pinning this. Visiting from Primitive and Proper. Have a wonderful Holiday. -K
Thanks Karen :-)
These chairs are amazing!…and the price you paid for them…remarkable!
I’ve featured them over at Think Tank Thursday. Thanks for linking them up!
http://www.saving4six.com/2012/12/welcome-to-think-tank-thursday-10.html
These chairs are awesome! Featuring today.
XO
Kristin
Thanks Kristin.
I absolutely love what you have done with these chairs. I too have chars that the canning that is coming apart and have been searching sites to help recover them. Do you know any sites that show
conventional upholstered pads DIY ?
Hi Bev
I haven’t come across any tutorials though my initial plan was to simply cut some MDF plates, stick pieces of foam on top then cover them with wadding and fabric (using a staple gun) before attaching them to the chair (maybe with strong velcro). There would be a slight gap between the pad and the seat where the fabric and wadding is tucked beneath so I was going to hot-glue on some braid or rope to border the pad and hide the gap. Using velcro (or something similar) to attach the pads means they would be able to be removed and recovered easily if desired.
Hope this helps.
Kristine
These look great–now I can live with mine!
Sooooo, I have mismatched dining room chairs that I’ve been thinking (obsessing) about painting FOREVER. Two of them are nearly identical to yours. You’ve sold me. I’m all over it. Although, I’d have to hand paint them, which is gonna SUCK. Totally worth it though, they look great. Now, to decide on a color…..or four……
Go for it Mindy!
I agree, hand painting will kinda suck though it will be totally worth it. Send me some pics when you’re done :-) I’d love to see.
I love chairs like these. I’m sick of the new style chairs.
Very cool! I’m featuring them in the PoPP Spotlight this weekend. Thanks for linking up.
Thanks so much Maryann! I’m thrilled to be featured on your amazing blog :-)
Dining Tables are very good to use. Dining chairs plays an important role to make your kitchen beautiful So if your dining table is looking good definitely your dining hall looks beautiful.
Ooh – I have those chairs – I picked mine up from roadside rubbish one day and multi-coloured them and used them as photo props. Unfortunately i’ve left them out in the rain and sun for a few years now, so I think they are beyond salvation .. I will find out when I return home in a few months time I guess..
Did you seal the chairs after you painted them?
Hi Kim
I chose not to seal these particular chairs as I like the informal matte finish of the paint and the fact they will naturally distress easily with use.
Kristine
Hi I am looking for 2-4 feather back chairs like these but toddler size.
Can you point me in the right direction?
Charles
Hi Charles
I’m not certain where you are based though I would recommend searching on-line for second-hand chairs. Here in Australia some of the best sites for pre-loved furniture are eBay and Gumtree. If you’re in the USA then I believe Craigslist is the best place to look.
Kristine
Hi,
Can you give me more details on the metal used? What thickness is it and what color is it? Also, how did you make the edges smooth enough to not catch on delicate clothing?
Thanks!
Hi E
I have now sold these chairs though from memory the metal was around 3mm thick. As mentioned in the post, my brother-in-law is in the metal industry (he’s a fitter and turner) so he machined the seat plates for me and gave them rounded edges. I think they were galvanised steel.
If you’re planning on DIY’ing something similar, you could use an angle grinder with a cutting tool to cut the metal sheet then a polishing tool to smooth the edges.
Hope this helps.
Kristine
Thanks so much for responding! I am going to do the same thing with a set of vintage farm chairs.
Elana
I love the outcome. At first, you think pretty cottage chair. Then, to your surprise, metal. Now it is industrial, too. What a neat twist. I love the combo.
I absolutely love these chairs. I am about to start my first upcycling chair project and wondered what type of paint you use. I want to paint my chairs an off white and bought some Preplock to stop the dark stain coming through but don’t know what to use as a top coat was looking at Dulux Aquanamel but don’t really know what would be durable on chairs or give a nice even finish. I was thinking about getting a paint sprayer but not sure. Would you mind sharing what you use? Thanks
Hi Karen
To be honest, I’m usually not that fussy when it comes to paint. Most of the time I use standard acrylic low sheen wall paint (because my dad often picks up half-used cans for free – from the transfer station at the local municipality where he works). I generally mix up colours myself from whatever I have on hand then seal my furniture with clear acrylic sealer.
For special projects, or those times when I do have to buy paint, I generally go with a semi-gloss (like Dulux Aquanamel or Dulux Wash & Wear – unless I want a speciality finish, then I might go for something like milk paint). I don’t use any sealer if I paint with a semi-gloss.
I painted these particular chairs with around three coats of low sheen wall paint using an air compressor. I didn’t bother with an undercoat or a seal coat though because I was going for a natural, distressed finish (and obviously some future chips and scrapes aren’t a problem).
If you want a perfect, durable finish, there are lots of different techniques and products you could use to achieve great results. Generally speaking, I wouldn’t recommend spraying on the undercoat unless your chairs are raw or very well prepared. I find that the paint just doesn’t adhere as well when applied with a spray gun (that said, some good quality canned spray paints can be fantastic). You could apply the top coat using a spray gun, just be careful to apply fine coats and keep in mind that whilst it provides a stroke free finish it doesn’t ‘fill’ as well. This is another good reason to brush on the undercoat. Also, for a super smooth and well-adhered finish, rub with steel wool or fine sandpaper between coats.
Of course, you could brush the undercoat and the top coat. Just use a good brush and apply sparing coats. I think the Aquanamel would be a good choice for chairs.
Hope this helps! Have fun and let me know how you go :-)
Kristine
Thank you SO much Kristine!
This it just the info I was looking for. Can’t wait to start painting my chairs. I still haven’t decided if I want a distressed look or go for a crisp clean finish but I guess I have plenty of time to figure that out. Also if I stuff it up the distressed look will hide that very nicely!
Very interesting about using a brush for the undercoat, I will definitely do that now as I was thinking of spraying but I definitely want the paint to stick. Will keep you posted on my progress. I think it will take me a while to get them done but hope to start very soon.
Karen