
I actually completed this chair months ago (some of you may even remember I posted a sneak peek on Facebook) and have just been waiting for some spare time to sit down and write the tutorial and share it already.

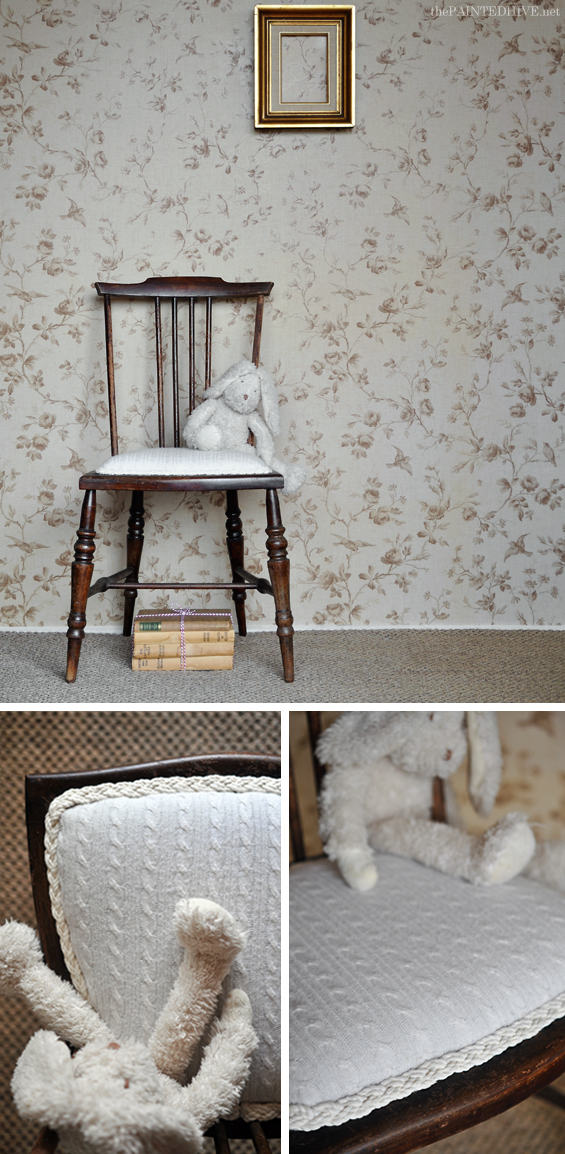
It’s a sweet little chair for Charlotte’s room (yes, I will get that space completed – one day). I picked it up from eBay for around $25 after a reasonably long search. You see, I have this problem where I tend to envisage things I want – usually things that don’t exist – which means finding them generally takes a really, really long time. Throw my aversion for forking out big bikkies into the mix and it’s near impossible. Anyhoo, when I finally spotted this chair I knew it was just right. The shape, scale and patina, not to mention the price, were all perfect.
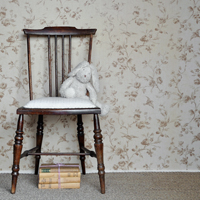
It’s the same chair I featured (in its ‘before’ state) in my distressed table post…
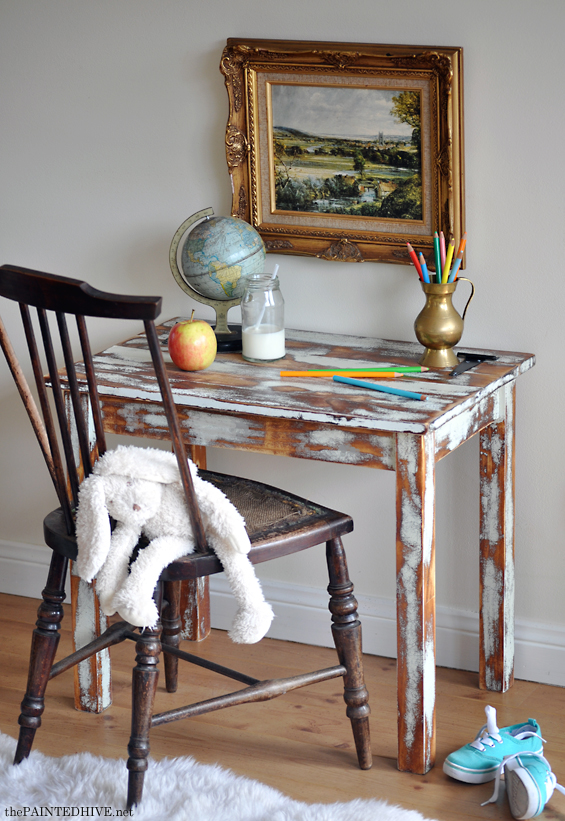
I must admit, after seeing these pics I fell a bit in love with the raw unpretentious look of the incomplete upholstery and did consider leaving it as is, though the exposed hessian and remnants of gimp were just way too itchy and scratchy so a new seat cover it had to be.
This is the first time I’ve ever upholstered a chair without a removable drop-in seat. I guess I must have felt kinda intimidated by the task, because this poor little chair sat neglected for over a year. Turns out my trepidation was unwarranted. The project was actually pretty simple and the result is surprisingly proper.
If, like me, you feel a little uncertain about the process of upholstering a chair with an attached seat pad, hopefully this tutorial will help shed some confidence inducing light.
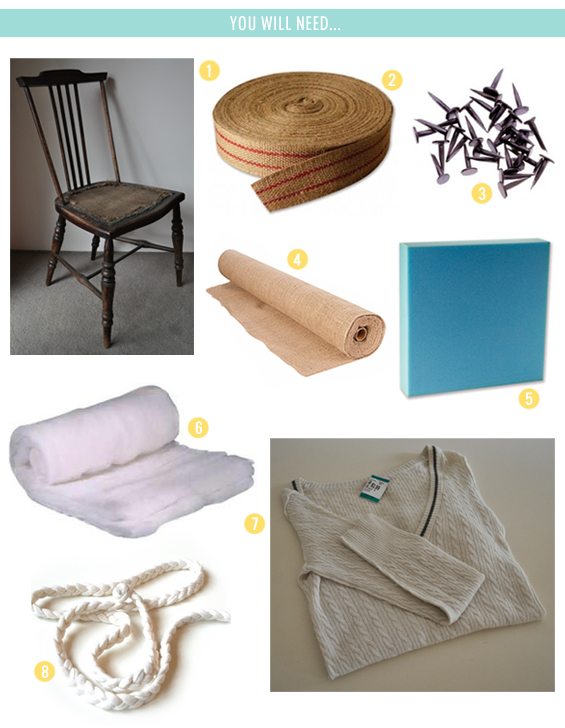
1 Chair
Duh! As mentioned, I’m using an antique child’s chair I picked up from eBay for $25.
2 Webbing
I’m using traditional jute webbing. Nowadays, you can get it in nylon and other materials too.
3 Upholstery Tacks
I used 1cm (3/8″) long tacks. You could use a staple gun instead though given the thickness of the webbing I just prefer the secure hold tacks provide.
4 Hessian/Burlap
To act as a base for the foam. Hessian is traditionally used though any strong woven fabric should suffice.
5 Foam
I’m using mid-density 25mm (1″) foam.
6 Wadding/Batting
To soften the curve of the foam and help conceal any inconsistencies.
7 Fabric
I usually go all practical when it comes to upholstery fabrics, especially where kids are involved, though in this case I kinda forgot about that. I wanted to use a cable knit jumper – a cream one at that – so I just did. Of course I’ve treated it with a fabric protector and have tried to persuade Charlotte to be somewhat careful though let’s face it, she’s a kid and it’s her chair so she can use it as she likes (within reason of course). I figure if it does get particularly dirty, worn or stained I always know how to recover it – that’s the power of learning to do stuff yourself I guess :-) I picked up my pre-loved cable knit jumper for just $3.99 from Savers.
8 Trim/Braid/Gimp
For concealing the staples. I’m using some really lovely braided cotton which goes perfectly with the cable knit fabric. I found it at Spotlight for around $3 a meter.
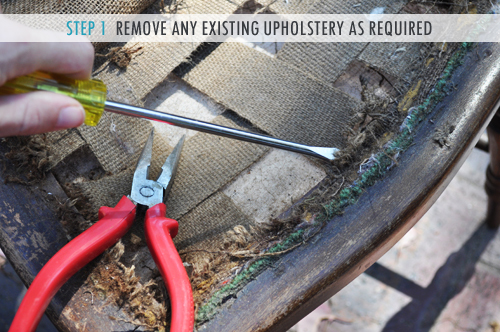
STEP 1 Remove any existing upholstery as required.
In the case of my chair that meant the old webbing, hessian and glued-on gimp along with a hundred million staples. Seriously. In many cases removing the existing upholstery can be the most difficult and time-consuming aspect of the whole project. If possible, avoid it if you can. My webbing and hessian was just a bit far gone to be saved.
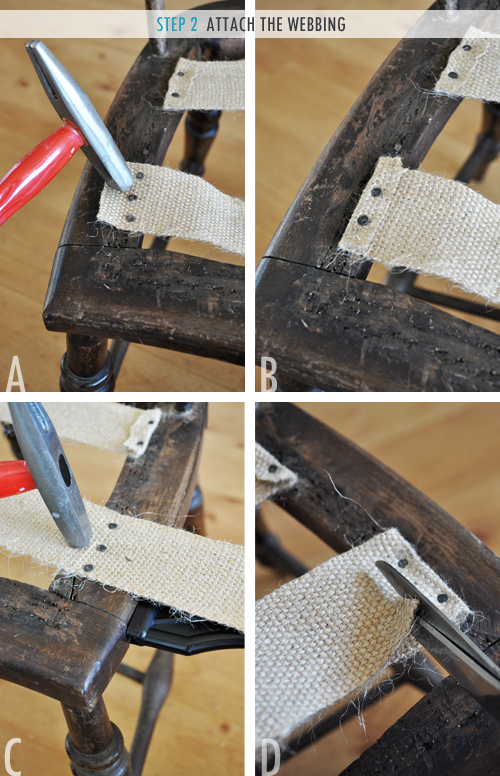
STEP 2 Attach the webbing.
You can do this in a few different ways. This is how I went about it (you can read my previous tutorial for upholstering a drop-in seat for a detailed explanation of a slightly different method).
A Cut a strip of webbing around 20cm (8″) longer than the width of the chair frame and tack it onto the seat. Take care to ensure you tack it as close as possible to the inside edge. Remember, you need frame space to attach the coming layers which also need to conceal the webbing.
B Fold the loose end over itself and tack again for extra strength.
C Pull the strip taut across the cavity (preferably using a web strainer – again, refer to my previous tutorial for more info) and tack again in the parallel position on the opposite side of the frame.
D Fold the loose end over itself and tack again then trim off any excess.
Repeat this process, weaving the strips, until you have something resembling this…

Of course, depending on the size of your seat, more or less strips may be required.
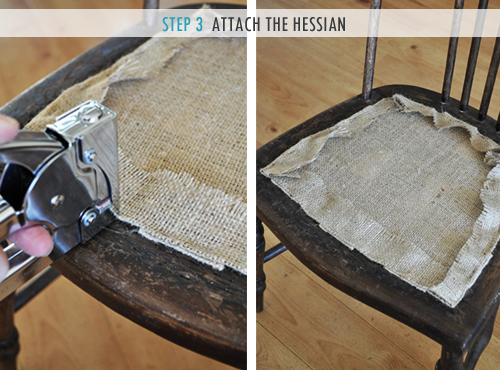
STEP 3 Attach the hessian.
Trim a piece of hessian around 5cm (2″) larger than the seat base. Position it on top then fold in the excess before stapling it in place. This just acts to fill the webbing gaps, making the base more comfy and strong.

STEP 4 Attach the foam.
Trim your foam so it just covers the hessian. An electric knife is by far the easiest tool for this task though if you don’t have one sharp scissors will do. You may also find it easier to make a template of the seat shape from card or paper first. Lay the foam in place and staple it on. I like to push down the top edge of the foam, tucking the side underneath, to create a nicely rounded finish. Ensure you grab enough foam with the staples to avoid it pulling through (tearing) and lifting in the future.
It will probably look a little ‘bobbly’ (yes, that’s a word) though provided the ‘bobbles’ aren’t too inconsistent the wadding and fabric should even everything out nicely.

STEP 5 Attach the fabric.
Trim a piece of wadding around the same size as the foam and lay it on top. Trim your fabric so it comfortably covers the seat (having excess makes things a little easier) and lay it on top of the wadding. Make sure it is straight and smooth. Neatly staple around the entire perimeter of the foam, pulling taut as required, then closely trim away any excess fabric.
TIP: Using a thick and slightly stretchy fabric, especially a soft woven one, usually makes for a more smooth and consistent finish. Thin and rigid fabrics show up imperfections much more obviously.
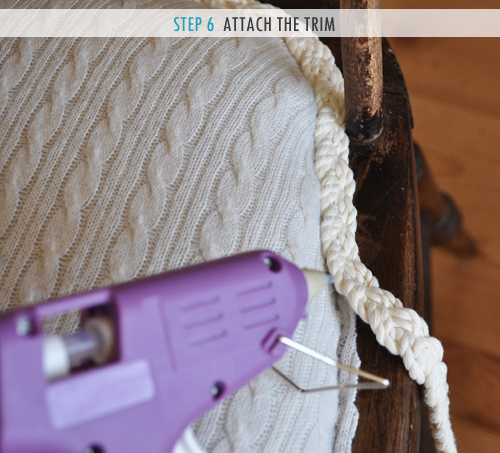
STEP 6 Attach the trim.
Choose an inconspicuous area or central position to start in (I began center back). Fold a small portion of trim under itself (to conceal the exposed end and create a neat loop) then attach it to the seat using hot glue. Press down hard to compress it slightly. Continue gluing and sticking until the entire edge of the fabric is concealed by the trim. When you reach the starting point, cut the trim leaving a little excess to fold under again, then glue it down abutting the beginning…
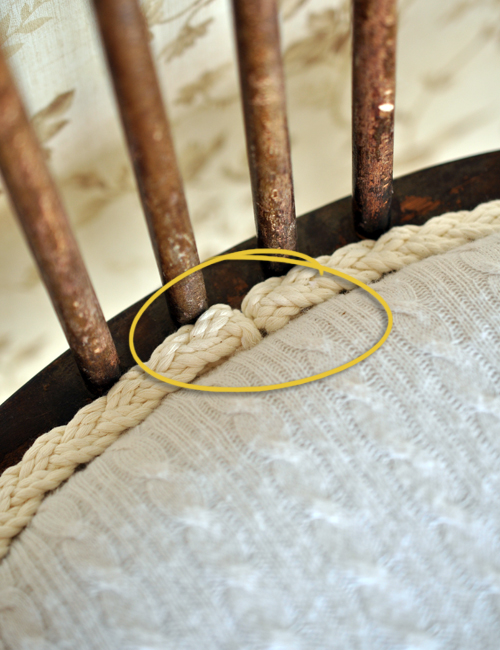
TIP: If, like me, you’re using a braided trim that easily unravels, keep the ends neat by tightly wrapping a strip of clear sticky tape around the area you need to cut. When you do have to cut the braid, cut through the center of the tape. This will leave only a small portion of tape which will neatly hold the loose ends together though be barely visible once folded under.
Done!
Like I said, hopefully this tutorial helps spark some motivation in those of you who have a chair like this languishing in a dark corner somewhere. Or, even better, maybe it might inspire a few of you to purposefully seek one out! In many cases chairs requiring some simple re-upholstering can be picked up for super cheap.
Now, onto the next project for Charlotte’s room…
![]()


So adorable.
How are you getting along with little Charlotte’s room? I can’t wait to see it.
Great tutorial.
Getting there Rosey – thanks for asking :-)
Hoping to complete the DIY window dressings next then onto some DIY custom under-bed storage followed by a bit of DIY wall art and then some new DIY bedding. Just recently completed a DIY lamp project for the space I hope to share soon!
This turned out beautifully!! Great tutorial. :)
Thanks Kate!
It’s very beautiful! Nice tutorial!
Me ha encantado tu blog y me he hecho seguidora para poder ver tus preciosos trabajos.
Thank you Ana. Glad you are enjoying my blog :-)
So, so cute – you did a great job and looks simple enough. Thanks for sharing.
What a great tutorial!! So clear and precise, photos great!!
Great idea to use the cable jumper. The chair looks really soft and cosy now. And cute.
http://llibbyslifestyle.blogspot.com.au
Always a delight to receive an email from “Princess Mary”.
LOL!
Clever girl! Love the texture of using the sweater:)
Thanks lovely.
Pretty! This was a really wonderful article. Thank you for supplying this info.
I LOVE the end result! I also love the wallpaper behind the chair. You have such great taste, I love your hive!
Thanks so much Yalanda. I have to agree, the wallpaper does work really well with the chair. Shame it’s in our entryway and not in Charlotte’s room :-)
Nice timing. I was wondering what I could cover the dinning chairs with once old. Great fabric.
Thanks Carol. Wouldn’t a set of dining chairs done in different yet co-ordinating cable knit jumpers look amazing?
Ha ha yes I thought that too
Wow what a great transformation! The chair turned out looking so pretty!
Thanks for the detailed instructions, I am working on a similar project and this is very helpful.
Love this too! Im going to try something like this for my next project.
Thanks for the inspiration!
http://www.endlesshouseaffair.com
This is the best!!! I can’t wait to try this with a chair I was honestly going to toss because it didn’t have a nice look. But so glad I found your tutorial blog!