

I love it when the launch of a new product provides the perfect excuse to tackle a well over-due project.
Such was the case with the release of Black Wax by Annie Sloan.
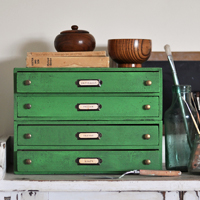
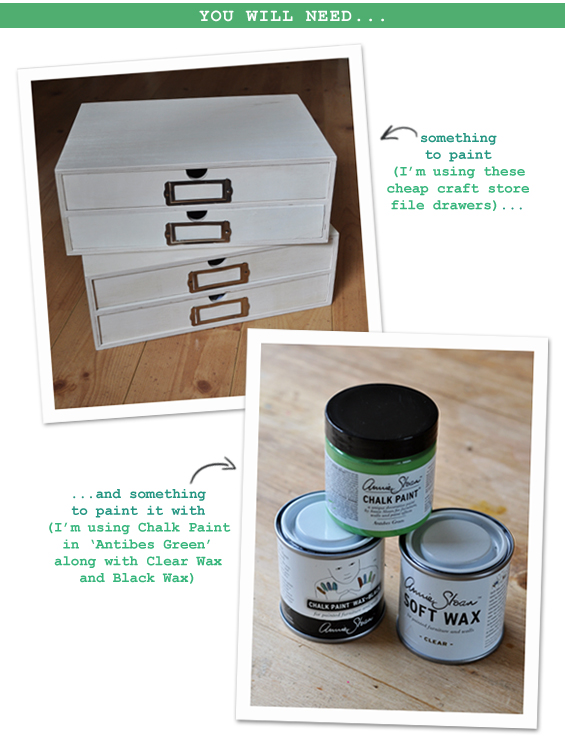
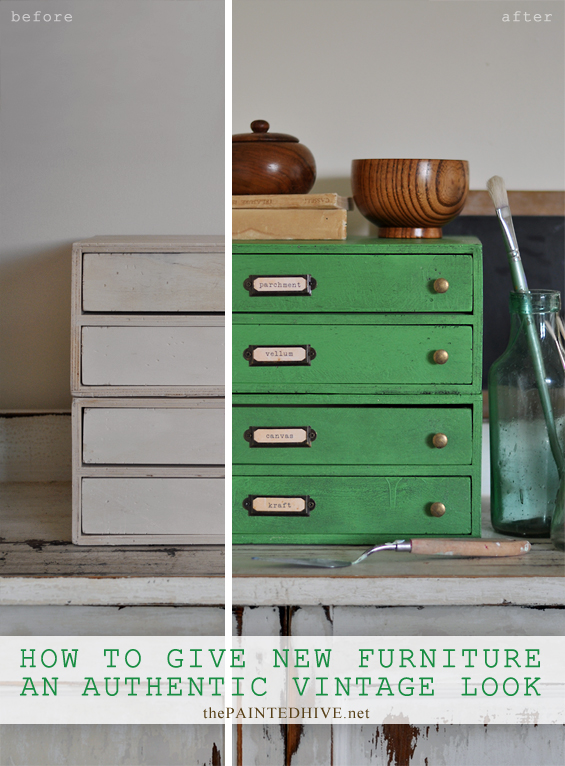
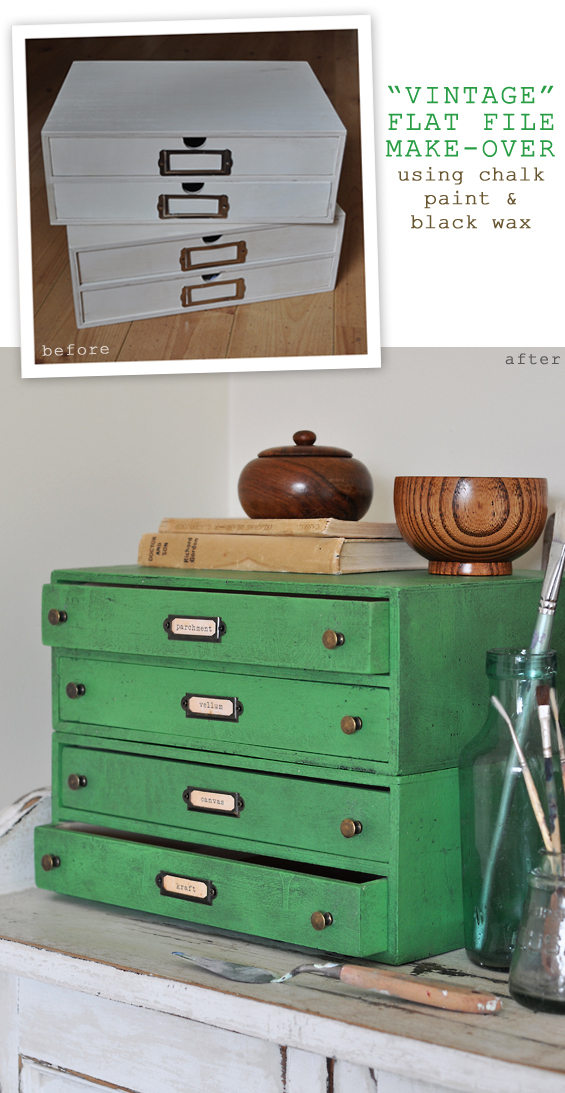
Teamed with Annie Sloan Chalk Paint in “Antibes Green” it seemed like the perfect way to jazz-up some blah file drawers I bought years ago.
Used right, Black Wax produces a very authentic-looking vintage patina, which nods to industrial and has lots of grungy character. I know it’s not for everyone, though it was exactly the look I envisioned when I first spied these boring naked drawers. And achieving it was even easier than I thought!
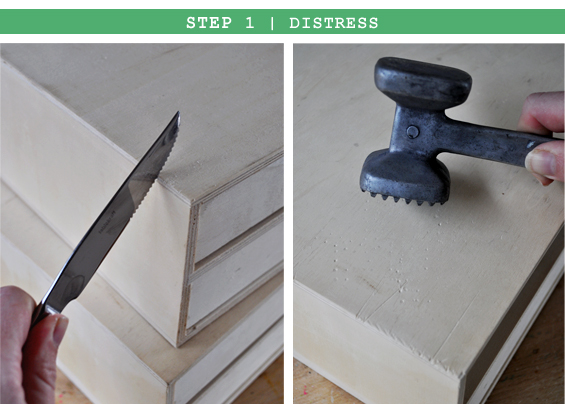
1 Distress.
Because my wood was so new and bland, I decided to add some imperfections which would better showcase the Black Wax.
The first thing I did was removed the silver label holders and turn the drawers around to hide the finger pulls. This is just a preference thing.
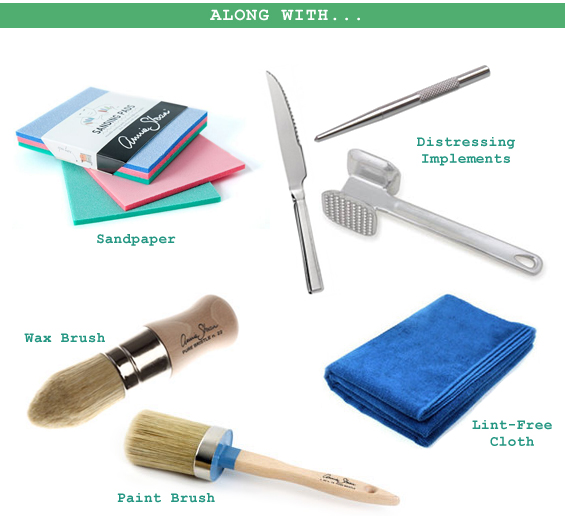
I then used a regular steak knife to create dents and scratches, a meat mallet to randomly indent the wood, a circular leather punch to add some variation and a rivet to form deeper holes.
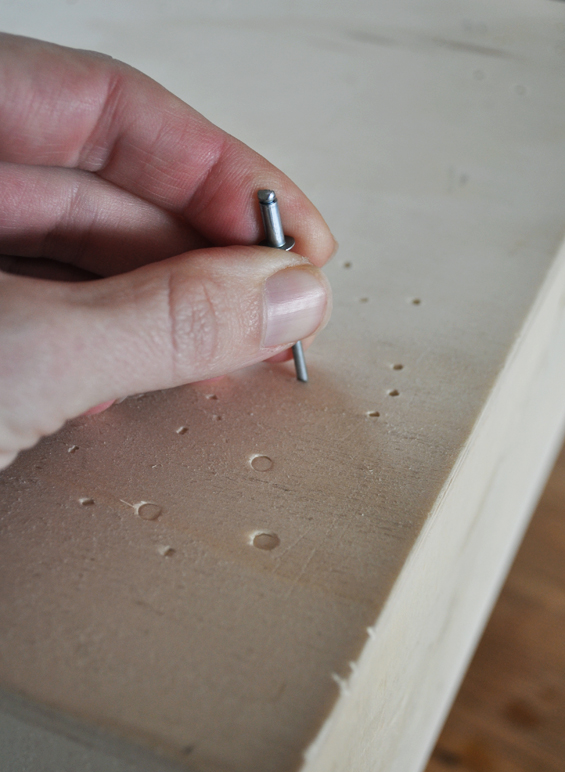
My wood was super soft, so I didn’t need to use any heavy-duty implements. If your item is made from hardwood, you might need to get a bit more serious with your tools!
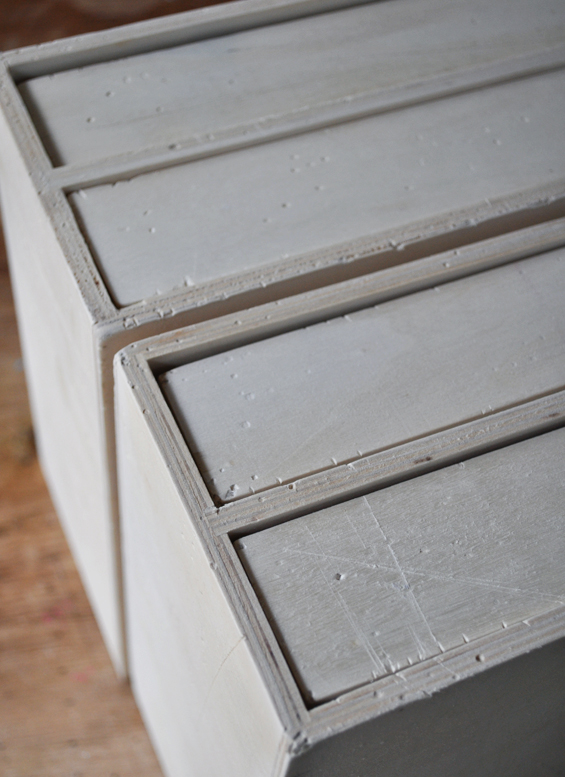
Purposely distressed wood looks a little weird and un-natural prior to being finished because it’s so even in colour and shows no other signs of age. Trust me, the antiquing process makes it awesome.
I also rounded the corners of the boxes and drawers to mimic the wear that a genuinely old piece would naturally exhibit.
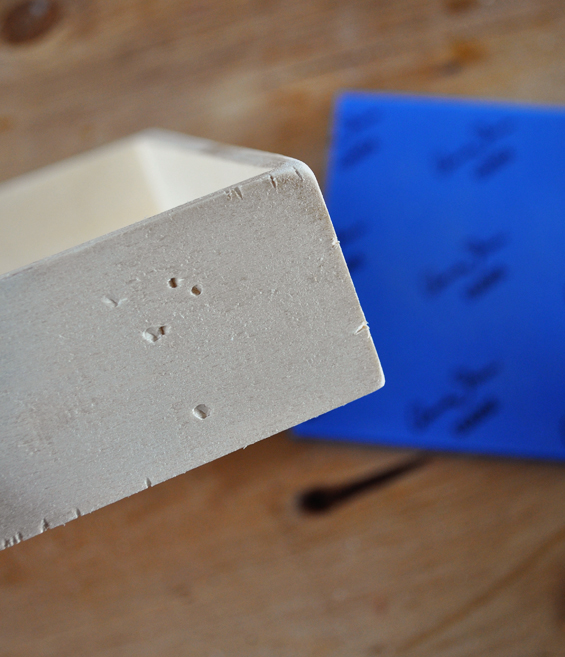
To finish, I gave everything a light sand (just to soften any rough or splintered areas) then wiped it all clean.
Note: I wasn’t going to undertake this step initially as I know Chalk Paint can produce lovely texture unto itself. As mentioned above however, I decided I wanted to see how the Black Wax worked with texture in the actual wood. And I’m so glad I did! All of the scratches, dents and holes I produced really do help make this piece look authentically vintage. Of course, if you have a genuinely old piece then you can simply omit this step though it’s great to know that with a bit of distressing newer pieces can look genuinely old too!
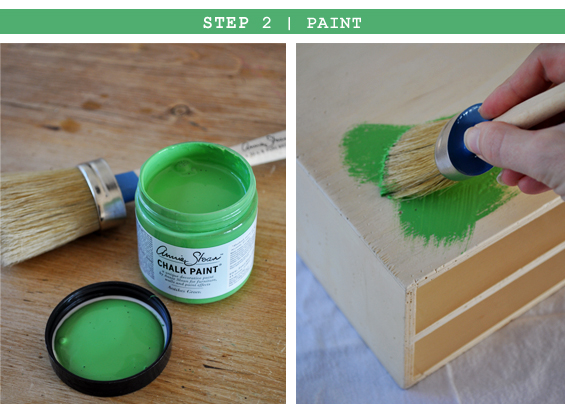
2 Paint.
This is the fun bit! Painting with Chalk Paint in this grungy, vintage style is so quick and easy. You can basically be as messy, haphazard and imperfect as you like!
I started by ensuring my paint was extremely well combined. All paint needs a good stir prior to use, though I’ve found that Chalk Paint in particular settles very thickly at the base. You really need to mix it well to ensure even consistency.
Once I was satisfied my paint was thoroughly combined, I simply began slapping it on my drawers.
I cross-hatched, stippled, dripped and dribbled!
Above you can see just how deliberately messy my paint job was!
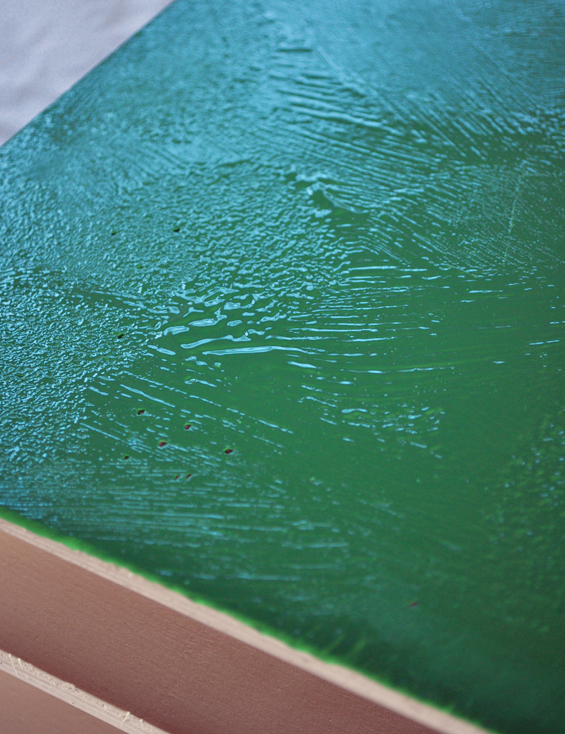
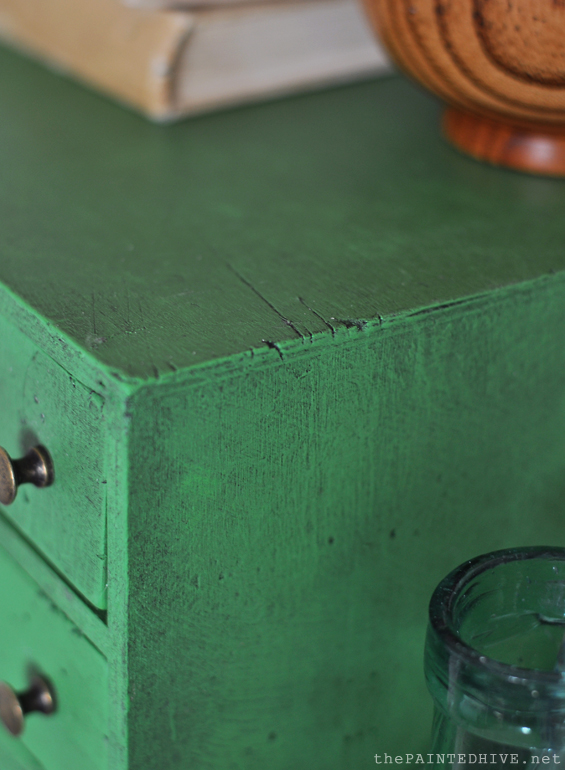
One of my favourite techniques is to lightly drag a brush over an almost dry area of thicker drops, ridges or dribbles to create, what I like to call, “tears” in the paint. I don’t know if this is a commonly done thing already, however I’ve not seen it demonstrated anywhere before, so I’m claiming ownership :)
Once waxed the “tears” look really cool and random – very natural.
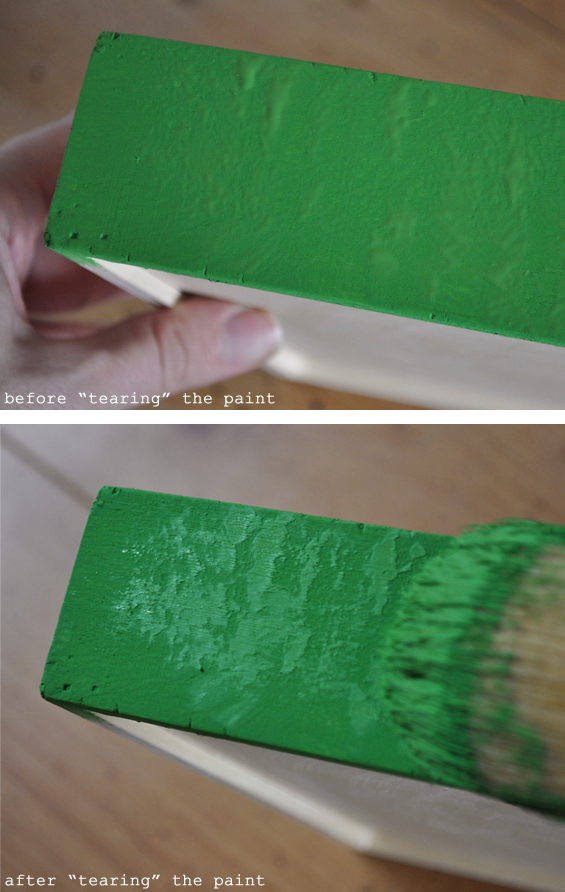
“Tearing” the paint by lightly dragging a brush over an area of almost dry blobby bits creates really nice random texture.
Once I was happy with the level of texture and amount of coverage I had achieved, I allowed the paint to dry thoroughly. Chalk Paint dries fairly quickly, though if you have super thick patches of paint or simply want to speed-up the process, you can use a hair-dryer.
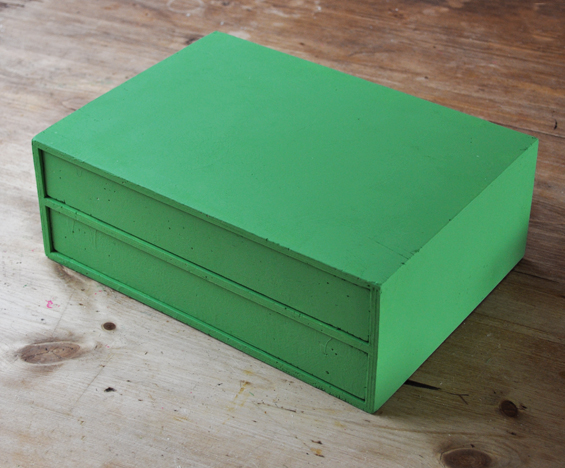
The finish looks a little flat in the above pic though there is plenty of character which you’ll see come to life in the following step!
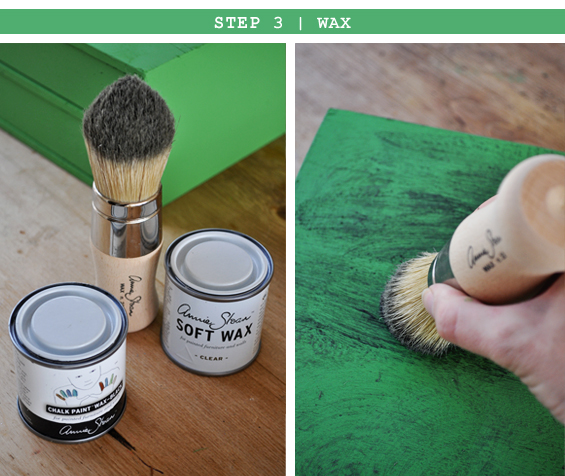
3 Wax.
To begin with I placed a small scoop of both Clear Wax and Black Wax on separate plates.
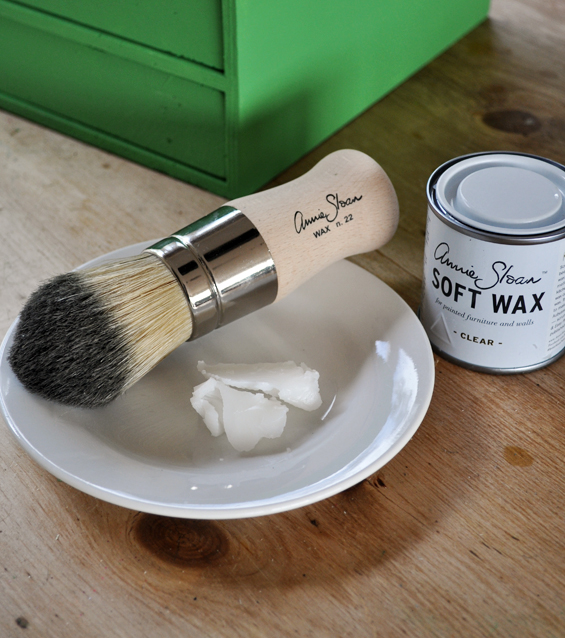
It’s best not to dip directly into the tins to avoid tinting the wax, especially the clear wax which needs to be kept, well, clear. It’s also simply easier to charge your brush and stipple off any excess wax on a plate.
It’s recommended to apply a coat of Clear Wax prior to Black Wax to avoid the paint taking-on too much stain and to assist with the buffing process. I did a test patch on the rear of one of my boxes first and found that the Black Wax alone was indeed a little too dark for my liking. It was also more difficult to buff evenly.
Rather than Clear Wax my drawers first though, I decided to try a short-cut by combining my waxes. And it worked really well!
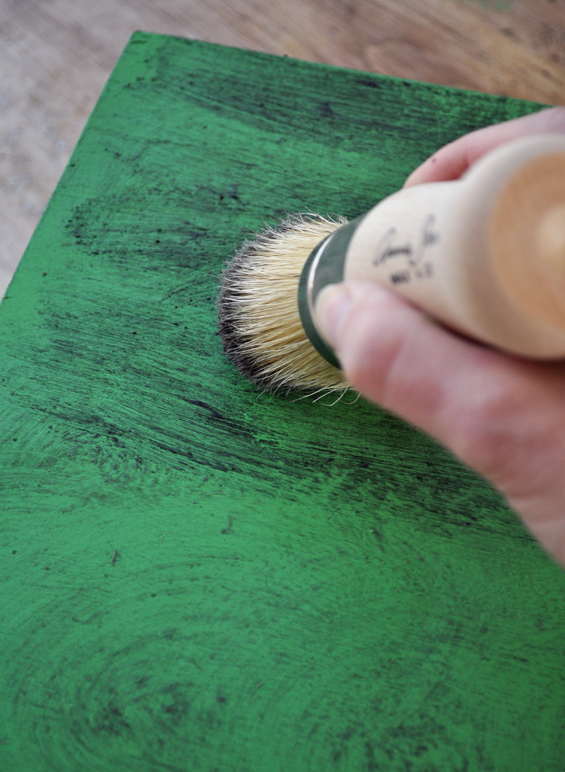
I simply picked-up a small amount of both Clear Wax and Black Wax on my brush then rubbed it onto my drawers. I worked in smallish sections and used reasonably forceful sweeping stokes teamed with circular motions, stippling in areas to ensure I got into all the nooks and crannies.
If there was a patch which looked too light or too dark, I simply corrected it with a bit more Black Wax or Clear Wax as needed.
Once I had completed a section, I used a lint-free cloth (an old baby swaddle in my case) to buff off the excess wax and even-up the finish.
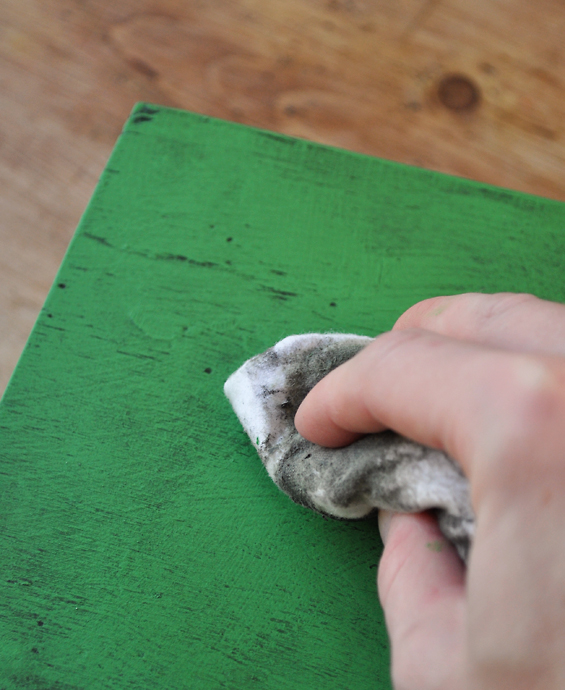
Again, if after buffing I felt there were still un-even patches, I simply applied a bit more wax then buffed again until I was happy with the result. It was super quick and easy.
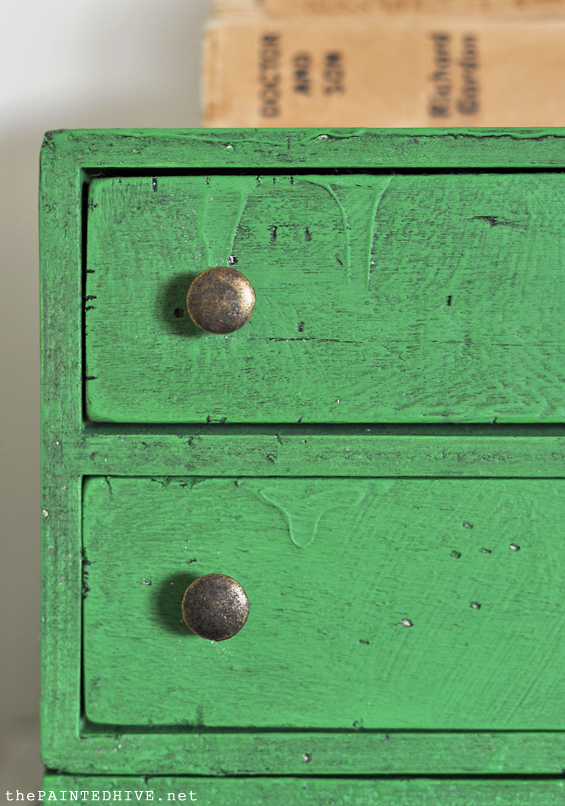
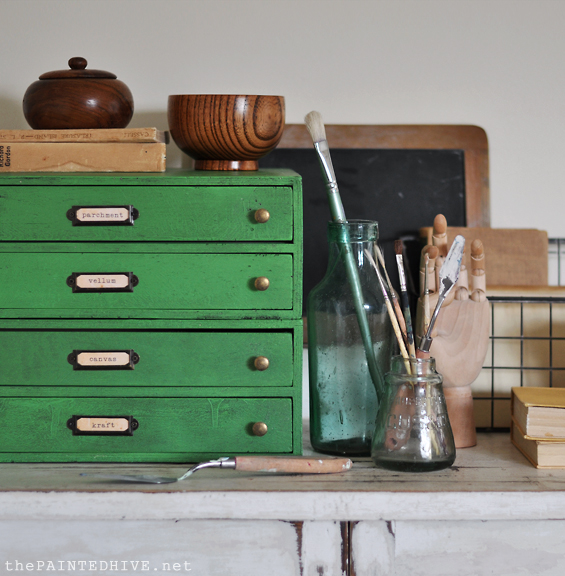
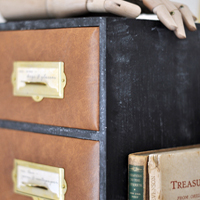
Below you can see the impact the Black Wax really has.
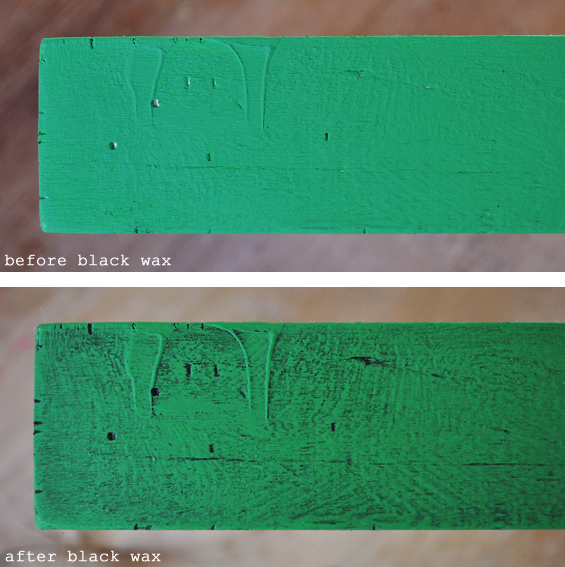
How amazing is that “vintage industrial” goodness? It’s almost like magic! Remember, this is actually brand new wood! Can you see the brush strokes, dribbles and “tears”?
Like I mentioned earlier, I know this grungy look isn’t for everyone though I was stoked with the way this was turning out!
Note: You can use a cloth or a regular paint bush to apply the wax if you don’t have a specialty wax brush. This is actually the first time I’ve used a proper wax brush and for a job this size, although it is nicer to handle and does distribute the wax with more ease, it’s certainly not essential. That said, I can imagine the benefits of using a proper wax brush for larger projects.
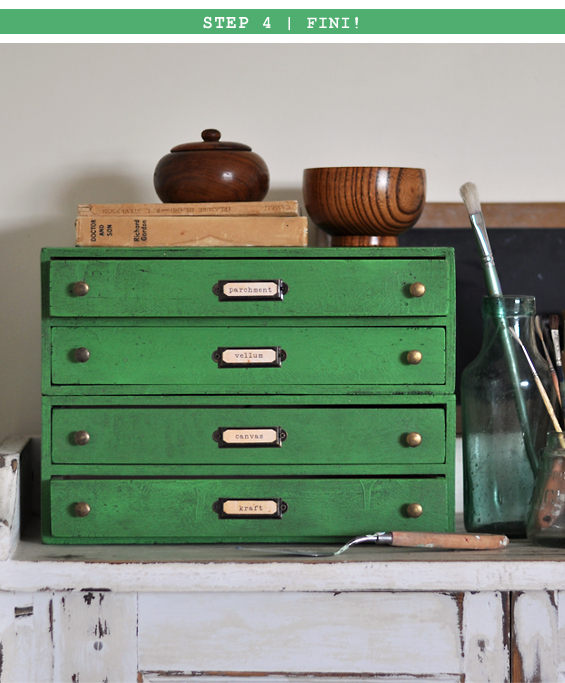
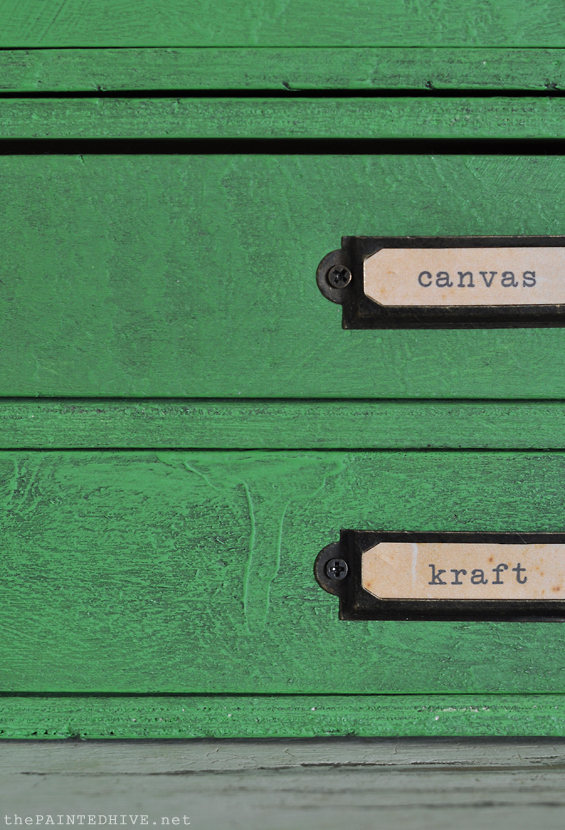
To complete my drawers I added some label holders and small brass knobs which I had left-over from this project.

Similar hardware can be found super cheap on the D Lawless Hardware website.
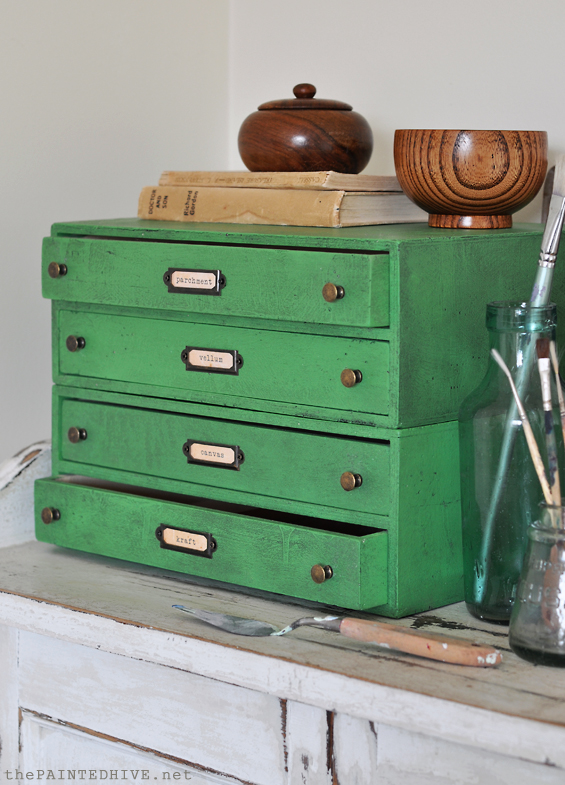
I originally bought these drawers on clearance for around $10 each, so naturally they’re not craftsman built items. Though I kinda like the way the slightly wonky drawers, with their uneven gaps, seem to bolster the primitive charade!
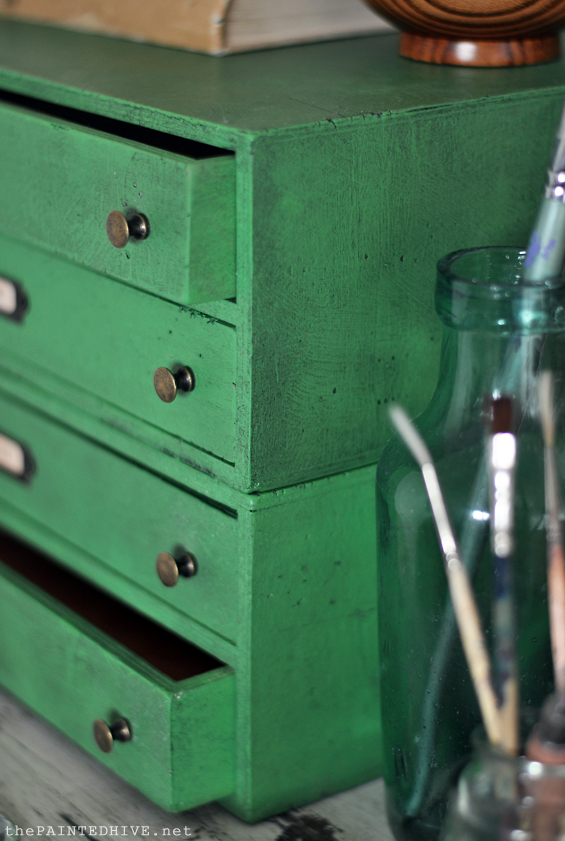
I was going to style these drawers really minimally, though I can never seem to master that!
You can find further tutorials, product stockists and ALL you need to know about Annie Sloan Chalk Paint and her associated lines on the official Annie Sloan website or through Unfolded.
![]()
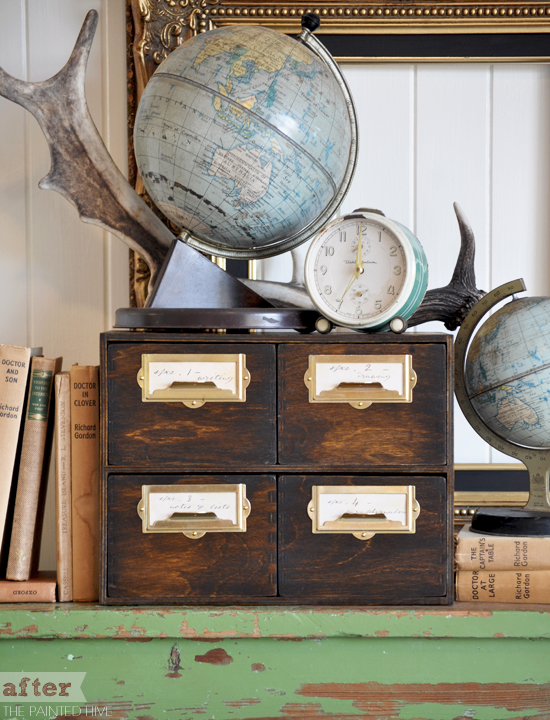
You can also check out my previous tutorial for creating an aged patina on new furniture using Annie Sloan Chalk Paint and Dark Wax alone (no distressing!).


I absolutely love it! What a great green. I’ve been reluctant to try dark waxing, because I was worried about messing it up (and wasting all that money/ruining the product). Now I’ve got some very helpful tips to use. Thanks!
Thanks Deb.
I was the same! It is a little daunting. This is actually only the second time I’ve used dark wax though my first project gave me heaps of confidence. I would suggest starting with something small (like I did) to get a good feel for the product. Once you get going, I think you’ll find it’s super easy and very hard to stuff up. The Clear Wax acts as a balancer and eraser so there is plenty of room to tweak the finish.
Perfect aged finish!
Thanks so much Sharon. That’s a lovely compliment coming from an expert like you :)
I love this! I’ve always admired painting like this, but never quite knew how to achieve the look. Thank you and pinned!
Brenda
Thanks Brenda. I actually always felt the same way until I tried it!
The messy painting and haphazard waxing all feels a bit crazy and amateurish though it does come together in the end. And there is actually lots of wiggle room for adjusting the look of the finish by applying more clear wax or dark wax as needed.
Love this look, Kristine. And it’s a fun project!!
Thanks so much :)
Love this! Great tutorial!
Kris
Thank you so much for this post I love it to pieces.. I just installed new floor to ceiling book shelves and am on the look out for boxes with a difference to fill them. I want them to look great but also to be practical enough to store a lot of my crafts etc. and these small drawers would be perfect. My shelves are dark gray and light gray but I love the antibes green you used. I painted a tray in this colour with the dark wax too for a guest bedroom and we love it. Great post with tons of photos and details.
Thank you again
Marie
Paint It White Blogspot :-)
HI LRISTINE,
THANK YOU SO MUCH FOR THE TUTORIAL. YOUR DRAWERS TURNED OUT GREAT.
I HAVE YET TO PAINT MY FIRST PIECE. I HAVE PURCHASED A PAINT BRUSH BUT
THAT’S AS FAR AS IVE GOTTEN. THERE ARE TOO MANY PAINT LINES AND PRICING
IS PROHIBITIVE FOR A NOVICE LIKE ME.
YOUR TUTORIAL HAS TAKEN SOME OF THE FEAR AWAY…..I’LL BE KEEPING AN EYE OUT FOR MORE TUTORIALS.
BILLIE
Hi Billie
I agree that choosing the right paint can seem daunting – and some are prohibitively expensive. If you’re just starting out, I would suggest looking at the “mis-tints” or “oops” paints, or maybe even just buying an inexpensive sample pot. When I was refurbishing and on-selling furniture as a hobby, I would frequently use free paint that had been discarded and, to be honest, the results were always good. Specialty paint can be fantastic though it’s certainly not the be all and end all.
So glad this post has given you some confidence. Have fun with your projects and don’t hesitate to ask me any questions or contact me again if you just feel like talking things through.
Kristine
As usual: Amazing.
LOL, too sweet Julie :)
Love the final look of these little drawers. I’ve been needing a set of drawers to hold random office goodies. I saw some in Kmart, but thought they were a bit bland. This technique should make them much more my style. Thanks so much.
Little drawers like this are so handy! I’ve got them sitting around everywhere.
I’ve seen those Kmart ones Libby. They’ll look great once you work your magic on them :)
I love them Kristine. Can you recall where you found these craft drawers? I would love to get some and give this project a go.
Hi Tracey
I came across them on clearance in Riot Art & Craft one day, though that was about two years ago now. I know Officeworks has similar ones though they appear to be better quality and, as such, are more expensive than mine. IKEA has some too (with a combo of small and large drawers) though again, they’re not super cheap. I just had a quick Google around and couldn’t really see any cheap, crappy ones like mine. I’m sure they are out there somewhere though. Sorry I can’t help more.
Kristine
Looks great! Adds so much more interest.
Loving your transformation on these little drawers! Thank you for sharing them at the Happiness Is Homemade Link Party!
I am a big fan of the vintage look on furniture – these are really well done and add a lot of character to both the furniture and the room they are put in to. It makes it a lot easier to transform old furniture and repurpose it – along with also complimenting the room it is put in to. Minimalist is everything, it is the opposite of sleek and expensive looking furniture.
This is a great project and I would not have thought to created that look I would have to glop the paint on. The green paint from Annie Sloan is beautiful I have used it many times and it’s gorgeous when you use the black wax over it. I am so happy I stopped by and found this great post. I would love for you to share at a linky party I have going on right now. I hope to see you there. http://diy180site.blogspot.com/2016/08/dishing-it-and-digging-it-link-party-110.html
They look wonderful, love the colour and the patina you added with paint and wax.
Thanks so much Jenni :)
Really cool idea of giving a vintage look to furniture. The end result looks as authentic as ever. Thanks for sharing!
Perfect look, Kristine. Awesome idea of giving a vintage look to furniture.
Its difficult to believe that the end product started from a white drawer! Truly awesome work and tips.. Thanks for sharing!
Not only was what you did, taking New to Old awesome, but your steps made it where even someone just beginning could easily do this project!
Can I ask where did you find these boxes?
Thanks Billie. I bought them on clearance for $10 each from a craft store. Just happened to notice then one day as I was walking by. Unfortunately, that was around two years ago now so they no longer sell them however have a Google around for “craft drawers” or “document drawers”. You might be able to find some similar ones.
x
Thanks for sharing your expertise. I have several sets of similar drawers, and I think I will give this technique a try. Yours turned out awesomely!
Looks great Kristine ! Sorry I haven’t commented earlier but a great example of how well the Chalk Paint by Annie Sloan Black Wax works, Kathee
Thanks Kathee :)
Do you think this technique would work on a table top? I love the look and the texture-though the texture is my biggest concern…
Hi Samara
I assume you’re referring to a dining table?
I don’t believe the texture would be an issue as it is relatively soft and smooth to the touch (it’s more visual than tactile) though I do think the wax might not be durable enough. Generally, wax isn’t protective enough and wears quickly on dining tables which are used and cleaned frequently. As this wax is tinted, you would also likely notice areas of patchiness after a short while. If you’re willing to re-wax often and don’t mind a bit of wear you could certainly give it a go.
Kristine
I love the new look! Definitely looks industrial and old. I just picked up my small sized Annie Sloan black wax and love it so far! IM a new follower and I’m now following along on Instagram. Your tutorials are awesome! Very comprehensive. I’ve been painting a long time but can always use inspiration and love seeing different techniques. I love the any you created natural looking worm holes on your piece too.
Thanks Sandy. I so appreciate your comment about my tutorials. I put a lot of time into them so it’s really nice to know they are appreciated. Thanks again :)
Pinning this, they look incredible! Also we would love to have you at our new To Grandma’s House We Go linky party :)
Thanks so much for inviting me along. I just linked up a few of my most recent projects :)
Thanks so much for sharing! Pinned!
I love the green and black colors together – that’s an awesome color choice I have never seen before. The final drawers look amazing and I’d never guess they started out looking so plain. #HomeMattersParty
Thanks so much Nicole :)
Kristine, you did a terrific job with this project. I liked how you used your tools to distress. I’m a big fan of Antibes Green but I’ve not used the Black Wax before. I need to get some. I saw your link at the To Grandma’s House We Go party.
Wow, this is looking awesome! And a very well structured and detailed tutorial, which is easy to follow. Many thanks for sharing your experience! :)
What a great post to give an extremely amazing look. I love the way have done it here. I just love the green chalk paint. Thanks for sharing such a great post.
Hi Kristine – Since this is an older post, I am not sure you will get this. Did you turn the drawers around to the back, so the cut out didn’t show on the front of the drawer? I would love to try this project. Thanks Julie
PS I am loving that Antibes Green more and more….but it needs to be aged to look best like you did it.
Hi Julie
I sure did. Easy peasy :)
Kristine
I saw some in Kmart, but thought they were a bit bland. This technique should make them much more my style.
I’ve read this post previously and came upon it again today and was as impressed as the first time I read it. So easy to follow and amazing results. Well done!
Can I ask, where to do buy you Annie Sloan paint? I live in rural Australia so would have to get it mail order.
Thanks Cathie. You can do a stockist search here: http://www.unfolded.com/find-stockist/. Many of these suppliers have an online store and will ship nation-wide. Hope this helps :)
I saw this post and loved it especially the Antibes green – I’d already used it on an old garden chair. Imagine how delighted I was when I went to my daughter’s flat in Edinburgh and saw that she’d bought a very similar stack of drawers for her tiny university bathroom. She’s bringing it home to me so I can transform it! I’m looking forward to ‘ageing’ it – not tried that before. Love all your projects – great inspiration. Thank you!
Oh yay! Thanks for letting me know Carol. Feel free to email me some finished pics – I’d LOVE to see :)
Looks great – Huge fan of the green xx
I’m just about to start this very same project for my daughter only I’m painting the drawers different colours. I know that I shouldn’t paint the side of the drawers but do you paint the inside of the drawers and the backs too? I’ve been wanting to ask this question for a while for other projects I’ve done.
Hi Carol. If I’m just painting something basic for my own personal use, then I generally don’t bother painting any of the “hidden” areas. Sometimes I don’t even cut in neatly – shhhh! If it was a special piece, or something to be on-sold, I would certainly take more care. Whether or not I choose to paint the interior of the drawers might depend on the condition of the existing finish or if I want to create a particular look.
Creative idea of giving a vintage look to furniture.End result is awesome
Creative idea of giving a vintage look to furniture.End result is awesome!!