
If you follow me socially, you may recall seeing a little snippet of this “marble” project already…
Could you guess what I was making?
Well, in all fairness, my use as a fireplace hearth is rather obscure and it could have been almost anything. From a tabletop, to a decorative bread board, to a wall shelf, to a mantel, and everything in between!
This “marble” slab was designed to sit beneath my parent’s electric fireplace…
Although there was nothing wrong with it and it already stood on a bulky plinth, I liked the idea of giving it a more authentic look and helping ground the entire unit (as it is merely freestanding) with a traditional hearth-like platform.
My initial desire was to use a solid slab of real stone. Ha, ha, good one Kristine. Turns out even an inferior grade off-cut was gonna be waaaay too pricey. So, I considered several other options including, though not limited to; laminate, engineered stone, concrete, paving, brick, tile and vinyl wrap, before eventually settling on a DIY experiment using…contact paper!
Yep. I had no idea how this was gonna turn out though for just $20, and only an hour or so of easy work, I figured I had nothing much to lose. Fingers crossed!
Soooo, let the experiment begin.
Remember, although I’m using my “piece of marble” as a hearth it’s essentially a solid slab which could have many uses (some of which I’ve mentioned above). Let your imagination run wild!
YOU WILL NEED…
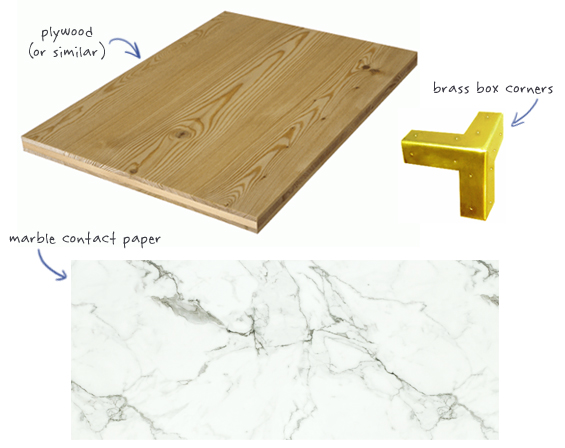
PLYWOOD
Obviously, this forms the base and you can use whatever suitable material you like. I wanted my little brass corners, which are 22mm deep, to fit exactly so needed my base to be the same depth. I couldn’t find an off-the-shelf material with a depth of 22mm, so I simply attached some 4mm deep trim to an 18mm deep plywood off-cut I already had to bring it up to the right depth.
MARBLE CONTACT PAPER
I used a carrara style contact paper with a light grey vein. It can be found online here at Crockers Paint & Wallapaper. The great thing about this supplier is that they offer contact paper by the meter, so you don’t need to fork out big bikkies on an entire roll. This particular paper is nice and glossy and pretty easy to work with too. It doesn’t stick to itself too badly and can be re-positioned if needed.
Note: International readers, it’s easy to find similar contact papers on eBay, Amazon or Etsy.
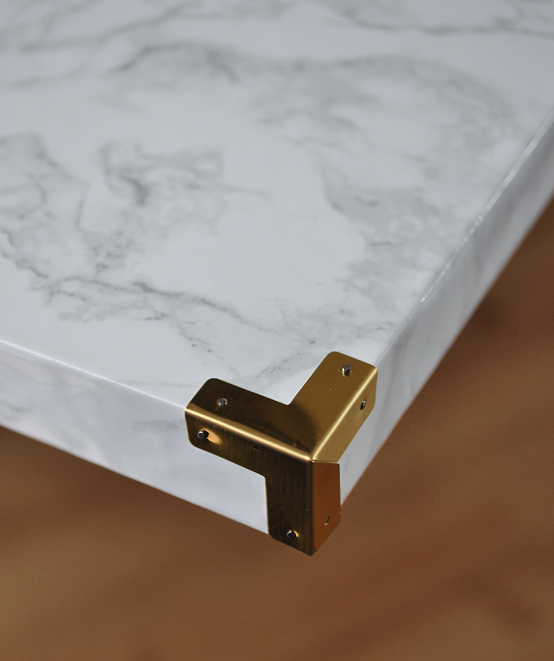
BRASS BOX CORNERS
Thinking to use these gave me an “ah-ha” moment.
You see, the thing with contact paper is that no matter how neat the application is any corners will never look seamless or be super durable. They force an inevitable break in the pattern, which belies any illusion of realism, and produce a point of weakness due to exposed joins which are highly likely to peel.
So, for the sake of both form and function, I needed to conceal them somehow. For the longest time I was contemplating the best way to edge the whole hearth when a light bulb suddenly went off. Duh! I only need to cover the corners. I bet I can find some cute box hardware for that. Yes siree, I sure can!
Theses little brass corners can be found here at D Lawless Hardware and cost less than $2 for a set of four. Score!
THE PROCESS…
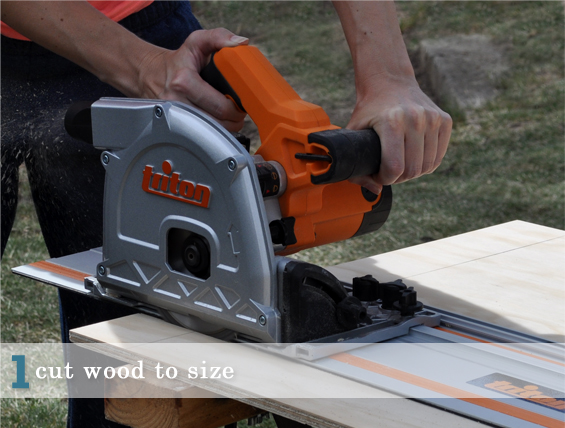
1 Cut wood to size.
Determine the dimensions for your hearth (or whatever you’re planning to make) then trim your piece of ply (or whatever you’re using as a substrate) to size. If you’re not keen on cutting wood, the hardware store will probably be able to do this for you. As touched on above, I also added some trim to bring the depth of my plywood up in-line with that of my brass corners.
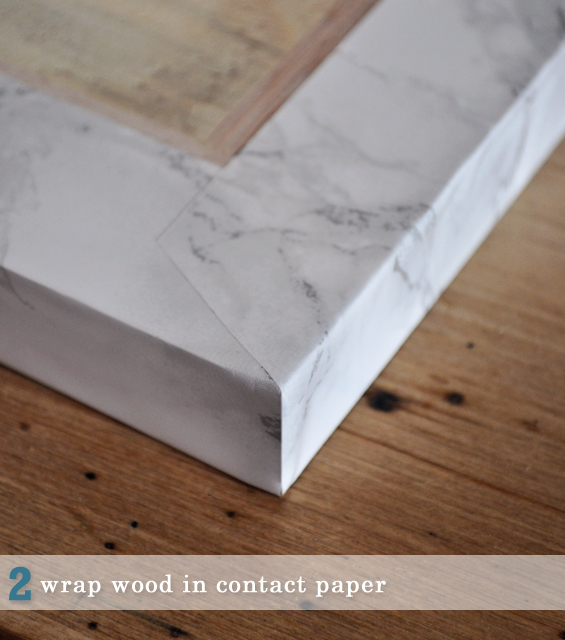
2 Wrap wood in contact paper.
This can be a little daunting and it’s hard to know where to start.
Conventionally, once the contact paper has been trimmed to size, you begin attaching it at one edge of your substrate, peeling the backing and smoothing the contact as you go. For whatever reason I found that method challenging and ended up removing the backing sheet entirely, positioning the contact on my base then smoothing it from the center, out. I wrapped both the long sides first, then trimmed off any unnecessary excess before wrapping the short sides. I made sure the corners were tight and relatively neat though as they were being covered I wasn’t overly fussy.
Obviously, the above pic shows the under-side of my plywood.
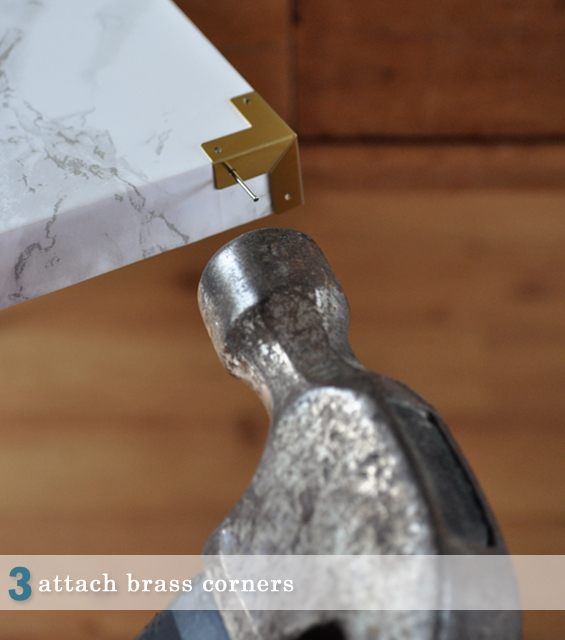
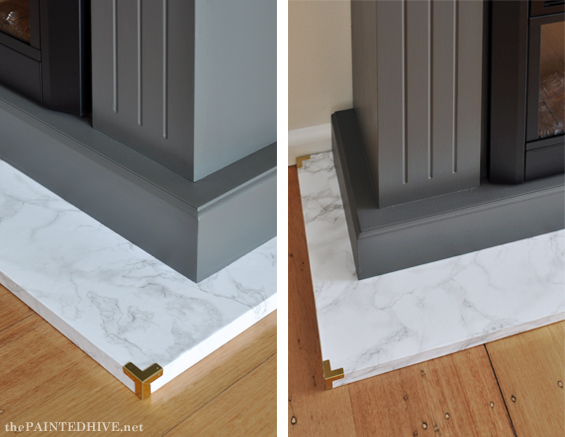
3 Attach brass corners.
Simply hold your corners in place and hammer them home with little brad nails. My brass corners didn’t come with fasteners so I had to purchase some. I could only find steel brads at my local hardware store and was planning to paint the small heads with a gold paint pen, though they are so tiny it actually doesn’t matter.
NOTES
:: Because plywood isn’t naturally smooth, any surface texture may show through the contact paper. Ensure your surface is as smooth and clean as possible. Although it wasn’t too much of an issue for me, next time I would probably use something smoother, like MDF or melamine.
:: Check to ensure your piece of wood is nice and flat. The last thing you want is a slight curve or warp ruining your “stone” slab.
:: The contact paper I used comes in a width of 45cm. If you’re planning to cover something wider than this, you might want to search around for a wider product to avoid having joins in your surface.
:: I simply used my hands and the spine of a book to smooth my contact paper though you can buy specialty film applicator tools if desired.
:: Make sure your brad heads aren’t too small or they’ll slip right through the little holes in the brass corners. Don’t ask me how I know this.
:: The brass corners come with a clear plastic coating. It’s kinda hard to see so just be sure to remove it first.

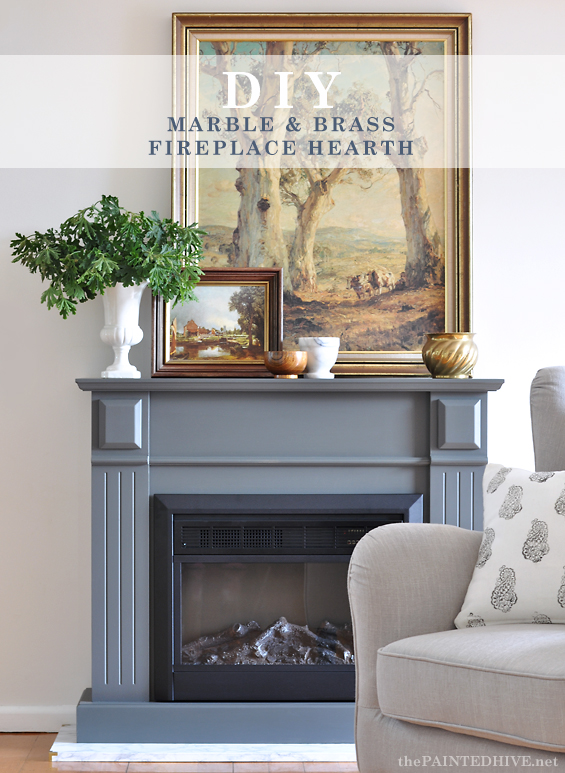
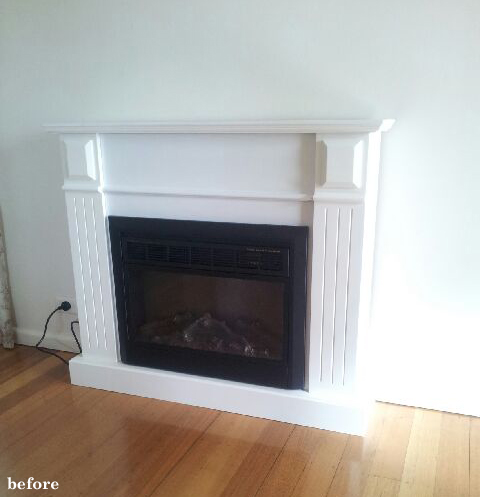
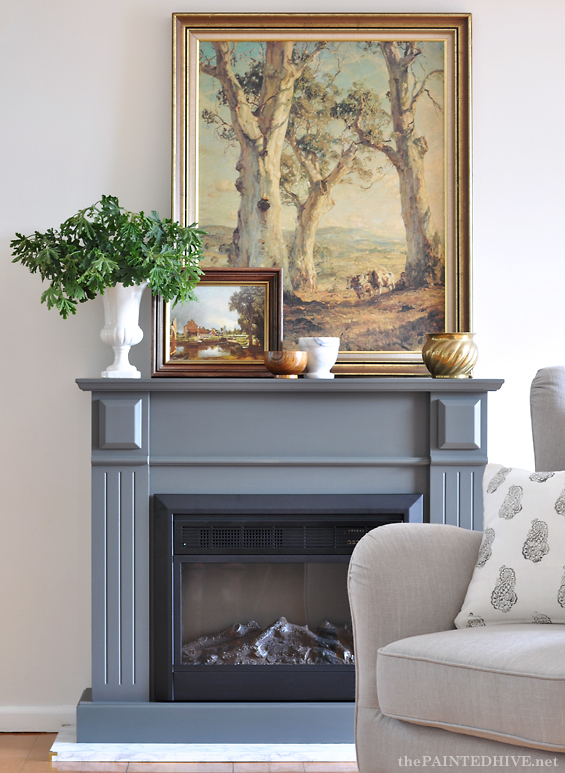
Whilst this electric fireplace will never be as glorious as a real one, it still has a certain charm and does form the focal point in my parent’s living room. So, in order to make the most of it, we also gave the surround a lift with some fresh paint.
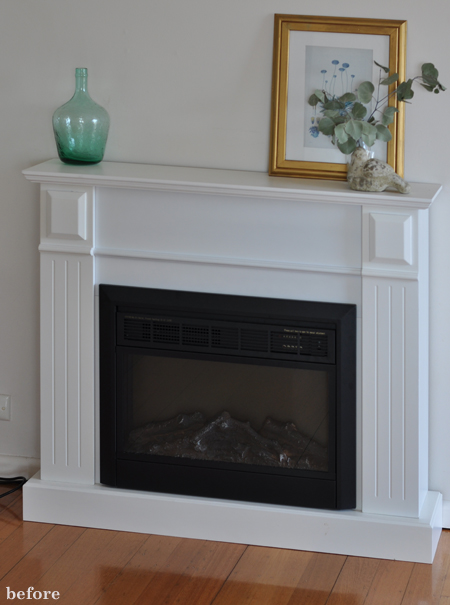
The original white factory finish was two different shades and, although the surround is made of wood, it looked quite plastic-ish.
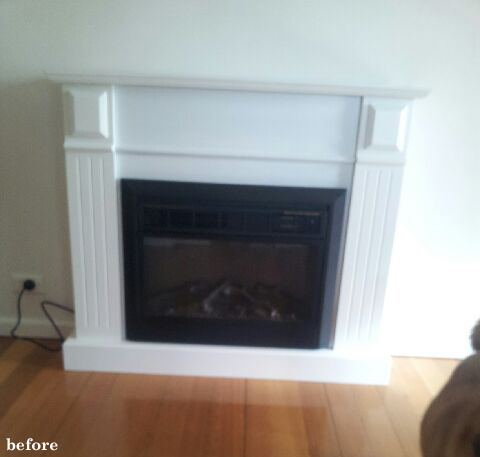
Please excuse the terrible before shot (taken with a crappy phone camera by my four year old!).
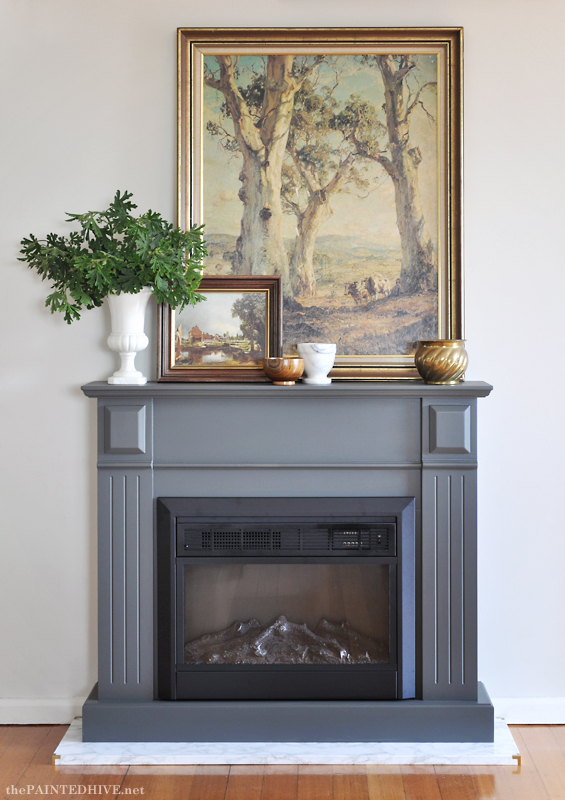
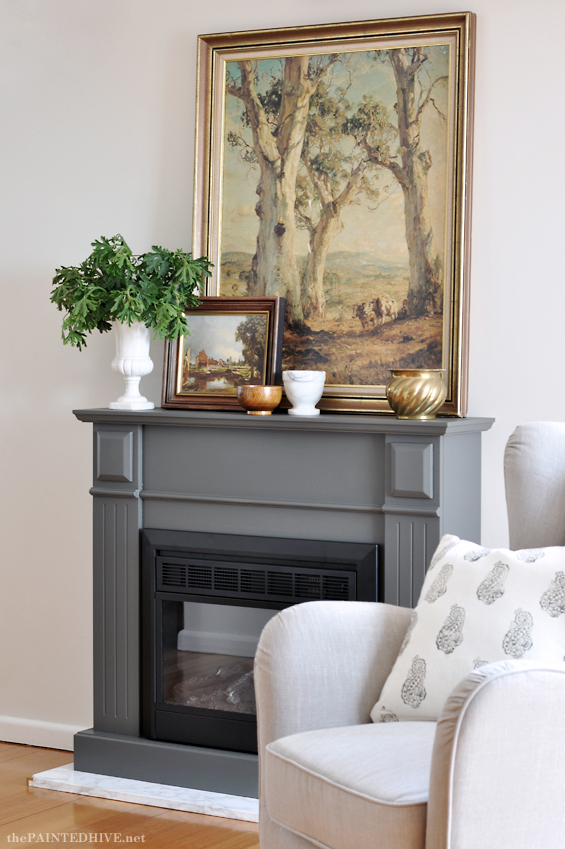
The new moody colour (Colourbond Woodland Grey by Dulux) picks-up on the vein in the “marble”, contrasts with the light walls and gives the fireplace a much more sophisticated overall feel (the darker colour will also help balance the television which will eventually be mounted above the fireplace).
As a finishing touch, I also painted over the visible gold text on the grill. It’s just a small detail though it does make for a cleaner look.
We contemplated adding a reclaimed timber mantel too though decided against it for now. Maybe that will happen in the future. Maybe.
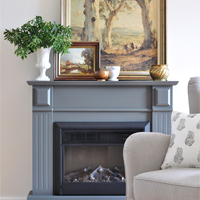
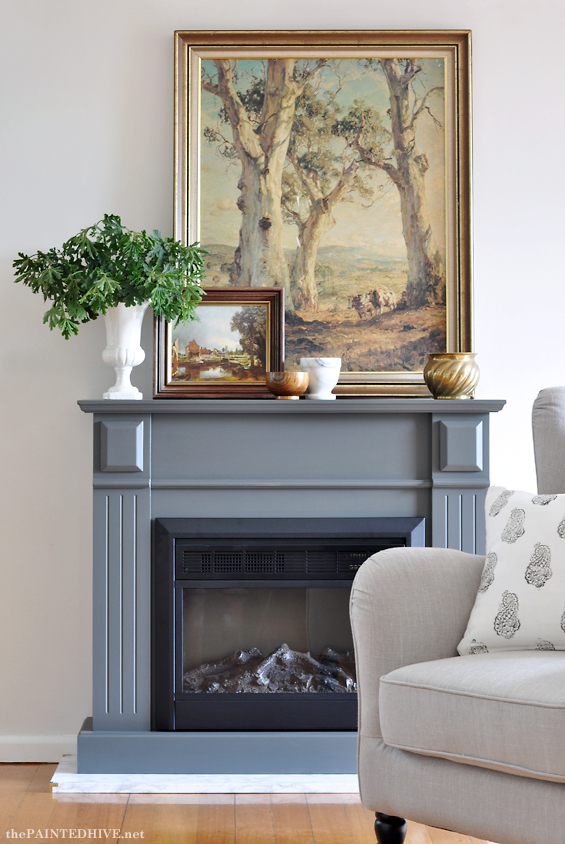
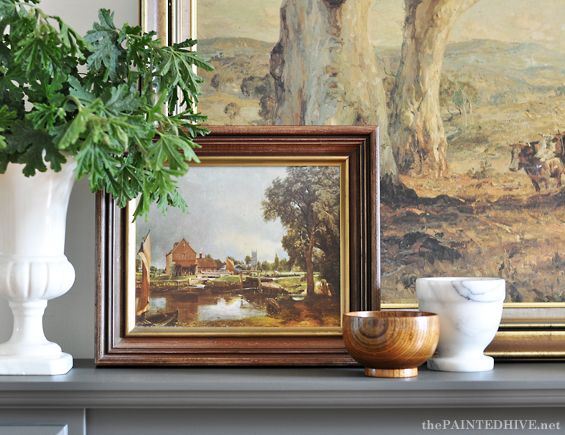
I had planned to style this fireplace in a clean, trendy, contemporary way though no matter what I do things always seem to end up looking rather vintage-y around here :)
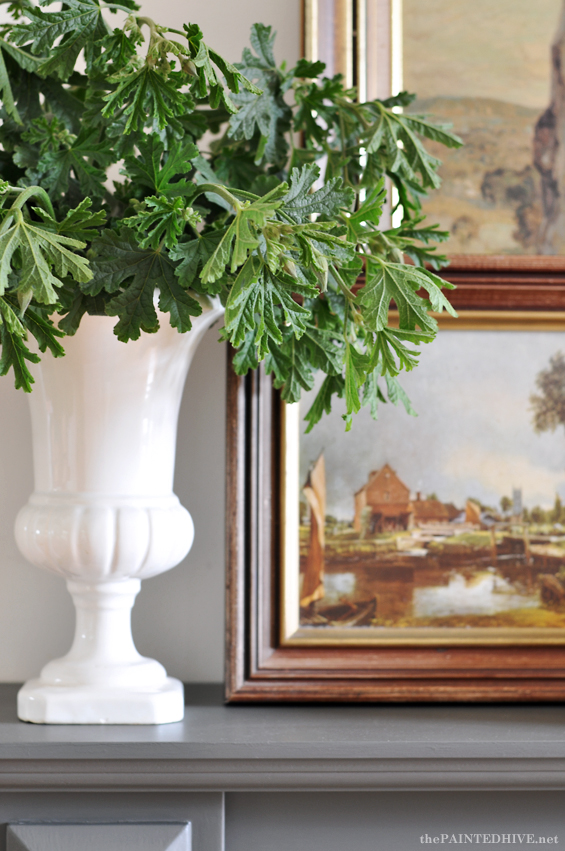
All of the accessories and artwork are thrifted.
The wingback armchair is from Ned’s (amazing price and free national shipping!). The block-printed throw cushion is an easy DIY project which I’m planning to post about in the future.
I am so rapt with the way this hearth turned out! Because it’s at my parent’s house I don’t see it everyday though each time I do it seems to look even better than I remembered! It’s almost a shame to cover it up with the fireplace (though, beautiful as it is, it would be kinda weird having a slab of faux marble sitting on the floor for no apparent reason!).
Have a great week all.
![]()
Just in case you’re wondering why I decided to spruce-up my parent’s electric fireplace, I’m actually working on a room makeover at their house which I hope to share more deets about soon!
I was fortunate to be provided with the brass corners (D Lawless Hardware) and contact paper (Crockers Paint & Wallpaper) for this project.


Oh wow. One of the nicest DIY’s I’ve seen in a while. I absolutely love this and all the different options. Very inspiring.
Thanks Sarah :)
You know what, I often smirk at contact paper projects because I just know that in real life they simply are not going to look as good or be as durable as suggested.
You however actually think about the practical and cosmetic problems and come up with real solutions which can make this affordable product work for everyone. Just brilliant and so attractive.
It is so beautiful – I ADORE the colour. I wish I had a fireplace in my home, it would look like this!
Thanks Ashlea.
I don’t have a good spot for one in my home (as this is my parents) though because this is just a free-standing unit it’s super easy to install. It’s essentially just another piece of furniture!
x
It looks great and whilst I don’t have a fire place either, I think I could come up a million ways to use the process to make other things! Thanks for the supplier recommendations – it is great knowing where you can get things like this in Australia. I read a few DIY US blogs and I spend so much time trying to source the stuff to make their fabulous ideas – it does my head in!!
Ha, ha. “It does my head in” is totally me every time I try and source something here in Australia too! It took me ages to find decent marble contact paper and even then I had to negotiate with the store to stock that particular colour – they were more than obliging though and are really great to deal with.
The corners are from the US. Although you can find alternate styles here in Oz that particular design simply isn’t available anywhere. The great thing about them though is they’re so small shipping is actually affordable.
That is stunning! Those fireplace manufacturers should hire you to style them for catalogues – I bet their sales would increase tenfold!
Ha, ha. A REAL styling job…in my dreams (or maybe one day in reality – maybe). Thanks so much Catherine.
I always feel excited when I notice an email from you in my inbox because I know it will be some new and awesome project and I’m never disappointed. :)
Aww, thanks so much Julie. Your comments are always so lovely and encouraging.
How cluey are you Kristine !
Yet another gorgeous makeover .
Great work !
Crissy x
Great project, I love it. If you are looking for brass nails later for something else, they sell them where there are picture hanging hooks. I bought a set with a lot of different sized hooks and nails. Other vintage looking hardware is available online at LeeValley.com I get stuff from them all the time, no affiliation and their hardware catalog is wonderful.
Thanks Val. I’m actually in Australia and it’s super hard to find certain hardware items here. We do have brass brads though they are more of a specialty item (I just didn’t have the time to search around or buy online then wait for delivery). Brass picture hanging nails (which are readily available here) are a bit too large for this particular application.
I have checked out the Lee Valley range several times – some lovely stuff. Again, international shipping can be a killer for us Aussies and they don’t have the exact same ‘T’ corners I used for this project.
Thanks again for your input :)
Cheers
Kristine
What a terrific look! Your parents must be very proud of you! Love that painting too!!
Kay and Will Lake
I love love love those paintings (even if they do give it a vintage vibe). And the brass corners pull everything together perfectly. As someone without a fireplace or mantel, I’m fairly jealous!
Thanks Jamie. If you have a blank wall somewhere a unit like this is easy to install (well, no actual installation is required!). It’s essentially just another piece of furniture.
What a clever idea! Totally changes the look – your makeover is stunning!
Thanks Malissa :)
Your whole fireplace/mantle is gorgeous! Who knew contact paper could look so good!!! I found you through Just a Girl and her Blog Link party and I’m so glad I did!
Thanks again Gina (I also saw your comment on my IG feed). That’s really sweet of you. I’m glad you found me too :)
I never would have guessed this wasn’t real marble. You can’t tell from a distance and it really gives the fireplace a solid looking base. Thanks for sharing your tutorial at Vintage Inspiration Party.
Thanks Betsy. It really does look authentic – even from close range.
Wow I am amazed at what a big difference the marble hearth makes to the fireplace Kristine!!! Such a simple DIY for a huge impact. I would have never thought to use marble contact paper. I hope your parents are enjoying their new fireplace! Thanks so much for sharing your project at at Dream. Create. Inspire. Link. I hope you will join us again tonight @ 8EST. Take care, Tara
Thanks Tara. Thanks for hosting :)
Amazing! It looks great! and thanks for breaking down all the steps so detailed!
Thanks Lindsay :)
I really love the entire fireplace. Where did you get the actual fireplace itself? It’s everything I’ve been looking old, it’s new ,its classic but it current as well . That particular style would be perfect for my apartment.
Hi Joseph
Thanks!
My parents bought the fireplace through one of those “deal” websites (like where they have daily and weekly sales). I think it cost around $250. If you Google “electric fireplace” you should find heaps. Some can be really pricey so you might need to shop around for a good deal.
Kristine
Thanks, Kristine!
Sheer brilliance Kristine.
Who’d have ever thought that Contact Paper would create such a genuinely gorgeous piece of home decor!?!
Thanks for another awesome tute.
<3
Pia
Thanks Pia :)
At first I thought you were going to do a faux marble paint technique for the hearth. The contact paper is genius! The brass corners really finished the look. I love the way the gray paint transforms the fireplace and the room. Very sophisticated!
Thanks so much Linda. I was tossing-up ideas for getting the marble look and hand-painting was an option though contact paper is just so much easier (and probably more realistic looking as it does use an actual high resolution marble photograph). The only down-side was the exposed seams at the corners though thankfully my brass fittings take care of that beautifully :)
Oh Wow! What a great idea! Your fireplace looks so nice! Well done! Thank you for sharing it this week at making broken beautiful! I do hope you come again next week … inspiration like this is always welcome!
Smiles!
Terry
Thanks so much Terry and thanks also for hosting :)
Looks lovely, but where/how did you hide the power outlet and cord?
He, he. I was waiting for someone to notice that. When I wrote and shot this post a few months ago the fireplace was actually just sitting in a temporary location near my parent’s breakfast nook so I simply shimmied it over a bit (away from the wall outlet) and didn’t plug it back in. It is now in its intended position in my parent’s living room where the power outlet sits behind it. It also now has a haulking great TV mounted above it so sadly is no longer styled as shown :( Oh well, the TV has to go somewhere I guess and mum did originally purchase it (the fireplace I mean) to go below the TV.
Really, Amazing! It looks awesome! and thanks a lot for sharing such a wonderful idea.
Just found your sight and am really impressed!! Excited to see what transformations you tackle next. Could you please share what paint colors you used for the fireplace and walls in your parent’s room?
Hi Jodi
Thanks! The colours are listed in the posts though it can be hard to find them. The fireplace is Dulux Woodland Grey and the walls are Dulux Antique White.
Cheers
Kristine
Awesome post, great pictures and very well written, plus the final fire place looked GREAT! Thanks for sharing with us!
Oh my gosh!! What a great idea!! I wish my mind was as creative as yours!
wonderful fireplace!! how did you hide the power outlet and cord? waiting for your reply. Thanks Again for the wonderful post.
Hi Nancy
When I originally wrote and shot this post the fireplace was actually just sitting in a temporary location near my parent’s breakfast nook so I simply shimmied it over a bit (away from the wall outlet) and didn’t plug it back in for my after shots. It is now in its intended position in my parent’s living room where the power outlet sits right behind it.
Cheers
You can see it here: https://thepaintedhive.net/2016/11/living-dining-room-makeover-the-final-reveal/.
:)
Hi there,
good work! The final fireplace looked AMAZING!
Thanks for an interesting post!
Thank you for sharing. This is a great idea to welcome your friends in a beautiful space.
Thanks for sharing. Amazing content
sasa