For the past four or so years, all of Charlotte’s craft supplies have lived in a big plastic tub on the top shelf in her wardrobe.
Aside from the fact her room has limited storage space which means we can’t be too picky about where things are housed, they were stowed away somewhat out of reach so that I could be the one in charge of when and where crafting would take place – I think we all know, or can imagine, just how prudent three year olds are with paint and glitter!
Though with Charlotte maturing, starting school and showing a growing interest in all things craft, it was clear she needed her supplies closer at hand.
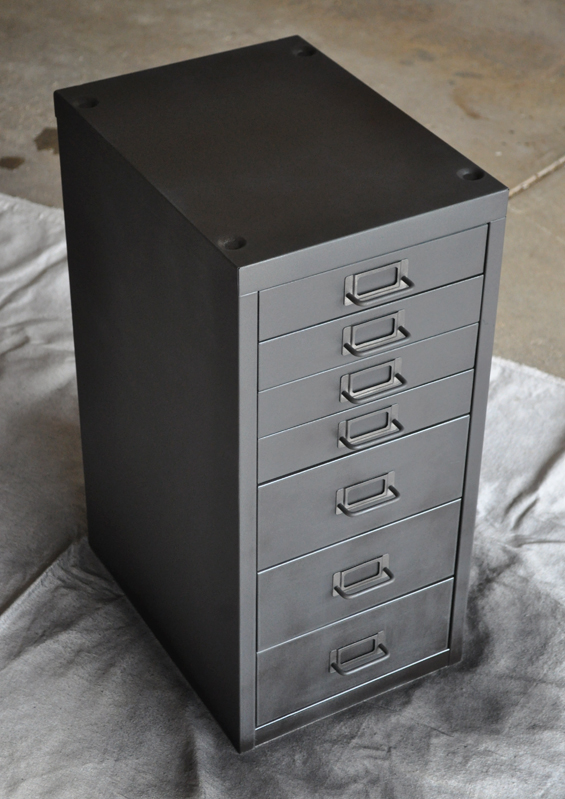
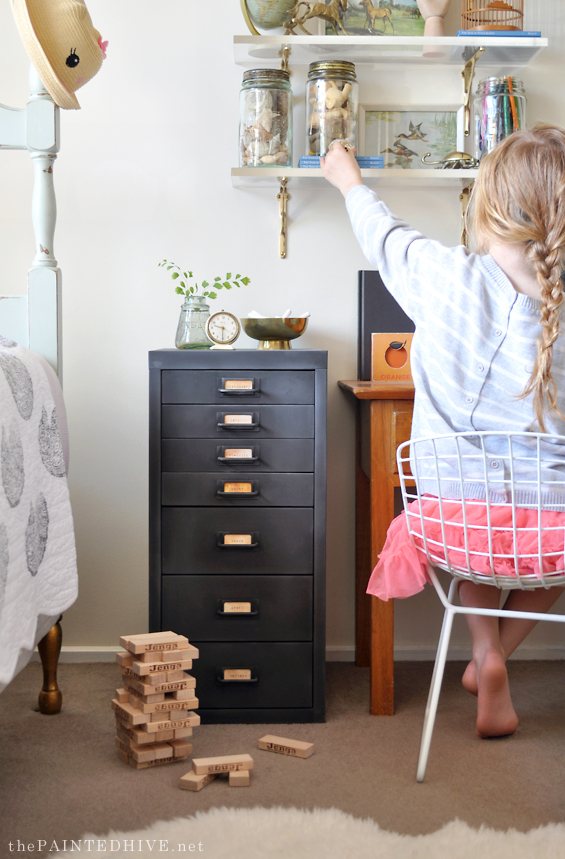
Enter this little file cabinet…
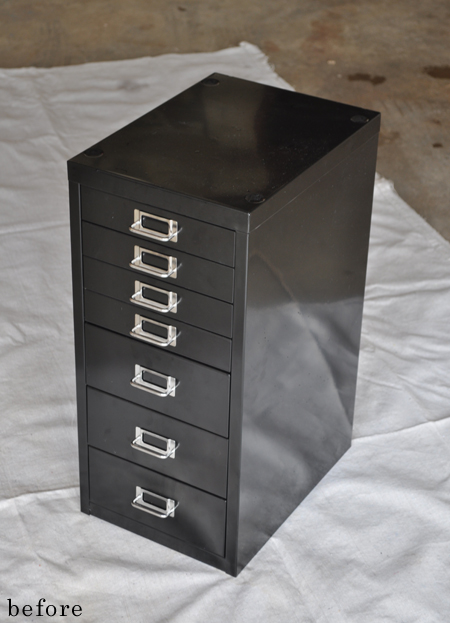
To be honest, I wasn’t sure I’d be able to fit any more furniture in Charlotte’s teensy room though when I saw this sweet cabinet at Officeworks it seemed just right. It’s nice and compact yet still bursting with storage space. Seriously, this thing is like Mary Poppin’s handbag! I even made my sister, who also has a tiny house, go out and buy one too and she was equally as impressed by its TARDIS-like qualities!
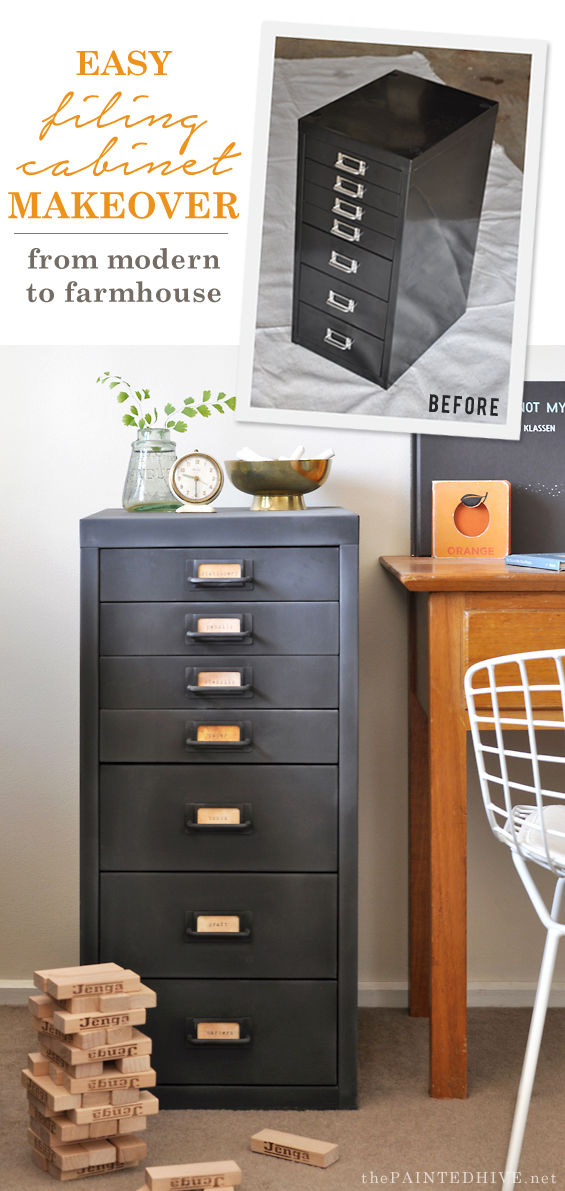
Of course, me being me, I couldn’t leave well enough alone so decided to give it a little makeover. I know that altering a brand new piece of furniture may seem weird though the glossy black finish teamed with the shiny silver handles was just a tad too harsh and modern for Charlotte’s cottage style room. So, this is what I did…
STEP 1 SAND
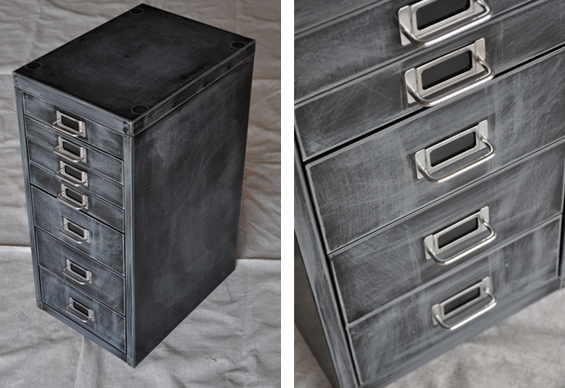
Using course grit sandpaper I thoroughly scuffed the entire cabinet. This gives the surface “tooth” which allows new paint to adhere well.
Now, I could have stopped here as sanding does create a nice distressed look, though it was just a tad too “scratchy” for my liking. Plus, it was difficult to get around the handles evenly so the distressing looked a little unnatural and linear in some areas.
Note: I chose not to remove the handles because they are riveted on. Removing them would have meant breaking the rivets and probably having to replace the handles. For ease and the sake of ‘making the most’, I decided to keep them.
STEP 2 CLEAN
To remove any residual dust or grime I thoroughly wiped down each surface using isopropyl alcohol.
I’ve used isopropyl alcohol to clean metal prior to spray painting in the past and find it helps provide a fantastic, long-lasting bond.
STEP 3 PAINT
I gave the entire cabinet two – three light coats of chalkboard spray paint.
Ordinarily I would have removed the drawers though this time around I decided to keep them in place. And it worked really well! To keep the finish consistent I did pull each drawer out, just to the end of the inner lip, and spray painted around all the edges.
As soon as the cabinet was coated with the chalkboard paint I knew it was going to look cool when finished. Phew! It instantly lost its modern edge and became all vintage-y.
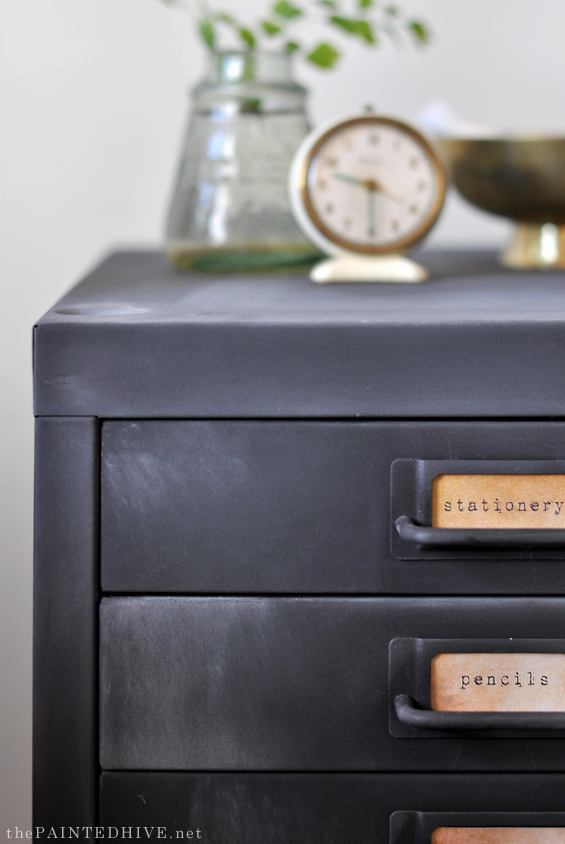
I love the matte finish with that slight graphite note.
STEP 4 SEASON
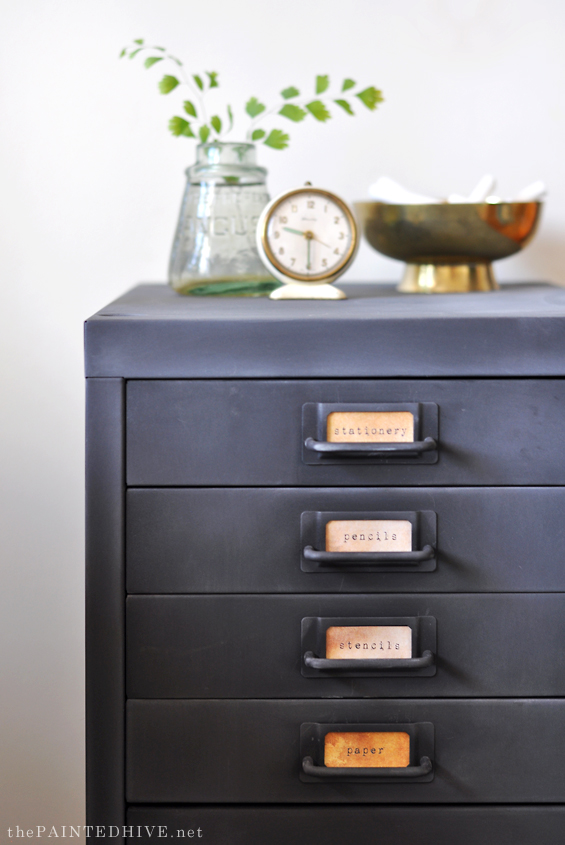
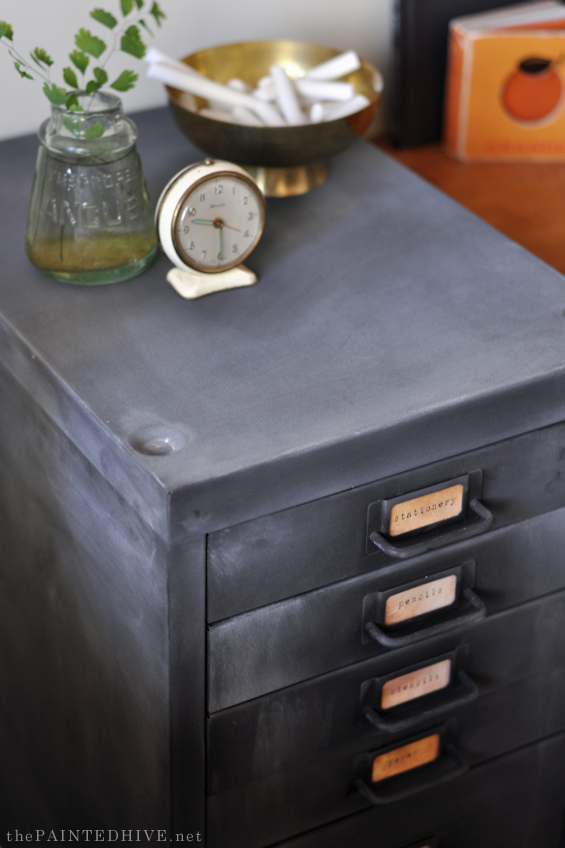
To finish, I lightly rubbed the entire cabinet with chalk before dusting it off again. This creates that soft, multi-tonal look you see on old chalkboards. It’s wonderfully textural and grungy and the gentle grey is a great neutral.
Oh, and don’t worry, it’s not dusty or anything to touch. The texture in the chalkboard paint holds the residual chalk dust in place.
STEP 5 DONE!
Seriously, that’s it! And I’m so in love with this easy transformation!
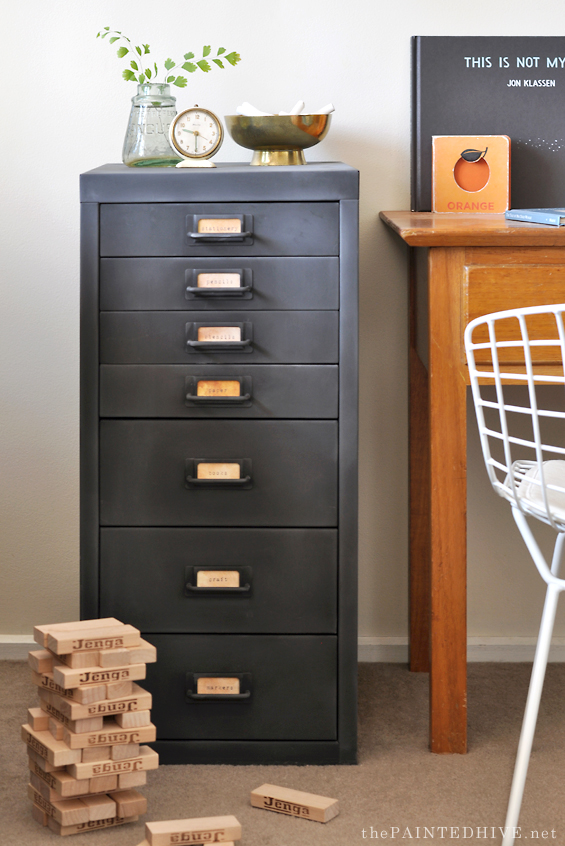
To complete things I added some aged paper labels to the handles.
The cabinet came with generic plastic castors which I chose not to attach. I contemplated adding vintage wheels instead though decided I quite like it sitting flush on the floor. Plus, it doesn’t need to be moved around so wheels aren’t really required anyways.
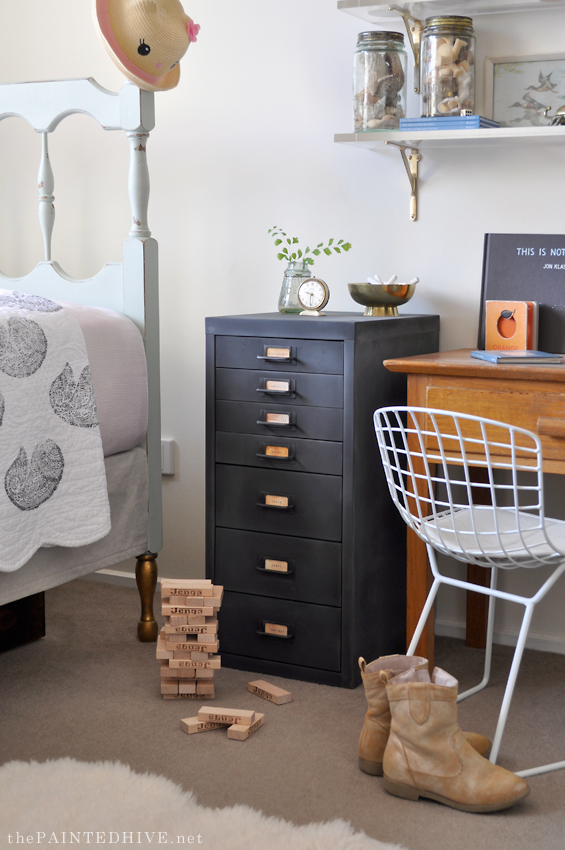
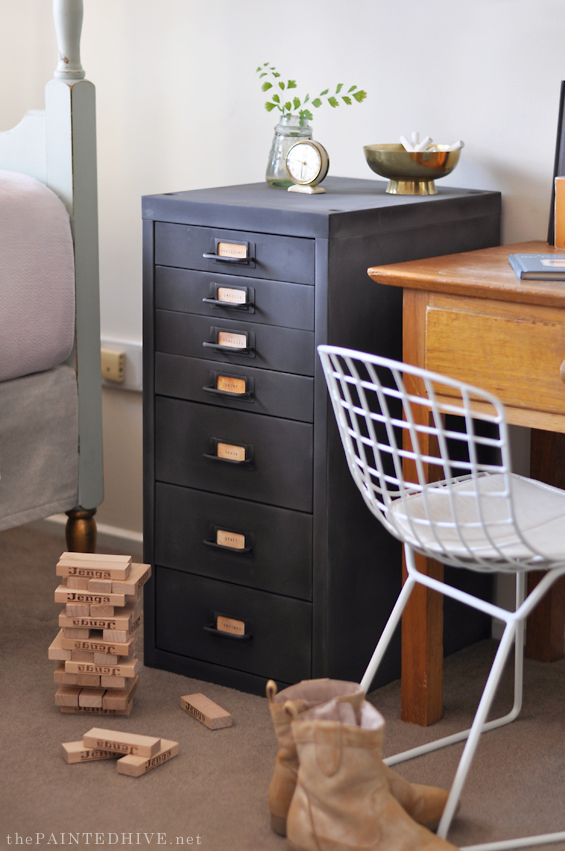
As mentioned above, the chalkboard paint knocked-back the modernity of the glossy metal beautifully and now the cabinet suits the overall vintage scheme of Charlotte’s room perfectly.
I was unsure how the handles would look being painted to match the cabinet itself. I thought they might get a little lost however the labels provide just the right accent.
Here’s a close-up pic to show the texture and variation of the chalkboard paint…
So yum!
As with all of the projects I complete for Charlotte’s room, this one was tricky to photograph due to the tightness of the space. No jokes, at one stage I was being harassed by dangling dresses as I stood inside the wardrobe to take some of the pics! The things we I do.
I actually have a matching cabinet with five small drawers which I plan to sit on top of this one. It will house Charlotte’s Lego and create a nice tall bank of drawers. Unfortunately, it will be too tall to sit beneath the lowest wall shelf so I have to move them all over a bit. It’s not a hard job though I keep putting it off.
When I do work up the motivation it will be the final project before this room is complete. Yay! Can’t wait to share the full reveal.







Once agan, so cool Kristine. And I love seeing that little pic of Charlotte in her space. Too precious. I’ve actually been looking for something like this to use for puzzle storage and just love what you have done. Thanks for the inspiration.
You. Are. Insane. Honestly, is there nothing you can’t do? Here’s an idea….. let your devotees send you their biggest design dilemmas and you save us?
LOL, sadly there’s plenty I can’t do Dawn!
More than happy to try and help with design dilemmas (they are fun!). I often receive questions via email and I try my best to respond to them all. Do you think I should create some kind of segment for my blog?
x
Yes pick an interesting or typical one and do a blog post on it!! :)
Great insight and creativity. Perfection, well done.
That looks great! You do have the eye for things that will fit perfectly. Love it. :)
I have 2 of those files in the basement right now. I never did anything to them because I couldn’t make up my mind what to do! Until today! Great job!
Great idea!!! Love it!!
What a lovely file and I love this idea for my girl’s room. Thank you for sharing.
Love it! I will try this with our old one in the basement! Will stores like staples or Michaels have the vintage paper?
Hi Kelly
Do you mean will they print onto specialty paper? Or do they sell it so that you can print onto it at home?
No, I just mean sell the paper so I can print at home!
Got ya. Decorative vintage style paper isn’t too hard to find though it can be expensive – especially if you need to buy a full pack. Another option is to purchase one sheet of scrapbooking paper and trim it down to fit in your printer.
A different approach is to search online for a free high resolution digital background (that’s what I did) then copy and paste it into your document and type your text on top. Just have a look on Google for something like “free high resolution paper textures” or “free vintage paper backgrounds” etc. If you have a good quality colour printer this is an easy option.
Yet another option is to tea/coffee stain your own paper prior to printing onto it. This is super simple. Just mix up some strong tea/coffee in hot water, place your sheet of paper on a baking tray then pour the mixture over the top. Once it has the deepness of colour you’re after, pour off the excess mixture and allow to dry. You can repeat if desired or splash it with a more concentrated mixture of tea/coffee to achieve more variation. Once completely dry you can iron the paper if it seems too crinkled or wavy.
Hope this helps :)
Thanks so much for all the help! Fantastic ideas. That gives me a lot of choices to make it work!
Looks awesome…I have a couple to try this out on! Thanks.
Well how cool is that!? And so easy!
I REALLY REALLY want to make this..but I am from the US and there is no office-works store here! Could you give me the dimensions though to see what I could find…although it’s those small top drawers that make it so special!! Thank you! Cindy
Hi Cindy
This one is quite petite – 28cm W x 40cm D x 63cm H. When I first saw it in store amidst the “regular sized” file cabinets I was like, “Is this a file cabinet for garden gnomes?”. LOL! Though when I got it home it was just right.
Check out Ikea. I think they have some similar ones. Otherwise, Google around. And remember, if you find something with finger pulls or hand cut-outs though you’d prefer handles check to see if the drawers can be turned around.
Kristine
Try the ikea Hemner
Found some almost identical ones at The Container Store. Sadly they are quite pricey though. Also saw some similar ones at Walmart.
I love love love this project! Thank you so much! We have a silver cabinet almost like your one from IKEA that I am going to transform!
I’m brand new to your blog, and this was a great way to start. Love the piece. Love the simplicity of it. And love that you know how to spell “stationery”! :)
LOL, well I did have to double check!
Thanks Janet. Glad you like it :)
Love this idea, and can do in a craft room as well!!! I just fell in love with the gold painted feet on your daughters bed, so special !!
Yes, perfect for a craft room Julie!
Love it, just gorgeous. I also have this cabinet and a smaller unit in white for the kids’ craft and scrapbooking supplies – I also couldn’t believe how much they swallowed up when I packed them! Very TARDIS-like indeed!
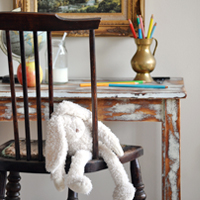
I love it and the footed brass bowl on top holding the chalk is the piece de la resistance!
That is one of my favourite little pieces!
Love it you are amazing!
You never, ever fail to amaze, Kristine! This is simply brilliant and classic and so adaptable to many decorating styles and schemes.
You have the most wonderful aesthetic and I’m in awe of your talent and willingness to share. Bravo!
Aw, too kind. Thanks Suzy :)
I have one of these in turquoise in my craft room and it screams new amongst all the other vintage pieces in there. I love what you have done with yours. But then, I love everything you do…I am just not as good at getting things done. I might make an exception for this one.
Lol, oh Robyn, haven’t you noticed I pretty much only get one – two simple things done per month? Trust me, you do not want to see a photo of my kitchen which we haven’t touched in the ten whole years we’ve been in this house!
I was contemplating buying a turquoise one any leaving it as is though Charlotte’s bed is a soft blue and I thought it might be too much. I also liked the navy one they have though it’s metallic so a bit sparkly for me.
You should def make an exception and get this project done – sooooo quick and easy.
:)
Nice work!!! Looks SO much better :)
Thanks Cherie :)
Could I use challk paint instead of chalkboard paint?
To create the same look and function as I have? To be honest, I’m not certain Gwen (though probably not). I have never tried to season or write on ‘chalk paint’ with chalk. It might work.
That said, of course you can paint over metal with chalk paint in just the same way you can with almost any paint, though can you create the same grungy, multi-tonal, graphite look as seasoned ‘chalkboard paint’? And can you write or draw on ‘chalk paint’ with chalk like you can ‘chalkboard paint’? Like I said, I’m not certain!
Perhaps I should do an experiment and post about it?
I looove how this turned out! Plus I had no idea there was chalkboard spray paint (I hopped on the Bunnings website immediately) – how awesome is that?! xx
LOL Kate! Yes, how cool is it? I discovered it a few years ago. I thought it was just another one of those things they only had in the US!
This is so awesome! Now I want to go find a file cabinet and do the same thing. Nice work!
Thanks so much Angela :)
This is gorgeous! I love it! It looks completely transformed,
Wow! You’ve made it look better. The original metallic look was not very homey and so ordinary. I’m really impressed with the transformation you made.
What a fun technique and one I haven’t seen before! Thanks so much for sharing your creativity at Vintage Charm!
Thanks so much :)
Love this project, Kristine, and will be sharing it at Vintage Charm tomorrow!
Thanks so, so much :)
This is probably one of the first DIY file cabinet makeovers I’ve fallen in love with! Wonderful job, and thanks for sharing it with us at The Creative Circle Link Party!
Thanks Iris :)
Lovely work :)
Love this project! What brand paint did you use?
Hi Ann
Not sure which country you’re in though I’m in Australia and used White Knight Chalkboard Spray Paint.
Cheers
You’re Brilliant ⭐️⭐️⭐️⭐️⭐️🌝
curious as to how well the paint held up on the handles? I am right in the middle of this project on my own file cabinets and have he handles all taped up for that reason. However, I’m now wanting to paint the silver metal handles!? Thoughts ASAP please!
Hi Lynn
Everything has held up great! Not one chip. Chalkboard Paint is slightly granular so has fantastic sticking power.
Kristine
Love this project! What color chalkboard paint did you use? I can’t tell if it’s black or a dark gray. Thanks!
Thanks so much. It’s just regular black.
How did you make the labels? Is it a stamp? Did you tea stain it or is it the paper itself?
Hi Nicole
I created the labels digitally. So, I grabbed a free vintage paper texture for the background from the net, added my text using my desired font (measured the label holders first to ensure it would fit) then printed them out onto regular copy paper before trimming them to size.
Tea staining the paper is another easy option which I’ve done several times.
Let me know if you need more info.
Kristine
Modernity? lol I absolutely love what you did with the file cabinet. I have a really cool file cabinet a friend gave me. I’m definitely going to do this. Thank you, Judy from Georgia
Thanks Judith. Have fun!
Oh, and LOL! ‘Modernity’ (as defined in the Merriam-Webster dictionary) is “the quality or state of being or appearing to be modern”.
perfect! i love this! just curious, how did you clean it off after seasoning it? same method as before? thanks!
You can wipe it with a clean dry cloth after dusting of the chalk.
Hi! I love this look but I’m curious how do you clean it down the road? If I use a wet cloth will it take away the chalky finish? Thanks!
Hi. I usually just give it a light dust though if it gets dirty you can clean it with a damp cloth then just rub some more chalk over the top.
what size grit sandpaper did you use? I love it! Can you use other colors than just white chalk?
Hi Kat
I don’t 100% remember the sandpaper grit though it would have just been medium (something around 80-120).
Yes, of course, you can use any chalk colour you like.
Kristine