Update: Check out how my timber furniture looks in my refreshed farmhouse style master bedroom here.
Before I began my master bedroom revamp I knew I wanted some rustic timber to keep the space warm and grounded, however finding the right pieces to ‘restore’ rather than ‘refurb’ is easier said than done.
We all know how easy and effective slapping a fresh coat of paint on a piece of furniture can be – not only does it completely transform the feel of an item though it can also hide a myriad of sins. So, when you’re planning on paring-back rather than packing-on, a little more care (and/or blind faith!) may be required.
With that in mind I set about sourcing some second-hand timber pieces which would eventually become my bedside tables and finally found these on eBay.

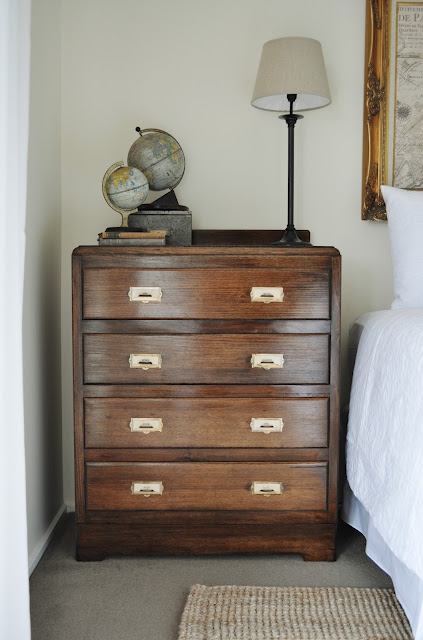
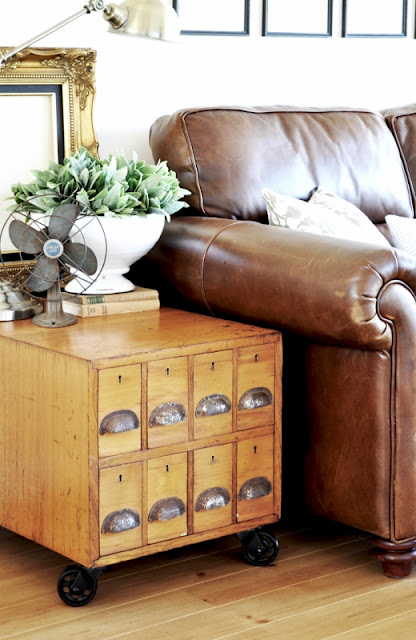
Deco Dresser ($60)
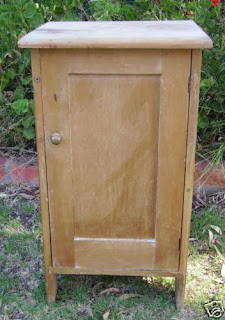
Kauri Pine Cupboard ($50)
Because my bed doesn’t sit centrally on the wall I wanted two pieces with mis-matched proportions to play off the asymmetry. I also needed plenty of storage.
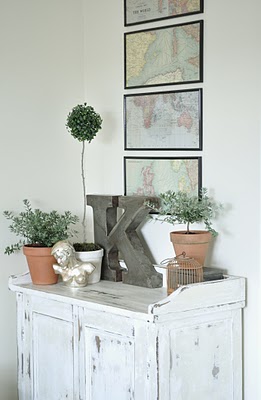
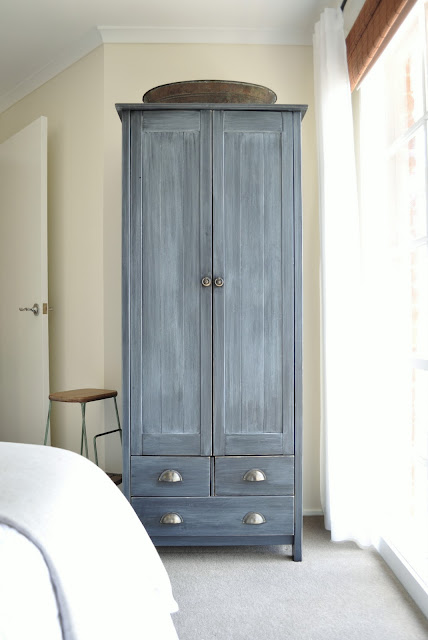
Remember my inspiration board.

I knew I was dreaming when I included that apothecary style cabinet (lower right) though thought I could somehow transform my crappy old deco dresser into something with a similar feel so I got to work.
First I removed the mirror and handles then stripped back the old varnish using my secret weapon; commercial grade graffiti remover. Seriously, this stuff is awesome! You just pour a layer on, leave it for five minutes then remove it with some soapy water and steel wool. It’s soooo much easier and faster than using a conventional paint stripper.
Okay, so admittedly I get mine from a friend in the industry though I’m sure it’s available somewhere for domestic use (sorry I can’t help more).
I next gave the dresser a light all over sand then stained it dark using a combination of walnut and black. I was careful to get the stain into all the imperfections in the timber to create the look of an aged patina. To finish I sealed it with three coats of danish oil then added some library pulls.

The pulls were originally shiny polished brass so I coated them with some old gold Rub ‘n’ Buff to create a tarnished look. I thought it may not stick given how smooth the surface was though it hasn’t budged. For something different, rather than label each pull with a numerical digit I used french written numbers (un, deux, trois, quatre, cinq, six, sept, huit) which I simply printed off my computer onto regular copy paper. I then stained the paper with a diluted coffee mixture to give the labels an aged appearance.
My original plan with the kauri pine cupboard was to keep it as is though the blonde timber looked too unbalanced against the walnut of the dresser so I decided to stain it dark too which was fast and easy because it was already so bone-dry no stripping or sanding was needed. I simply mixed up some walnut and black timber stain then gave it three good coats. There were heaps of gouges and grooves in the soft timber from years of love (or neglect!) so, as with the dresser, I was careful to let the dark stain penetrate all the imperfections to create an aged-looking, time-worn patina.




Absolutely love it, Kristine! May I ask where you bought the library pulls from? I love the way you have aged them. I used the coffee trick on the weekend for treasure maps my kids wanted to make!
Love your style!
You are seriously gifted! I looked at the before pics and thought….well, you know :-)
Looks fabulous!
You did an amazing job with both pieces. What a huge difference the hardware made. Love the direction the room is going and your inspiration board. All the best, Lori
Fantastic job lovely..you have made me feel so much better about the bedside tables I purchased off ebay not too long ago..the dilemma of to paint or not to paint..but everyone is painting everything white.and I quite like the natural earth feel that natural wood gives out…and so I think I will leave them as is for now. Thanks for the inspiration x
How do you do it? Well, you’re telling us of course, but I mean, how do you keep coming up with all kinds of gorgeous transformations for all kinds of furniture??? Could you come over here once, just to get me started at least??? ;-)
Bye,
Marian
both pieces looks amazing, you did a great job
Hi Kristine! Love all the creative & imaginative details that make each of these pieces so special, understated, elegant, and personal. Your bedroom is awesome!
Blessings,
Sindy :)
Perfection! I would have loved to see a picture of the dresser after you stripped it just before you added the stain. Just curious how far you stripped and sanded.
You’ve done it again. That deco dresser is AMAZING. The perfect choice for pulls. Love, love, love!
Both pieces look so wonderful! I know myself that stripping/staining is not an easy process, but it’s so worth it!! I’ve been wanting to try a danish oil or tung oil finish. It looks so nice!
They look terrific! Kudos to you for restoring such a great piece!
Wonderful transformations. I love odd pieces used by the bed instead of matching nightstands. Those look great.
P.S. Don’t know if you have clicked on the red blog rankings button lately. That site has been blocked with an attack warning and most people are starting to remove it form their blog I noticed. I took it off mine just to be safe.
Just gorgeous!
Love them! Glad you stuck with wood instead of painting.
Well, number one is they look fabulous, and number two, I love the natural loo! Such a nice change from all the painted stuff we all do. The pulls just make the dresser. Great job once again.
They look wonderful! And I can’t believe you got KAURI for $50!! Great shopping :)
oh my gosh! <3 this!
You have such a gift with furniture! I love the look and all your accessories look fantastic.
I have always stayed away from natural wood thinking that it always seemed so dark. You have me rethinking.
Wow, the drawers in particular look a million dollars! You have such an eye for what is possible. What a talent!
They both look great. My husband will be so happy to see timber being restored rather that painted. I love how you turn the ordinary into special.
both are stunning- love the hardware on the first dresser. i am working on a dresser now that it hink you will like- i am hoping to give it a more rustic look…
come link up to my party!
One hundred, million, gazillion gold stars to you! I absolutely adore wood! One or two gorgeous pieces in every room is a must. I also adore the painted white look too, but you just can’t beat having a rich timber piece to add a touch of nostalgia and solidity. Well done, love your home.
Suzy xxx
Would love to know how you got those wooden handles off! I’ve often seen dressers like this and know they’re built well, but hated the handles! This looks gorgeous!
a.
Looks great! Also curious where you found the library pulls. Love that look!
Kristine- I love it-You did a wonderful job. Would love to find some of that stripper…it is probably outlawed except for commercial use~ wouldn’t you know?>) And where did you get those library pulls? hugs- Diana
Both night tables came out great! Love the dark stain you used, and the library pulls on the larger night table.
You’re really turning your inspiration board into reality!
Awesome job on those dressers, Kristine!!! Wow! Love the vintage look to them without painting. And those pulls are just great! I’d like to know where you got them, too! :)
xoxo laurie
Gorgeous! My jaw, which dropped after seeing the first after picture, might never be the same:)
So freakin’ fabulous! Those library drawer pulls give such character. Your room is heaven!!
You have some great vision and the ability to make it happen! Both pieces are stunning and you are right, they do warm up the space!
Fab.u.lous!
I’ve put together a round up of pretty dresser revamps on Craft Gossip today and included your project. :) You can see it here
http://homeandgarden.craftgossip.com/6-beautiful-dresser-make-overs/
If you would like to share the Craft Gossip love and show your visitors you’ve been featured, you can grab a button here!
http://homeandgarden.craftgossip.com/grab-a-craft-gossip-button/
The deco dresser is amazing! I thought it was a campaign dresser from far away, but up close I love the pulls. You made perfect choices! And the idea of using commercial grade graffiti remover is interesting. I just looked it up online, and it’s readily available for purchase. I have been afraid to tackle a stripping project, but I just might have to try it!
As a complete novice decorator, I have learnt so much from your post! Thank you! The pieces look amazing.
Thats great! I will be starting my insurance business soon and will be remodeling a spare bedroom into my office. I can use an old dresser as a filing cabinet and wont have to buy one. Great idea!!
I would love to know more about the staining. Did you go over it with walnut and then add the black in places? Or mix them up together and then just rub it all on? The variation is really nice
Hi Louise
I simply mixed a dash of ebony stain in with some walnut stain then applied it to the cupboard with a rag (I just did this to make the walnut darker). The tonal variations you can see are caused by surface imperfections which were already present in the cupboard. Where there were gouges, grooves and extra dry or rough patches the stain has penetrated the timber more deeply making it appear darker.
Hope this helps :-)
That stain is gorgeous. Where did you get the library pulls? I’d love them for a dresser I am currently making over. This piece is perfect. Love love love!
Hi Natalie
Thanks so much!
This is one of the most affordable sources I’ve found for the pulls: http://stores.ebay.com/DONS-FURNITURE-CLINIC/_i.html?_nkw=plated+card+holder&submit=Search&_sid=48225045
Kristine
Hi
Love love this makeover !!
There are so many quality made timber items that deserve a second life
Can I also request the name of graffiti removal product …
I have multiple furniture items just awaiting a makeover
But I can’t face the prospect of paint stripping
I’m in Melbourne so may have a chance of tracking it down – or something similar :)
Btw – I make my own wipe off version of Danish oil for anyone who likes the diy option:
Equal parts: boiled linseed oil, matt varnish (poly) and pure gum turps.
Cheers
Sean
Thanks Sean.
I’m really sorry, though I completed this project a few years ago and haven’t used that stripping product much since so I just can’t recall the name of it. More recently though I’ve been using a comparable citrus based cleaner called Strip Eze which I think is designed for flooring.
Love your DIY danish oil recipe. Will have to give it a go one day. I’ll be sure to share with my readers when I do (with due credit of course).
Cheers