This was such a rewarding project.
If you’re not new here, you’re probably aware of my involvement in the Re-Love Project and what it’s all about. For those of you who don’t know, in short it’s a Feast Watson campaign in collaboration with Salvos Stores which sees eight designers “re-love” a neglected item of furniture with the resulting pieces being auctioned for charity. Pretty cool, huh? You can read my first post about it here and learn more on the Feast Watson website here.
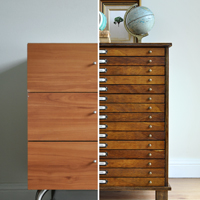
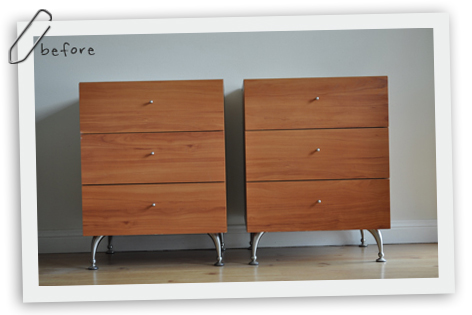
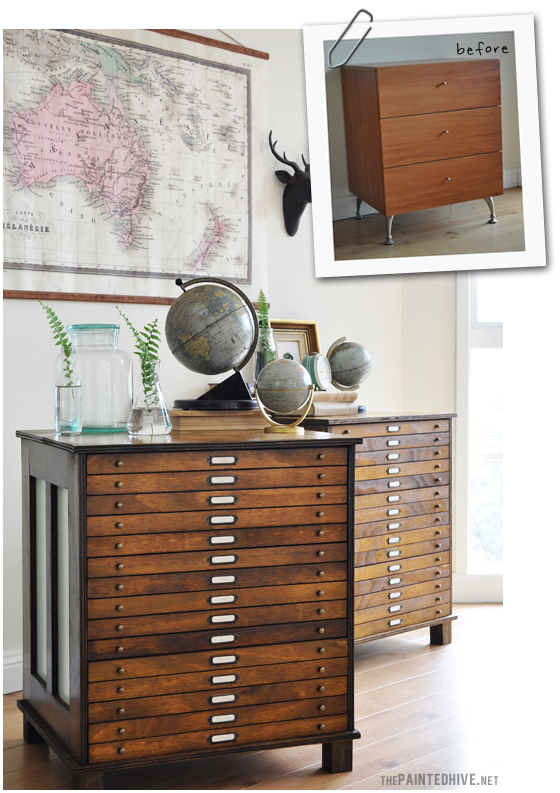
Anyhoo, as revealed in my previous post about the project, I started with a very basic laminate pair of bedside tables I picked up for just $25 (I know, they don’t look too bad, though the edges were all chipped and they had misaligned panels)…
…and a kinda ambitious plan to completely transform them!
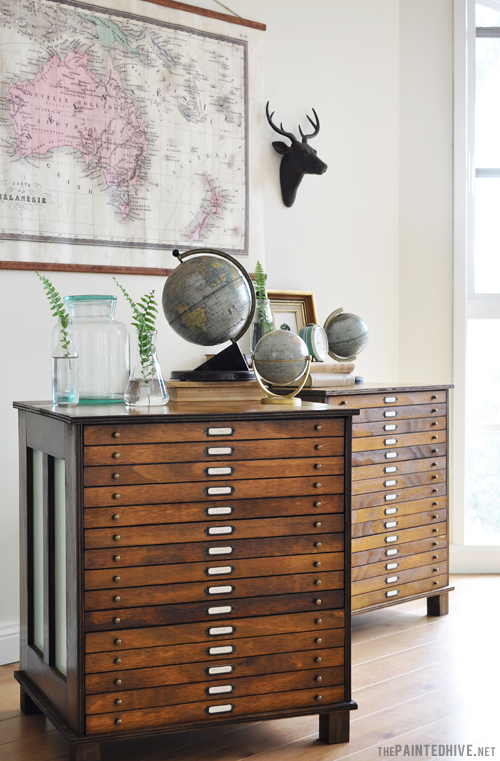
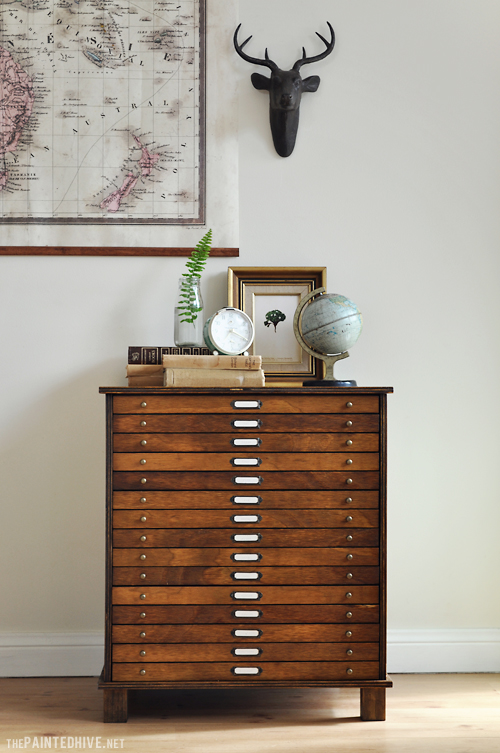
Basically, I wanted to “re-love” them into antique-style multi-drawer map cabinets in the same type of vein as my previous flat pack hack, though take it a few steps further and produce a truly authentic appearance. In doing so, along with challenging myself, I really wanted to encourage people to see the potential in those sometimes over-looked second-hand pieces of furniture (which are often affordable and abundant). I’m sure you’re all aware just how pricey genuine vintage multi-drawer cabinets can be so having the ability to create our very own DIY budget-friendly versions is pretty cool, maybe even a little empowering.
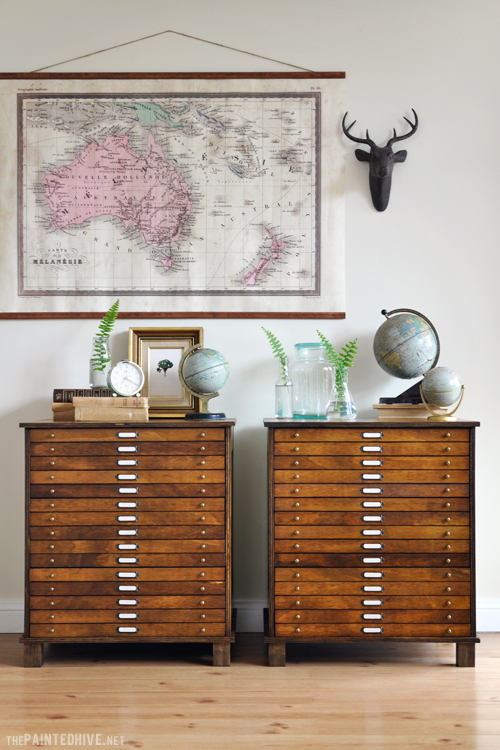
Anyhoo, despite a few hiccups along the way, numerous vision adaptations and those customary moments of self-doubt, things actually turned out perfectly and I’m honestly stoked with the results! I can’t wait for the auction (even if I am a little melancholy about having to let them go – at least I now know I can always create some more!).
Here’s how the whole thing went down…
Note: As you’ll read below, I cut all of my cladding from sheets of pine ply to save a bit of money and so I could completely customise the size. If you don’t have the tools or confidence to create your own strips from sheets, you should be able to find suitable sized “off the shelf” planks of timber so you need only cut them to length.
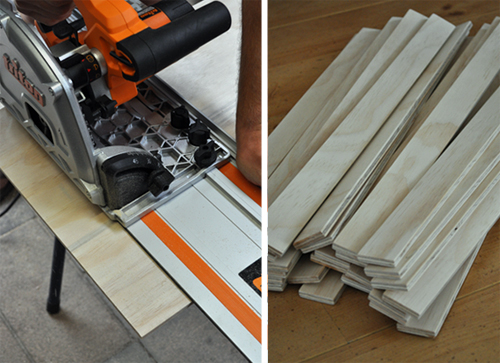
I started by carefully measuring the bedside tables then pretty precisely cutting all of the cladding from large sheets of pine ply. This included the faux drawer fronts (30 pieces in total), the shaker-style side trim (20 pieces in total) and the tops and bases (four pieces in total). Remember, I’ve got two tables to work with so all of the pieces and processes are pretty much doubled, having just one item of furniture would probably make things quicker and easier. I used our plunge track saw (an invaluable tool for a job like this) for the long cuts, switching to a basic drop saw for the shorter cuts.
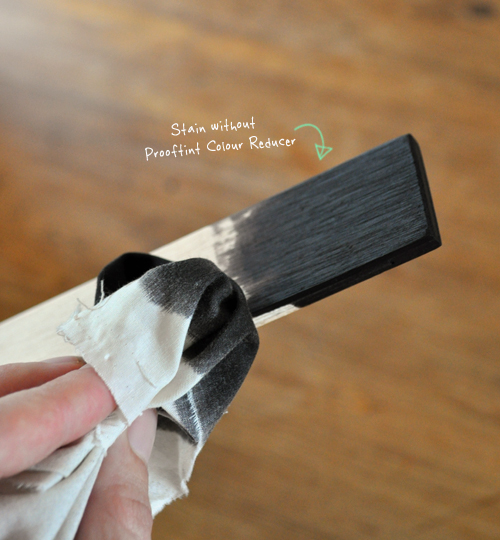
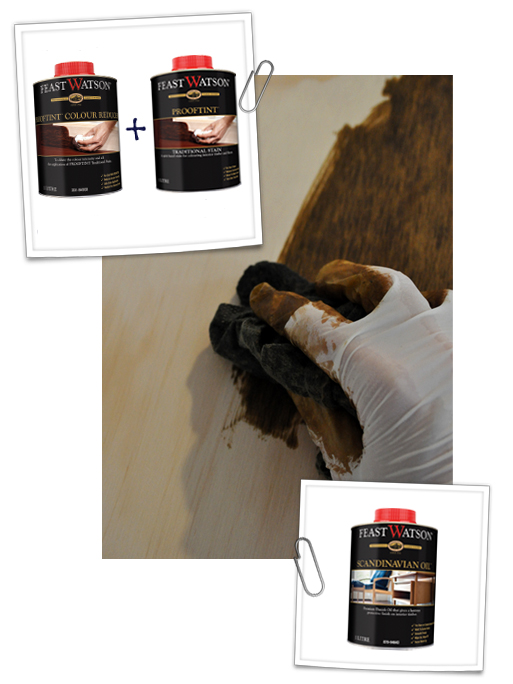
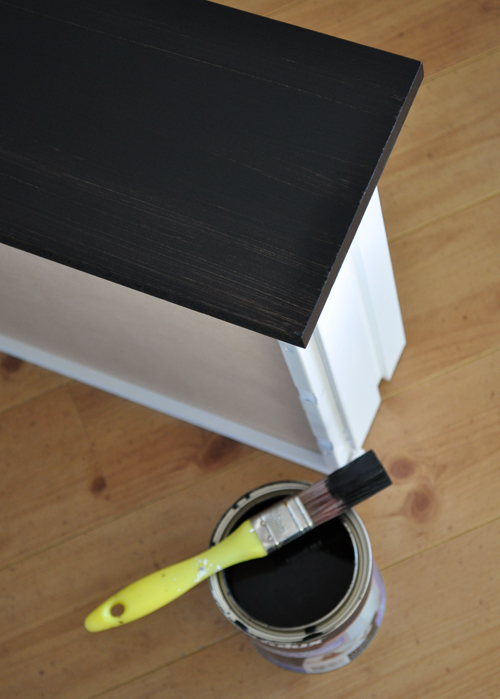
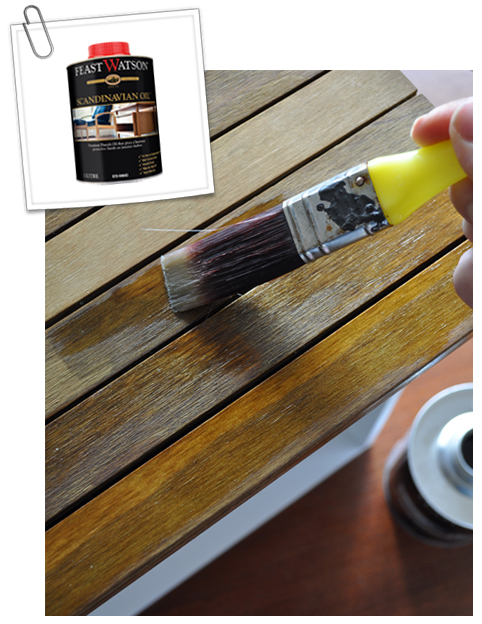
Once all the cladding was cut, I thoroughly sanded each piece, finishing with fine grit paper for a nice, smooth finish. Using a lint-free cloth, I then applied two coats of Feast Watson Prooftint (Teak) diluted around 50/50 with Feast Watson Prooftint Colour Reducer. Because ply is so porous it’s easy for penetrating stains to come out looking way too dark. I tested a scrap of ply with undiluted stain and it appeared almost black (below pic)!
The colour reducer was perfect for achieving the exact tone I wanted, which, if I had to describe it, is kinda like a rich honey caramel – yummo! At this stage I also applied one coat of Feast Watson Scandinavian Oil (oh, how I love thee!) to easily seal all of the edges before attaching the cladding to the bedside tables. I used a brush and ensured it was well incorporated.
NOTES
:: Of course, you don’t have to use ply. I did for a few different reasons; one) to keep costs down, two) because it’s available in lots of different sizes and depths so I could completely customise my cladding, and three) because I wanted that slightly raw, industrial look – and contrary to what might be considered crude, I actually especially like the appearance of the multi-toned ‘sandwiches’ where the interior layers are exposed. If you don’t have the confidence or tools to create your own cladding from sheets of ply, or if you’d simply prefer to save the time and effort involved, you should be able to find suitably sized “off the shelf” timber planks instead. It just might mean spending a little more money and maybe being a bit restricted in terms of size. Remember too that some hardware stores might even cut your timber for you.
:: If using ply sheets, take note of the grain direction. I ensured mine was always running lengthways. Also, it’s likely your ply will have a “good” side so inspect your cladding and present the most attractive face. In addition, check your sheets prior to purchase and avoid those with noticeable imperfections, such as cracks or filled knot holes.
:: When taking all of your initial measurements, remember to factor-in the depth of any intended cladding. For example, my bedside tables were 42cm deep without cladding however once attached the faux fronts (which are 6mm deep) increase this to 42.6cm. I know that 6mm might seem pretty insignificant, though over-looking it would have created major problems, including leaving my horizontal side cladding 6mm short and my top and base overhang looking disproportionate.
Clearly, the existing modern chrome feet had to go. I originally planned to use these grungy industrial metal castors I had found online, though when I saw them in person decided they were a little too chunky and might compete with all my brass knobs and label holders, making everything look too busy. Also, at around $20 each, although not overly pricey for industrial metal castors, they weren’t exactly cheap. I instead opted for plain timber feet cut down from a length of square pine. Not only do they compliment the shaker style simplicity though they were super affordable.
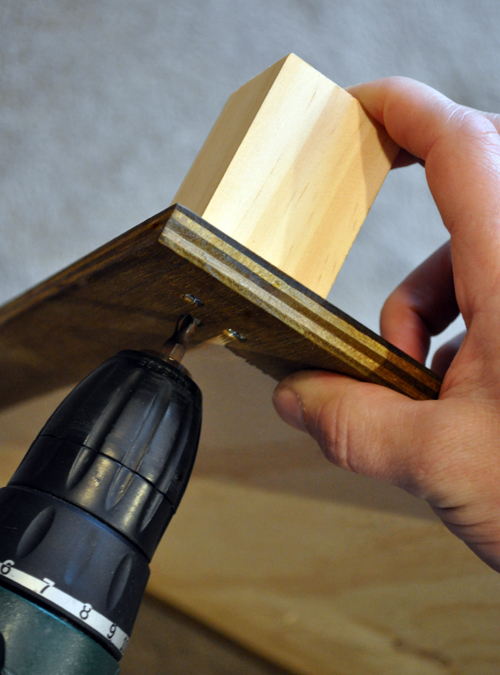
For ease, I attached them to the bases (using liquid nails and three screws) prior to connecting the bases to the actual bedside tables (once attached the screw heads will be completely concealed).
I finished them in the same manner as the cladding; two coats of Feast Watson Prooftint (Teak) combined 50/50 with Feast Watson Prooftint Colour Reducer and one coat of Feast Watson Scandinavian Oil.
Before attaching all the cladding some painting was required.
To create an illusion of depth between the faux drawers I decided to paint the underlying real drawers black. I first thoroughly sanded each drawer front using an electric palm sander then applied one coat of Dulux Wash & Wear Flat (Black) using a brush. I didn’t bother with primer or multiple coats of paint because they were being clad over anyway and only the tiniest amount would be visible.
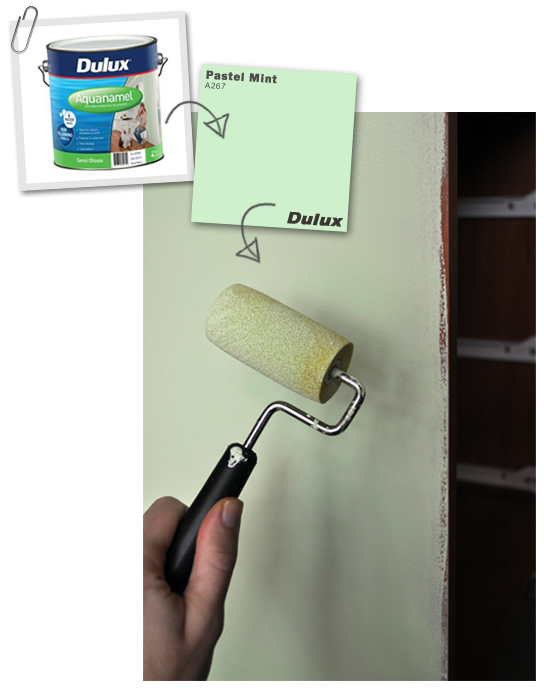
I was originally going to clad the entire sides of my tables with solid pieces of ply (like the top and base) though decided that using shaker style trim would be a bit more interesting and leave room to add a subtle colour pop! I thoroughly sanded each side using an electric palm sander with heavy grit paper. Remember, these tables are laminate and I really wanted to make sure any exposed paint was going to stick. I used a foam roller to apply one coat of Dulux Prep Lock Primer followed by two coats of Dulux Aquanamel Semi Gloss (Pastel Mint). Don’t worry about the apparent missed areas you can see in the below pic, the edges are being clad over.
Whilst I was at it I also painted the MDF backs. I know, I know, no-one is ever gonna see them though I think it’s a nice touch for whoever buys the tables. It’s the kinda detail that lets you know someone took care.
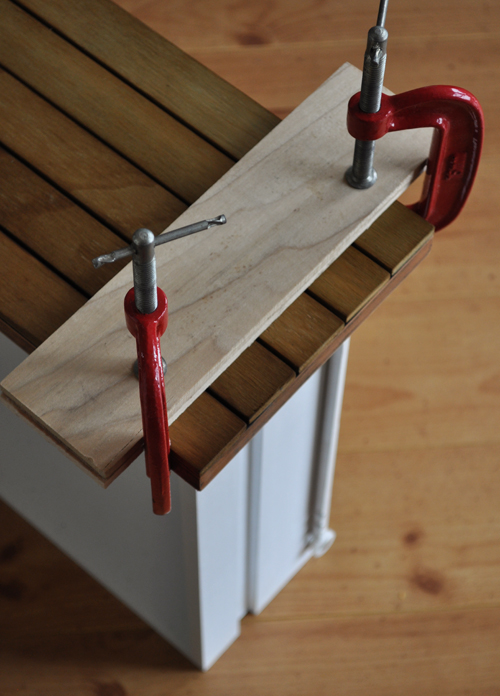
I started with the drawer fronts, working with one drawer (five pieces of cladding) at a time. To the rear of each piece of cladding I applied a sparing bead of liquid nails, spreading it evenly with a scrap of cardboard (to eliminate any overly thick areas and potential seepage). I then carefully laid each piece in place on top of the drawer. Once all five faux fronts were in position, I carefully clamped them. Bearing in mind the faux fronts will also be held in place with the handle screws, the purpose of the glue at this stage (although a worthy bonding agent in its own right) is really just to keep everything in place and make the process of attaching the knobs simpler.
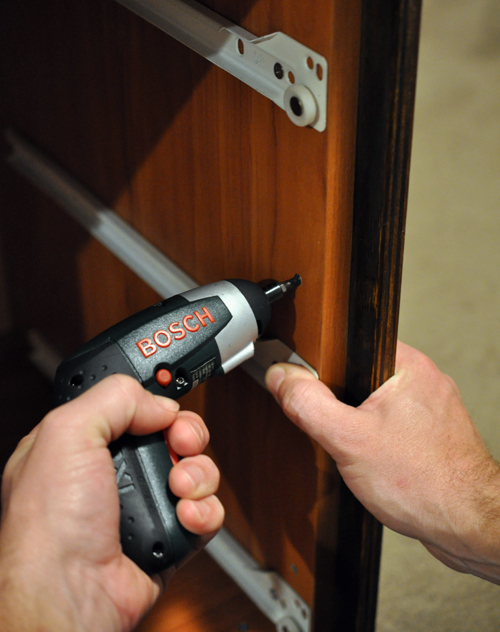
The sides were a little more tricky. After attempting to clad them on my own and taking over an hour to attach five measly pieces I enlisted some help. Having two people for this process was soooo much easier. Each piece of cladding was smeared with liquid nails and held firmly in place by one person whilst the other person pre-drilled then screwed them on from the inside.
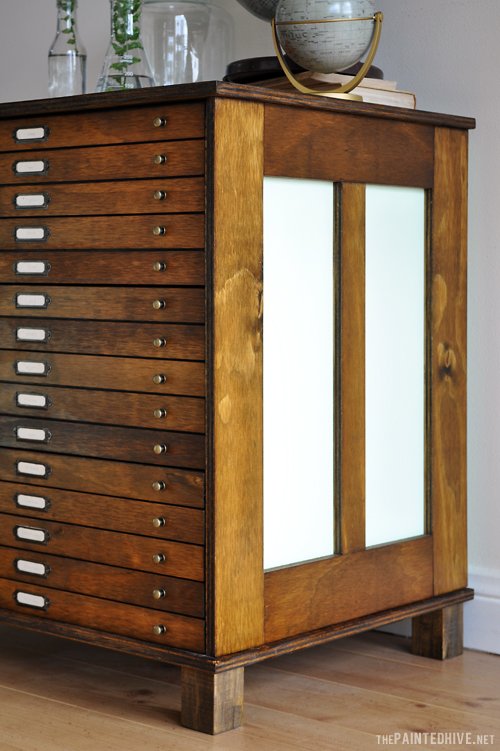
We started with the front-most vertical pieces. These needed to protrude the existing sides of the bedside tables (as can be seen in the above pic) in order to conceal the sides of the drawers (as the drawers originally sat on top of the sides – as can bee seen in the before pics). So, with the drawers in place we lined up the first piece of cladding perfectly, held it in position then removed the drawers to screw it on. This piece was then used as the guide for aligning the remaining four pieces of side cladding – no measuring or marking took place, it was all done by eye.
The lighting makes the mint look quite white in this photo. In reality it is far more green.
The top and base were easy. A big dollop of glue and five screws driven in from the inside.
NOTES
:: If you don’t have proper clamps, you can use anything heavy to compress the glue while it sets.
:: Make sure your screws are the perfect length. Long enough to penetrate the cladding though not so long they protrude through. I decided to use a combination of glue and screws to eliminate the need to clamp (saving time) and for extra insurance in terms of the cladding bonding.
:: Take care that when clamping or screwing, your ply remains in its intended position. The glue can make it prone to sliding.
My favourite part! The process of oiling really starts to bring the piece to life.
Using a brush I applied five (yes, five!) coats of Feast Watson Scandinavian Oil to the timber cladding, ensuring each coat was thoroughly incorporated. The raw, open-grained nature of ply makes it incredibly thirsty so five coats was needed to achieve the gentle lustre I was after. I sanded lightly between coats with fine grit paper to achieve a smooth, even finish.
Scandinavian Oil (more commonly known as Danish Oil) is my absolute favourite timber sealer. It goes on like water and creates a lovely soft sheen which enhances the natural grain and colour of the timber plus provides a protective finish.
NOTES
:: Be careful with the thickness and number of coats you apply. Scandinavian Oil can become quite glossy if allowed to ‘build’. Ensure each coat is thoroughly incorporated and any excess oil is wiped away.
:: Just in case you’re wondering, as touched on above I applied one initial coat of oil prior to attaching the cladding to seal all of the edges. I decided to complete the oiling process once all the cladding was connected to the tables (rather than whilst it was still in separate pieces) so there was no risk of damaging the finish during attachment. This just meant I needed to take a bit more care not to get oil on the painted areas.
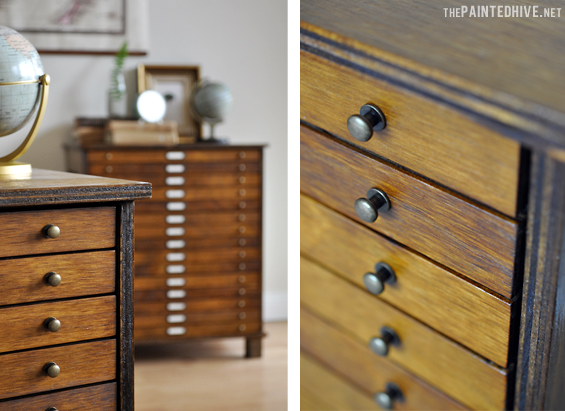
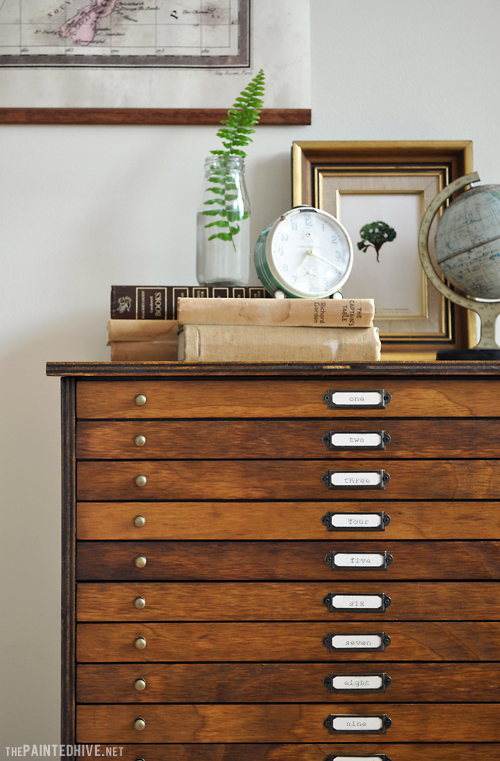
I knew from the start that I wanted to do something a little different with these drawers. Rather than using label holders with pulls (which I have done on numerous occasions in the past), I opted for plain label holders flanked by small brass knobs. At first I thought I’d made a mistake and should have stuck to one central label pull, though now I absolutely LOVE the look!
Finding affordable mini knobs was tricky. Even the timber ones I came across were pricey. I settled for some I found on AliExpress (Antique Bronze Mini Handles – 42 cents each), though unfortunately they didn’t arrive in time :-( Luckily, the day before the project deadline, I managed to source some similar ones locally (Kaisercraft Brass Treasure Drawer Knobs – 70 cents each). Although they were a little more costly they are perfect. One of the great things about the fact that these bedside tables are actually modern in construction is that the drawers are on smooth glide rollers which, even with the small knobs, makes opening them a cinch.
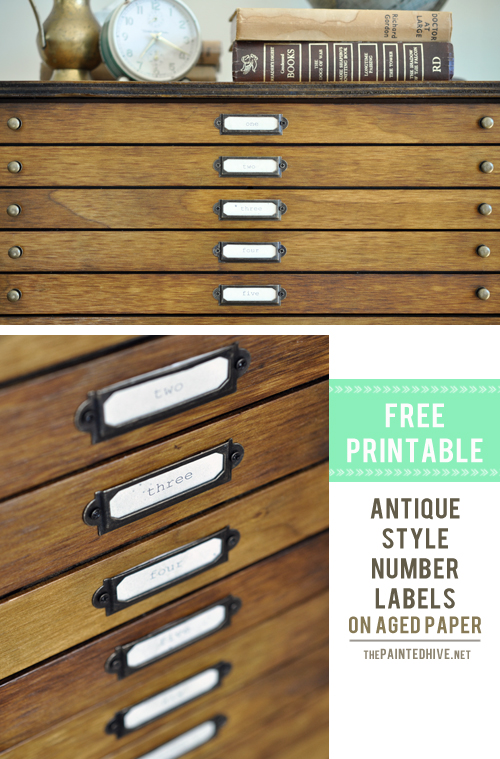
The label holders are from eBay (60mm x 17mm Antique Bronze Label Holders – $13 for ten). I created some simple number labels on antique paper to fill them (see link above to view and download).
I was a little daunted by the prospect of having to accurately measure and attach 30 small label holders and 60 mini knobs though it actually wasn’t that bad. The trickiest part was ensuring the handle screws were all cut to the right length.
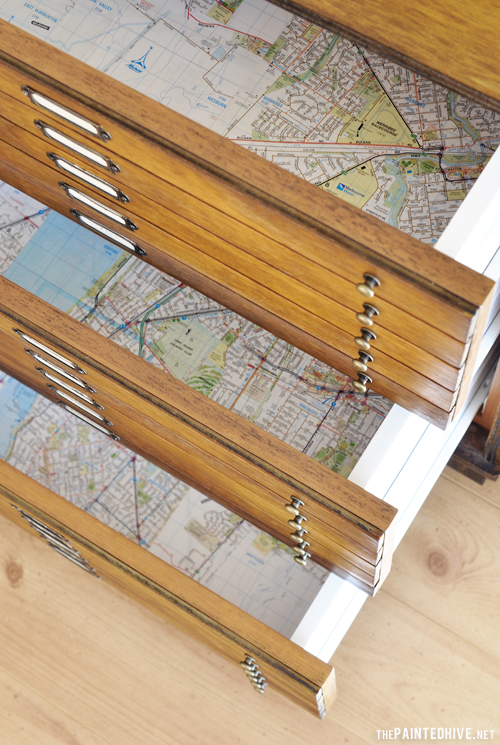
As a finishing touch I decided to line the drawers. I was originally planning to use geometric patterned wrapping paper (like a chevron or trellis) though was having trouble finding what I wanted when I had an alternate idea. Given my design for the bedside tables was loosely based on antique map drawers I thought using pages from my old street directory to create a random collage-effect would be perfect! I attached some of the pages using Mod Podge though found that the thinness of them caused some bubbling (nothing major, and it pretty much dried out completely, though enough to bother me) so I completed the lining using double sided tape – simple and perfect.
Project complete!
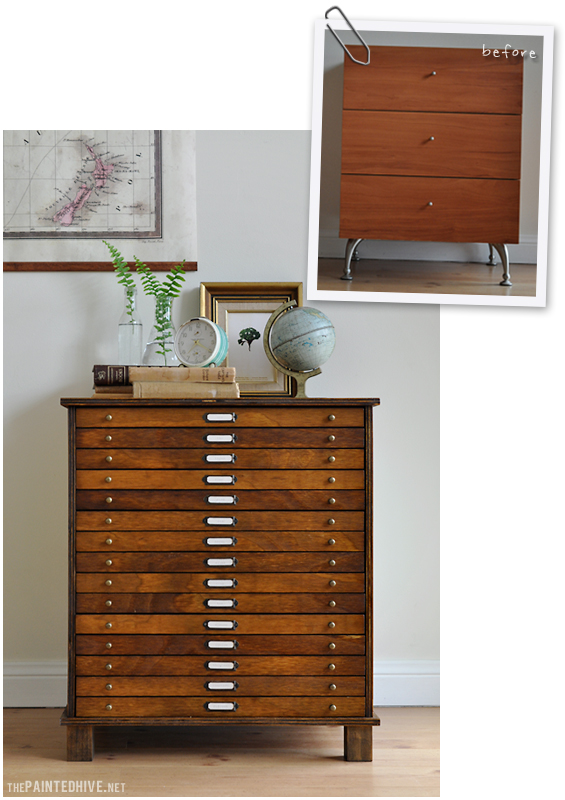
Remember what they looked like before? Here are some comparison pics.
Some of you might be thinking this all sounds like too much work, I mean, why not just make the whole thing from scratch? Well, it is definitely an option, though furniture construction (at least complex builds involving components like drawers) isn’t really my strong suit. Having a structurally sound starting point saved me a heap of time, effort and even money, not to mention the worry of it spontaneously imploding! Whilst it’s true that there was a bit of effort involved, it wasn’t really difficult, just a little time consuming and repetitive (given there were two of them).
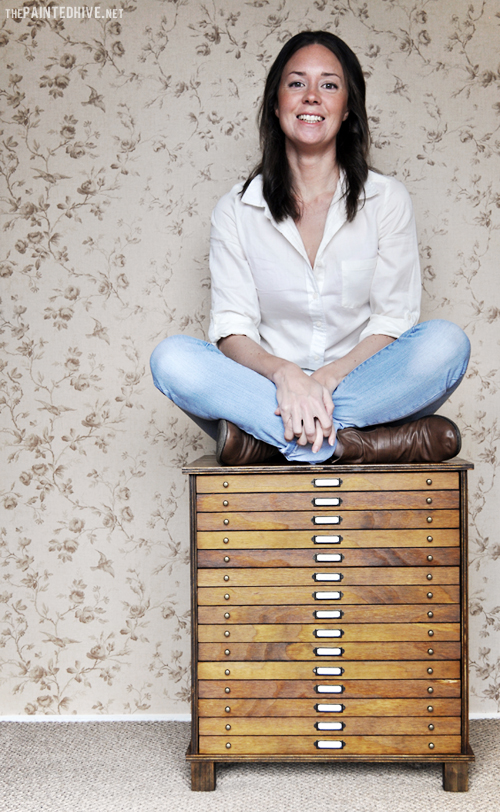
Now, here’s something you don’t see everyday, a photo of….me!
The campaign marketers requested one so I thought I may as well share :-)
Remember, along with the pieces of the other seven designers involved with this campaign, these babies are being sold for charity, so if you love them (or know someone else who would) be sure to stay tuned! I’m not across all the eBay auction deets yet, though can tell you they go live on Thursday 24 July. In addition, I’m excited to let you know that Feast Watson will be covering shipping costs Australia wide! How awesome is that? So, whether you’re in Brisbane or Broome you’re in no way disadvantaged (of course, if you’re located outside Australia you are more than welcome to arrange your own freight). I’ll be sure to post again once the auctions go live!
PS Lots of hugs and kisses to my wonderful husband who helped immeasurably with this project.
UPDATE
The charity auction has now ended. Thank you to everyone who bid. We managed to raise a cumulative $2,500 for the Salvos!








This is amazing! Love to see the transformation! Great idea!
GREAT JOB! THIS I would love to try out!
It’s nice to see something totally new and refreshing from the usual!
Especially love your last picture!
Catherine
Kristine, These look so high end…straight out of Restoration Hardware or a designer catalog. You did an amazing job and I can’t believe how creative and talented you are.
xx,
Sherry
Thank you Sherry. Means a lot coming from you.
xoxo
These are just amazing, they take my breath away. I have pinned these, but I am not handy with a table saw, or any power tools. I wish to change that so perhaps, some day, I shall follow your lead. Absolutely fantastic, you are so clever and imaginative,
Thanks Susan.
You should definitely give some power tools a go – very empowering (no pun intended).
WOW! Amazing job!
Love it! What tool did you use to cut the cladding? I have difficulties cutting long strait cuts without a table saw, but my garage isn’t big enough to hold such a large tool. But your photo shows a circular saw with some sort of guide??
Meg
That is our plunge track saw. It is AWESOME!
As you mentioned, it comes with a guide track so you get perfect lines without the need for a full table saw (we don’t have the space for one of those either) plus it is completely portable! It was a little pricey though so far has been invaluable.
If you Google “plunge track saw” (or similar) you should find them so you can read more and check out the prices.
Kristine
xoxo
Would you mind terribly telling me what brand and model your plunge track saw is? Didn’t even know there was an alternative to a table saw so this is great!
Apologies, I entirely forgot to say how blown away I am by your project! BLOWN. AWAY.
No worries Anna. I think this is the exact one: http://www.tritontools.com/en-AU/Model/TTS1400.
Up until a few months ago I didn’t know they existed either. Super handy tool.
Thank you, I really appreciate that.
Amazing! And it’s nice to see you :)
OMG! They are absolutely stunning!
You are amazing…to see the potential in a piece is one thing
but this one totally blew me away. Your execution is perfection!
You deserve an award of some kind!
He, he, too sweet. Thanks Tery.
These are so unique! Love them so much :)
They are absolutely incredible, you’ve outdone yourself with these! Lovely photo of you too x
truly amazing!
Wow – another gorgeous project that is perfect to the last detail! That last photo of you is beautiful – so glad you shared!
Thanks so much Karen :-)
WOW! I am completely blown away, what an amazing makeover! I love everything you did, but I am particularly taken with lining the drawers with maps – what a fabulous touch. Plus, I love your photo!
Thanks Julie. I’m so glad I thought of using pages from my old street directory – I really love they way it looks.
Kristine, you’ve done such a wonderful job – I had to look twice (and then three or four more times) to understand the intricacies of what you have done. It’s spectacular, love it! Well done! :-)
Cheers, Penelope
Thanks so much Penelope.
Clever, clever you Kristine! You did a lovely job and certainly not one that you automatically think of when you see the before pics! Now I’m off to look at the other contributors
You are a genius! The tables are beautiful.
OMGoodness!! I would not have believed this was the same piece if I hadn’t see how you transformed it! I can honestly say I don’t think I’ve ever seen a more amazing transformation. You are so talented.
Thank you Anita.
Those tables are AWESOME! Fantastic job as always :)
They are amazing, a perfect project!
AMAZING. I hope you’re keeping one set for yourself! You look like Princess Mary of Denmark in that photo.
WOWSERS! Amazing and so very inspiring! Love what you’ve done. (and the pic is cool too!)
Thanks Jelaine :-)
BTW I’m getting around to your design consult – promise!
Wowza! I’m quite certain this is the most remarkable furniture transformation I have ever seen! They look so beautiful now!
Thank you Lisa. Your comments are always so sweet :)
This is the most amazing furniture makeover I’ve ever seen – truly amazing !
Pinning right now !
Hopping over from Bloom Design – so happy I did!
Hugs,
Suzan
Thanks so much Suzan.
Holy Moly! These are freaking amazing! I want them! Great job.
Thanks Rebecca.
:-)
Amazing, amazing, amazing!!! What a transformation you’re a total upcycling magician… I’d love to try this out one day. There is definitely going to be a very happy bidder out there in a few weeks! :) Tina
Thanks so much Tina. Still totally looking forward to checking yours out. Be sure to let me know when you share :-)
This might be the best furniture makeover I’ve ever seen. Well done!
He, he. Just made me giggle.
This is the most stunning example of turning a sow’s ear into a silk purse!
Beautifully though out and executed. Would love to make them mine :)
Kristine, amazing. can you imagine if you had your own shop. Even the way you dress the room is items we all want to have. Was also delighted to see a new picture of you. Your looking younger, all that creativity is keeping you healthy indeed. Thank you darling as always it’s such a treat to receive your posts.
Oh Carol, you are just too, too sweet. Never fail to make me smile.
hi Kristine, I love Feast and Watson products so well done on the competition but mainly I wanted to say I love these drawers. Now I’m going to be wanting to try something out like this myself. they are just fabulous. Once the eBay campaign is up I’ll share on my site/fb page for you also
cheers Fiona
Truly impressive and inspiring! Wow! You are so talented.
Amazing! I am always excited to see your name in my emails. Your tutorials are excellent and inspiring. You do look like Princess Mary!
Kristine, twice in 1 week you have impressed me with your awesome creative skills. Thanks, Julie.
P.S. I think we may have a 2 degree of separation through your husband if he is a teacher too??!!
I like! I now need to find something suitable I can use. Maybe I wil change my tall boy into a map drawer cabinet. Thank you for the clear instructions. I’m so impress with the Re Loved end product. You did an awesome job!
You have outdone yourself. It is hard to believe that these are the same pieces of furniture that you started with. I love the idea of using maps for drawer liners. I wish I lived in Australia so that I could bid on these. I think shipping to the US would be prohibitive but thank you for the tutorial which travels well! I think you’ve created a new category for up-cycling. Well done!
Holy Christmas….those are gorgeous! I know it was a lot of work but the finished product is so perfect….all of the details. Of course….you never disappoint:)
He, he, “Holy Christmas”.
Thanks Sherry. A bit of work though more time than anything.
xoxo
Love the bedroom refresh you did for your best friend recently too.
You have got to be kidding me!! I’m in love!
Wow, amazing!! Super, I love it!
You’ve got to be joking… this is amazing!! Totally in love!
Amazing, amazing… I love it and the maps inside made it even more perfect! Great job!
I concur with the general opinion…AMAZING!!!
I must admit, sometimes I don’t read every word of a blog post… too impatient I suppose. However, I read and studied very sentence of your post. It’s so informative and helped me fill in my gaps of understanding with regard to properly measuring, tools, materials, etc. The finished products are stunning. Thanks also for the introduction to new products like the stain and danish oil.
Thanks Martha
I love your most recent makeover too (the light grey sideboard with the beautiful wooden top). Tried to leave a comment though for some reason I couldn’t get it to publish. That large map wall chart is to die for too!
These are amazing. Every step of the way my jaw dropped lower and lower!
You rocked it, Kristine!! My first time here and love what you do. I’m getting ready to set up my at home office and asked my hubby if we could find a “diamond in the rough” to turn into an apothecary cabinet. He gave the go-ahead and I’ve been on the hunt. I wasn’t looking at the style you redid, but now I will! :o)
Awesome Larissa!
Mine are more inspired by document drawers though I do love the look of apothecary cabinets too. I guess they tend to have more of a grid-like formation with squarer drawers. Would love to do something like that one day too!
AMAZING!!!!!!!!!’!!!!!!!!!!!!!!!!!!!!
That’s a whole lotta exclamation marks :-)
This is such a spectacular makeover! Since you announced the project, I’ve been waiting for them every single day I must admit ;) The look of stained ply is very appealing. You inspired me to make shallow ply drawers for an old metal caddy I plan to revamp. Thanks a lot for sharing, what you make is always such a feast for eyes!
Thank you Monika. Stoked to have inspired you.
xoxo
This is really awesome. Regarding your plunge how heavy is it? Does your hand fit it well? Is the safety turn on button easy to use? I’ve been doing research on them to find which brand to purchase.
Hi Carla
For a saw I guess it’s reasonably light. As with most power tools, size-wise it is designed to better fit men (grrrr) though it is comfortable enough. The safety is thumb operated and quite easy to use.
If you’re uncertain, I would recommend visiting a hardware store and comparing in person if at all possible.
Hope this helps. It’s a great tool.
Kristine
Brilliant…..so clever :)
I am crazy in love with this transformation! Thanks for including such an awesome tutorial as well. I’m sharing your awesomeness on my FB page here – https://www.facebook.com/KnickofTime. I hope you’ll come share it at the Vintage Inspiration party on Monday evening!
I’m in shock. Amazing.
Stunning. I’m on the hunt now for a similar set of drawers for the inside, so I can transform the outside. If I wasn’t in the US I’d bid in a heartbeat.
:-)
Well done! You should be proud. I really like the map drawer liner. Very nice touch. I liked the original piece too though. Oh wel,l sometimes you gotta break a few eggs.
Thanks Tom. To each their own :)
I wasn’t personally a fan of the style they were originally and, to be honest, in person they looked pretty crappy (probably how I managed to purchase them for just $12 each). I failed to get some close-up pics of the laminate though it was actually pretty badly chipped around the edges.