
I know you guys think I’ve forgotten I’m supposed to be finishing the living-dining room makeover at my parent’s house, though I am still working on it…and it’s sooooo nearly done!
One of the projects I’ve just crossed off the “to do” list is the window treatments.
There are three large windows (one incorporating a glass sliding door) in the space so it was a biggish job and getting it right was important.
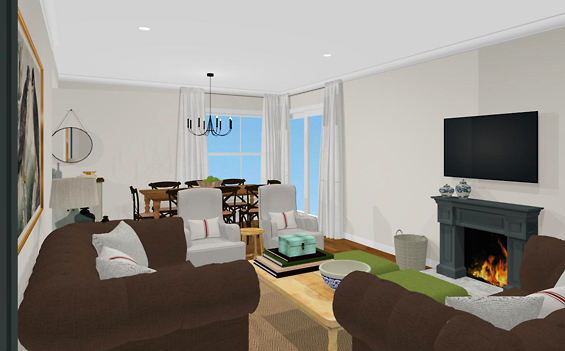
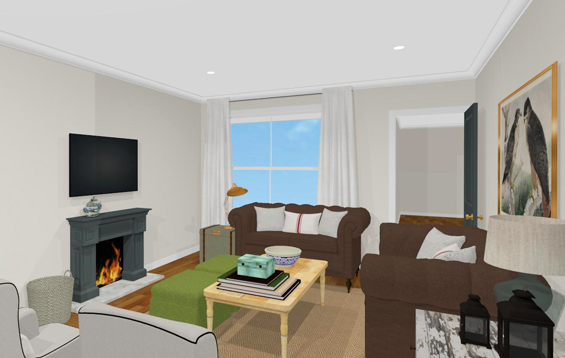
Here they are in my initial concept renderings…
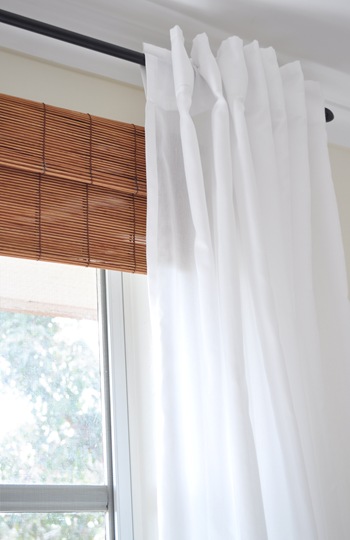
For privacy and light and climate control we started by installing simple white block-out roller blinds which blend seamlessly with the architraves.
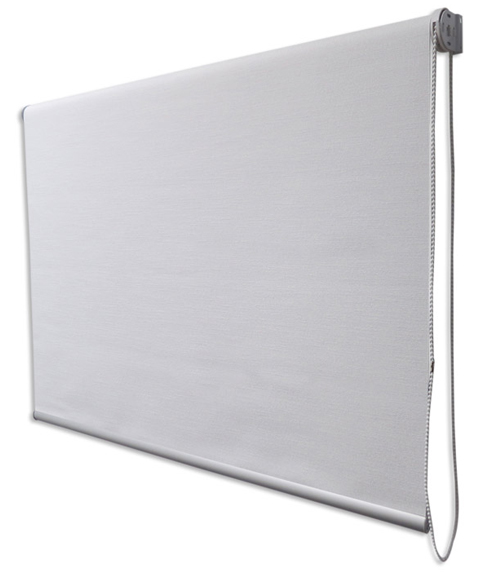
Practical, yet not so pretty.
Roller blinds are my go-to. They are super affordable, incredibly functional and relatively streamline – which works well if you’re after a clean look. If, however, you want to create a sense of cosiness and make a bit of a statement with your window dressings, they do lack the softness and impact of some fabric treatments. So, we also decided to hang stationary drapes. These not only help temper the lines of the window frames and provide relief from all the “hard” surfaces in the space, though also work to conceal the roller blind cords and ends.
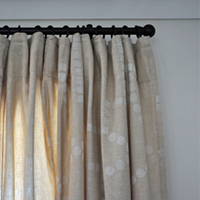
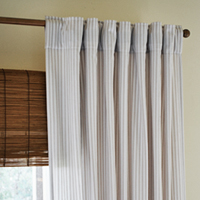
You might recall from one of my previous posts that we went with inexpensive off-the-shelf curtains from Ikea (the LENDA in beige).

The tie-backs make them look a bit dated in this pic. We won’t be using them.
Ikea curtains are a great option. In general they are quite affordable and come in lots of simple styles which lend themselves to a myriad of schemes and are perfect for further customisation. Also, their proportions tend to be quite generous which allows for mounting them high or pooling them on the floor (if you like that look). More than that though, their ample drop also provides wiggle room for adapting the heading (with ease) if desired – which is exactly what we did!
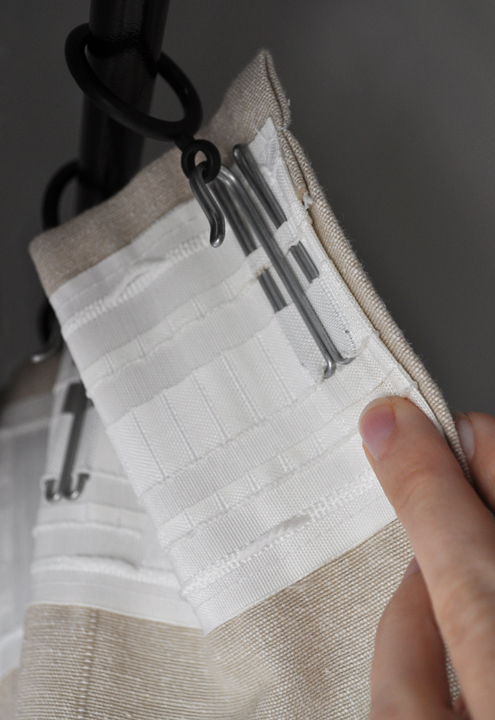
To give our curtains a more tailored look, we decided to remove the tabs and add little rings. This was a simple matter of cutting off the existing tabs, re-hemming the top then sewing on some heading (pleat) tape.
Next, to determine the right drop, we hung them on their rods (mum previously had curtains in the room so we simply used the existing ones), pinned the bases up so they just skimmed the floor then took the curtains down again and sewed-up the hems.
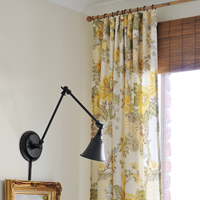
To further customise the panels, I also decided to add a subtle pattern in the form of a trellis stencil.
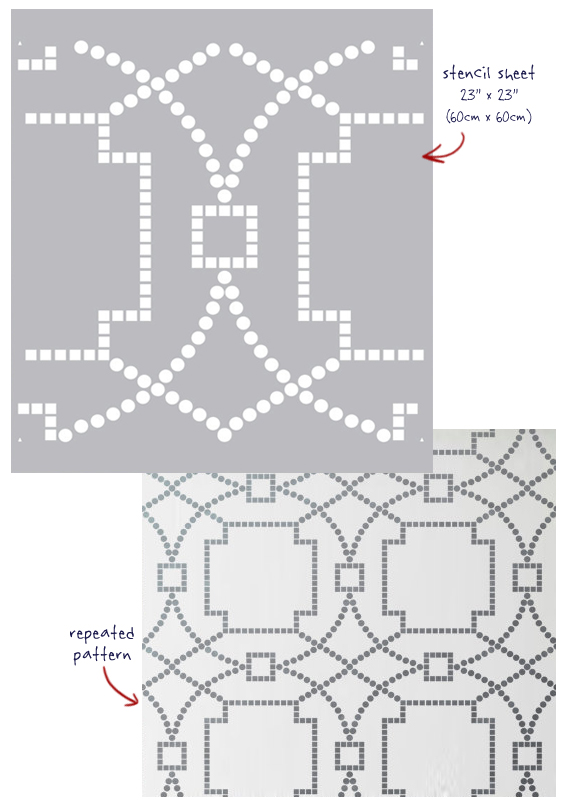
I bought this stencil for a project about three years ago and never got around to using it. I found it here on Etsy. The pattern’s not absolutely ideal for curtain panels though it was fun to use something I already had.
I haven’t really stenciled since I was a teenager and thought it would be cool to make my bedroom look galactic! And I’ve never used a large all-over stencil before. Though despite my initial hesitation it was actually super easy. So easy I didn’t feel it even warranted a proper tutorial, though here are the basics of what I did…
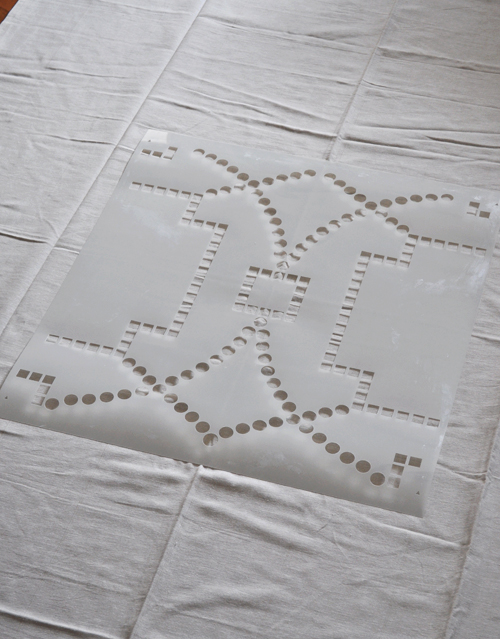
1 With a curtain panel laid flat on the floor, I positioned the stencil in the center.
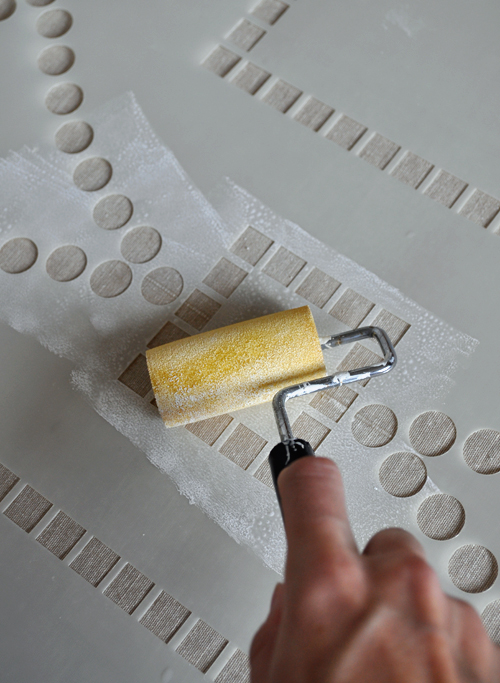
2 Using quite a dry foam roller (I “off-loaded” excess paint by rolling it back and forth in a small paint tray), I applied a sparing amount of white acrylic craft paint.
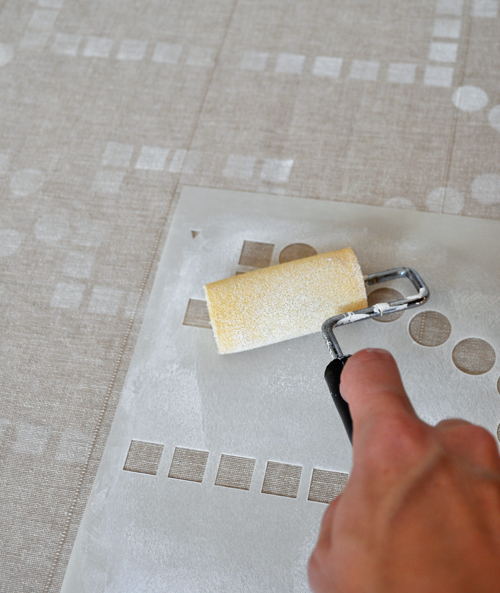
3 Once one full stencil was complete and dry to the touch (sparingly applied acrylic craft paint dries almost instantly on fabric), I lifted the stencil and re-positioned it as required, working from the center out until the whole curtain panel was complete.
I started quite cautiously, measuring to the center of the panel, taping down each side of the stencil and using the “registration elements” (small triangular marks you can see in one of the above pics – designed to act as a guide for accurately re-positioning the stencil). After my initial panel was complete however, I decided it wasn’t necessary to be too fussy. I stopped using tape and started guessing where the center of the panel was based on the fold lines. I also gave up using the registration elements and simply eyed the re-positioning of the stencil. It was heaps quicker and the results are identical. If I was stenciling something really prominent, like a wall, I would probably take more care, though curtains are pretty forgiving. Besides, I did want a slightly imperfect “hand-made” look anyway.
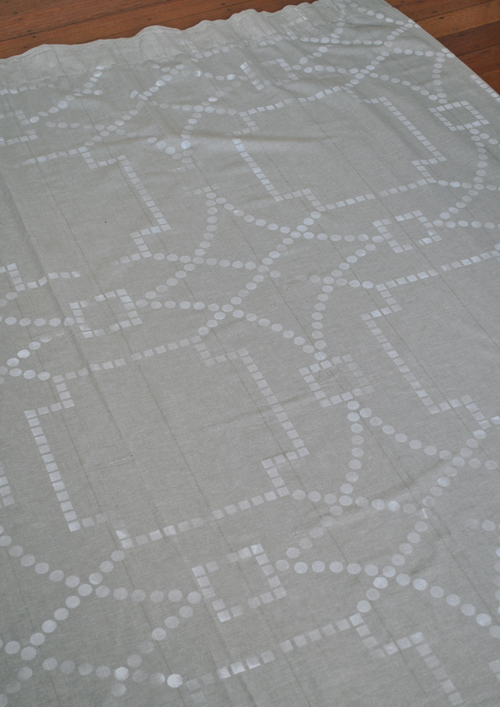
Because the curtains won’t be closed, you don’t see the stenciling in its entirety. It’s a bit of a shame because the trellis design is really cool though I do love the way that little hints of pattern peek out here and there, helping to break-up the beige and add some interest.
And I adore how the dots and squares impart a slightly tribal feel.
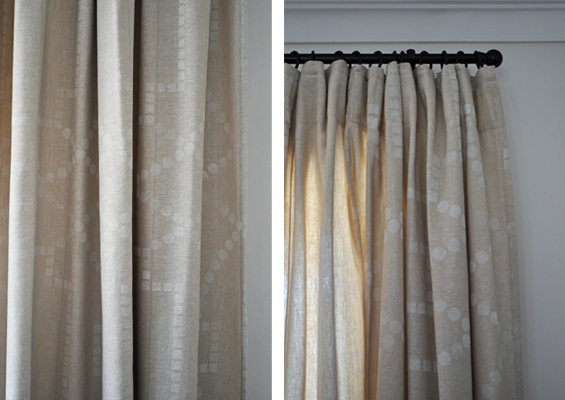
Sorry I don’t have any “full” shots…they are coming soon along with the complete room reveal!
As mentioned above, mum previously had curtains in the room so we used her existing metal rods and brackets. And to keep costs down we went with plastic rings and finials.
Yep, they’re plastic. Is that a decorating faux par? Can anyone even tell what they’re made of when they’re seven feet off the floor? I know I can’t.
Hang on then. Just pretend I never told you and no-one will ever know. Shhhh.
![]()
Catch up with all posts about this room makeover here.


Ooooo – I’m definitely using that idea for my bedroom curtains! I love how subtle the pattern is. Thanks for sharing. :)
Thanks Deb :)
I love the simplicity of this and can’t wait t see the curtains in the room!
Thanks Lorraine. Can’t wait to share!
WOW! They look so good.
Cheers Ronald :)
Love how these turned out! Can you share where you found your drapery rings? I’m struggling to get my custom drapes (expensive) hang properly, which cheapens the look :(.
Thanks!
Hi Melissa
Wish I could help, though I believe you’re based in the US? I’m in Australia and bought them from a local store here. They should be available in lots of places though.
Kristine
I am DYING for a sneak peak of your re-love dresser that is in the works!
Love the curtains though. Just enough to create interest and give that customised feel.
Thanks Anna. Ah, yes, the Re-Love sideboard! There might be a few sneak peeks next week :)
This is an amazing idea! I have some black similar curtains that feel so plain in the space but I think I might try a technique to spice them up! Thanks for sharing!
Yes, you are absolutely correct…And it is very informative and very clear and easy to understand..
Hi Kristine,
I’m just about to stencil some IKEA Lenda curtains, as I was unable to find anything at all suitable for my room. (What is it with this country? No nice drapery fabric to be had!). You say you used acrylic craft paint. Do you mean the simple tubes (eg Derivan), which we used at school? Was there a reason you didn’t just use wall paint instead? I take it you didn’t use any fabric paint medium mixed in with it? Mind you, we all know it never came out of our uniforms, so I guess it’ll hold fast!
I’d be very grateful if you could let me know. Love reading your blog, and seeing all your nifty ideas. Thanks Kristine.
Cheers, Liz. (NSW)
Hi Liz. Yep, I just used standard acrylic craft paint (possibly Jo Sonyas?). I did choose it over wall paint because I find it is better quality (much thicker – for great coverage and minimal bleed – and dries super fast). You could use wall paint instead and the results would probably be very similar. If I was using a stencil which required lots of paint, I might even opt for wall paint because it would be heaps cheaper. I didn’t add any textile medium as they’re unlikely to be washed often. You’re right, paint sticks pretty well to fabric without it (I have a pair of pants which can certainly attest to that!) though I think it also helps “soften” the paint to avoid cracking and flaking. For something like cushion covers which see lots of use, I think the textile medium is probably beneficial, though drapes should be able to hold their own.
I’m not sure if anyone has posted this info already but…if you require curtain length to be longer than the standard IKEA Australia length of 250 cm, then you can buy IKEA UK drapes on eBay. They are manufactured to be 300 cm long. I was so relieved to discover this as it saved me from having to modify/insert a horizontal band on the IKEA Australian drapes.
That’s a great tip. My ceilings are only the standard 240cm so the length of the regular drapes is ample for me, though I imagine anyone with high ceilings would love to know about this. Thanks for sharing :)
This is a great idea! Oh how i love learning new things! Thanks for posting this!
Hi what brand of drapery tape did you use for this project?
Sorry, I have no idea what the brand was. Can’t even remember which store it was from! It’s either the IKEA tape (https://www.ikea.com/au/en/catalog/products/10296954) or something we found at Spotlight.
Hi Kristine, thanks for sharing. I love the design of living room. I’m also looking for some ideas with simple curtain tracks during the lock-down. This definitely inspired me! Take care!