
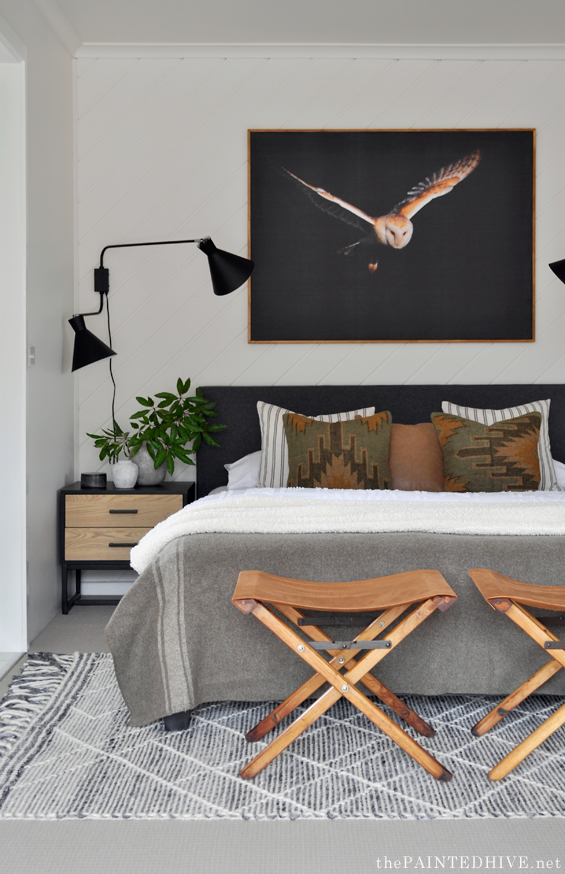
Thank you all so much for the amazing response to my brother’s bedroom reveal. I was incredibly flattered by all the lovely comments.
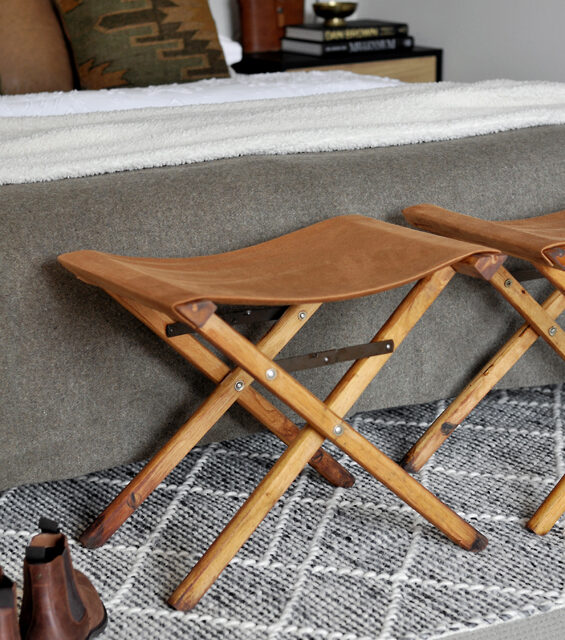
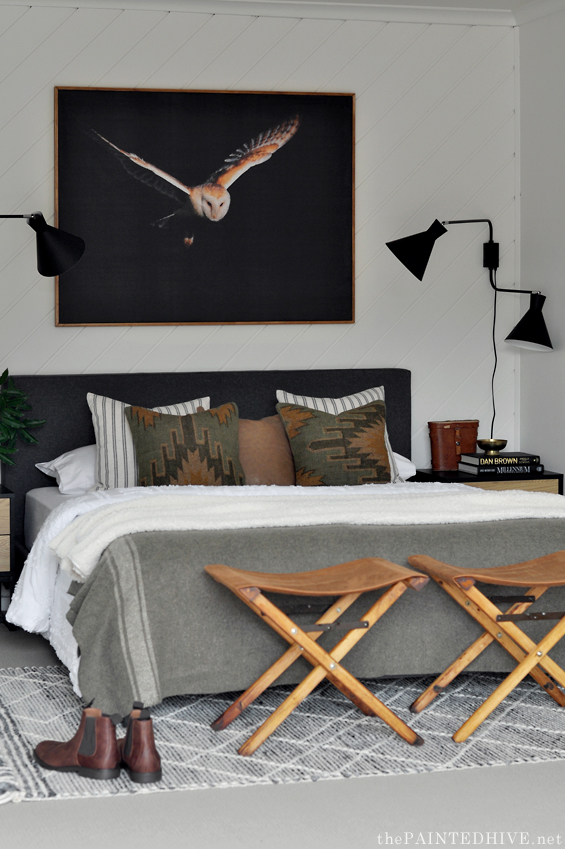
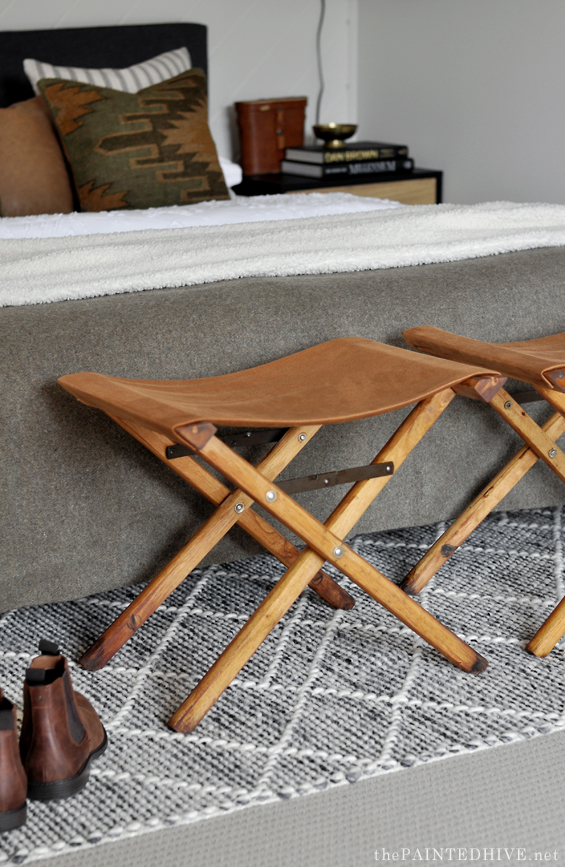
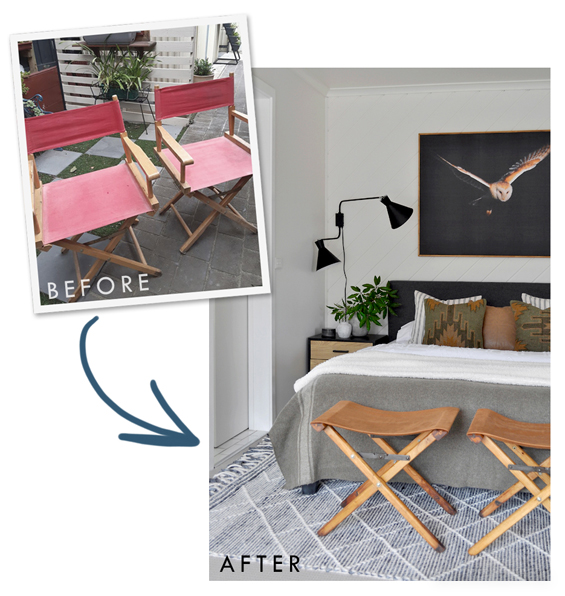
There were many mentions of the end-of-bed stools which I created from two old director’s chairs.
It was a really easy and affordable project and they add so much warmth and character to the space.
Here’s how I did it…
STEP 1 | SOURCING
Of course the first thing I needed to do was source some inexpensive second-hand director’s chairs.
The most common style have vertical supports at each corner, like this…
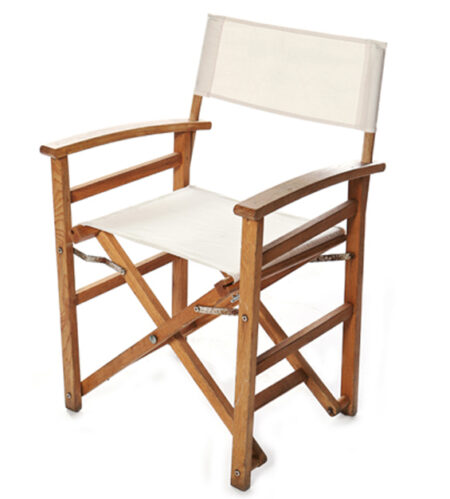
But some have a simple cross base, like this…

I was open to the idea of using the more common style if needed, but I didn’t really want the vertical supports. I was pretty certain it would be okay to remove them and that the stools would still be sturdy, but as I didn’t use them for this project I can’t really say for sure.
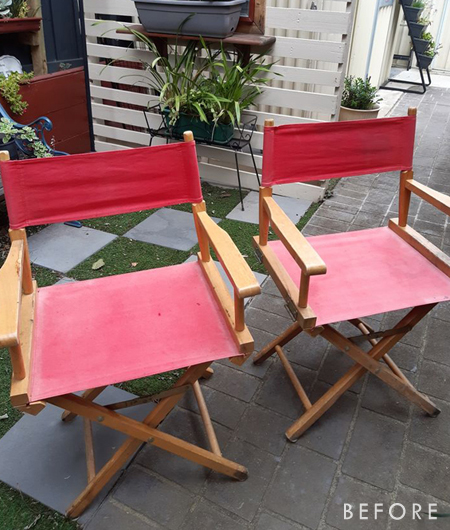
After a little bit of hunting I was lucky to come across this pair with simple cross bases on Marketplace for just $20.
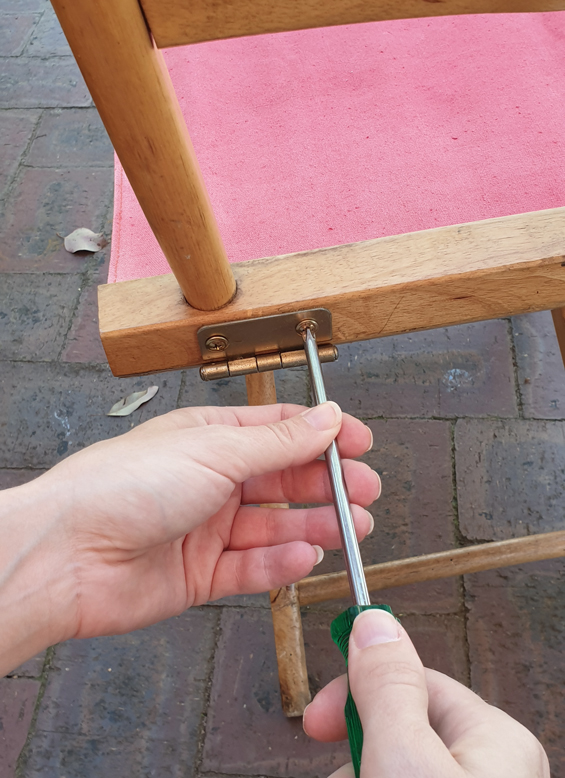
STEP 2 | DISASSEMBLING
Because these stools are designed to fold flat, the top section was merely attached with hinges so removing it was a simple matter of undoing some screws.
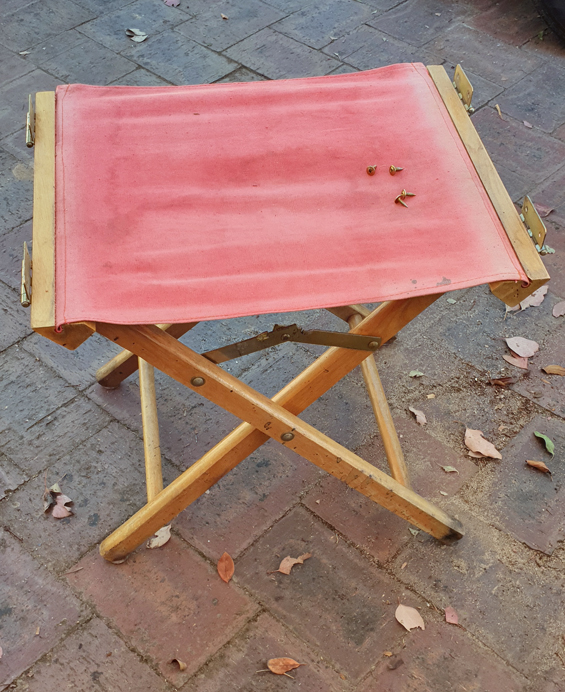
Next I removed the old seat fabric to be left with a naked frame.

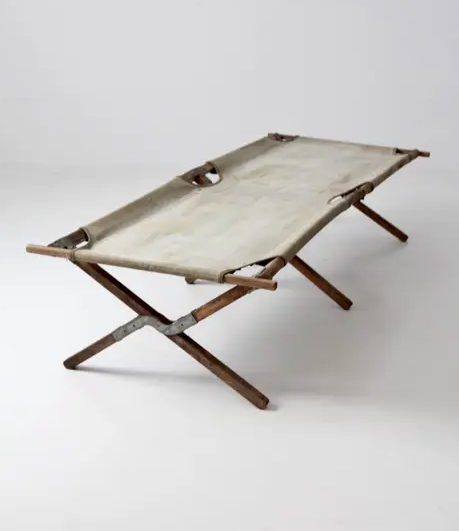
Now, in hindsight I didn’t need to do this next bit. You see my original plan was to combine the stools into a campaign style bed I could use as a bench, kinda like this…
So I trimmed off the horizontal dowels because they looked too busy.
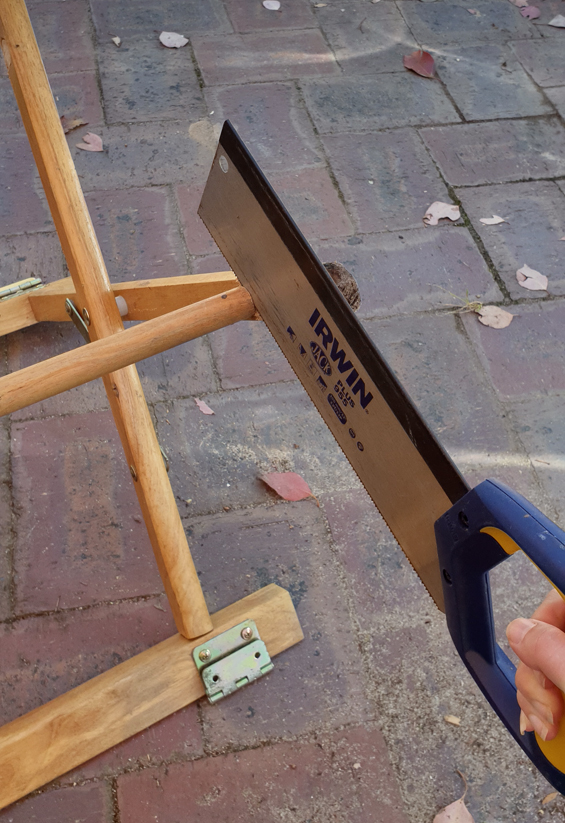
But, after playing around with some visual ideas for the bench, I decided I didn’t like the scale of it so scratched that plan. Which left me with the two stools which would have been fine with the dowels still intact. But, oh well. Thankfully removing them didn’t effect the stability of the stools.
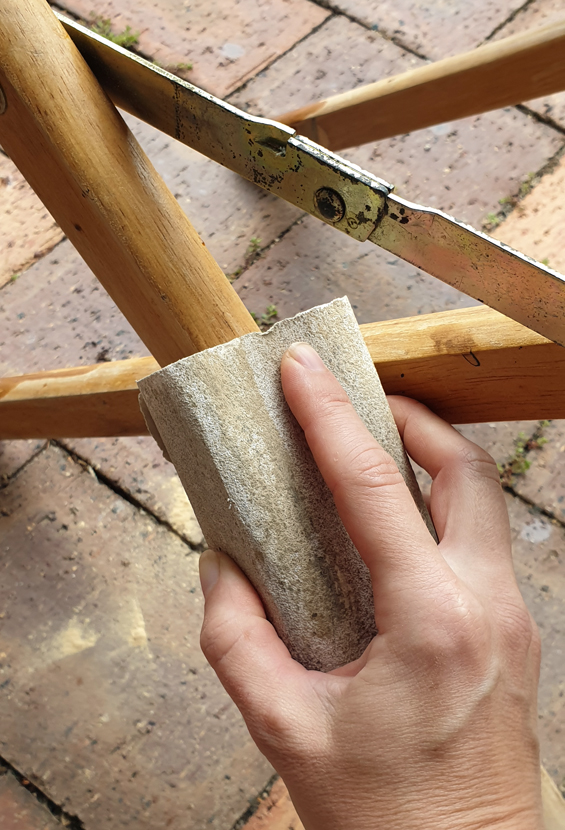
STEP 3 | REFINISHING
There were quite a few knocks and dents in the timber, even some minor breaks, so I was never going to make things look brand new. Lucky I like a bit of vintage charm.
All I did was fill a few holes with wood putty (including the ends of the slots where the original fabric was embedded) then lightly sand and thoroughly clean the timber before sealing with some linseed oil lightly tinted with oak stain.
Tinted oils are great when you can’t be bothered going right back to raw timber but still want to nourish and slightly deepen the wood.
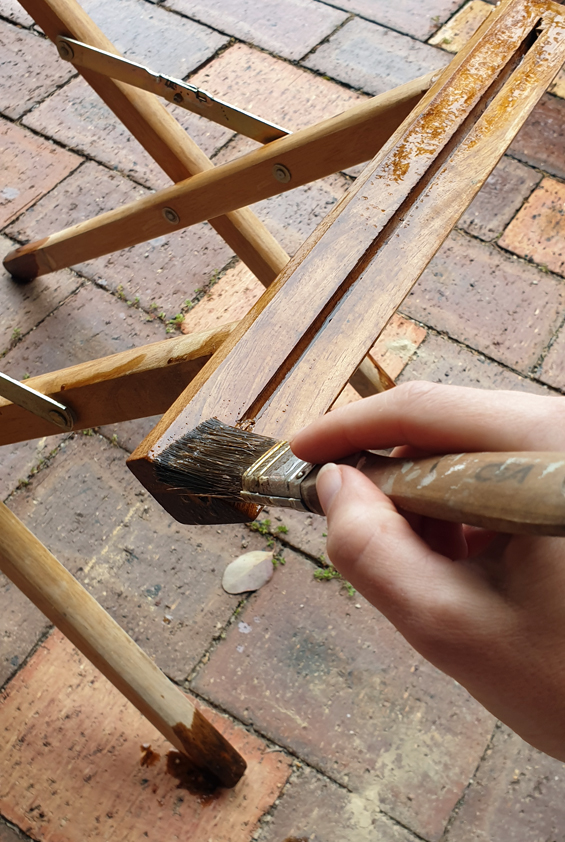
I contemplated leaving the rusty steel brackets as is, but in the end I felt they were a little too patchy so decided to paint them bronze.
The paint will likely scratch off if the stools are folded but there’s no real need for that given they’re being used as fixed items of furniture. Plus, it’s an easy touch-up job.
STEP 4 | UPHOLSTERING
This was super easy.
I used a suede style faux leather which doesn’t fray so no sewing was needed! I bought the fabric from Spotlight several months back. Sorry, I can’t recall what it was called but from memory it was around $12 per meter.
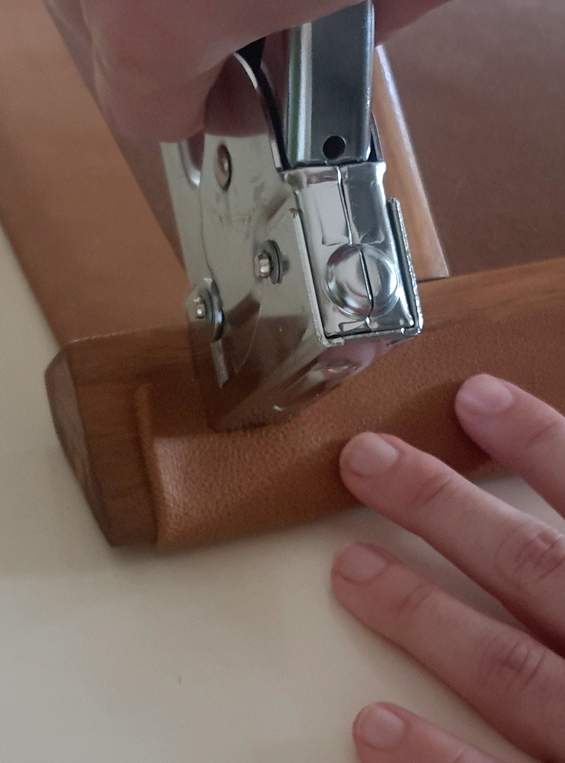
Rather than upholster the stools in the same manner they were originally (where the fabric was embedded into the slots), I decided I wanted to wrap my fabric right around. Not only was this easier but there were some obvious breaks in the wood around the slots so this would ensure they were covered.
All I did was trim my fabric to size, position it on the stool (folding the long sides under to conceal the raw edge), then staple it to the underside.
Rather than make it super taut I gave it a bit of a slouch for a relaxed look.
Of course, you need to be mindful of the weight of your fabric, using something quite strong and rigid, as anything too thin or stretchy could easily sag or tear. If you’re worried you could always attach some webbing to the base first, like this…
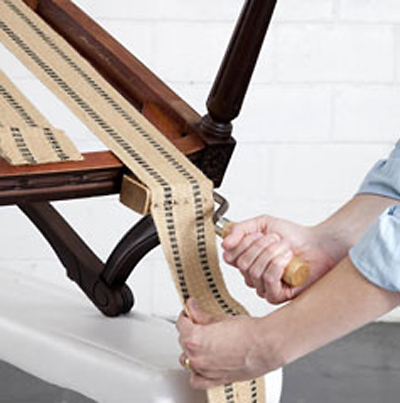
Or you can reinforce your fabric with a backing.
In addition to, or as a substitute for, the staples you could use upholstery tacks. This would definitely be a good idea if your point of attachment is somewhat visible as exposed staples don’t look the greatest.
And it was as easy as that!
DONE!
As you can see the timber is still quite “rustic” with lots of tonal variation and imperfections, but as I mentioned earlier that’s not something which bothers me. In fact, it’s often something I deliberately incorporate to add character and interest to a room.
Feel free to shoot through any comments or questions.
![]()


Thanks for the tutorial, very detailed and you are a rock star at the simple makeover.
Thanks Kathy :)
Love, love! Thank you for instructions now excuse me whilst I go search marketplace!
Ha, ha. Have fun!
Who would have thunk it , but you … BRILLIANT idea and job! You NEVER cease to be original! ;)
Thank you :)
CORRECTION: You NEVER cease to be ordinary — you’re so CREATIVE! ;)
Great idea… Thanks for helping us figure it out! As always, you’re amazing! Always exciting to see your name in my inbox. :)
Brilliant! I am off to scour for some directors chairs now!!!
What an imaginative and creative idea, expertly executed! Thanks for the idea and the detailed photos.
Thanks so much. You’re welcome!
Nice work! :) So creative!
This is such an awesome DIY! It’s genius! Love the look too.
Thanks Amy :)
I went straight to eBay to look for chairs until I realised I don’t need chairs or stools. At least right now. 😆
Fantastic transformation as usual! Your vision always blows me away. ❤️
Brilliant!!! Such a simple item, why didn’t I think of it.. And I love the dirty leg look.
Ha, ha. Thanks Pat :)
Very creative as usual! Well done
Love it, love it, love it. You have a real talent for taking something that’s and a little tired and turning it into it something really classy.
I am so glad you are back and with such an amazing makeover! Your brother must the thrilled! Every time I hear news of Australia, I pray for you and your family. You are one of two women with families I “know” in Australia 🙏🏽❤️
I love this makeover – and how clever to suggest we use webbing under the fabric.
About two years ago I was cleaning out my in-laws’ house and I came across an old cot, similar in style to the one you have pictured. Sadly I didn’t keep it. I donated everything to a thrift store owner, so hopefully someone recognized that diamond in the rough!
Thanks so much for the inspiration!
Love the rustic feeling you add to this chair. Thanks for sharing!
Looks great.
Brilliant! All I’m left is to find director’s chairs ahahahah
Seriously though, this is a great tip on how the true design value of this may be frequently desguised!
Love from Portugal
Thanks Andrea.
I love this idea!! I would have never thought to turn director chairs into little stools! I definitely need to try this out!
Really fun idea. Hope there was use for all of the cutaway parts, too!