
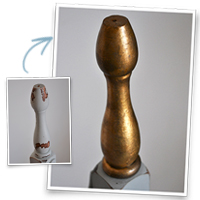
Ever since painting my Chippendale desk chair….by hand…with a brush…over the course of several hours…a paint sprayer has been high on my ‘to buy’ list.
Some of you may recall I have sprayed furniture in the past using our air compressor, though that big, noisy, heavy piece of equipment isn’t something I like to reach for too often.
I mean, compressors are great for HUGE jobs or serious furniture refurbishers who churn out piece after piece, however for the occasional dabbler like me they can be over-kill. Call me lazy though lugging it out of the shed to complete a small or one-off project always felt too inconvenient.
My new spray system from Bosch however feels anything but inconvenient.
It’s compact, quiet and light-weight. Perfect for painting large or intricate pieces, like buffets, bookcases, dining chairs, anything carved and everything made of cane.
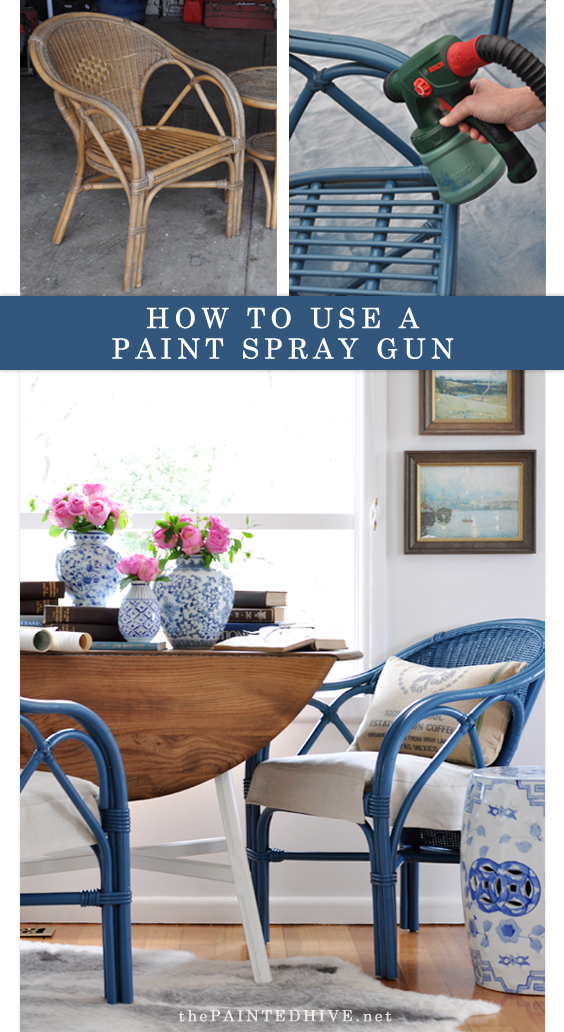
Just like this tired old outdoor setting of my parents…
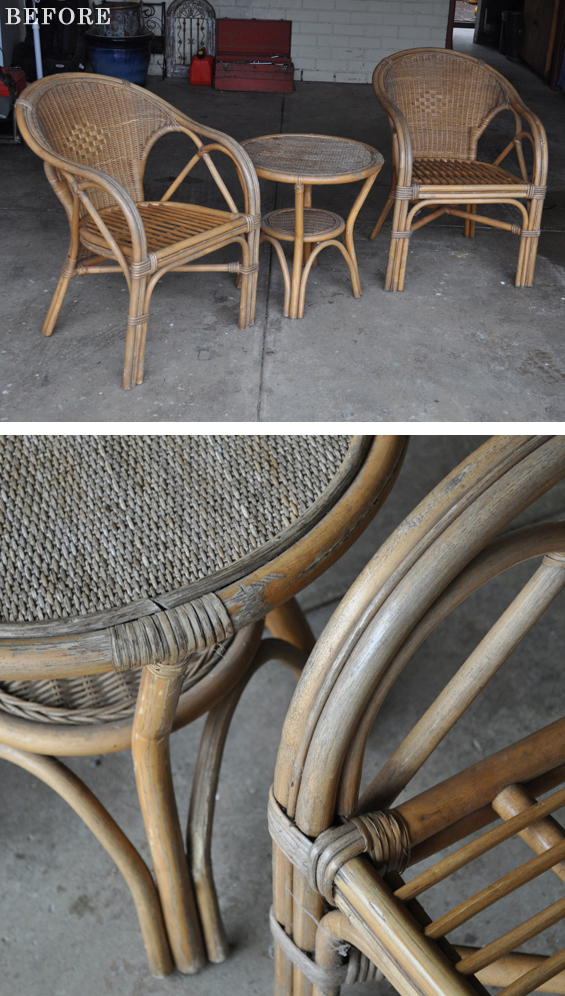
I love natural cane, and don’t mind a bit of weathered charm, though these were bordering on drab. Some love was definitely called for. So, here’s what went down…
STEP 1 | SAND & CLEAN
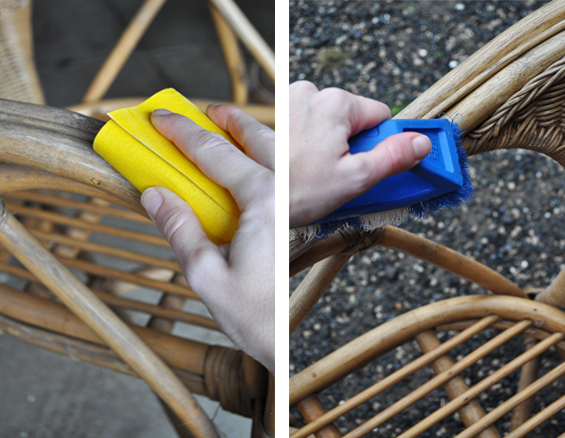
I started by giving everything a light sand then a thorough scrub with warm soapy water. This setting was covered in dust and cobwebs and was ideally suited for a good drenching with a pressure washer, though the weather was pretty cold so it would have taken way too long to dry.
Note: Remember, painting furniture with a spray gun isn’t quite the same as using a brush where you almost “push” the paint into the piece. You need to take your time with any prep to ensure the surface is ready to “suck” some paint in otherwise it will merely sit on the surface and scratch off with ease.
STEP 2 | PAINT
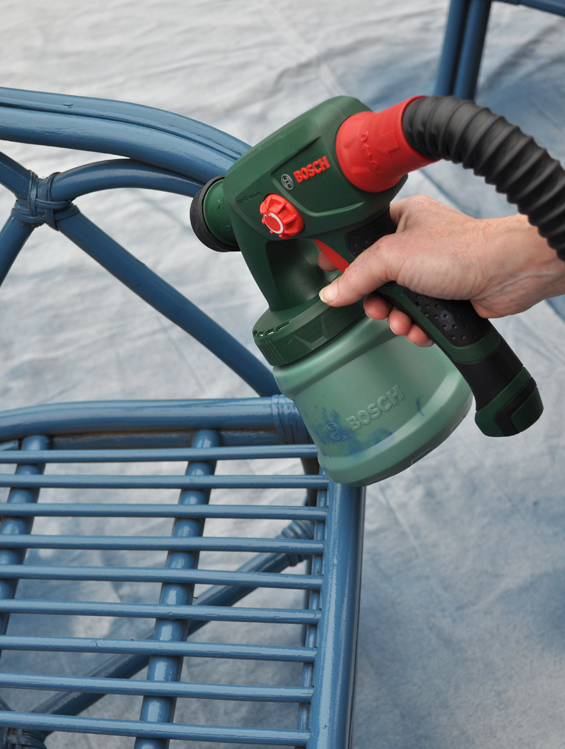
First, let’s talk about this spray system.
Basically, it’s a spray gun attached to a portable motor via a flexible hose.
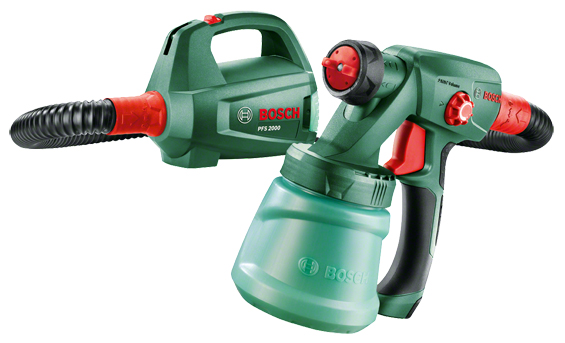
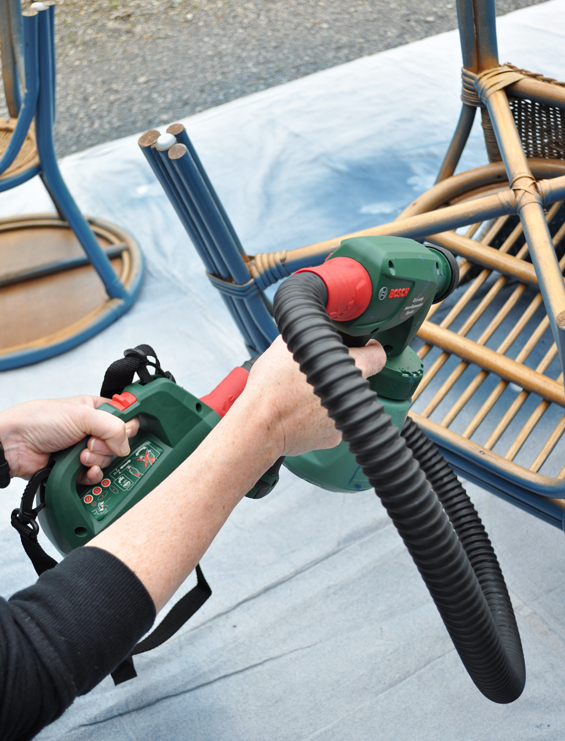
It runs off mains power so has plenty of kick and there are only two controls to worry about; paint volume (set by the dial on the side of the gun) and spray orientation (set by the dial around the nozzle of the gun). Trust me, it’s a cinch and soooo good! The motor has a shoulder strap and ergonomic hand hold so is easy to carry (I preferred to hold it in my hand or rest it on the ground).

As you can see, it’s very compact and easy to carry in your hand or over your shoulder.
To get started, I laid down a drop cloth (you could use one of those fandangle “spray tents” I’ve been seeing lately) and positioned my furniture so I could work around it with ease.
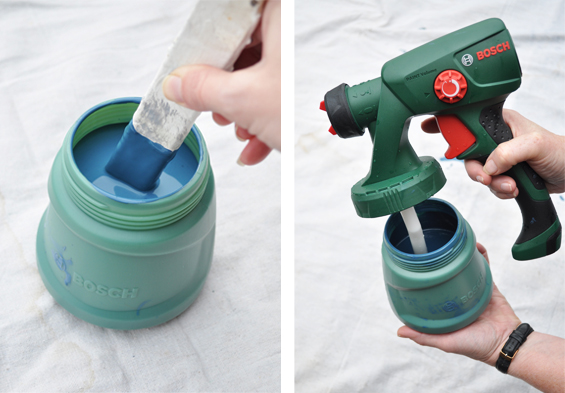
After giving my paint (see note below) a thorough stir, I decanted some into the provided container using the included sieve to ensure it was free of any large particles which might clog the spray nozzle (this is particularly important if you’re working with older paint which might contain lumps and bumps).
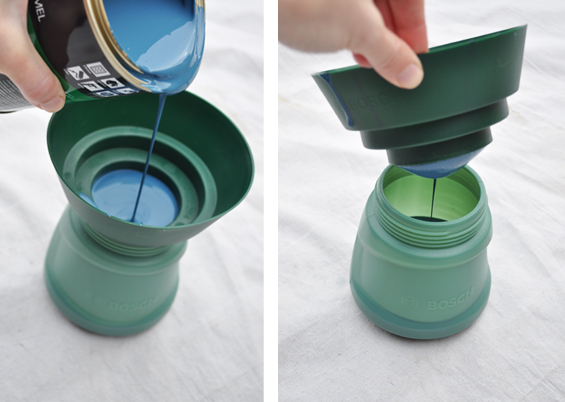
I then added around 10% water (to thin the paint slightly for smooth spraying) and stirred thoroughly again before screwing the container to the spray gun.
Before spraying my furniture, I pumped a small amount of paint into the air just to check spray volume and orientation and get a feel for the gun. Then I simply started painting my pieces!
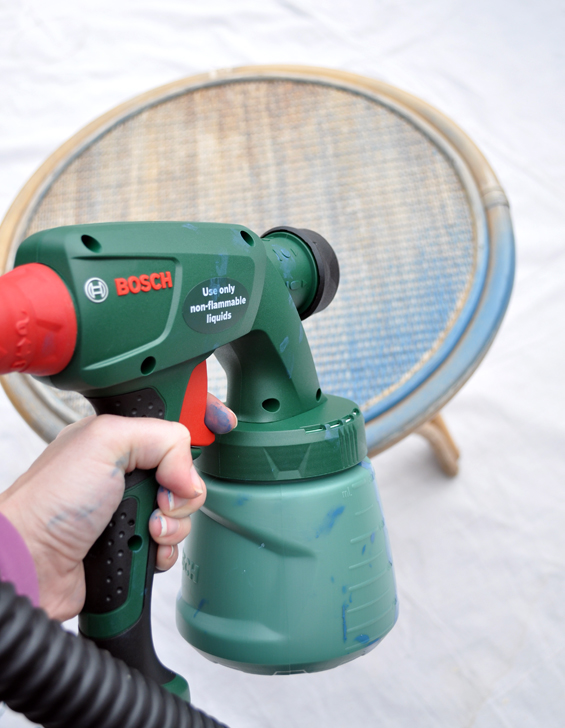
Excuse the fact I have paint all over my hands and the unit. Aside from the fine over-spray, it’s actually quite a mess-free process though it is tricky to take pictures and paint at the same time! Thanks go out to my mum who stepped in to pose for some of the shots :)
I held the gun around two hand spans away and lightly coated the furniture, taking my finger off the trigger from time-to-time to adjust the controls and re-position myself as needed. I like to work in sweeping motions following the lines of the furniture rather than in random continuous swirls. And I know it goes without saying, though several light coats are much better than a few heavy coats so don’t be too tempted to cover your piece entirely with the first pass.
Once I was satisfied with my coverage on the top side of my pieces, I needed to allow the paint to dry before flipping them over to complete. Rather than risk any paint drying or thickening in the gun, I decided to clean it while I waited.
I must admit, I was dreading the clean-up as I remembered it being a bit of a nightmare with our old compressor spray gun. Fortunately however, this Bosch gun was a breeze to clean! The parts unscrewed with ease and the paint washed straight off the plastic components. And to keep any left-over paint fresh between coats (or jobs), there is a container lid provided.
Once my pieces were dry, I flipped them over, prepared my gun again and then painted the undersides.
Thanks for being my hand model again mum!
Granted, it did take a few goes to get into all the nooks and crannies evenly, though it was still heaps quicker and easier than using a brush. All up, this project took me only around one hour (plus drying time). Pretty darn good.
Note: Mum had requested a bold blue so I went with ‘Winner’s Circle’ (by Dulux) in gloss acrylic. I don’t usually go for gloss though do think it works well with cane (something to do with Chinoiserie glam perhaps?).
Tip: I didn’t prime my cane because it was bone dry and I was applying a dark colour. If you’re working with a previously coated item which might repel your paint, or if you are attempting to cover something dark or tannin-rich with a light colour, a primer is recommended.
STEP 3 | UM, THAT’S IT!
Seriously, it’s that easy.
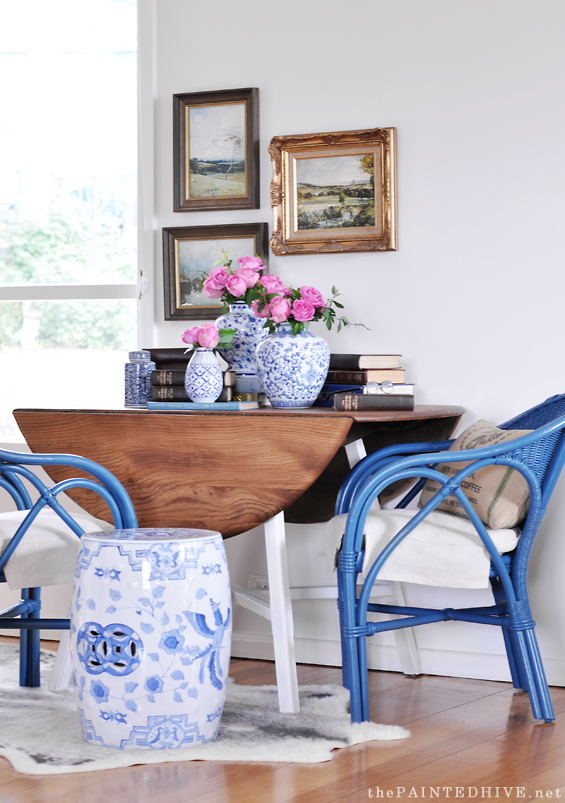
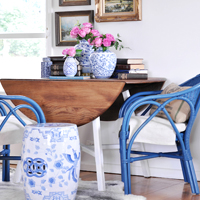
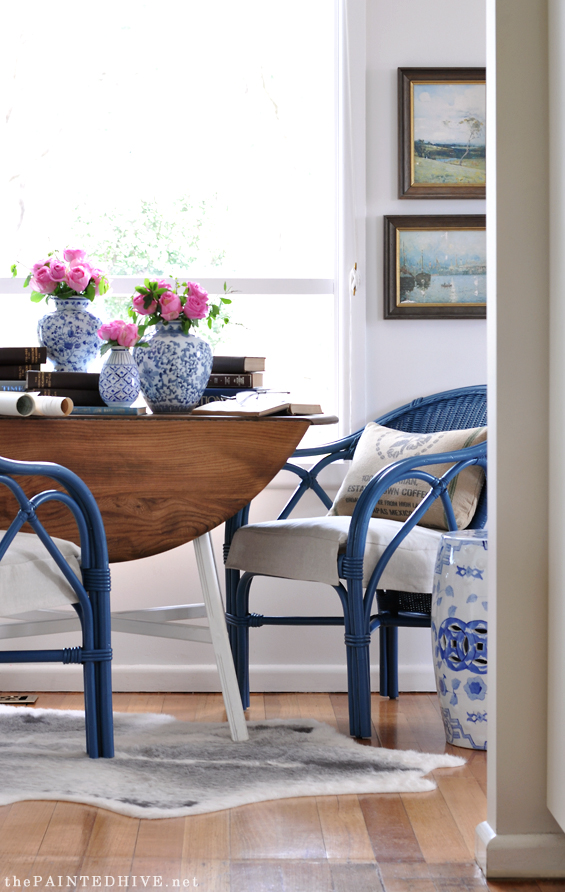
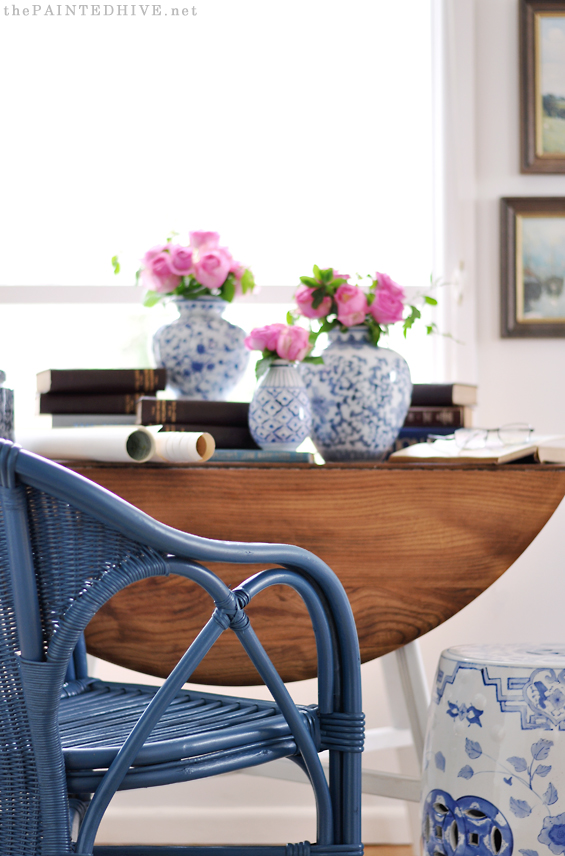
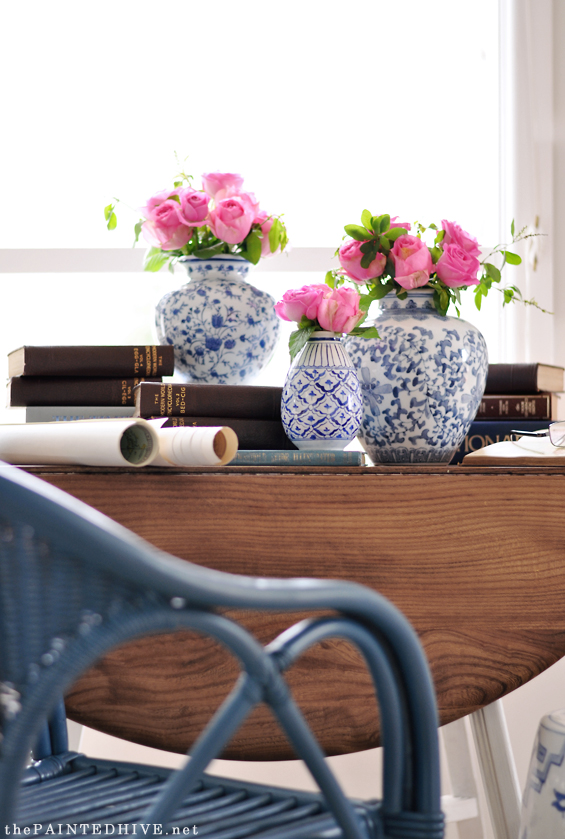
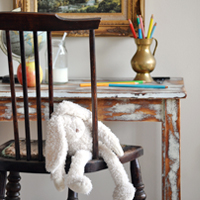
I was planning to shoot the finished setting outside (as, well, it is an outdoor setting) though the weather wasn’t on my side so instead I set the chairs up in my parent’s breakfast nook and styled the space like a little library of sorts.
It was fun!
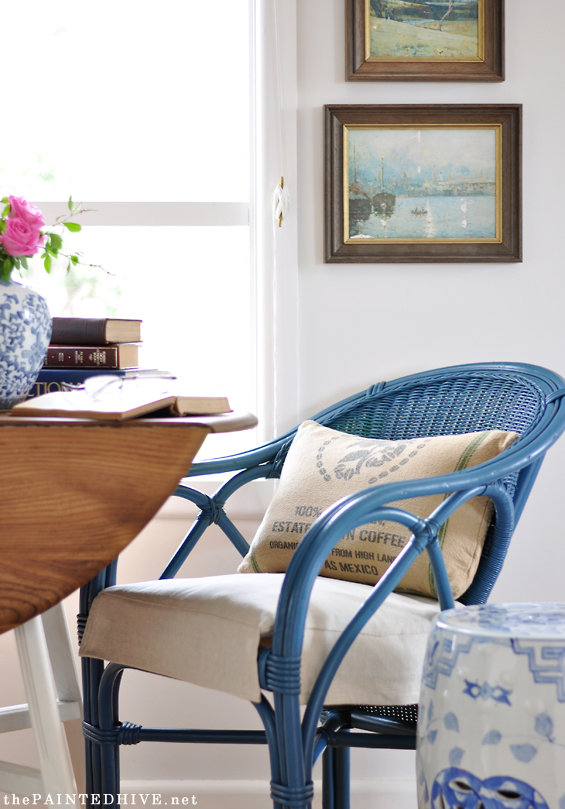
To compliment the chairs my mum made some simple skirted pads using one of our left-over Ikea curtains.

The table was a $20 eBay find I bought a year or so ago. Only just discovered last week that it’s actually an original Ercol! Awesome score!
The ceramic garden stool was saved from hard rubbish and the faux fur rug is from Kmart.
All of the books are thrift store finds, as is the artwork, and we shopped mum’s house for the blue and white vases. The roses are simply from the supermarket, bulked-up with some greenery from the garden.
You may recognise the “coffee sack” cushion which is actually a kitchen tea towel I made into a simple lumbar pillow a few years ago.
This was a fast, simple and fun project, though what I really took away from it, and what I hope I can make some of you realise too, is the potential beauty in imperfection.
I’m not talking about the charm of an old scratched dining table or the allure of a wonky primitive dresser, though the fact that things don’t need to be ideal to be lovely.
“Making the most” is something I’m often able to embrace, though at times the niggle of having things “just so” does become a little hurdle.
When my mum first suggested I paint her cane setting, I was skeptical about how I could make it work for my blog.
“It’s pretty generic”. “It’s not very special”. “How am going to make it look great?”.
As the project progressed, my doubt continued.
“The blue’s not quite right”. “The seat pads aren’t tailored enough”. “Is the gloss too glossy?”.
It wasn’t until I paired the chairs with her breakfast table and added a few pretty accessories that I began to appreciate the power in “making the most” again.
No, they’re not stunning designer chairs and the blue’s a touch more grey than I’d have liked and the seat pads aren’t piped, though the chairs look really lovely in that breakfast nook.
In fact, they’ve given the space such a surprising hint of charm that mum is even going to keep them there! Had I not needed to test out my new spray gun I probably wouldn’t even have looked twice at those ordinary chairs. Yet here they are.
Of course, if you have lofty decorating dreams you’re determined to chase down, then by all means, go for it! However, just remember that in the meantime you don’t need to sacrifice your present home happiness.
If, on the other hand, you’re simply pining over the impossible, then consider welcoming the potential beauty a more realistic approach might yield.
You don’t need to think of it as settling, or conceding, or failing. Why can’t it be capitlising, and overcoming, and winning? And, maybe most importantly, choosing contentment?
So, visit a few thrift stores (or shop your own house), pick up a paint brush (or a spray gun!), throw some pretty foliage in a vase and have a go at “making the most” for now.
You might just be surprised!
![]()
BTW Do you follow me on Instagram? I’ve just started my very first hashtag series all about made-over home decor! Be sure to check it out and follow along for heaps of inspiration.
Sharing this project for the Link Party Palooza at I Heart Naptime.


I am so excited to hear about this spray gun! I felt the same way about having a “lunker” spray gun combo. I don’t do enough to warrant one, but more importantly, I don’t have the room to store it. I have a couple projects that are perfect for spray gun painting – I’m checking out this Bosch! You do such a great job with using what you already have. As I have said before ;) you have a great eye for the possibility of a piece of furniture. And the bonus for me is that I ALWAYS like end product. You inspire me.
Aw, thank you so much Deb. You always say the nicest things.
I’m not quite sure why it took me soooo long to get around to acquiring a more portable paint spray system, though I definitely have no regrets. Am actually looking forward to the next time I can use it!
Good Morning Kristine!
I am a fairly new subscriber to your blog and I want to tell you that I am thoroughly enjoying reading your posts. I just came back from walking the dog, sat down in front of the computer with a cafe latte and a nice piece of white chocolate raspberry cake and proceeded to read about your project painting the cane chairs blue!
First of all, I want to encourage you to keep blogging as you have a real gift for writing and you even make step by step instructions seem fun to read. Thank you. You are inspiring me to go back to my paint brush (as my husband keeps suggesting I do.) I was on a bit of a roll painting old furniture with home made chalk paint, stenciling, and doing different finishing techniques with what I call mixed media, decoupaging, then when a couple of things didn’t turn out as well as I hoped, I kind of froze. Makes no sense right? I haven’t picked up a paint brush for nearly six months…. even met a lady who was willing to sell my stuff for me. Anyway…………….thank you for the inspiration to get back on my horse so to speak. Ironically I have an old wicker elephant with a detachable tray that is in similar condition to the chairs that you did. It is awful and I mean awful! My mother in law … bless her heart thought I could paint it and make it nice. It is hidden behind the TV right now. I can see the potential. I would have to use a brush as I am in a condo on the second floor and have no place to spray paint.
Keep on keeping on Kristine,
Sincerely,
Nancy from Canada
Hi Nancy
Thanks so much for sharing some of your story with me, and thank you also for your sweet words.
It does seem to make no sense how we recoil from something we truly enjoy because of a few perceived failures. And really, they are just that, aren’t they, I mean “perceived”? It can be a bit dispiriting falling short of your own expectations though I guess it’s important to try and see every little flop as an opportunity to improve (in whatever way).
I’m so stoked my little blog has helped reinvigorate you! Good luck with your “awful” elephant. I’m sure you can make it lovely (feel free to send me a pic once it’s complete – I’d love to see it).
Thank you for your readership and encouragement :)
Kristine
Those chairs turned out really well.
I have the slightly larger Bosch spray gun, and although I used it successfully on a drawer cabinet when I first got it I totally messed it up when I tried to paint a door with it. I somehow managed to deposit half a litre of paint on one side of the door on my first coat! However, seeing how nicely this turned out has inspired me to try it again on the next project.
Oh no! Isn’t it weird how we can get something right one day, then so totally wrong the next day? I think this happens to everyone from time to time. Who knows why?
Glad you’re going to get back on the bike though. I’m kinda in love with this spray gun :)
Kristine, I was excited to read about the paint sprayer but I could hardly concentrate on the steps as I kept having to go back and look at that adorable, charming library/breakfast nook. Your mother was exactly right to keep the chairs as they are. Such an inviting little spot!
He, he. Thanks so much Deborah. It all came together really beautifully. Love it when the heavens align :)
I love drop side tables, blue and white china, pink roses, furniture with wooden tops and white legs and a good make over so you have ticked all the boxes for me. Inspirational as usual.
Ha, ha. Must have been channeling you Julie :)
Beautiful post! Beautiful arrangement! Thanks for sharing!
Thanks Alfiya :)
Hey,
You’ve brought these chairs back to life, they look beautiful! I love your plant pots as well they are so pretty.
Thanks,
Chloe
https://www.etsy.com/shop/lushaprints
Thanks so much Chloe.
:)
PS So sorry I haven’t replied to your last email yet. I’ll get onto it.
What a lovely setting. I love your styling choices- so charming with the books, art and rolls… not to mention the blue, white and pink combo! You are so right about finding beauty in the imperfections- and the potential in our limitations :-)
I have put off buying a sprayer- as I never know which one to buy, and if it will be a pain to clean. But I will definitely look into this one. Thank you for you thorough post!
I put off buying one too Ashlea because our original metal one (which we used with the compressor) was a PAIN to clean. This one is honestly a breeze. Even easier than cleaning paint brushes (mind you, I am messy with my paint brushes!).
Thanks so much.
x
Hi! I am new to your blog. I started painting furniture about a year ago and sell some of it at a flea market booth near my home. I had bought a spray gun and tent but was kind of disappointed in how things turned out and haven’t had the courage to use it again. I have a set of six chairs and a dining table that would paint up much faster with a sprayer!
I love your words of encouragement about our “perceived” failures…have a couple projects which have not turned out as I had hoped. I am encouraged, now to keep at it! I think I get an idea how I think something should look in my head as opposed to how someone else sees it….need to let go and “make the most” as you say. I let these ideas and perceived disappointments stall my work and make me want to give up (felt that way yesterday!) These words of encouragement are indeed divine timing for me!
Oh yay, loved reading this Janet. I mean, not the part where you mentioned feeling a bit disheartened, though the part about deciding to keep at it! You’re so right. Sometimes we can get caught-up with a set vision and forget about the cycle of progression. The fact is, there are a million different lovely ways to re-finish the same item of furniture :)
I need to get my hands no a spray gun! These look amazing I love the colour blue you’ve chosen too :)
Thanks Michelle :)
I love the color and that little nook looks like an awesome little coffee spot in the mornings! By the look of it this spray gun is a easy to use, I like that it provides a container for the paint when not in use that is a plus. That is always my pet peeve when using my homeright, I usually never have something at hand so now I’m saving all my glass sauce jars for that. Anyhow I love the blue!
Thanks Carmen.
Yep, it’s great that the paint containers (it comes with two) have lids you can simply screw on once you’ve finished with your job. So handy.
Pretty nifty! ;-)
This is a stunning transformation! Love that colour, too. Thanks for the step-by-step tutorial – makes this project so approachable!
Thanks Jelica :)
I got a spray gun for Christmas and still haven’t used it for the very reason you say. The Bosch spray looks like just the thing I need. It is definitely on my “To Buy List”. Great Tutorial.
This is a great little unit Debra :)
I love the blue color you used for this project. It turned out lovely and looks perfect paired with the other blues in the table arrangement! I’ve been wondering about the cleaning process for a sprayer, so glad to hear it was easy. I may have to look into getting one myself.:)
Thanks Lisa. I was so dreading the clean-up as our old metal spray gun was such a nightmare, though this was genuinely fast and simple. I actually found it easier than cleaning paint brushes!
Honestly, I didn’t know Bosch made a paint sprayer. We only have a model that hooks up to our conpressor too and it is just too big for me to work with on smaller jobs. I am in the market for a sprayer to finish off things like our deck and to paint a room with rustic paneling. I will certainly keep the Bosch model in mind. The chairs looks fabulous btw.
Thank you so much Donna.
I too have painted wicker and wondered if it was worthy of a blog post. Let me tell you, those chairs are beautiful and I really like your post!!
Thanks so much Melony :)
Brilliant! The chairs would be a total passover by most and here you have made them a true keeper! Who needs piping? I love what you did with the cushions and the vases and pics picking up the colors. I actually love the color blue they are as well. I think I would be afraid of a paint sprayer, but you knocked it down to size and made me feel like I could actually do it! Thanks also for joining TaDa! Thursday Link party!
Thank you so much Debbie :)
Hi Kristine, I’m Anne from Birdsong Bits and Pieces (https://birdsongbitsandpieces.blogspot.com), and I found you from the Feathered Nest link up. I love your chairs, and that sprayer is to die for! I do a lot of furniture painting, and I might have to invest in one of these. Thanks for sharing!
Thanks for visiting Anne. Am slightly in love with that new sprayer :)
This is such a beautiful makeover. The color is fabulous and the tutorial is just great. Thanks so much for sharing with us at Friday’s Furniture Fix. Please watch for it among our features and out on social media in the next few days. Susie from The Chelsea Project
Thank you so much Susie. Thanks for hosting :)
This is gorgeous!!
Thanks so much :)
These are so pretty. I have a set that is very similar in my living room and also feel that they are too blah. You just gave me a much-needed kick to go ahead and repaint them. I’m so glad I found this post.
Oh yay, so glad to have helped inspire you a little Mary :) Thanks so much.
So beautiful! I love it all… You are my favorite this week!
XO
Oh wow, thank you so much Desiree :)
Those chairs look amazing!! Love the color you painted them :)
Blessings,
Edye | http://gracefulcoffee.wordpress.com
Thanks so much Edye :)
I’ve been a bit slow to comment on this but like all of your projects it looks fabulous. You may just have given me the inspiration to tackle my own weathered cane setting. I just have to wait until the building work is finished and the last of the termites are eliminated from the premises. Sigh…I never dreamt it would take more than two years and almost all my sanity. But…the end is definitely in sight.
Oh Robyn, you are STILL going! I take my hat off to you lady. I’m too scared to renovate our bathroom/kitchen because at the mo’ I can’t stomach the thought of the disruption it might cause for a few weeks. Can’t imagine sticking it out for over two years! Come to think of it, I’ve even been putting off replacing our broken floor tiles because I can’t be bothered moving all the furniture around to accommodate the installation! Will get there one day.
Hope the home stretch is smooth and swift for you :)
Amazing inspiration. We need to freshen up an elderly relative’s estate house for sale. I have been writing heaps of lists of pretty things we can do to freshen up the place without doing a reno of any kind. I can’t seem to get the others on board, yet my head is absolutely brimming with ideas – discount stores, op shops, loving what is already in the house, raiding the shed….. I might get the others to visit your blog to see exactly what I have in mind. I am not bogged down with emotion, as I am just an inlaw, so I can see the place with much fresher eyes than the others who lost a family member. I really think you can be terribly clever with not much cash.
I love your work. I feel vindicated for bringing home the sad finds that manage to take up room in the “to do” shed! Doing things up – the journey is as good as the destination, when you can look back at what a treasure was originally.
Keep up the brilliant work!
This made me smile. Thanks so much Christine.
We did something similar when my brother sold his house a few years ago. We spent virtually nothing though put in a fair bit of work transforming things he already owned, integrating road-side finds and op shop goodies and freshening-up his kitchen and bathroom. Staging for the open house was the best bit! It looked fantastic in the end and sold within one week!
It’s exciting having a whole house to play with and unleash your creativity on. Good luck with everything :)
Love the chairs, can you tell us the paint brand/color?
Sure Nadyne. It’s actually mentioned in the post though is easy to miss. The colour is “Winner’s Circle” by Dulux and I used a Gloss Acrylic.
Cheers.
Lovely work
Thanks so much :)
Wow your site is amazing and exactly what I was hoping to come across. I have 2 very blah cane love seats and a matching chair and coffee table. They are in my sunroom and I have picked out new flooring for this room. I was hoping to spray the wood to update it. I am so excited to buy a sprayer and try this. Do you also have any thoughts on my spraying the floral fabric seat cushions for this set? Have you tried this or seen it being done. Wondered about how well it would hold up? I would really appreciate any help you might offer. Thanks Inga
Hi Inga
Hmmm, haven’t personally seen it done though I’m sure it has been! Perhaps have a Google around – I’m sure you’ll find people who have project tutorials.
I imagine regular paint would produce a rather crusty texture though did you know that you can buy specialty upholstery spray paint? It would undoubtedly be more expensive than regular paint though might be worth a try? Otherwise, if you’re okay with the seats feeling a little rough you could always just give the regular paint a go. If you are planning on replacing the cushions anyway then you’ve got nothing to lose.
Kristine
I the efforts you have put in this, regards for all the great blog
posts.
Maybe you mentioned the paint color in the post and I’m just not seeing it. Can you please share the color?
Sure Alexa. It’s in the post though easy to miss. “Winner’s Circle” by Dulux.
:)
I have searched for this paint sprayer, but can’t find it stocked anywhere in Australia. Do you know where they can be found?
Hi Louise. Hmmm, that post was from over a year ago and it looks like the 2000 model is hard to come by now here in Oz. The 1000 model is very similar and can be found in quite a few places. I’ll ask my supplier and get back to you if you’re specifically after the 2000 system.
Cheers
Hi,
Thanks for replying. It appears that the 1000 model is for wood finishes, lacquers etc and not wall paint, so I think I need the 2000.
I will give Bosch a call and see if I can find out what the story is.
Thanks for your help!
Love them. Love your decorating attitude! Very inspiring. I can spend all day reading your blog….☺️
Aw, thank you :)
Love your ideas girl! x