
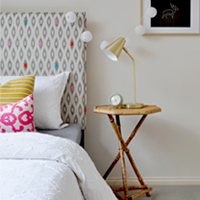
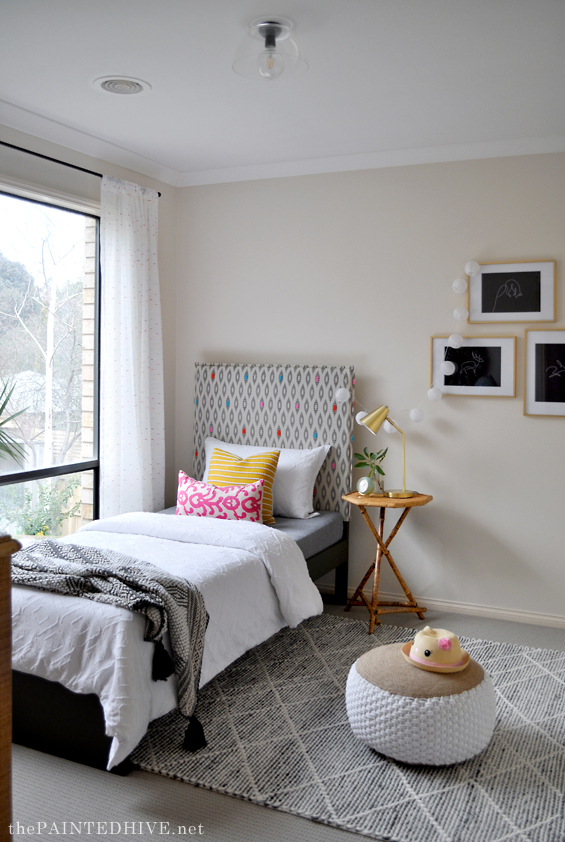
If you saw the girl’s bedroom reveal from the flip house, then you’ll already know a bit about this simple bed makeover.
As mentioned in that previous post, the bed was already in the room and originally I was tempted to replace it.
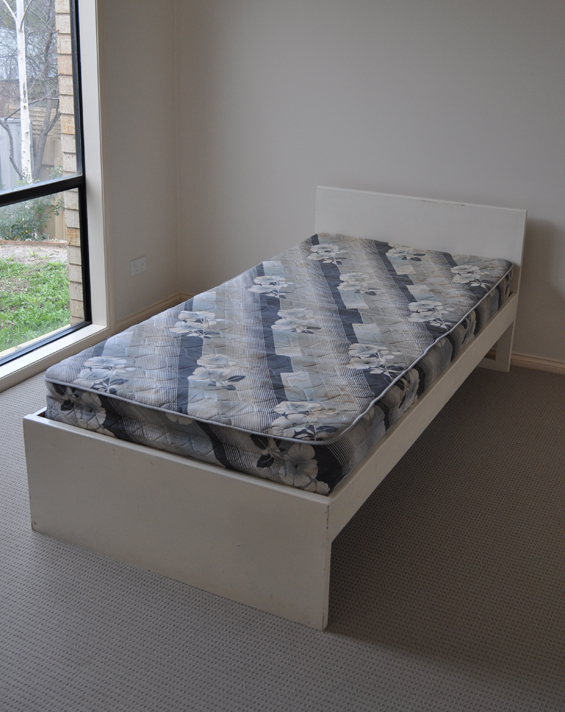
It was just so plain and basic that my initial reaction was ‘blah’, though then I figured the fact it was so plain and basic meant it had unlimited makeover potential!
The options here were endless, however due to time and money restraints I didn’t want to do anything too full-on, so decided to keep things simple with paint and a headboard upgrade.
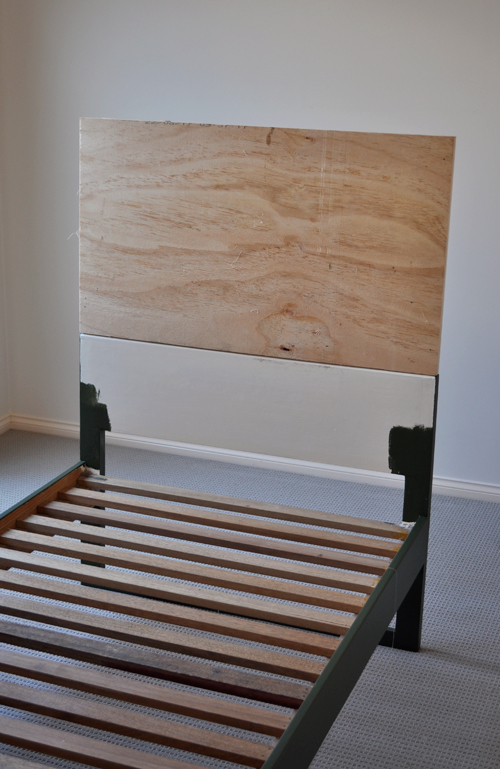
The first thing we did was give the entire base a coat of green paint (which was simply left-over sample pot paint from the console table I built).
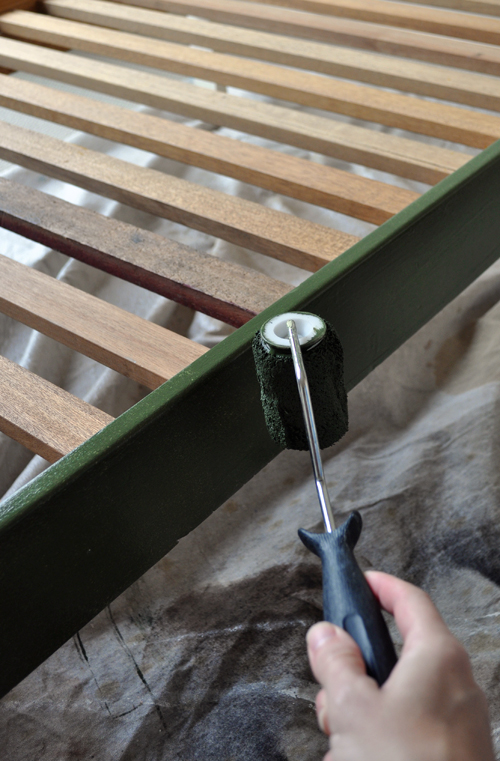
You can see the truer colour here. It looks much darker in some of the other pics.
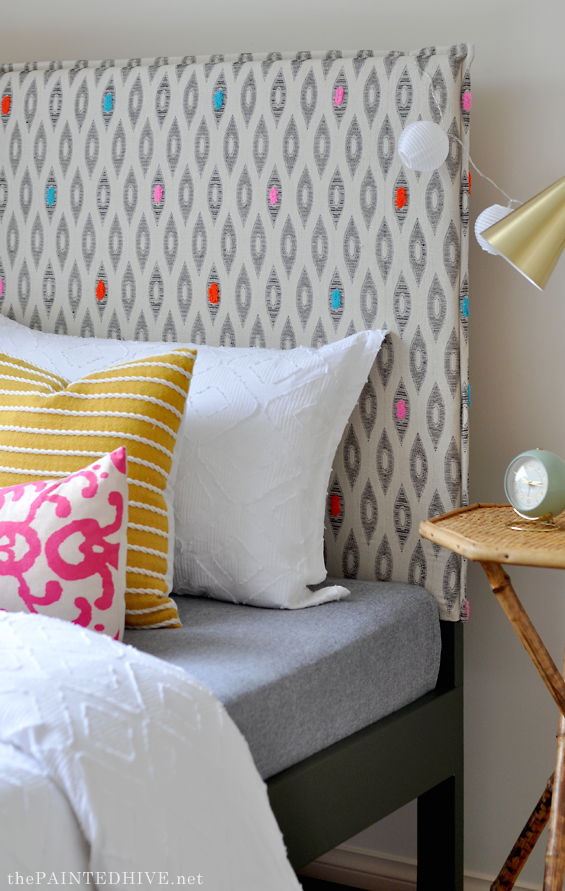
Next, I used some scrap timber I already had to build and attach a headboard “extension”.
Of course, if you’re planning on replicating this project, the way you construct and attach your extension will depend on the style of your bed.
There were a million different ways I could have done this, though in the end I just went with what was quick and easy, using things I already had.
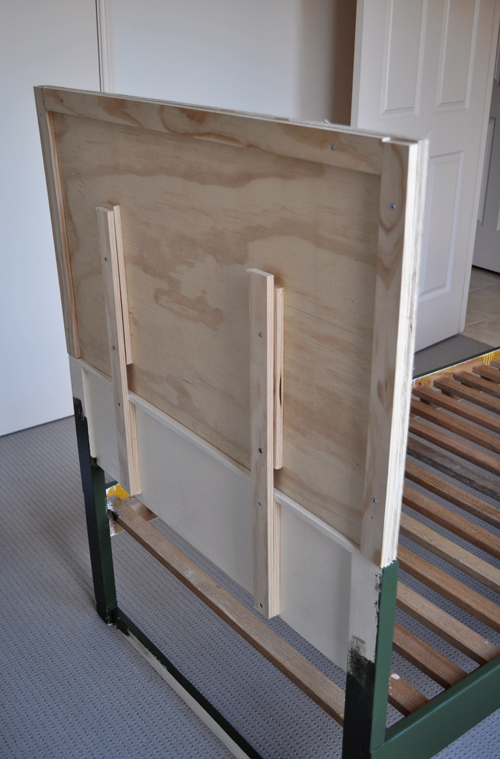
As you can see, the rear of the existing headboard was recessed so I framed the extension in a similar manner, then I used pine batons and screws to join everything together. It’s no masterpiece but it does the job, plus it was always going to be concealed anyway so I was never concerned about it looking perfect.
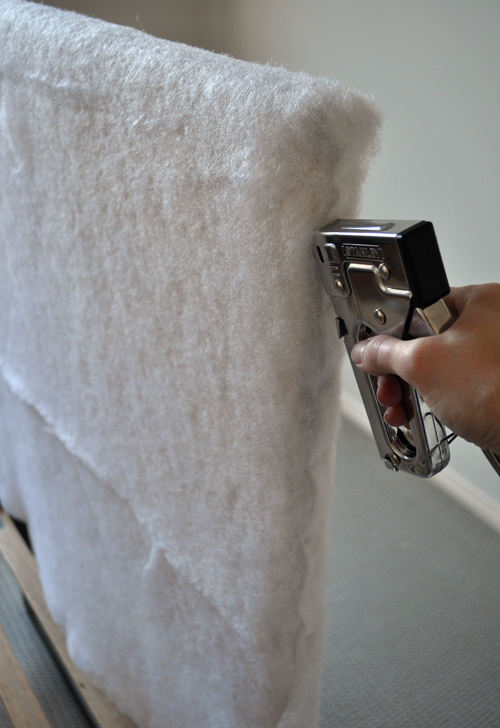
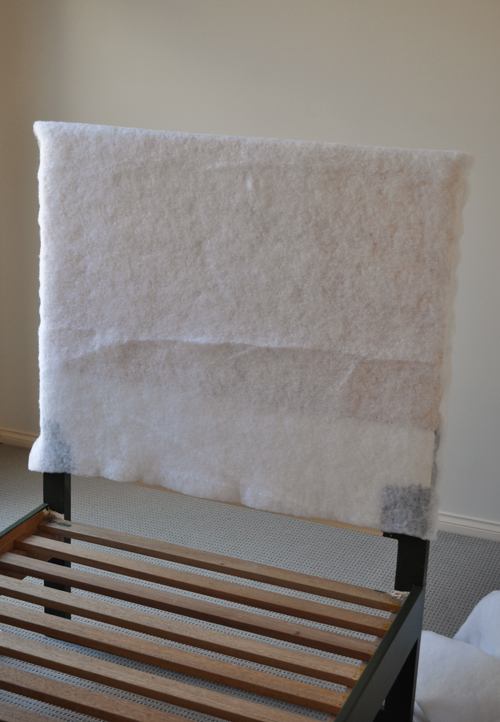
To soften things, we then covered the entire headboard with wadding.
Now, the fun bit!
I didn’t get images of the slipcover being made, because mum sewed it whilst I was building the headboard, though it was really easy.
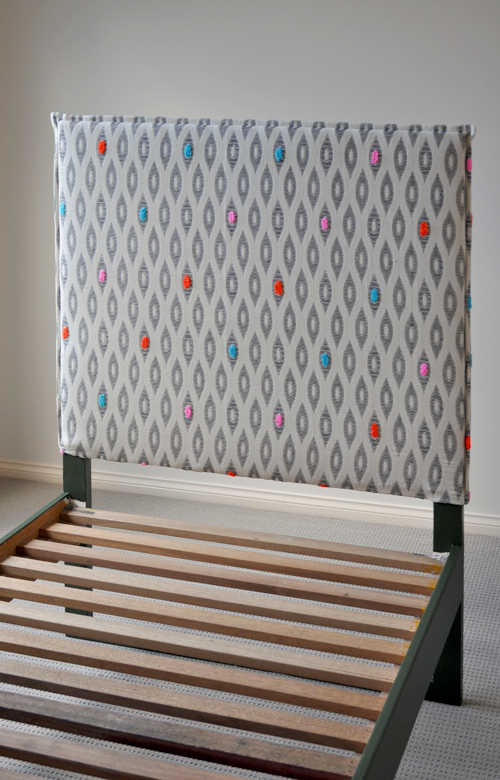
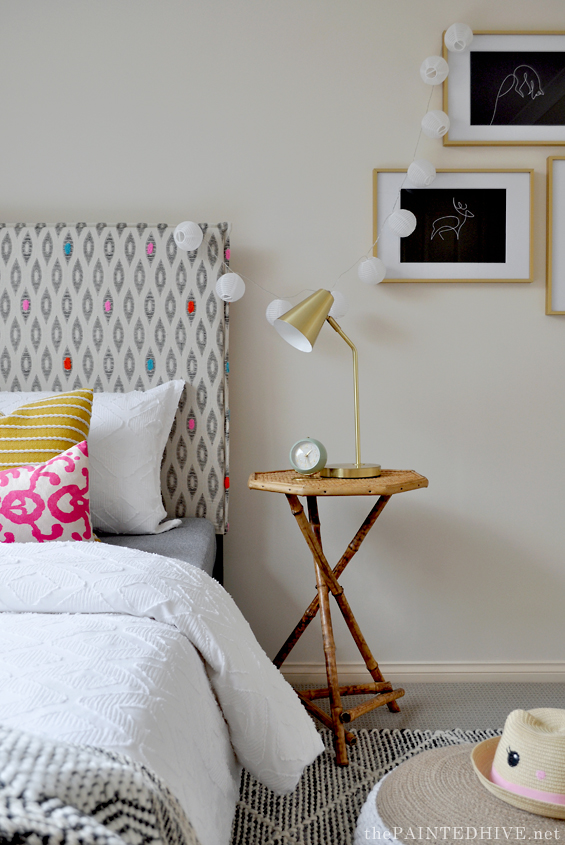
I wasn’t quite sure what kind of style I wanted for the headboard, though when I came across this fabric at Spotlight it instantly jumped out at me!
It’s kind of a mix between tribal and boho with a fun twist!
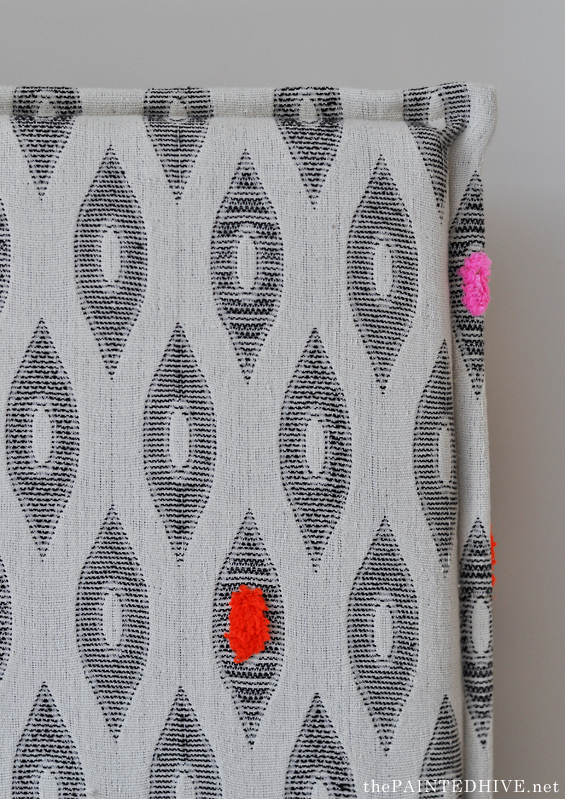
To make the slipcover you just need to cut two pieces of fabric slightly larger than your headboard, place them right sides together, sew around the edge (leaving the base open, obviously), turn it in the right way then sew a small border to create the tailored edge.
Then it just slips over the headboard.
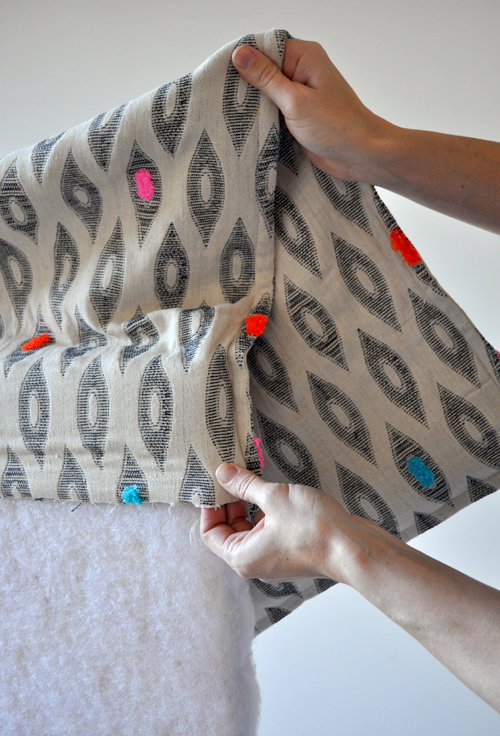
Once it’s on, simply turn the base under to hide the raw edge. If wanted or needed, you can even attach it at the bottom to keep things taut. If you don’t plan on removing it, you can staple it in place. Otherwise, you could look at adding something like press studs, buttons or velcro which could easily be undone.
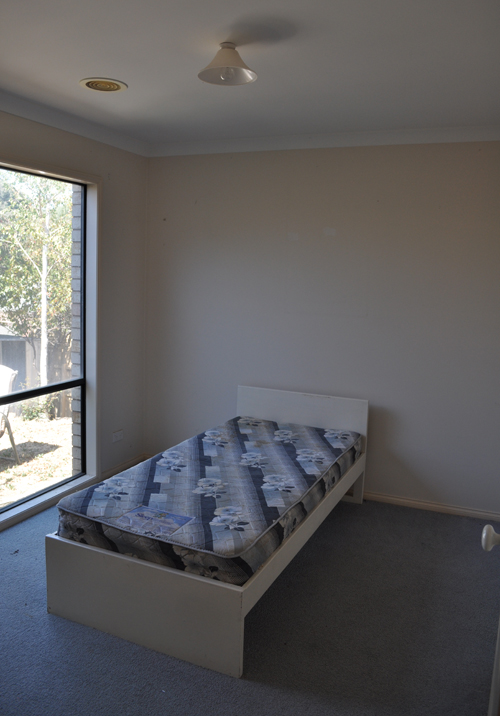
BEFORE
AFTER
And it’s as simple as that!
![]()
Find the full bedroom reveal HERE.


Hey Christine,
I don’t know what wadding you used here so please excuse me if I’m telling you something you already know, but a while back I did a project that required wadding and I found some on Etsy that is made from recycled plastic bottles! Such an awesome use of something so dreadful. If you haven’t already- maybe something you could get onto for future projects! Bed looks great by the way. So glad you didn’t throw it out but gave it a new life.
Sorry- Kristine!!!
That’s a great idea. This was just regular synthetic stuff.
And no worries about the spelling of my name. I get all sorts. It’s a tricky one.
What a big difference this made! Looks amazing. I always love to see these kind of transformations. thanks for sharing!
Thanks Leslie :)
Fantastic!
Great work!
Wow turning an really ugly bed into something cool and beautiful… great work !!!
It really gets me to thinking about transforming even items that you think have NO HOPE
Thanks Julie. Yep, like I said, my initial reaction was just to replace it. Though a bit of sideways thinking never goes astray!
Love this, especially the fabric. I did something similar years ago but made the headboard to short. Now I know how to extend it! I also flip the front and back and then it extend the times between washing the slipcover.
Great idea. That also just gave me the thought that you could use different fabrics front and back to change the look!
I love how you use green as a colour with black and whit or cream. Did you sand and prime the bed frame before painting it green?
Normally I would at least sand though this was done in ten minutes purely to stage the room. We simply slapped a coat of paint on!
This is why I enjoy The Painted Hive! You are so creative with what you have. It is a win win “when ya use what ya have” LOVE IT!
Thanks :)
Great job Kristine…can you please give dimensions…I’m racing out the door to Spotlight!🤸🏻♂️🤸🏼♀️🤸♀️
Hi Kaye
Hmmm, I’m not entirely certain. We just made it to fit! I guess it’s standard single bed size. So about 92cm wide x 80cm high (at a guess).
Cheers
Hi Kristine, Thank you again (and again!). I just love it. And I feel I could try it even though I don’t need it at the moment. That is the effect of your tutorials on me! :)
Magda
Thank you :)
That headboard looks gorgeous! But you could have made it shorter too, just my suggestion.
Hi there,
The room looks terrific. Did you make the cushions as well or are they available to purchase?
Elaine
Thanks Elaine. Cushions were ready made. I got them from Spotlight though that was about a year ago now :)
I’ve been thinking about doing something similar but never thought its possible. Had to check again that I seen the name of the blog correctly as I follow your page on FB (Tribe) too.
You’ve done amazing here, I love it!
I’m thinking of making this on my toddlers bed as his bedhead is acrylic (I just hate how hard it is and radiates cold when its winter) but I’m not too sure how I would attach the wadding on the actual bedhead. Some sort of glue? Or am I better off attaching the wadding onto my cover itself?
Thanks!
Hi Rachelle. Thanks so much :)
You could potentially look at lining the slipcover itself, but you might be better off using something like quilting batting because it would be easier to work with than wadding. Just be mindful that if you want the tailored edge you will need to make sure it’s not too thick. Otherwise, I guess you could glue it to the bedhead. I wonder if foam glue or even hot glue would work?
This is my first time visit here. From the tons of comments on your articles,I guess I am not only one having all the enjoyment right here!
Wow! Thank you for sharing this amazing step by steps and DIY headboard tutorial.