
I realise this basic project is far from rocket-science, however a few of you expressed interest in learning more about it after I shared a brief overview in the bungalow bedroom reveal post from last week.
So, I thought it would be nice to put together a little tutorial.
Like I mentioned, it was a super simple project but sometimes it’s the most basic hacks which are the easiest to overlook.
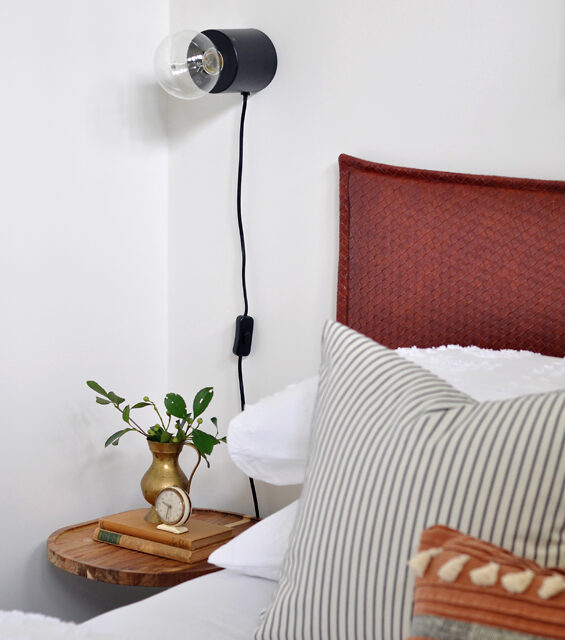
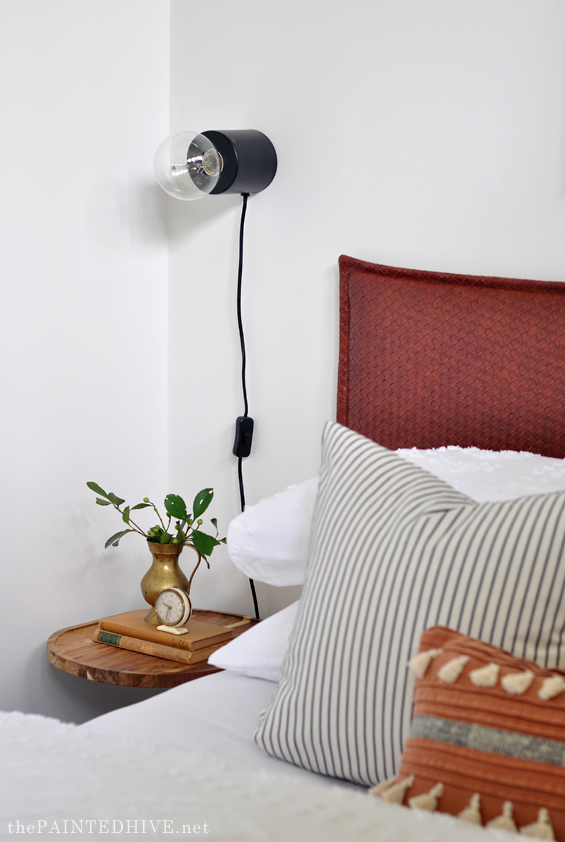
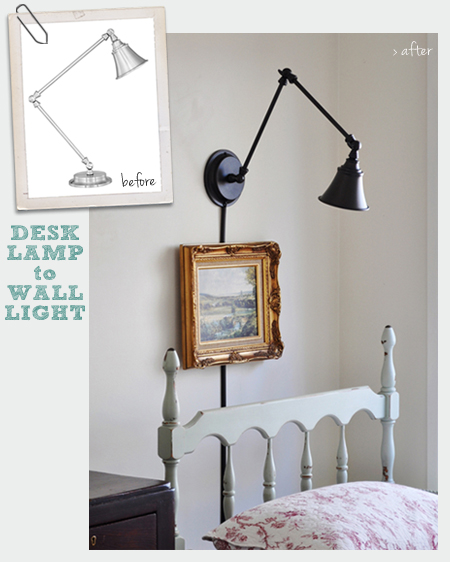
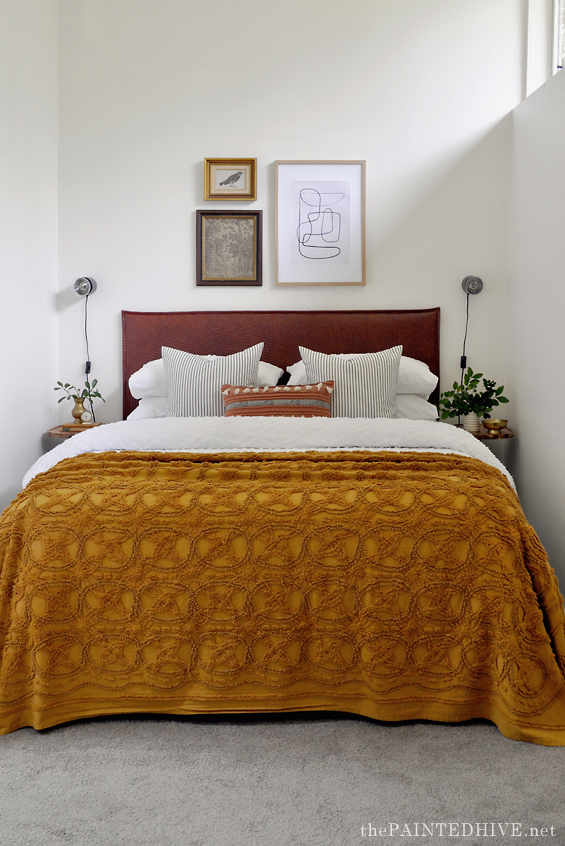
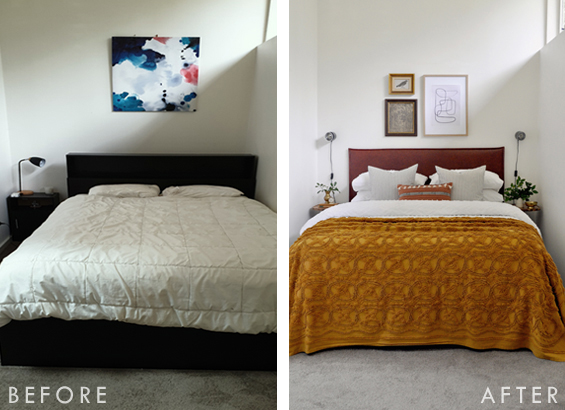
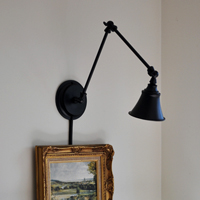
When I was putting the bungalow bedroom together I didn’t have space for table lamps or the budget to install hard-wired sconces, so my next best idea was to convert some affordable table lamps into wall lights. I’ve done this once before, around six years ago, for my daughter’s bedroom.
But this time around it was even quicker and easier!
When I was looking for a lamp, my priorities were to find something light-weight, with an in-line switch, which could be easily wall mounted, and was very affordable. I also liked the idea of it being quite minimal and sleek.
After a little bit of hunting around, I decided on these very simple Marlo Table Lamps which I found at Bunnings for just $10 each. Can’t really beat that!
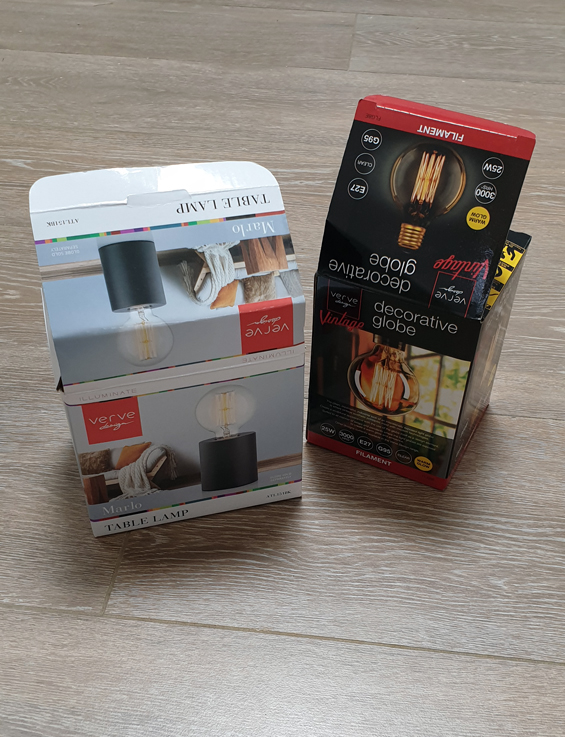
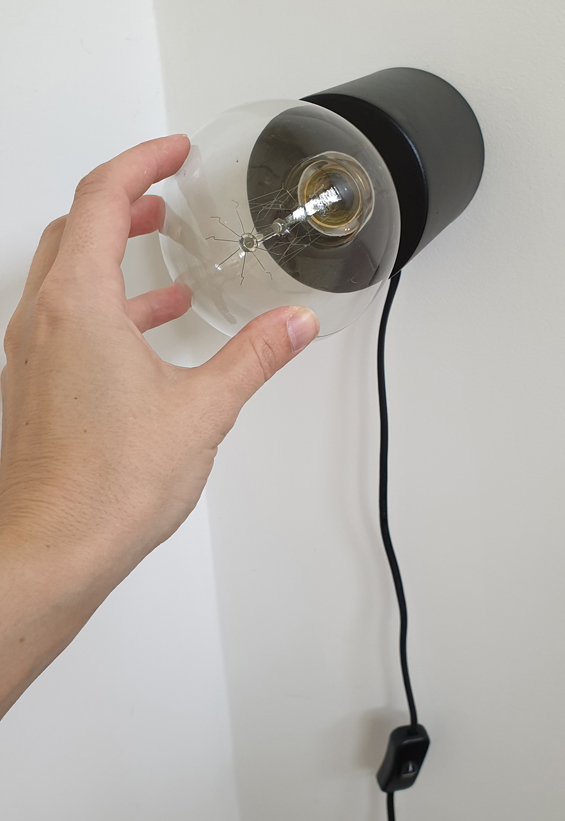
Of course, I also needed to add pretty bulbs, so paired them with some vintage style decorative bulbs as shown. I think white frosted bulbs would have been nice too for a more modern look.
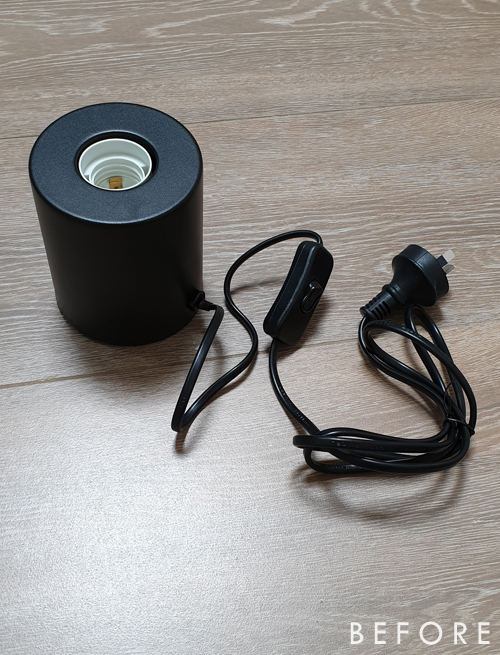
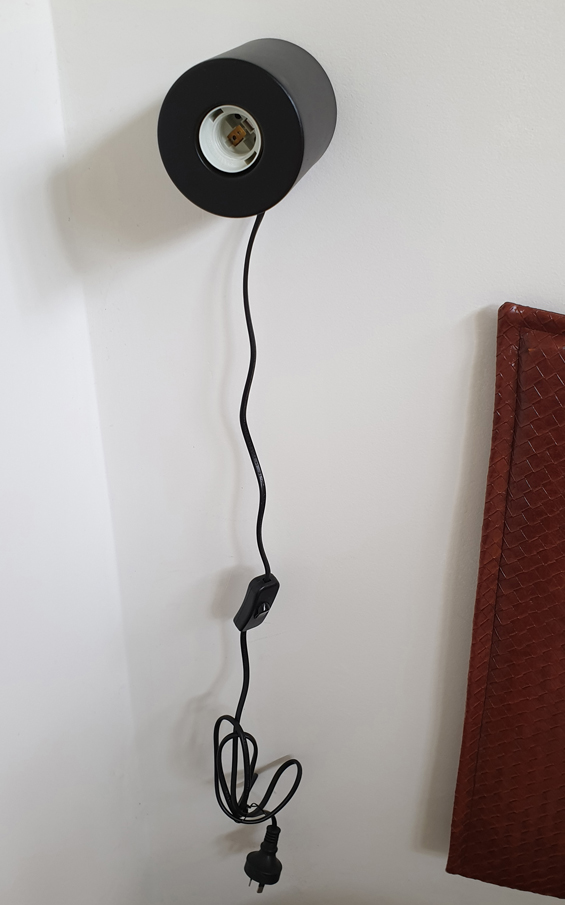
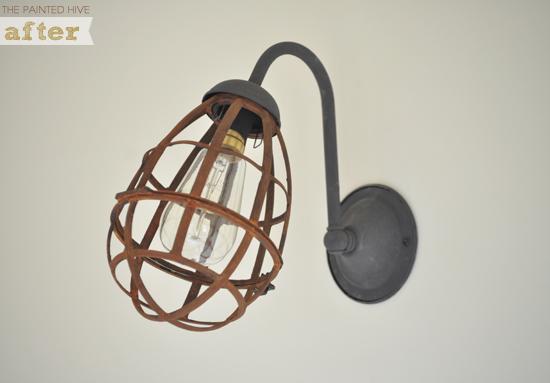
Here’s the lamp straight out of the box (and right way up!).
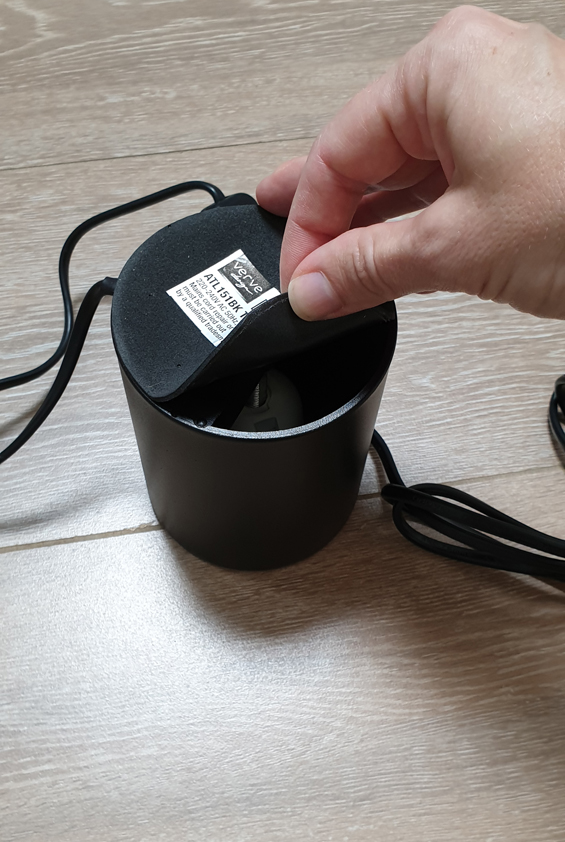
The base had a thin foam cover, so I peeled that away to reveal a cavity.
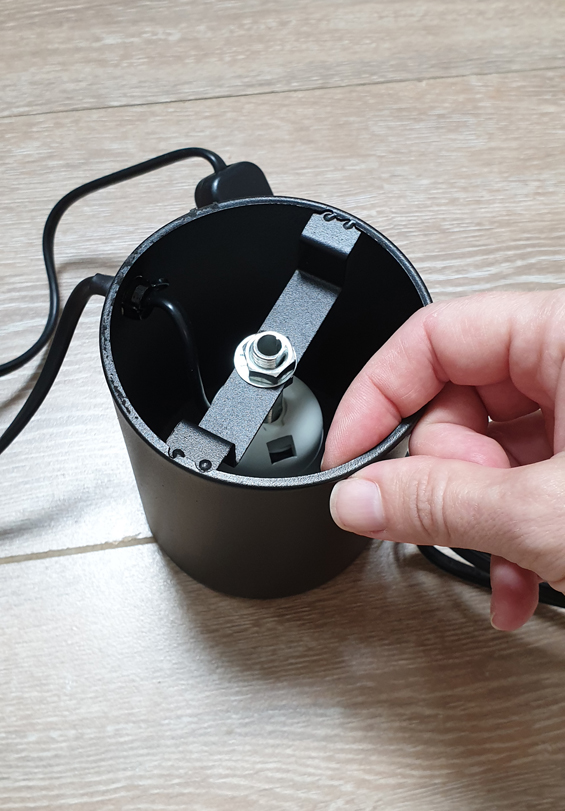
The cavity offered a few different options for wall mounting the lamp, but I decided that the best method was to simply hang the inner perimeter lip from a basic wide-head nail.
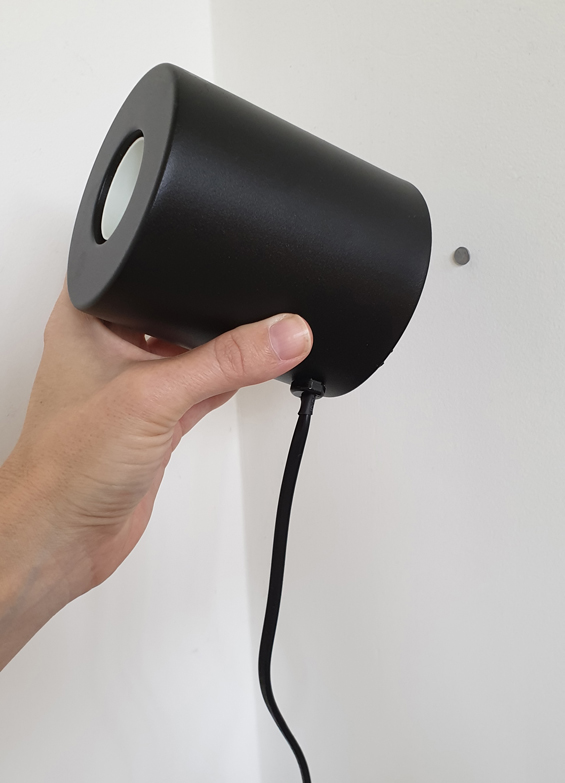
And it worked perfectly! All I did was hammer a nail into the wall so that the head was almost flush, then slide the lamp over until the lip caught in place.
I know it might seem as though the light is merely hanging on for dear life, but the lip is ideally formed to ensure everything is super stable and secure. Trust me, I gave it several decent yanks!
To finish the look I screwed in my bulb (as previously mentioned).
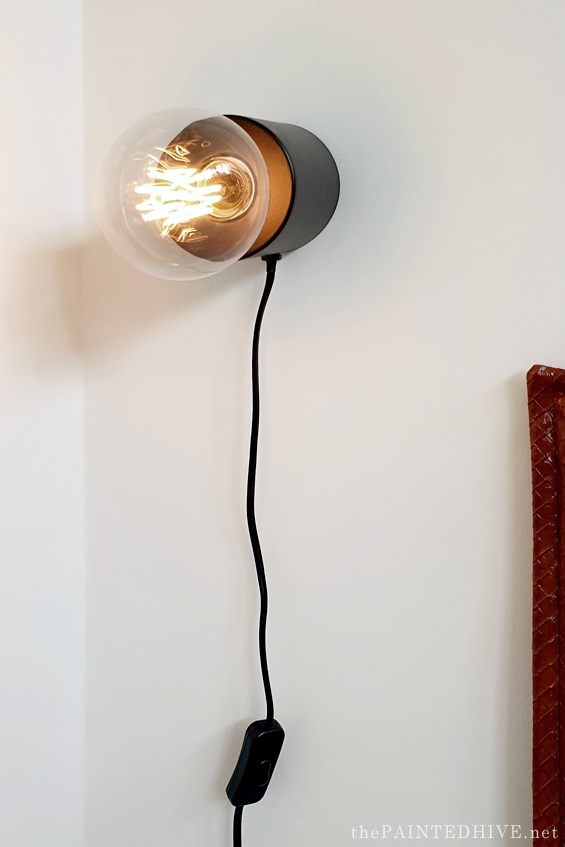
Let there be light!
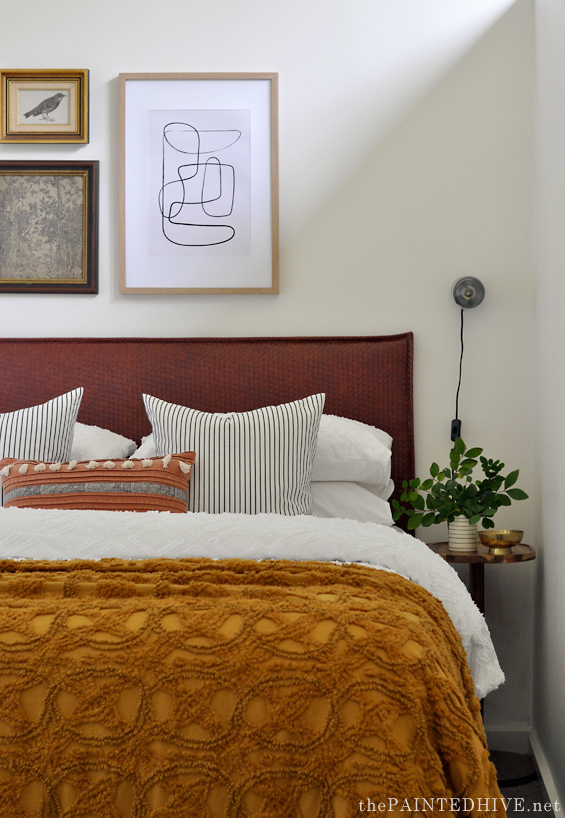
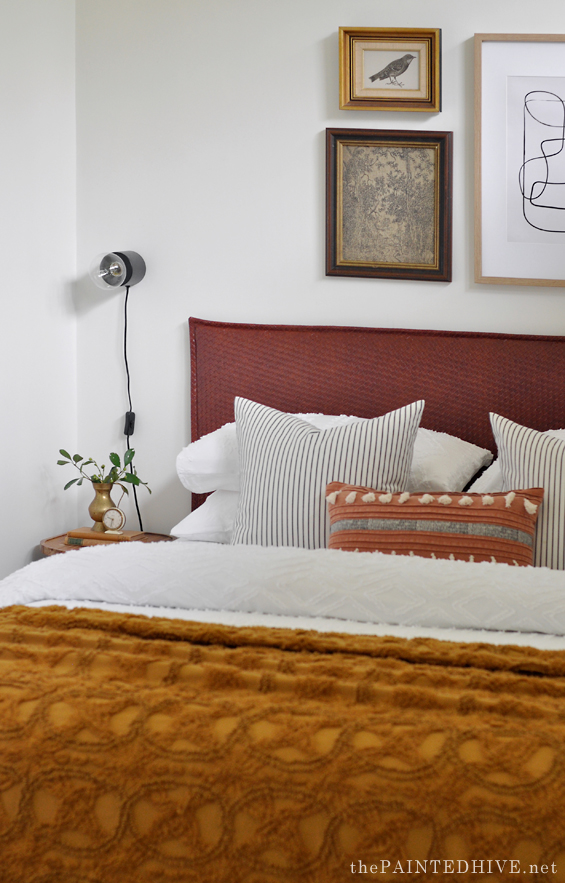
This bedroom only had one power outlet on the left wall, so I used a piggy-back plug. One point holds the plug from the left lamp, and one point holds a short extension lead with runs behind the bed in order to hold the plug from the right lamp. Does that make sense?
So happy with the way they worked out!
![]()
You can see more from this Airbnb Bungalow Makeover HERE.


Great post and explanation…ps thanks for the info on the Aldi side table and couch too. Have a good week. Kathy, Brisbane
No worries Kathy :)
Such a simple fix for a huge problem…….you’re ingenuity is amazing. Thanks for the ideas you pass along to us.
Couldn’t say it better….
Aw, thank you guys :)
You’re just so excellent – thank you for taking the time to think up these clever little ideas, explain them and be so humble in your presentation. Been following for years, and am forever impressed at your work – I get so excited when a blog post comes into my inbox 😁 thanks again x
Aw, thank you Katrina. Comments like this totally make my day!
It’s nice when you see such a great work! Continue writing
Thanks for the tutorial Kristine.
No probs :)
Love this! This saves so much space for your nightstand as well!
The excellent blog and image quality of this post are also good.
Table Lamps Provide a different look of our home.
nice blog thanks for the details
I really wanna say good work…