I’ve been in love with beautiful block printed textiles for ages now.
I don’t know what started my slight obsession (let’s just blame Pinterest) though despite my adoration, up until a month or so ago, I didn’t actually own anything block printed (let’s just blame procrastination).
A few years back (yes, years) I started looking around for some block printed fabrics and other ready-made items, like quilt covers and throw cushions, though most of what I came across was either too pricey or just not quite right.
Note: If you are interested in purchasing block printed textiles – in favour of crafting your own – I found Etsy and eBay did have a nice and affordable range (mainly direct from India).
So, I decided to have a go at making my own! This way, not only could I completely customise my design in terms of colour, scale and pattern, I could also choose my fabric and it would be an easy, fun, affordable and rewarding DIY.
When I first starting looking for wood blocks a few years ago, finding them was a little tricky (even suitable rubber stamps were elusive). They have become much more prolific of late though and can now be found in loads of places for really great prices. Initially, I went on a mad online search, eventually narrowing down eBay as a good source. It’s funny though. At the time (around four years back) I saved a heap of wood blocks to my ‘Watch List’ though never actually bought any. It took stumbling across some at a local homewares store recently to finally prompt me. Sometimes there’s just something about buying stuff in person.
Anyhoo, let’s do this thing.
You will need…
1 Fabric.
I’m totally cheating and using a ready-made plain cushion cover I found on sale ($6 from Spotlight – Ikea has some great ones too!). Of course, you can use whatever you like. From fabric off the bolt, which you can then make something from, to numerous other pre-made items, like; bed sheets, curtains, lamp shades, throw rugs, dish towels and so on.
Note: Remember, your fabric doesn’t need to be light or neutral. You can stamp onto dark or vibrant colours if you use a contrasting toned paint.
2 Acrylic paint.
Any good quality water-based paint will suffice. I just used some left-over craft paints I already had to mix up a custom colour.
Note: You could use specialty fabric paint or ink instead (you then wouldn’t require any textile medium). I personally prefer using standard acrylics because they are more affordable, easier to find and come in a wider variety of colours.
3 Textile medium.
This magic stuff is what makes regular acrylic paint washable. There are heaps of different brands. I used Jo Sonja’s Textile Medium ($20 from Spotlight) because it was the first one I came across. This stuff isn’t super cheap though you only need a really small amount (around one part medium to two parts paint).
Note: As touched-on above, if you use specialty fabric paint or ink you don’t need to use any textile medium.
4 Wood blocks (or rubber stamps).
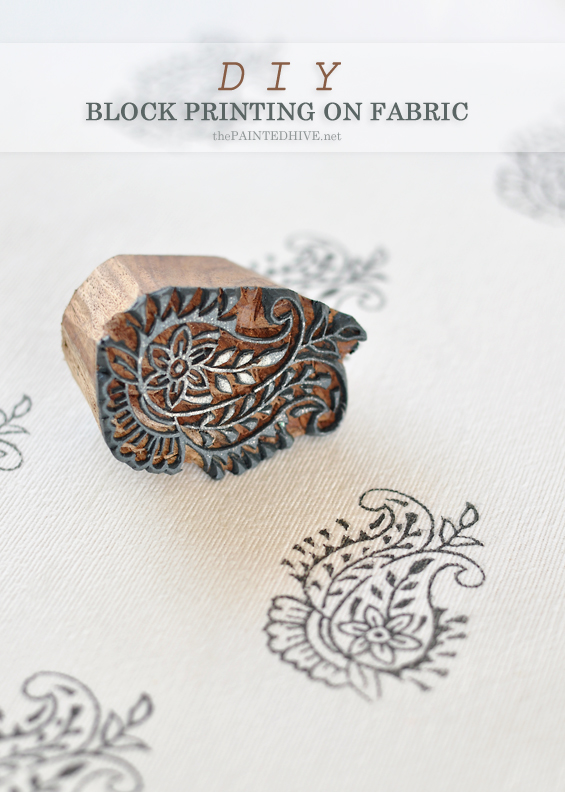
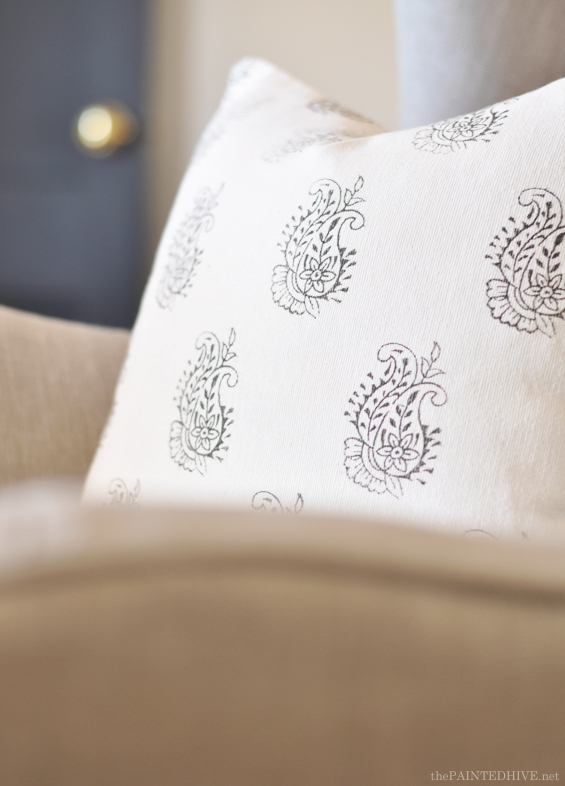
These come in all different sizes and designs. The one I used for this project measures around 7cm x 5cm (3″ x 2″) and has a simple paisley design ($6 from a local homewares store). Although I stumbled upon mine in a store, they are also easy to find online. A quick Google search will reveal loads (eBay and Etsy are two good sources).
5 Kitchen sponge.
This forms your “inkpad”. You can use anything which is slightly squishy and absorbent.
Note: Alternatively, you can use a foam roller or a small portion of sponge to manually apply paint to the stamp.
6 Paint brush.
This is just for mixing-up your paint and spreading it onto your sponge.
7 Iron.
To heat set your paint and make it washable.
The process…
STEP 1 Launder and iron fabric.
This isn’t entirely necessary though it does provide a nice clean starting point. Pre-washing your fabric ensures any factory coatings or chemicals are removed and also allows for any shrinkage. Ironing just makes your fabric neat, smooth and ready for stamping.
STEP 2 Mix acrylic paint with textile medium.
Pour your paint into a dish. If, like me, you’re creating a custom colour (I used black, white, cobalt and cadmium to achieve a deep green-grey) ensure the paint is well combined and that you have enough for your entire stamping project. Mix your acrylic paint with the textile medium as per directed (mine was at least two parts paint to one part medium).
STEP 3 Spread paint mixture onto sponge.
Using a paint brush, spread a generous amount of your paint mixture onto your sponge. You now have a custom “inkpad”.
Note: As mentioned above, you could instead use a foam roller or small portion of sponge to manually coat your block – I just find the inkpad method cleaner and easier.
It is tempting to forgo this step and simply dip your block straight into some paint though in my experience this produces uneven results, even when excess paint is blotted on a paper towel.
If needed, place a piece of card, wood or plastic beneath your sponge to avoid paint penetrating any underlying surface.
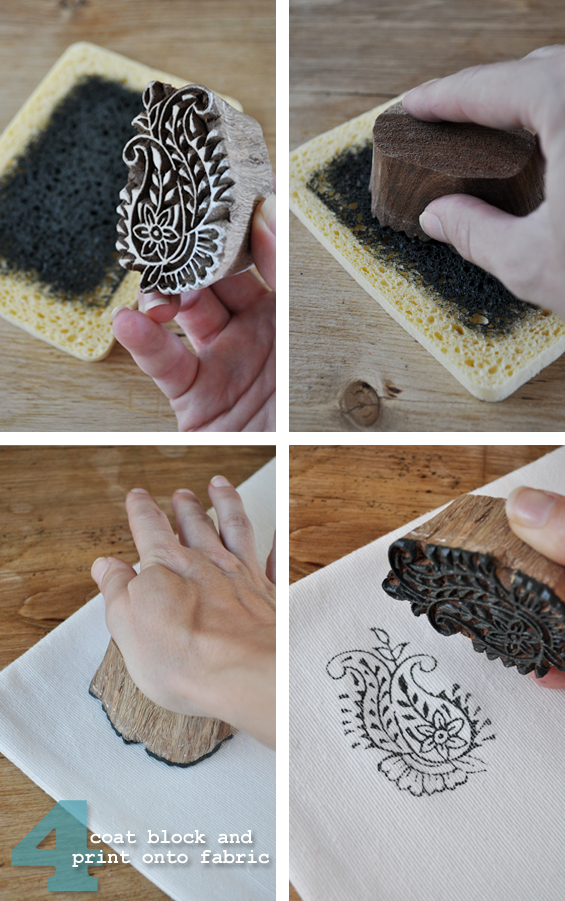
STEP 4 Coat block and print onto fabric.
First, lay your fabric on a nice, even surface which isn’t too hard. If needed, use an old dropcloth (or similar) to provide a little bit of cushioning (some give is needed to produce even prints – particularly if you are using a hard wood block as opposed to a soft rubber stamp).
At this stage, think about the general look you’re going for (placement/spacing/position of prints) and, if desired, measure and mark your fabric. I simply eyed mine.
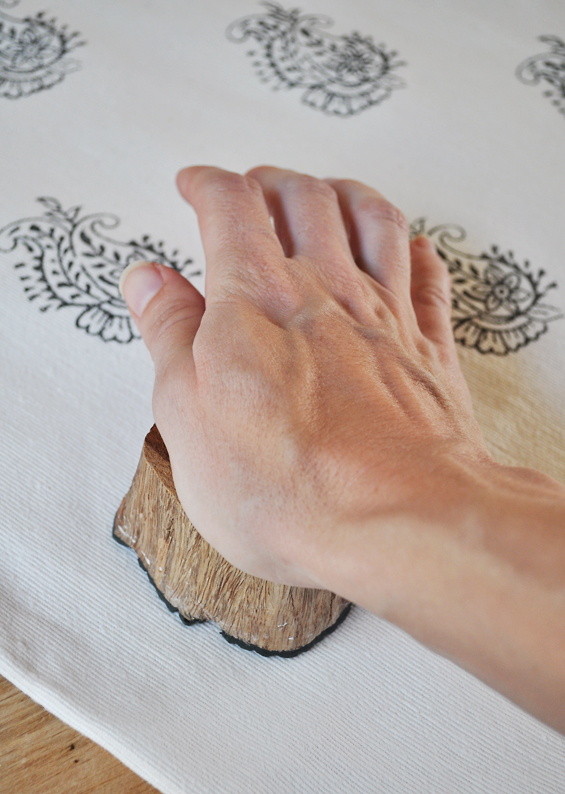
Dab your stamp on the “inkpad”, ensuring thorough and even coverage, then press it down firmly in place on your fabric – you can even give it a bang – before carefully lifting.
Continue with your design, re-dabbing the stamp before each new application to ensure consistent prints.
Don’t forget to re-coat your “inkpad” as required too.
Allow to dry thoroughly (my textile medium directions recommended 24 hours).
Note: I recommend doing a trial stamp first on a scrap of identical or similar fabric to gauge how much paint and pressure is needed.
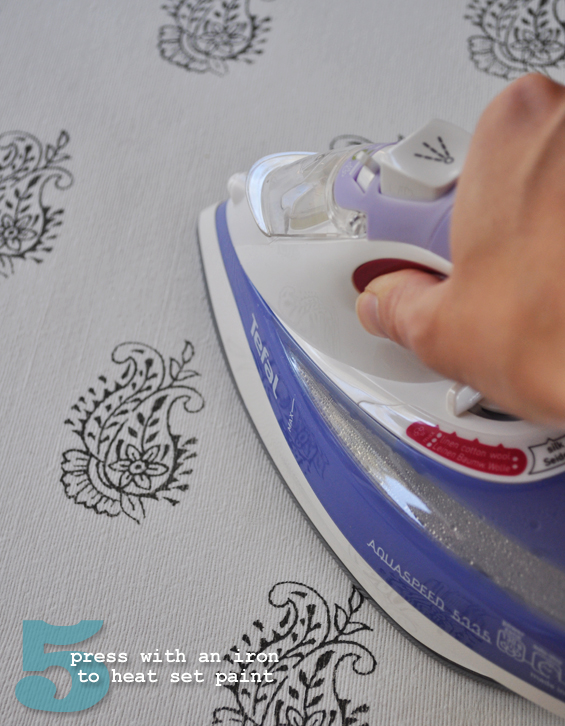
STEP 5 Press with an iron to heat set paint.
Follow the directions on your textile medium to heat set the paint. I believe the general idea is to use as hot an iron as your particular fabric will take and press your prints for a minute or so until the paint changes slightly in tone. Depending on the delicacy of your fabric you may want to use a thin cloth as a heat buffer.
Note: Although your item should be hardy enough to withstand normal laundering, I like the idea of using a gentle cycle – just in case.
And, it’s as simple as that!
I am sooooo in love with this DIY!
As suspected, it really was easy, fun, affordable and rewarding. I may be slightly addicted!
And as mentioned earlier, I was also able to completely customise my design.
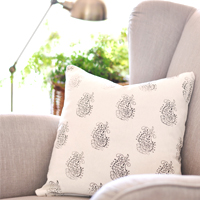
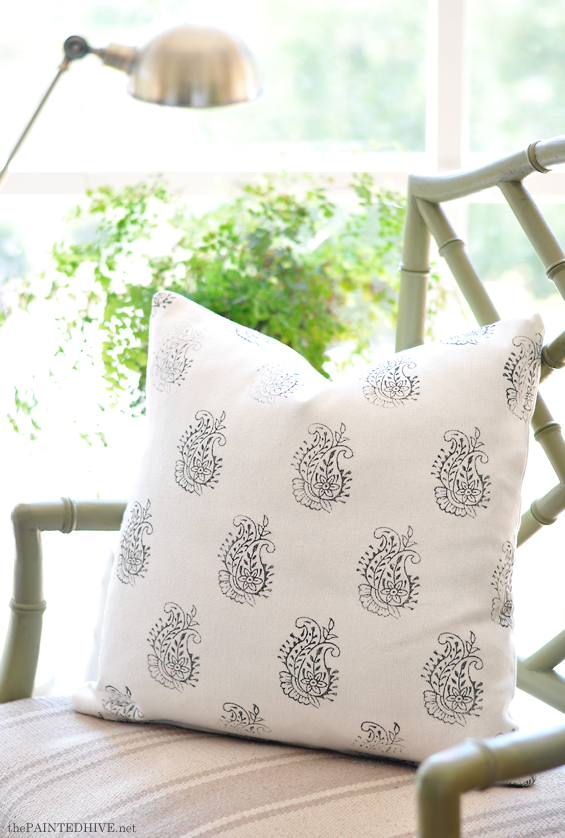
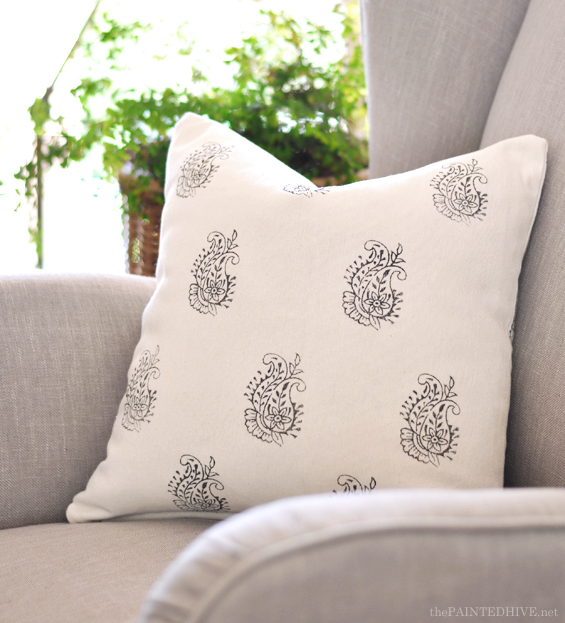
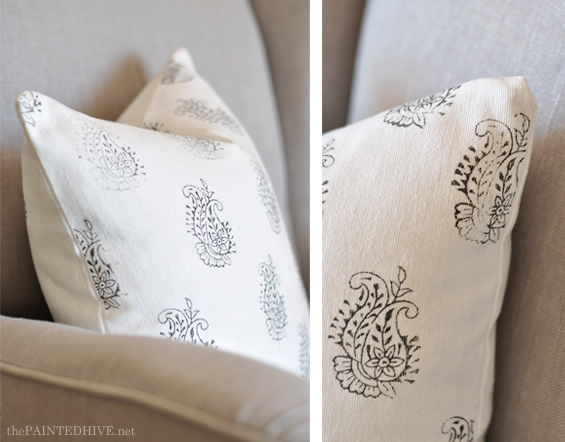
On one side of my cushion I created a sparse-ish pattern…
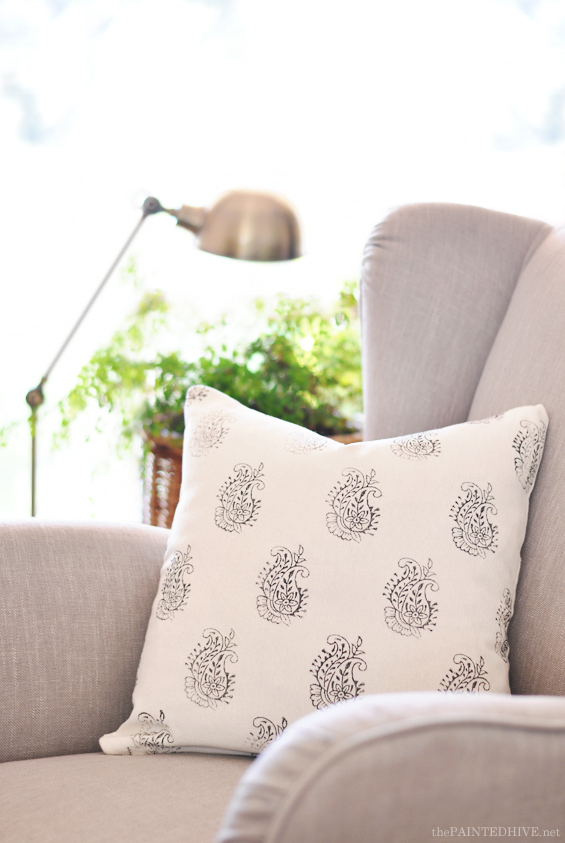
On the other I experimented with something fuller…
This fuller pattern was designed to make my cushion appear as though it had actually been made from a block-printed fabric, rather than having been post-printed, so I applied some partial stamps at the edges to create the illusion of a continuous pattern which had been cut through.
Stamping over the edges did produce some patchy prints due to uneven contact where there were seams and hems. This is something worth keeping in mind though it didn’t bother me one bit.
In fact, I think any imperfections and little nuances communicate that this is a lovingly hand-made item, and make it all the more charming!
Have a great end to the week all :)





Another beautiful project and fantastic tute Kristine. I am hunting for wood stamps as I type! SO excited to try this.
Just lovely. Your steps and photos are so encouraging. Thank you.
You. Are. Amazing. :) Julie
Awww, too sweet Julie.
Hi Kristine,
I have recently subscribed to your email newsletter and this is the first project that has popped up in my inbox! It really is lovely, thank you for the inspiration.
Thanks so much Kristie. It’s lovely to have you reading along :)
I’m actually glad you mentioned this post came through to your inbox. I’ve been having some trouble with my RSS feed and email subscription service (looking into alternatives at the moment) so it’s great to know it came through for you.
x
Mmmmm. Like this idea. I can see sheets with their tops beautifully stamped and along the edge of pillow cases and … Just love the Indian look. Now to find some wood blocks. Thanks for the inspiration.
Yes Libby! That’s on my to do list too. Maybe for Charlotte’s room. Maybe for my room! Not sure yet. It would be gorgeous.
Which homeware store did you get your wood block?
Hi Lilian
The store is named Oku Den. It’s a boutique artisan store (there is only one – it’s not a chain). I’m not sure where you are based though it’s located in Hurstbridge (outer north-east Melbourne).
Hope you liked the project :)
Cheers
Kristine
This looks really beautiful Kristine!
Thanks so much Gilly :)
I’m a sucker too for block prints! I love them so much I started making my own, but I haven’t tried mixing the acrylic paint with fabric medium (I use fabric block printing ink). Great tip! Pinning, and heading over to follow you on IG too…
Thanks Meredith. Aren’t block prints just so lovely? The traditional paisley designs are probably my fave though now I’m also thinking about using regular rubber stamps to embellish my kid’s plain bed linen. Maybe little bunny rabbits for my daughter and cute bicycles for my son.
I am tempted to try textile paint next time. I imagine it is similar to work with.
Thanks for the comment :)
Excellent tutorial and I love the finished pillow.
Thank you Donna :)
Thesis a wonderful tutorial, beautifully presented. Thank you.
Thanks Karen. What a lovely complement coming from such a beautiful quilter.
:)
Well done! Perfect choice of pattern and great tutorial.
Extra points for an un-boring pillow, with slightly different sides. :)
LOL! Thanks so much :)
Kristine
Isn’t it amazing how less ‘frou frou’ ALWAYS Creates such beauty!?!
Your simple and elegant choice of stamp and incorporating just enough ‘white space’, means that your cushion cover is divine.
Wanna make me one? ;)
<3
Pia
Thanks so much Pia.
You’re right, sometimes (okay, most of the time) less is more.
Kristine
x
So smart are you!! I adore this idea! Great tutorial :)Will be featuring you this Thursday for the Think & Make Thursday party :) Thanks for sharing.
Oh, really? Wow! Thanks so much Heather :)
This looks awesome! Might have to try:)
Do it Sherry! This style soooo suits your beautiful aesthetic (and hand-stamping plain fabric is so much more affordable – and customisable – than buying by the yard).
x
Hi, I would love to give this a try and the block print you have used is so beautiful! I was wondering where you found the stamp? Love it! Thank you
Hi Tamlyn
I happened to come across a little bin filled with beautiful wooden stamps at a local homewares store one day (Oku Den in Hurstbidge – outer Melbourne). They might still have some the same as mine. Perhaps you could contact them and ask.
Otherwise, you should be able to find a great selection on eBay or Etsy.
Kristine
Looks stunning, at first I thought it was one of Lauren Liess’s gorgeous fabrics! Good to know there are other options.
Thanks Eva. Yes, I love Lauren’s fabrics! There is just something about a block print and it is really easy to do it yourself.
:)
Hi does this method with on crepe fabrics ? .
Lovely diy
Thank you for sharing this. I love block printing since I first try in Jaipur 3 years ago and like you, after many years of procrastination, finally I started. The cushion is lovely.
Now the wooden blocks are available on Amazon
What would be the best paints to use on cotton bedsheets which undergo hot water wash. I am not finding much ‘heat proof’ paint suggestions. Appreciate if you can point me in the right direction.
Hmmm, I would think that any fabric paint which is correctly “set” should withstand hot water washing. Maybe do a trial on something small first and see how it goes.
Hi
Lovely creation…!
I also love block printing like anything.
Sometime back i bought blocks and tried with fabric painting. But it turned out to be flop.
I am from India.
I need guidance as what type of paints i need to select for block priting.
Pls suggest me with brand or name so that i can buy and try.
Thanks
It will depend on the type of material you are printing onto. With naturals such as cotton/linen and even cotton/linen blends I simply use standard acrylic craft paints mixed with fabric medium.
Hi
Thank u so much for your reply.
Any idea that we get acrylic craft paints in India which you are mentioning?
Being from Australia I can’t really recommend where to buy in India. So sorry. I’m sure you should be able to find some if you search.
You saved me a lot of time and trouble.. LOL I was looking at youtube vids on how to block print and they really skipped on just what kind of sponge to use and it was confusing. Now I am going to close this computer and get to work on my curtains. good blog, great instructions!
Thanks so much. Glad it helped you. Have fun!