

A little while back I was contacted by Sherylee.
She wanted to make some changes in her living room though was having trouble deciding on the design because she was struggling to visualise her ideas.
In short, she was feeling confused, uncertain and overwhelmed. And, as a result, things were stagnant.
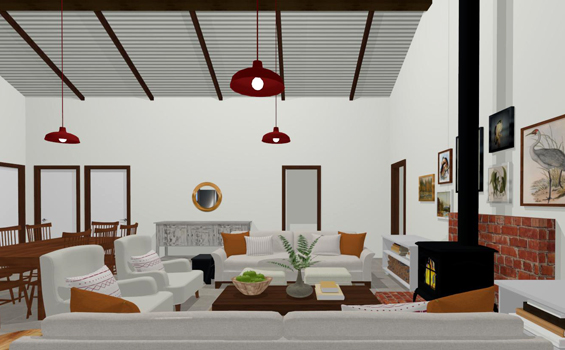
Here are some of the before pics she sent me…
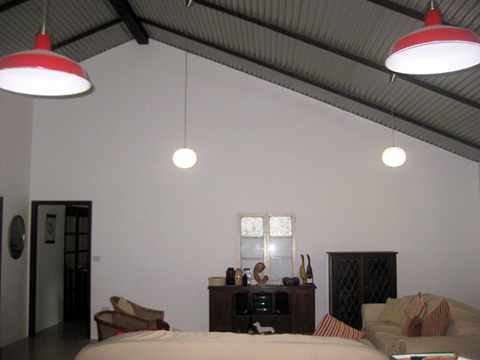

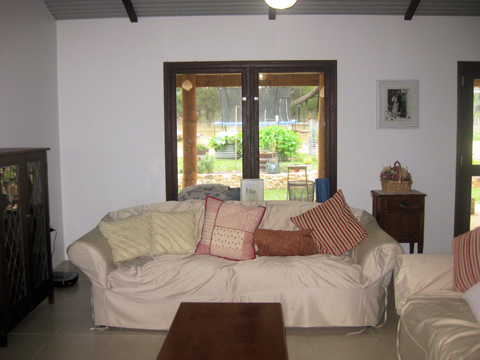
As you can see, there is a glorious vaulted ceiling, beautiful wooden beams and trim, nice neutral walls, and plenty of space.
Her “musts” list was pretty straightforward…
– Include a wood burner (she had already bought this)
– Retain wooden trim (it is solid Jarrah and she loves it)
– Include autumn toned accents (as they are used throughout the house)
– Retain storage bench beneath the window (you can’t see it in the before pics though it is visible in some of the renderings)
Of course, those were just the preliminary basics. To create the perfect space for Sherylee I also needed to know her “wants”.
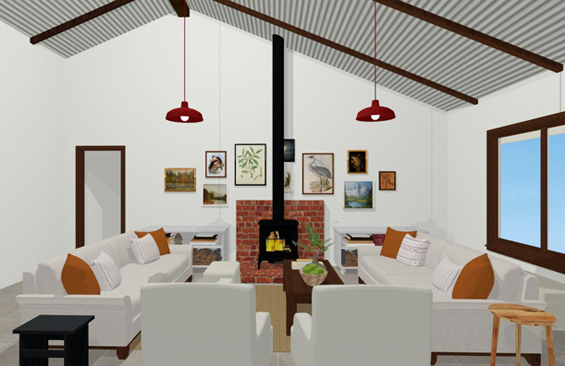
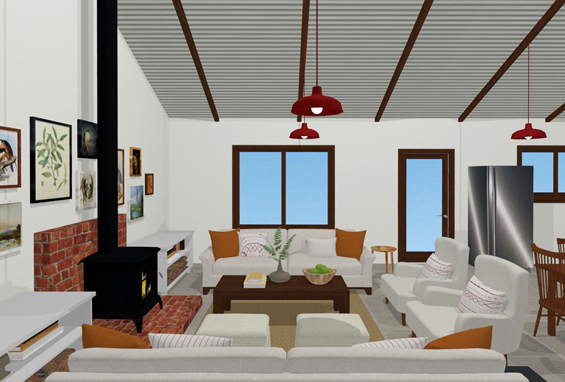
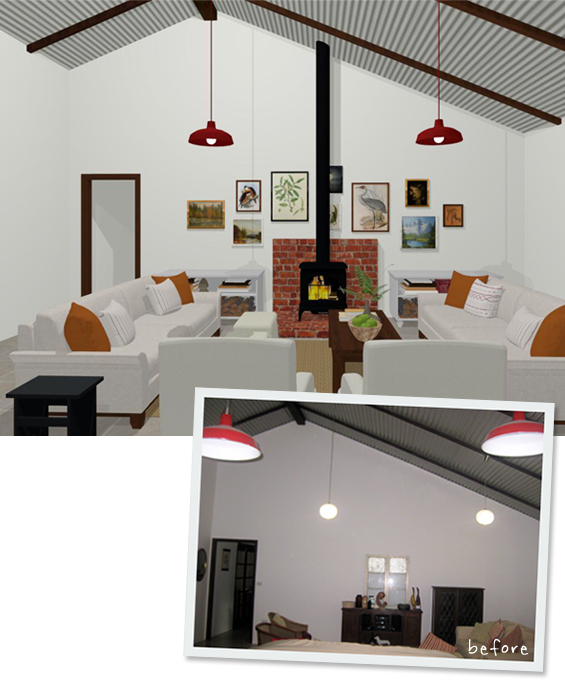
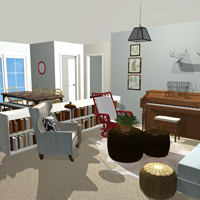
So, after many emails back-and-forth (sharing images, ideas and dimensions), plus some plan tweaking, here’s the final virtual design…

I love the way this room came together. Thankfully, so did Sherylee!
Here’s a short summary of some of the design decisions…
To provide a focal point, it made sense to position the wood burner centrally on the large, clear wall. This in turn dictated the furniture layout. I love the look of two sofas positioned opposite one another, and was so excited to be able to suggest this configuration as there is no television in this space. Maybe it’s just me, though I often see beautiful rooms with facing sofas and a TV which then can’t be comfortably viewed from front-on and wonder “how the heck did they get that past their husbands?”. LOL! Like I said, perhaps it’s just me, though I personally find it a bit impractical in most cases.
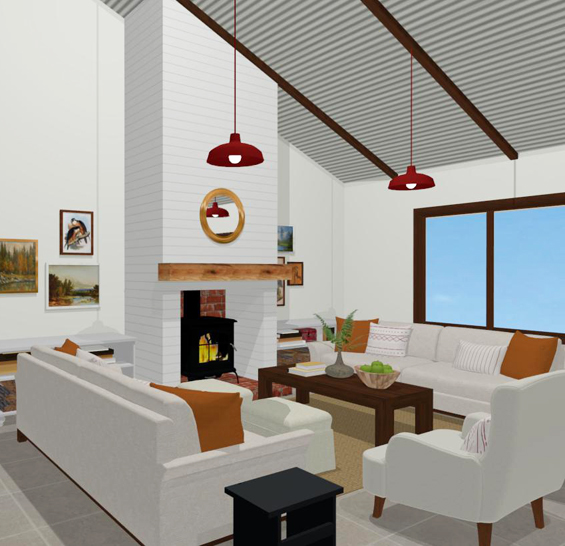
As mentioned above, Sherylee had already bought the wood burner and also sent me an inspiration pic of a reclaimed brick hearth she really liked so I incorporated something similar in the plan.
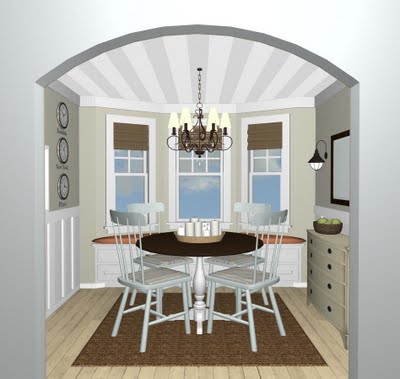
One of the other ideas we played with was building-out the wall and enclosing the wood burner and flue in the style of a traditional open fireplace…
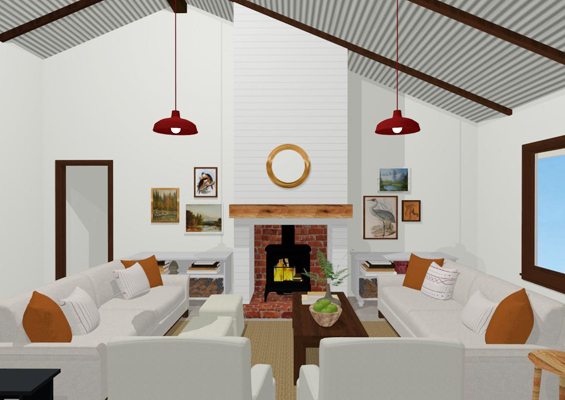
It looked really amazing, all dressed in shiplap and complete with a chunky reclaimed wooden mantel, though Sherylee wasn’t quite ready to commit to that level of construction. She mentioned it was definitely something she would keep in mind for the future though.
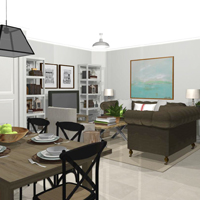
To give continuity to the large open-plan room (the kitchen and dining reside within this space too – just behind the armchairs in the rendering), I suggested that the pendant lights over the living zone should co-ordinate with those already in the kitchen (you can spy the original red pendants in one of the before pics).
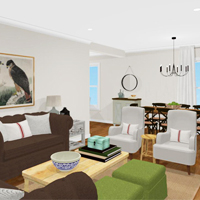
Sherylee was feeling quite lost about the placement, scale and subject of wall decor. We played with a few different ideas, though eventually settled on an eclectic gallery. They are fun and affordable to put together and can inject loads of personality and interest. Spanning the full wall and extending the art behind the flue adds to the appearance of width and helps unite the flanking cabinets as well as making a fantastic statement!
For something a bit different, and because the scale of the room allowed, I opted for one narrow coffee table and two ottomans, instead of one really large coffee table. Not only does this help provide a sense of spaciousness (as more floor area is visible), it also affords greater flexibility for reconfiguring the furniture if desired.
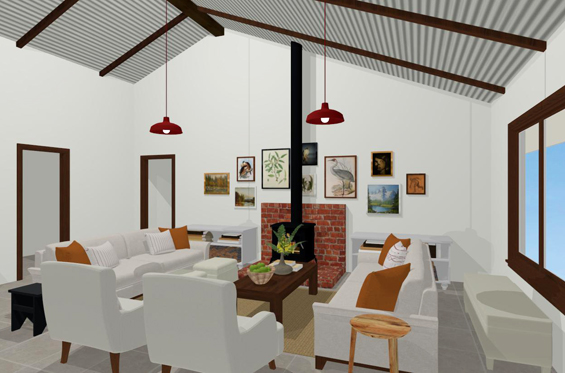
Here are a few doll’s house pics to provide a better idea of the furniture placement…
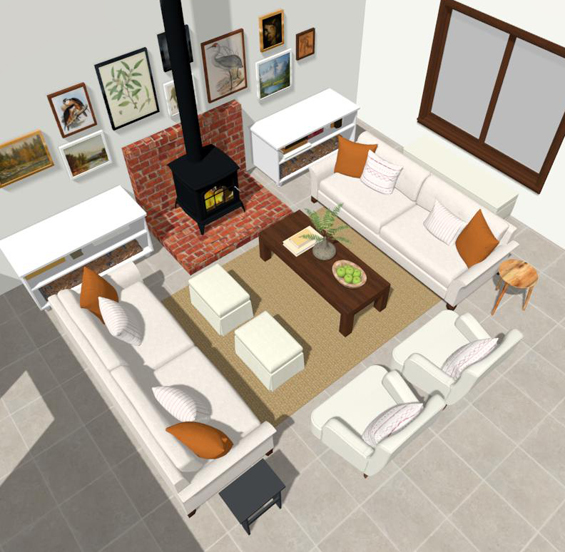
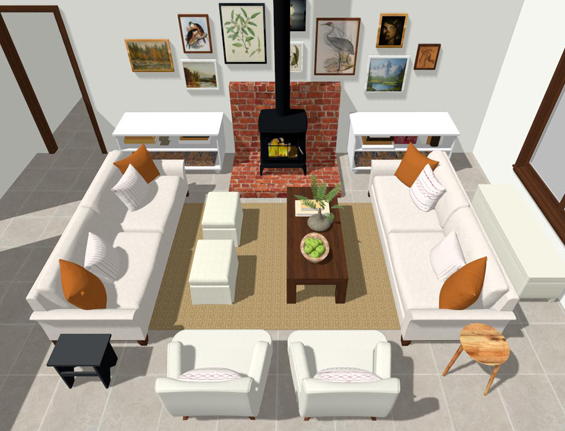
The rug could be a little larger, to anchor the armchairs too, though I’ve based the dimensions off the Ikea LOHALS which Sherylee already owns. And sacrificing a few inches to save a few hundred bucks is totally worth it in my eyes :)
The flanking cabinets not only offer practical storage for firewood and other items, though also help balance the wood burner. Although built-in cabinets would look fantastic, where possible I like the idea of keeping furniture free-standing so it’s easy to make future changes. Painting them in a colour which mimics the walls helps them look more integrated though Sherylee could also choose to make a statement with a pop of colour or beautiful natural timber finish.
Here’s a before and after collage just for comparison’s sake…
If you know me, you probably know that I like to “make the most”. This generally involves working with items people already have. You might then be wondering why I haven’t incorporated all of the furniture pieces you can see in the before pics. Sadly, they just weren’t quite right for the new layout. Fortunately though, Sherylee is still in the process of decorating other rooms in her house, so was happy to relocate items as need be.
So, that’s what I came up with. What do you think? I can’t wait to see how Sherylee brings this virtual room to life!
![]()
If you’d like some design help with a room in your home, feel free to contact me about a virtual consultation.


Absolutely beautiful deign as usual. I really love these posts. I know you’re a busy mom though keep them coming if you can.
Especially love the way you explain your decisions. It really helps those of us more challenged lol!!!
I thik it’s lovely. I;m not really a re/orange person though appreciate the ay you have incirporated the requested tones. It looks so inviting.
The built-in fireplace looks amazing. I really hope she decides to do that! I can understand her hesitation though. Lots more time and money and heaps more permanent. The recycled brick goes so well with the oranges and reds.
Living in a home with a darker wood trim and bricks (both of which my husband has requested stay unpainted), it’s really nice to see a room update that included those two finishes.
Yes, it’s easy to get caught up and forget that you can still make your room beautiful even if all of the elements don’t seem to fit with “the look”. There are lots of ways to create a lovely space!
What a spectacular change! Great ideas!
Be careful what you wish for though, we will all be sending you our problem room pics, lol!
LOL! Thanks Patricia.
What a gorgeous design! I hope she sends pictures once it is all together, I am sure it will look amazing!
http://www.thebeccalynn.com
What a great look! I could see your design aesthetic in it even before I recognized the pictures. ;) You have a great eye. When I first started following you it was about up-cycling furniture for your house, now you’re designing rooms for others – yay! Explaining the process so well is your distinctive touch. :)
Thanks so much Deb :)
Wow, fantastic job! I looked at the before pics and could totally relate to feeling overwhelmed with such a large, blank space to work with. I love how you’ve made it look so cozy, and I adore the fireplace.
Thanks so much Julie :)
So great to see this post Kristine! Thank you again :-)!! You will be pleased to know we are making progress on getting things done – wood fire installed (it looks fantastic!), side table built and painted, coffee table being revamped, gallery wall planned and ready to hang, gorgeous orange fabric found for cushion covers – and I even found a very similar vase at the op shop – it was mission brown but is now spray painted a lovely grey (I followed your tutorial on painting ceramic – so glad you had that one!). I am still searching for ottomans and chairs and we need to build those wonderful white cabinets, but it is so exciting to see your beautiful vision coming to life! You will be the first to see it when it is looking pretty :-)
Oh yay! Go you! It all sounds really exciting and I can’t wait to see the room :)
So glad to have been able to help you.
Looks awesome!! What program are you using for the Virtual Staging?
Thanks Lori. I use Home Designer by Chief Architect (https://www.homedesignersoftware.com/).
Thank you!
Quiet a improvement, i would say. Good job !
Wow yea that design looks so much more friendly and more inviting than whats there now. Great job on the design.
I wouldn’t know what to do with such a big space! Would love to see what she ends up doing!
Wow! Looks great! What software design did you use? You have an awesome skills designer.
Thanks so much John. I used Home Designer by Chief Architect (https://www.homedesignersoftware.com/).
Kristine
Like how you created a bit of a more cosy atmosphere with lowering the lamps with a wire. Also interested in the software you used!!
Thanks. I used Home Designer by Chief Architect.
Cheers
Just found your site and I love it!
You had a wonderful vision and executed it beautifully!