
If you’re anything like me, you probably have a cumbersome stash of old Christmas baubles taking up way too much precious real estate in your meager Christmas storage space.
Remember the time you thought it would be cool to have a multi-coloured tree? Then there was the “white” year. Followed by the “natural” year. Preceded by the “gold” year.
Those baubles sure do add up!
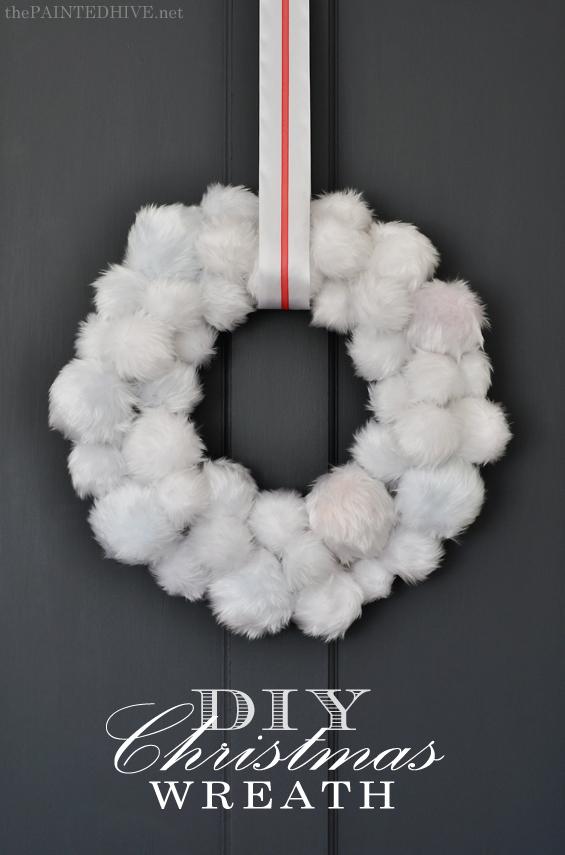
Well, here’s a fun, easy and affordable DIY which up-cycles some of those excess baubles and helps you re-claim precious space in that overflowing ornament box! Not to mention produces a pretty and unique Christmas wreath!
You will need…
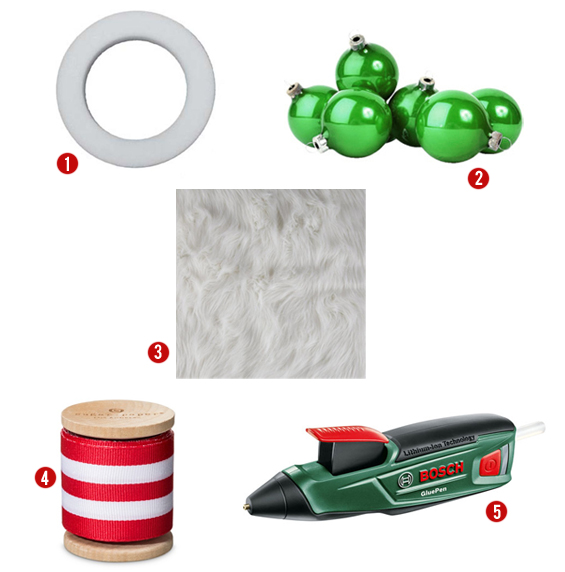
1 WREATH FORM
I wanted something flat so made my own wreath disk from some thick card I already had. You can easily make your own too (ensure you use something relatively sturdy to avoid sagging) or simply purchase a ready-made form (just be careful it isn’t too domed or your wreath might look overly bulky and it could take heaps of baubles to cover it). You could also buy a cheap finished wreath and remove or cover the existing “adornments”.
2 BAUBLES
Although I designed this project around the up-cyling of old baubles, you can use anything round. Polystyrene balls would work well. I simply used my old and broken baubles in an assortment of sizes.
3 FAUX FUR
I used some affordable faux fur I found at Spotlight for just $8 meter (on sale). The more expensive faux furs were tempting though this cheaper one works well because the backing isn’t overly thick, so is easy to meld around the baubles, and the nap is medium in length, so it conceals the gather lines with ease.
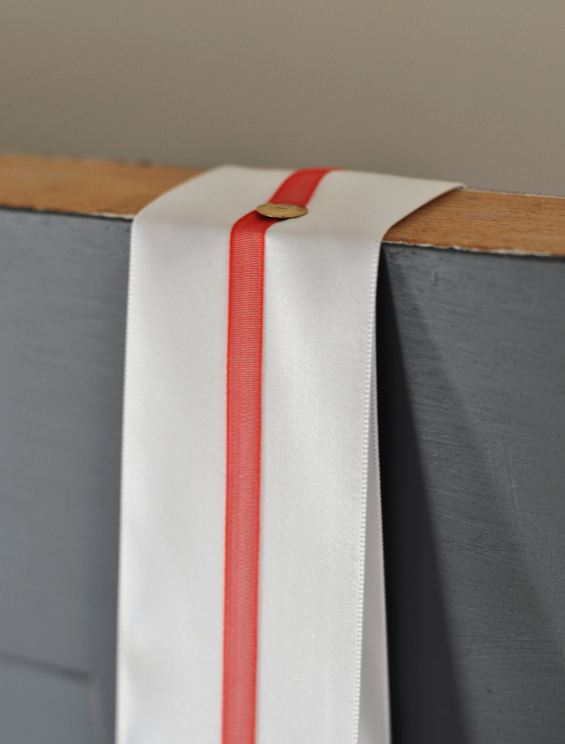
4 RIBBON
I couldn’t find the ribbon I had envisioned so decided to combine two – a thick white satin ribbon with a fine red organza ribbon. Of course, you can use whatever ribbon you like.
5 HOT MELT GLUE GUN
I used a Bosch Glue Pen. This pen is fantastic because it’s cordless (no more wrestling with power leads!) and has a very fine tip which allows for precision gluing.
The process…
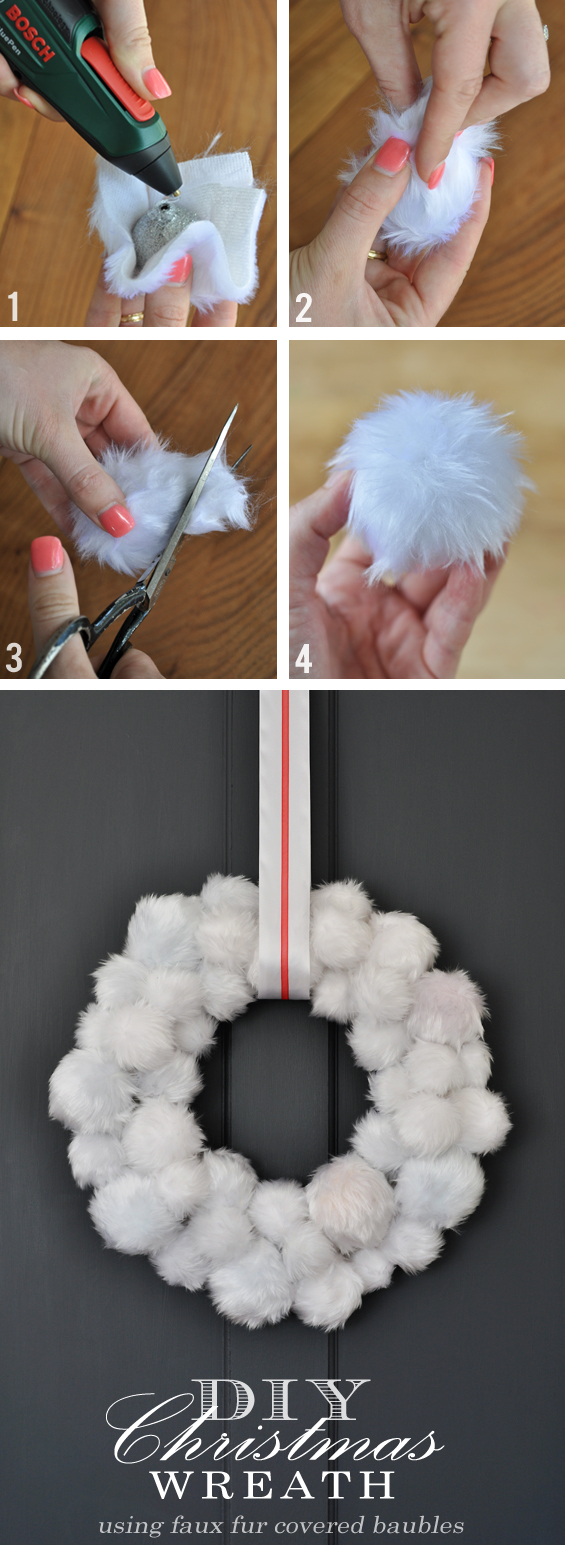
STEP 1 Cover baubles with faux fur.
This is pretty straight forward though getting the hang of it can take a bit of practice. Now, I don’t claim to be any kind of faux-fur-bauble-covering-expert, as this is the first time I have ever done it, though after lots of trial and error this is the method I personally found quickest and easiest…
– HOW TO COVER A BAUBLE WITH FAUX FUR –
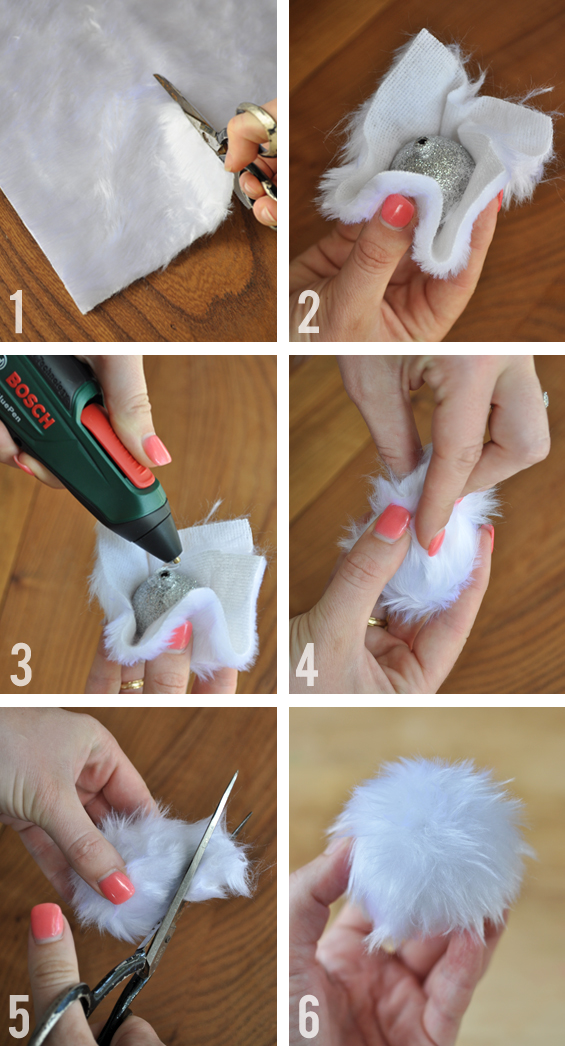
1 Cut a square of fabric which just covers the bauble.
2 Place the bauble, nodule side up, in the center of the fabric square and gather up the sides, holding the base of the bauble securely.
3 Squeeze a generous-ish amount of hot glue around the nodule.
4 Pull up the fabric and secure it tightly around the bauble, bunching it together in the same way you might wrap a bon-bon or make a wonton. Smooth and press as needed, ensuring all of the gathers are fixed in place with some glue. This is where the faux fur works so well – the nap of the fabric conceals any gathers which would be obvious if you used regular material.
5 Whilst the glue is still warm, trim off any excess fabric then press and smooth the cut ends down into the glue. Although you wont be able to see the area where the fabric meets once you make the wreath you still want it to be as neat and flat as possible.
6 You have created a nice round fluffy ball!
Now repeat that process thirty-seven times – LOL! It does sound tedious, though is actually quite fast and easy.
STEP 2 Attach baubles to wreath form.
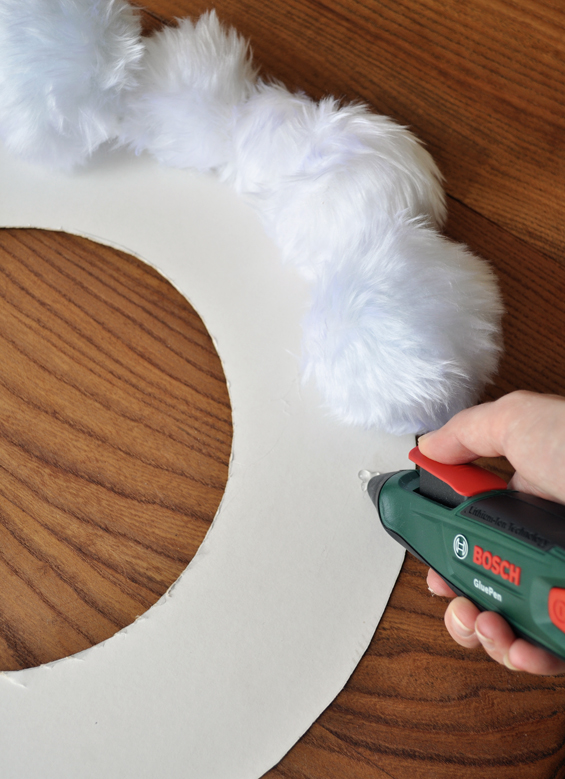
There really is no right or wrong way to do this as far as I’m concerned. I simply started by gluing baubles, join side down, around the outer edge of my wreath, ensuring I was covering the edge of the form. I then worked my way in, finishing by gluing small baubles on top to fill any gaps.
STEP 3 Attach ribbon.
I wanted my ribbon to sit neatly though was having some trouble due to the deliberate unevenness of my baubles. So, I wrapped a strip of cereal box cardboard in a faux fur off-cut then glued it to the wreath beneath where I wanted to position my ribbon. Voila! The strip is just narrower than the ribbon so is concealed yet provides a nice smooth surface for my ribbon to rest on (sorry, I tried to get a photo of this though all the fur just blended together so it wasn’t very clear!).
As mentioned earlier, I couldn’t find the exact ribbon I was after so I combined two – a thick white satin ribbon accented with a thin strip of red organza ribbon. To keep everything in place, I secured the ribbon to the rear of the wreath using a small dollop of hot glue.
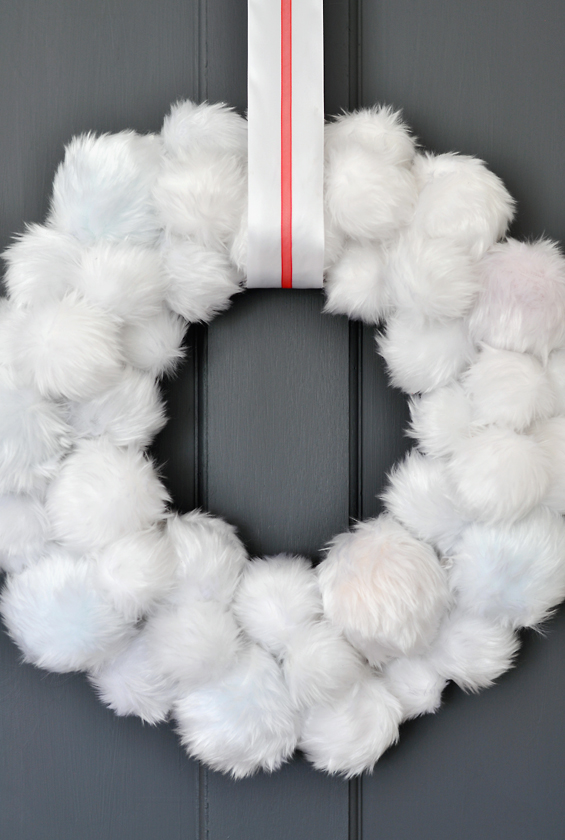
STEP 4 Hang and enjoy!
To hang the wreath I simply pushed a thumb tack through the ribbon into the top of the door. Easy! I didn’t trim the excess ribbon as this door always remains open so the rear is never visible. Of course, you could simply trim the excess or for something pretty and different, why not allow it to overhang the door and tie it in a bow then secure it to the door with some sticky tack or an adhesive strip.
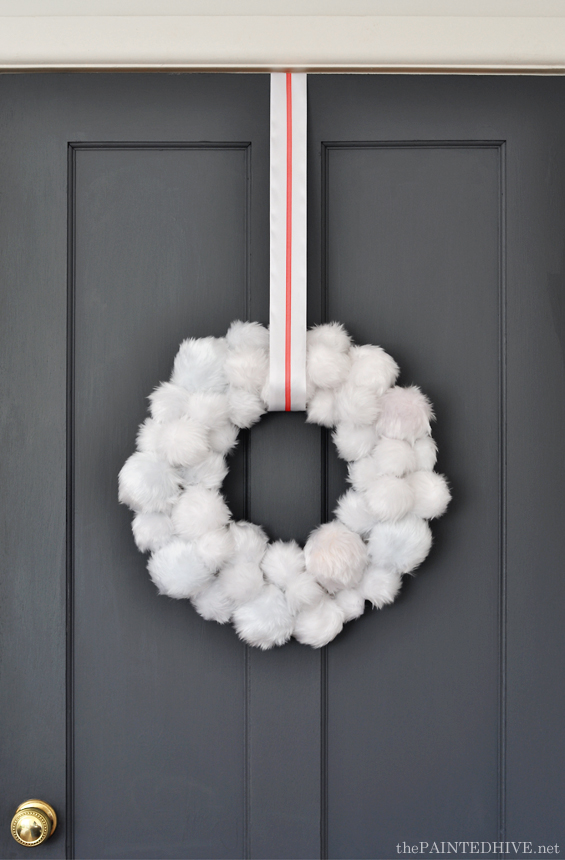
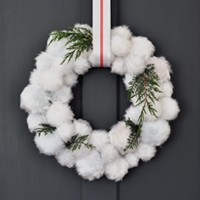
I love the way all the little white mounds mimic snowballs though also give a nod to Santa’s fur trimmed suit. So festive!
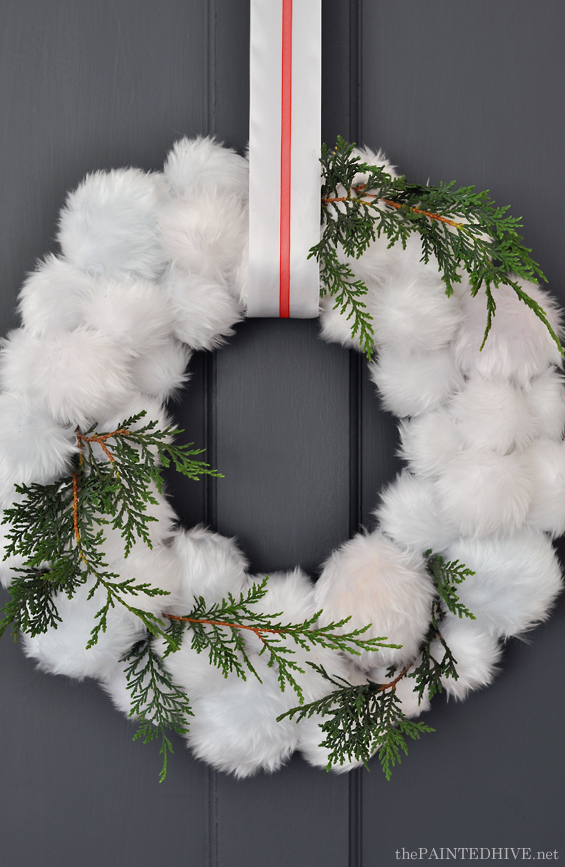
To add a natural hint I played around with some live clipped greenery. It’s simply nuzzled into the cavities so can be changed as needed. You could adhere some faux greenery for a more permanent finish. I also like the idea of incorporating a few scattered pinecones or star anise for an earthy, organic touch.
I know Christmas is fast approaching though if you’re still in need of a pretty festive wreath this one is fast and simple to make. And maybe if time doesn’t permit you can save the idea for next year (there’s a pinnable image below).
Have a great lead-up to the big day all!
![]()


So pretty and unique. Your ideas are always different and clever Thanks.
Thank you so much Lorraine. Merry Christmas :)
I love this wreath and the way you have used old Christmas balls though you didn’t do the regular ornament wreath thing. Pinned.
Thanks Penny. I wanted to come up with something a little bit different that I hadn’t seen done before and this was it! Have a great Christmas.
It’s lovely and all of your tips and tricks are appreciated.
Thank you Yammi :)
This has a great aesthetic – so pretty! And a great way to re-purpose. Hope you and yours have a Merry Christmas. :)
Thanks so much Deb. Same to you – Merry Christmas!
Thanks also for your lovely support and e-friendship throughout the year.
:)
I love this because it is so unique! Merry Christmas and Happy New Year
Thanks so much Carolyn. Have a great New Year!
Incredibly beautifully, as in a fairy-tale. Turned out originally, and main – all is simple. We will try to do independently)
Extremely cute! We tried this (it didn’t end up nearly as nice looking as yours) and it went perfectly with our powder white faux Christmas tree!
Such a beautiful DIY! I love tutorials like these, and yours look pretty easy to do. I will definitely be my next project. Thank you for sharing!
Brilliant, this is just what I wanted but could figure out how to without spending a ton of $$$. Thank you!!
Thank you for such a great idea and tutorial. I am always looking for ideas for projects for my annual church bazaar. Your wreathe looks great on a dark door and is good all winter (I live in Maine so snowballs are a great theme!).