Last week one of my daughter’s closest friends celebrated her 9th birthday.
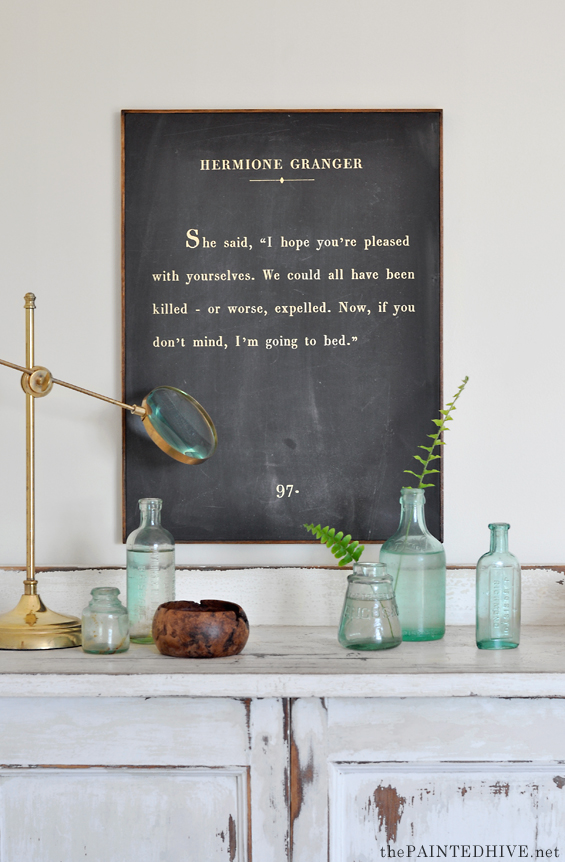
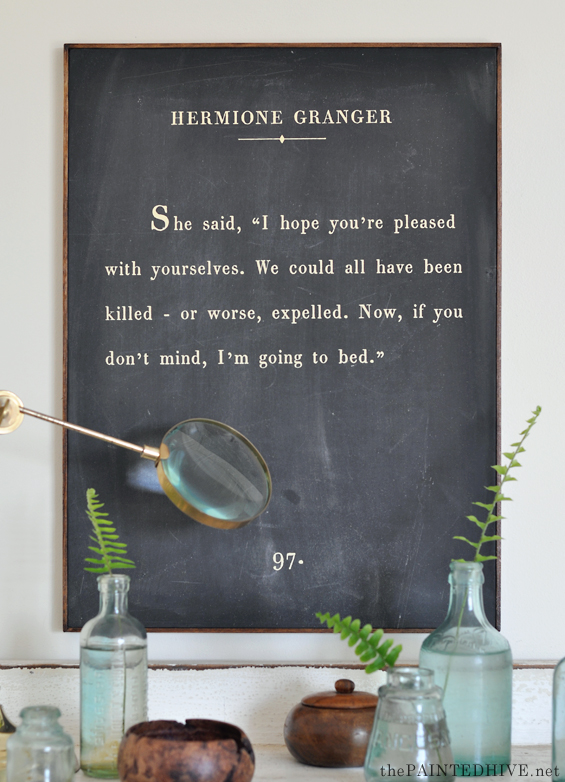
She is obsessed with Harry Potter, and her mum is an author, so for something special I decided to make her a custom book page sign.
Yeah, I know it’s not the funnest kids’ gift in the world, though I knew she would appreciate it.
I’ve made a few of these signs in the past using regular poster paper, but this time around I decided to experiment with a different kind of material – self-adhesive terylene.
Not only is it more durable than regular poster paper, it has a nice canvas-like texture too, and is a bit easier to apply.
You see, although I’ve gotten pretty good with using regular poster paper, it still has its risks in terms of bubbling, waving, bleeding or tearing during the gluing process. Most of these issues can be avoided by using the ‘dry-glue’ method (where you coat your surface with adhesive, allow to completely dry, then reactivate the glue with heat – usually using an iron – to attach the paper) but it’s still not fool-proof. Plus, I just wanted to try something new.
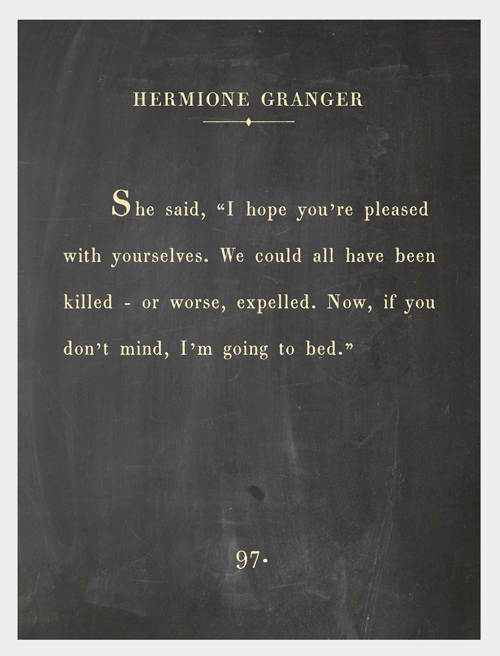
Of course, the first thing I did was decide on a quote and design the image.
I’ve created a few custom Harry Potter book page signs in the past, most of them with deep and meaningful quotes, but I wanted this to be a bit fun and quirky. This Hermione quote might be a little left of center but I know it’s a bit of a favourite among the kiddoes. The page number (97) represents the year the book was first published.
I used Photoshop to design the image though you can also use a basic publishing program (such as Word) or any other photo editing or graphic design software.
My original book page quote signs are large poster size (60cm x 90cm/24″ x 36″) however I decided to make this one smaller at around A2 size (42cm x 60cm/16″ x 23″). Due to the fact I planned to build my own custom frame I didn’t need to size it specifically. If you intend to use an off-the-shelf frame, then be sure to design your image to fit.
Once I was happy with my image I had it printed through Officeworks using their Self Adhesive Poster option. My A2 print cost just $15 (which is actually cheaper than their satin regular poster paper!).
Note: Most print stores will provide a self-adhesive option. If you don’t have an Officeworks near you, check what your local print store can offer. Or you can order online through Officeworks.
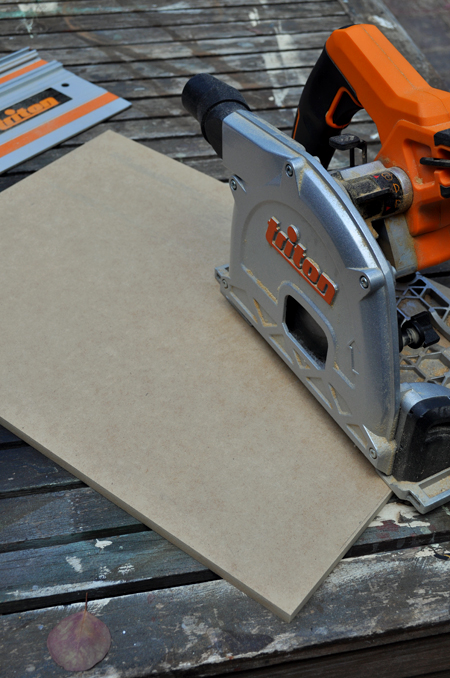
To back the print I bought a 12mm/.5″ deep MDF off-cut from my local hardware store for $2 and cut it to size. I used my trusty track saw though you could use a regular circular saw or even a jigsaw. Or, ask the hardware store to cut it for you.
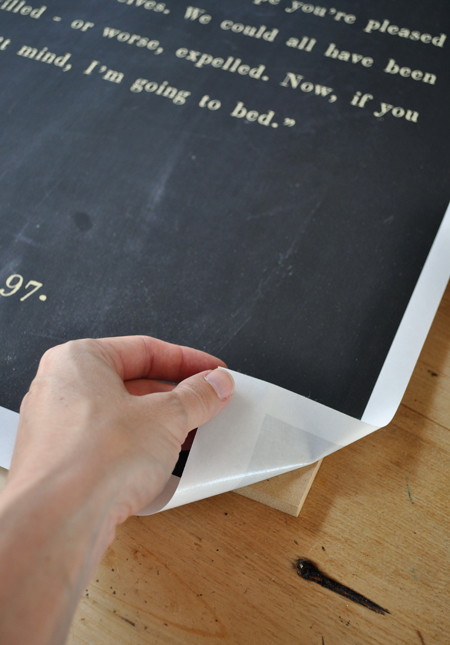
I made sure the MDF was nice and clean, positioned my print in place on top, then gradually peeled the backing away, before smoothing it down.
Sorry, it was a bit hard for me to take photos of this process as I needed both hands, but it was really easy. Just like peel and stick wallpaper. And unlike conventional vinyl contact, which can easily bubble and crease, I found this super forgiving.
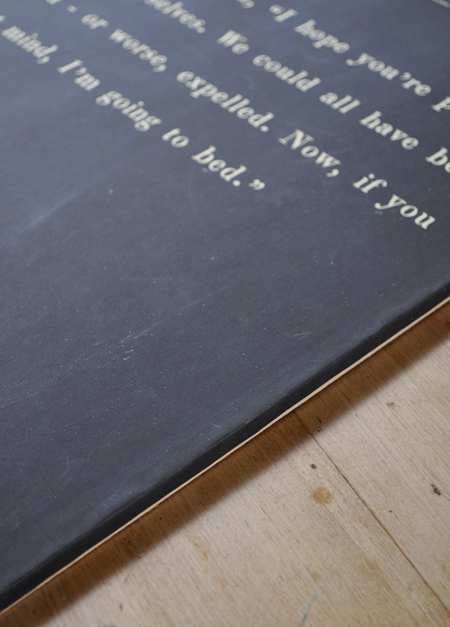
I then trimmed off the white excess and pressed the remaining poster border around the side of the MDF backing.
Note: Because I was making this as a gift I wanted it to look super neat and professional. As such, I didn’t want any of the excess poster fabric visible from the back. Under different circumstances I wouldn’t have bothered trimming it and would simply have wrapped the entire thing around the MDF.
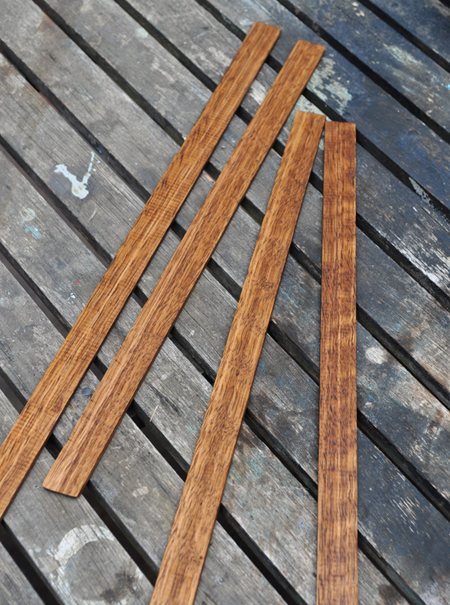
To frame it, I used some simple pine trim ($8) which I cut to size and stained a warm walnut.
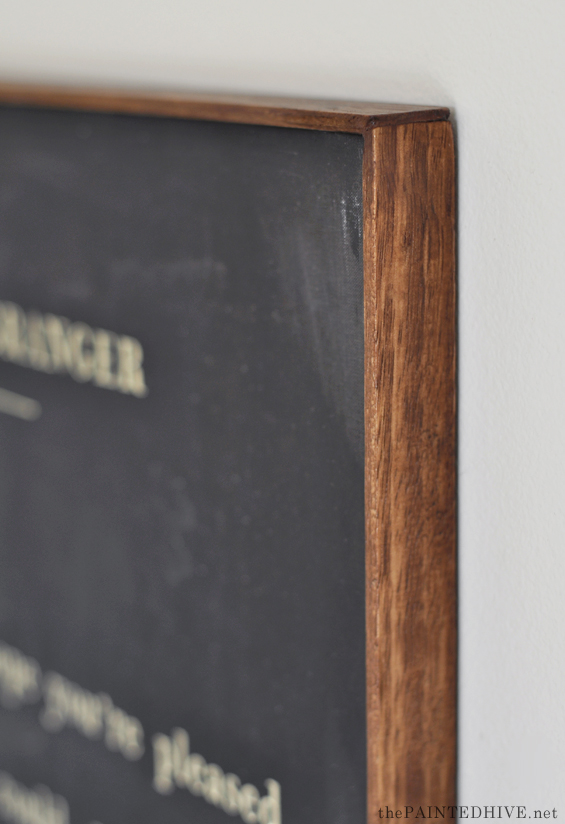
I attached it directly to the MDF backing using some wood glue and fine finishing nails, which I later countersunk and filled with co-ordinating wood putty.
You can also simply colour the nail heads with a black or brown permanent marker and they should blend right in. The frame is supposed to be a bit rustic so there’s no need to worry about making it perfect.
Note: The nail isn’t centered because the trim is deeper than the backing (not because I’m ridiculously bad at lining things up – however that may also be true – LOL!).
It’s that easy!
Because the frame is deeper than the backing you can simply hang it from the top piece of trim using a nail or two.
All up this custom piece of special wall art cost me only $25 and less than an hour to create! Not bad.
If you’re looking for some artwork to try this project out with, don’t forget to check out my Free Printables gallery.




Love this! Will be looking through your library to see what I can use for our needs.
Oh yay! Have fun :)
I love this and want to try it. Any chance you could post a video?
Thanks. Well, I didn’t record a video this time around and don’t really have a need to make another sign at the moment. I will be sure to make a video next time. It’s really easy though :)
I, too, love this project so much! Thank you for sharing. :)
You’re so welcome :)
This is genius! Seriously! If I only knew how to work technology, I’d be all over this! May need to consult with someone I know that gets how to size images & get the instant projects that come to my brain onto my walls! ❤️ Thanks for the inspiration!
Erin, it’s really not difficult. You can start with GIMP which is a free Photoshop-like program. Yes, it takes a bit to get the hang of though once you’ve got the basics down it’s a cinch. I actually have some tutorials if you want to learn more :)
https://thepaintedhive.net/tag/free-printables-series/
This three part series covers how to work with free printables though it will provide all the info you need to get started with creating your own images too.
You’re wonderful Kristine! Thank you SO much, this is gold! I’m all over it! ❤️
Have fun!
This may be a silly question, but how did you make the black of your poster have a chalkboard (uneven) appearance? Would that require Photoshop? I’m wondering if that would be possible in Word or another word processing program…
Not a silly question at all. I use what are called “textures” for the backgrounds of my book page signs. In this case I have obviously used a chalkboard texture. For some of my other signs I use aged paper textures.
You can make your own textures by taking photos of materials, or by creating them entirely digitally (which can take a bit of skill), or you can download textures online – which is the quick and easy way! Some are free and some are paid for. Generally the paid for ones are higher resolution and better quality though you can also find some great free ones too. Usually, the paid for ones aren’t very expensive anyway though. Just be careful with small or low resolution images as they will likely not be high enough quality to translate well for print.
To use the textures in a program such as Word, there are probably a few different methods, though I would import/insert the image, manipulate it to fit the page, and set it in Text Wrapping as ‘Behind Text’. Then you can simply add your text straight over the top!
Just be sure to set your paper size accordingly first (Word has some size limitations – max. of 22″ x 22″ – though if you save as a PDF the quality should be retained enough to enlarge for print, within reason).
For more info, be sure to check out my previous posts which explain some of this in greater detail:
https://thepaintedhive.net/2015/08/diy-quote-art-and-free-printable-sign/
https://thepaintedhive.net/2017/03/diy-over-size-book-page-quote-art-with-free-printables/
https://thepaintedhive.net/tag/free-printables-series/
Hope this helps :)
That makes perfect sense – thanks for such a detailed response!
I love it! Thanks for sharing.
Thank you :)
My niece, who is a college librarian, and her husband are moving into a grand old house were she will be fixing up a room for her library. This is going to make the perfect house warming gift. Now to find out one of her favorite authors and quotes!
Oh, she will love it!
You are seriously killing me with your talent and skills! This is so fun. I am all about the vintage look, I’m also a word nerd. Do you have other quotes available to print?
Aw, thanks. Yes, I have a few free printable quotes. You can find them here: https://thepaintedhive.net/free-printables/
:)
Love this updated version as much as the first time you wrote about it. I have the perfect thing to ask my Office Depot to print out for me using this technique. As always you da best!
Thanks Deb.
Kristine, I’m sure Charlotte’s friend will continue to love this gift even when she is 99. In keeping with the Harry Potter theme; you’re a wizard!
I love this!Can I ask what font you used?
Thanks. Sure, it’s called 1820 Modern.
Can I ask you what version of Photoshop you use for this?
I have CS4, so a super old version, but it’s still great :)
Do you Know how to put a photo on glass with a smooth finish, but no sign of brush marks. Just very smooth and any size. If so, what type or thickness of glass would be, or have you used?
Thank you in advance for any help you can give.
Much Respect,
Dianne 🌸
Hi Dianne. There are many ways to put a photo on glass, though I guess the thickness of glass will depend on how you intend to mount the finished piece? Can you share a bit more info? Cheers.