
I touched on this project a few posts back though wanted to re-visit it because now it’s totally done!

And looking pretty schmick! If I do say so myself :)
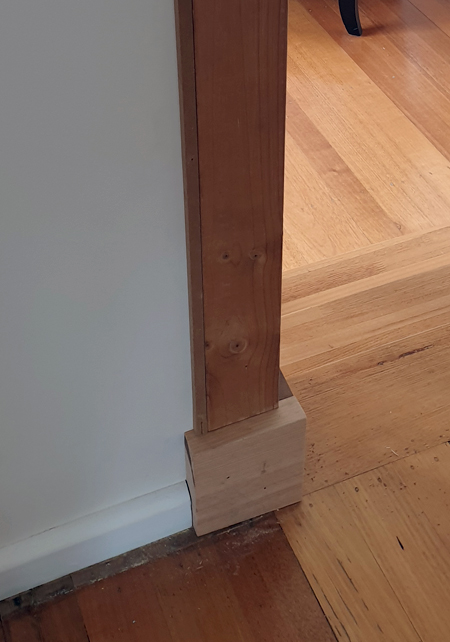
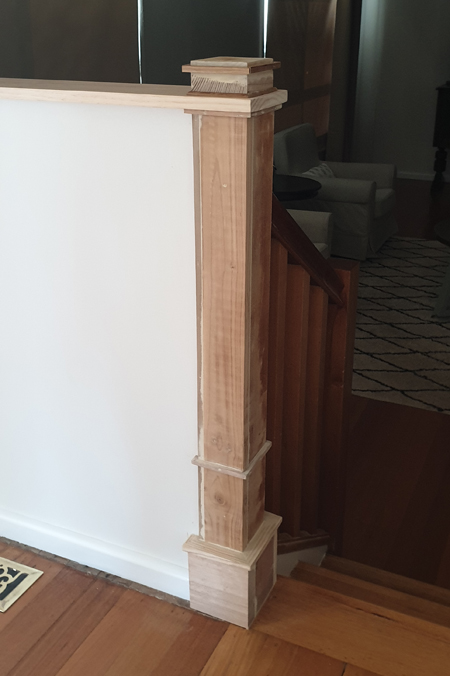
If you caught the past post, I shared how this newel-post-meets-half-wall was left in a bit of a mess after my parent’s builders made some changes.
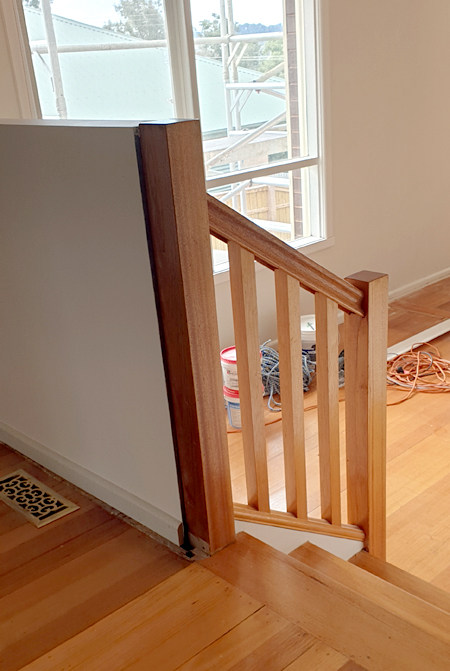
As you can see, it wasn’t exactly ideal!
There was originally a balustrade where the new half wall is (which was added to conceal some structural steel needed for the new extension above) however the builders weren’t quite sure how to deal with the situation, so I told them to just leave it with me.
I knew resolving things was totally doable, but I also knew it wasn’t going to be super easy. Figuring out how best to tackle this was a total brain melter. There were lots of different components to work around and everything was a little off square. It took a few days and lots of playing around, but I got there in the end!
Of course, there were lots of different ways I could have tackled this. If you’re after ideas or inspiration for your own staircase, be sure to check out the Paragon Stairs website, where they have loads of styles to choose from, including a huge spiral staircase collection.
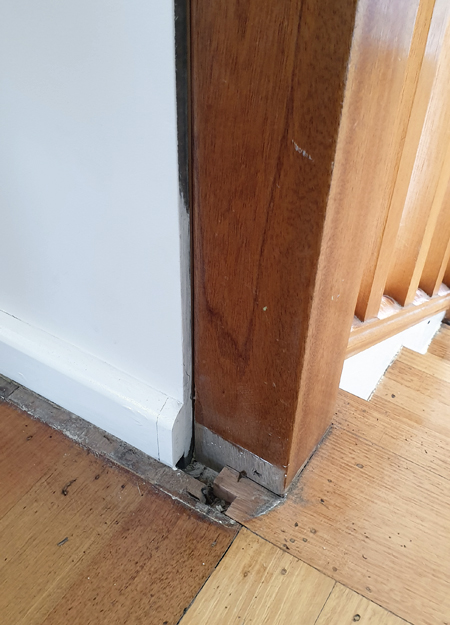
I started by bulking-up the front of the newel, so it was no longer shallower than the wall, and attaching a chunky skirt.
So that the skirt could extend beyond the post itself I used a multi-tool to cut down the existing skirting board a bit (you can see my pencil mark in the close-up before pic – two photos above).
Next I added some trim, just to give it a bit more character, and filled all the joins and nail holes.
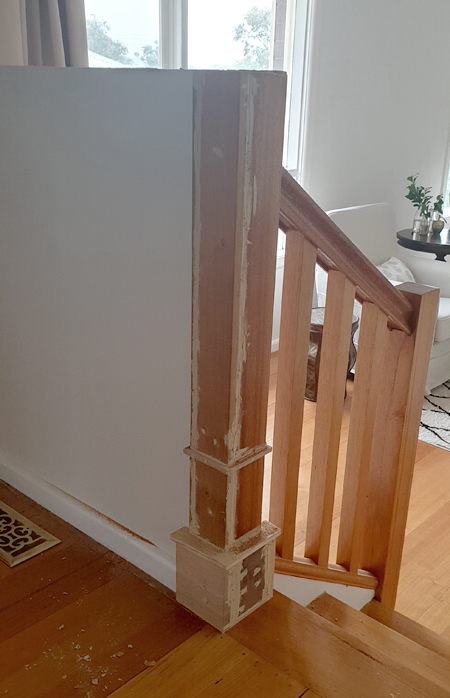
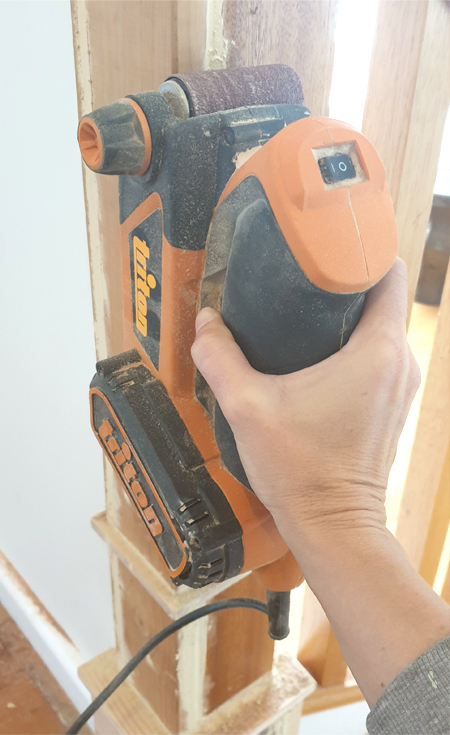
Then I sanded away until everything was nice, smooth and even.
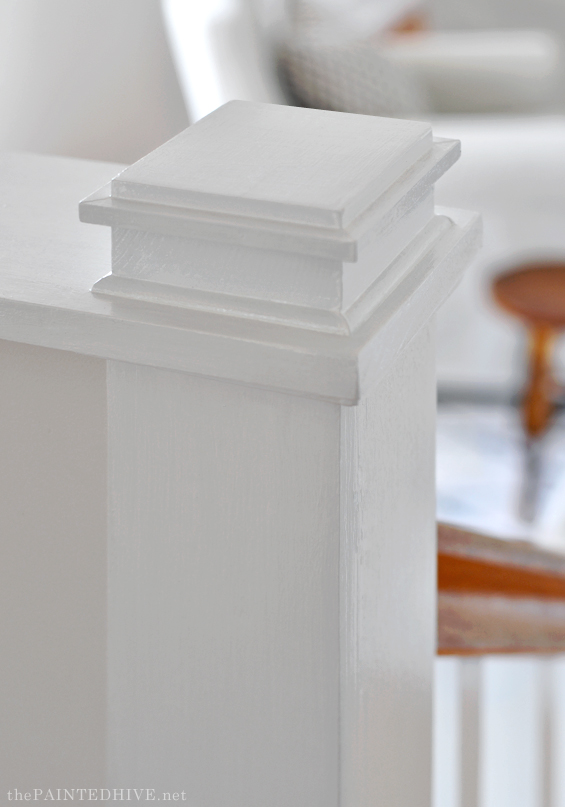
To cap the wall I thought it would be nice to add a shelf so I cut a piece of pine to fit.
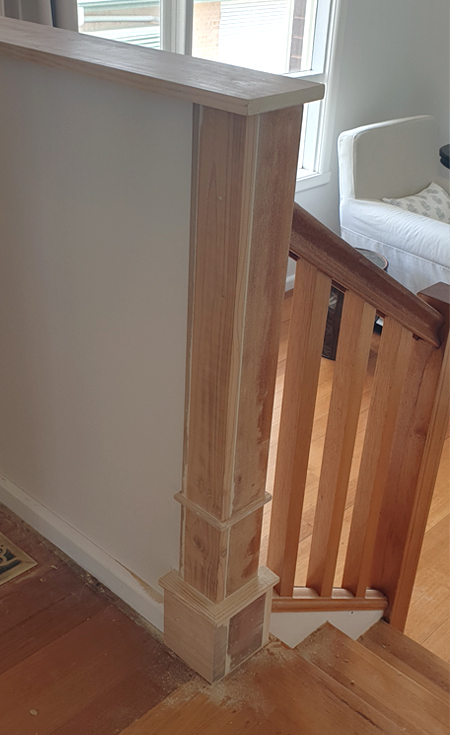
I quite liked the simplicity of this, though to finish things off I decided to build and attach a basic finial – which I liked even more! It will also tie-in better with the nearby newel post at the foot of the stairs which lead to the new extension (more on that to come!).
Then it was time to paint!
I contemplated leaving the shelf natural, or some of the trim around the top of the finial, however in the end I figured white would be cleaner and save the need to try and match all of the higgeldy-piggeldy wood.
I applied one coat of stain-blocking primer to prevent any bleed from the timber, and two top coats of Vivid White (standard untinted ‘builder’s white’) in Gloss (to match all of the other trim throughout the house).
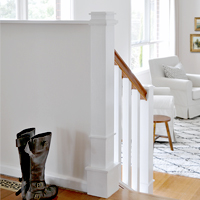
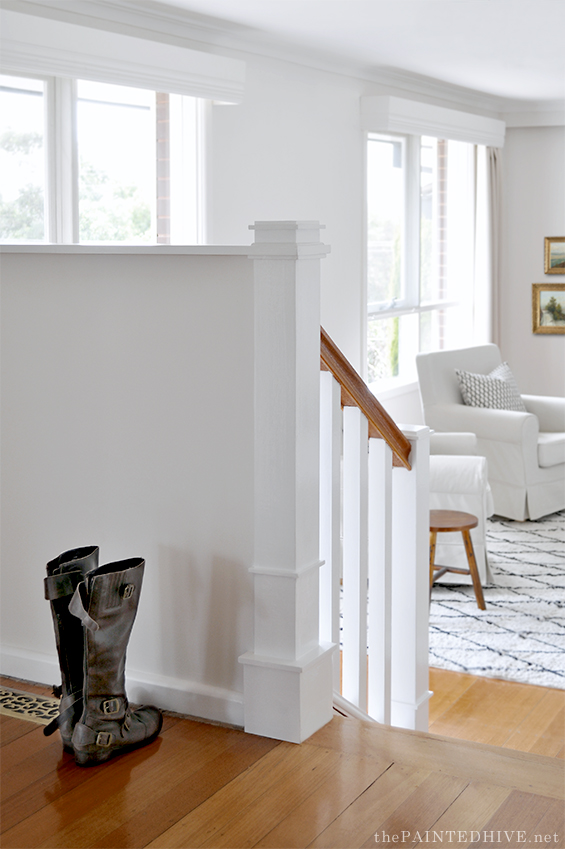
Ta-da!
I’m so happy with how it came together. It’s clean and fresh and classic, and looks as though it’s always been there.


And did you notice that I also added some trim to the lower newel? It was always my intention to have the upper newel as a ‘feature’, so I never wanted the two posts to match, however by attaching just a few simple pieces of co-ordinating trim they tie together perfectly.
Here’s a close-up of the finial. You can still see some of the timber grain through the paintwork. I know this look isn’t for everyone, though I personally love it! For me, texture from things like timber grain or brushstrokes (within reason) always makes things feel more “real”. Just remember, full gloss paint is pretty unforgiving in close-up photos as it accentuates light and shadows so please be kind :)
Of course, there were about a million different ways I could have tackled this project, and, if I’m honest, I really did just make things up as I went along, but sometimes that’s enough. And sometimes enough can be just right.
We still need to refinish the floor (can you see the strip of raw timber in front of the skirting board where the old balustrade base used to sit?), and complete about ten thousand other things, but this is one project ticked off the list!
BEFORE
DURING
AFTER
I kinda feel like this after deserves a jazz hands emoji or something – LOL!
![]()
![]()
I try and keep this blog as a dedicated ‘home’ space, separate from global issues we can all get enough of elsewhere, however given the unprecedented international climate, I felt I should comment.
Please don’t take my continued posts (which, casual as they may be, I know are trivial given the current state of the world) as any form of a lack of compassion, acknowledgement or understanding of the severity of the unfolding situation.
I’d simply like for this blog to remain a platform of escape for all of my lovely and valued readers, along with myself.
I hope you understand. Stay safe everyone.


Kristine
I appreciate what you say about the current world situation.
I also appreciate your positive outlook, and your obvious love of home and family.
Those are the values which will help us, as things get worse, before they settle into a new pattern of ‘Normal’
Stay safe, indeed.
Julia
Thanks Julia. Yes, it’s a tricky balance. Such strange times. I really appreciate your comment :)
Hold close to those you love.
Defs deserves jazz hands👋🏼🖐🏼
LOL, thanks :)
WOW! This is absolutely outstanding. Are you sure you’re not a magician??? Truly some of your greatest work!
LOL! Pretty sure a tame owl and “house elf” have never come through my bedroom window though I guess I could be wrong??? He, he.
Thank you for being so sweet.
What a big difference from a (relatively) small project! :)
Absolutely brilliant and beautiful fix! Thanks so much for this post!
Hi!
Thank you for helping to carry out with some normalcy in this new normal. I like to read your posts whenever they come. Keep up the great work!
Greetings from Denmark.
Patricia
Thanks so much :)
The railing turned out lovely and I love you statement “some times enough can be just right”. I think it would be great on a tee shirt. Thank you for not interrupting your blog with a “Breaking News” about current world events. There is no need to as we get bombarded with infor even minute. I will know go and wash my hands again!
Thanks Pat. Yes, it’s hard not to acknowledge things as I’ve been seeing some people getting slammed for their apparent “ignorance”. I’m sure there’s no-one among us who isn’t personally effected in some way, so far from ignorance it’s merely an attempt to stay sane!
Wow! That’s beautiful – as always, I am in awe of your creativity! Makes me want to go home and jump into a new project. And, thank you – I think the chance to escape from the reality of everything else for a few minutes, is a necessity right now, more than ever. Thank you for your positive outlook – I needed that today!
As always, stunning!!!!
Fabulous job It looks so good !!! You always finish every job off in style.
Thanks Julie :)
Beautiful!
I think you nailed it and it looks stunning! I look forward to your blog posts to escape all the gloom-and-doom news nowadays. Keep it up. Hope you and all your family stay well.
Looks great AND you changed the rug!
Thanks. LOL, yes, the old rug was only in one of the before photos which was taken quite a while back. My mum changed the rug a few months ago. She sewed two cheap Kmart ones together!
This is genius! It’s interesting that paint makes everything look like it’s always been there.You have an amazing eye for the finishing details.
It is in whatever normality we can maintain (continued blog posts as a example) that will allow us to weather this a tiny bit easier. I enjoy your content as is and hope to be able to continue to do so. Stay safe and thank you
On top of current craziness, my community had a 5.7 earthquake this morning. My house is fine and the damage is minimal for most but the addition of another unexpected event is stressful. I appreciate the ability to read normal posts to keep my mind focusing on other things.
Oh no! Sorry it has taken me a while to get back to you. I hope things have settled down (as much as they can right now).
Brilliant! Jazz Hands from the USA.
Your “platform of escape” is very much appreciated, Kristine! Thank you!
Thanks Olivia :)
Keep on doing what you do girl!
Ditto to all of the previous comments referring to your blurb about COVD19! Back to the business at hand……loving the glimpse of the sitting room in the background. I’m sure I’ve said it before but you’re a tease. :) Looking forward to more photos and details on those fabulous looking pelmets.
Thanks Julie :)
It looks amazing and yes, definitely jazz hands!
Pure genius! I love how you solved fixing the post – such a simple solution! I always look forward to your posts. I hope your family is doing well. These times are challenging but we have to do our part and stay focused on the positive, designing and creating including.
Thank you so much :)
💗 Beautiful Stairs Ideas Designs – Best Stair Design for House 👍👍👍
Are you kidding? You and all the other décor bloggers who keep sharing creative, beautiful and inspiring posts are keeping me going through all this. And since most of us are confined to our homes right now, you and others are helping us make our spaces better. I am definitely looking at my rooms with fresh eyes.
Thanks you!
This looks phenomenol! As somene new to your blog, I’m wondering how did you learn how to do all of this?
Fantastic solution! You never cease to amaze me with your out of the box solutions to things that would at least have me both stumped and in tears. :D
Some great work you have done here.