
Catch up on all the Suite Extension posts HERE.
It’s been a while since I’ve shared a good old-fashioned furniture upcylce.
And I absolutely love the way this one turned out!

I’d been on the hunt for some kind of cabinet for my parent’s suite extension for a while, something to act as a kitchenette extension of sorts – an item to provide additional storage for things like groceries and servingware.
I was really keen on something old with lots of character to off-set the fresh, new kitchenette, though most of what I came across was too petite or too expensive. It was time to start thinking more creatively.
So when I stumbled upon this dated pine hutch on Marketplace I could see the potential.
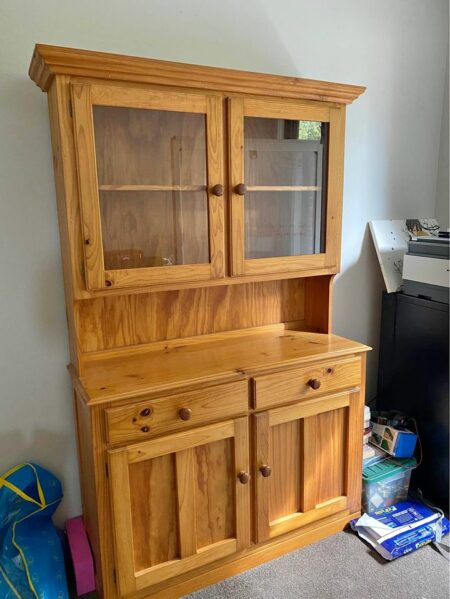
Priced at only $30, it had the right proportions and simple, primitive look I was after.
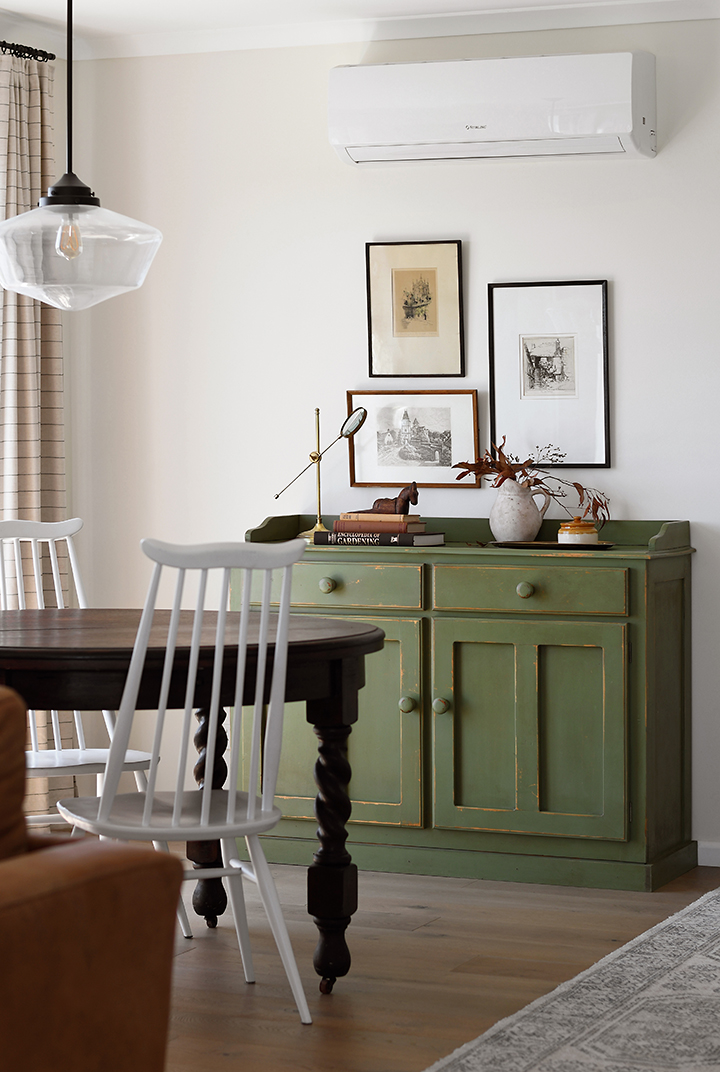
But…due to an air conditioning unit on the wall where I planned to position it, and the fact the nearby kitchenette already had open shelving, the hutch section wasn’t needed.
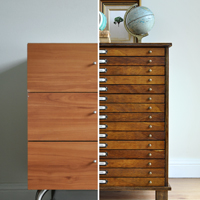
Most hutch units are constructed in two sections so are generally easy enough to dissect (many are even made to be dismantled for transport). Luckily that was the case in this instance so removing the top portion was quick and simple.
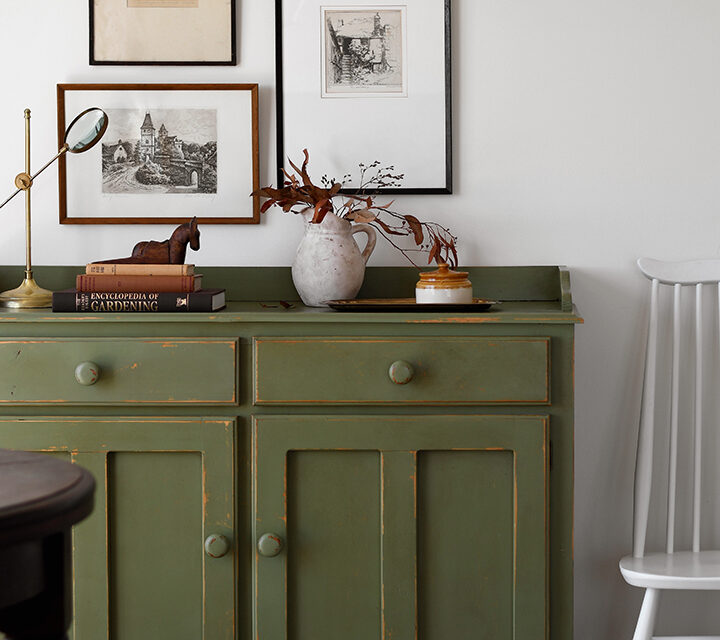
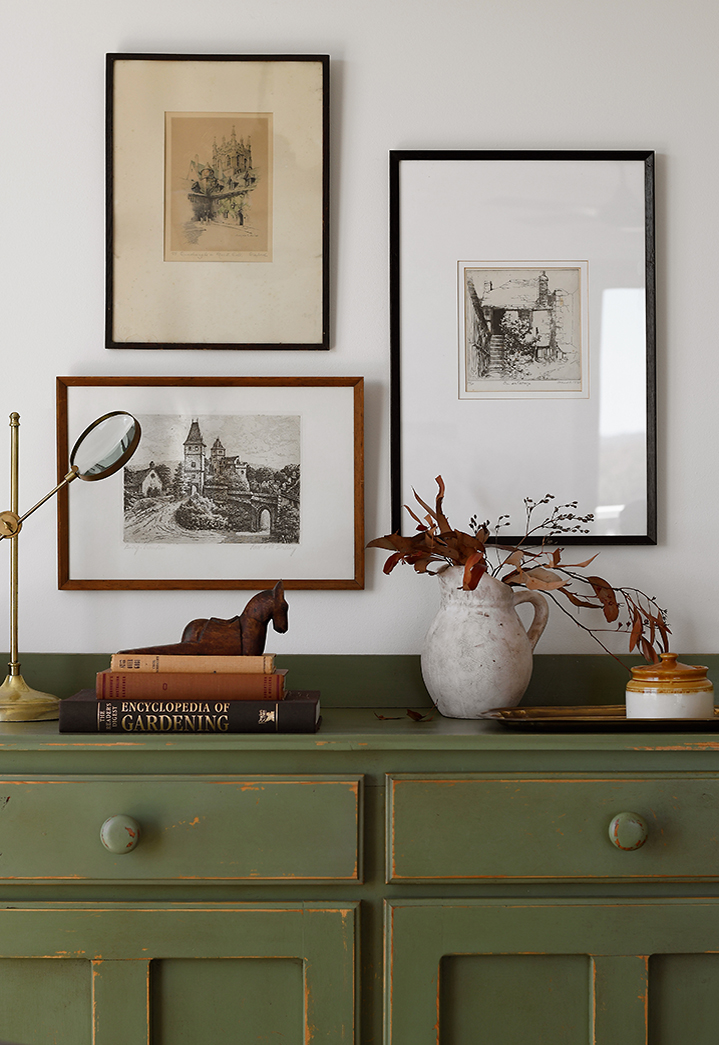
It’s at this point I should apologise for my lack of photos. This project was undertaken during my blogging absence so I didn’t capture it in detail. It was actually a rather hurried makeover done in anticipation of my sister’s family moving in to the suite extension. Although I completed it over a year ago it wasn’t until this week I actually hung the art and styled it properly which really brought the space to life!
Although I wanted this piece to be quite basic and unassuming, I also wanted it to be somewhat unique.
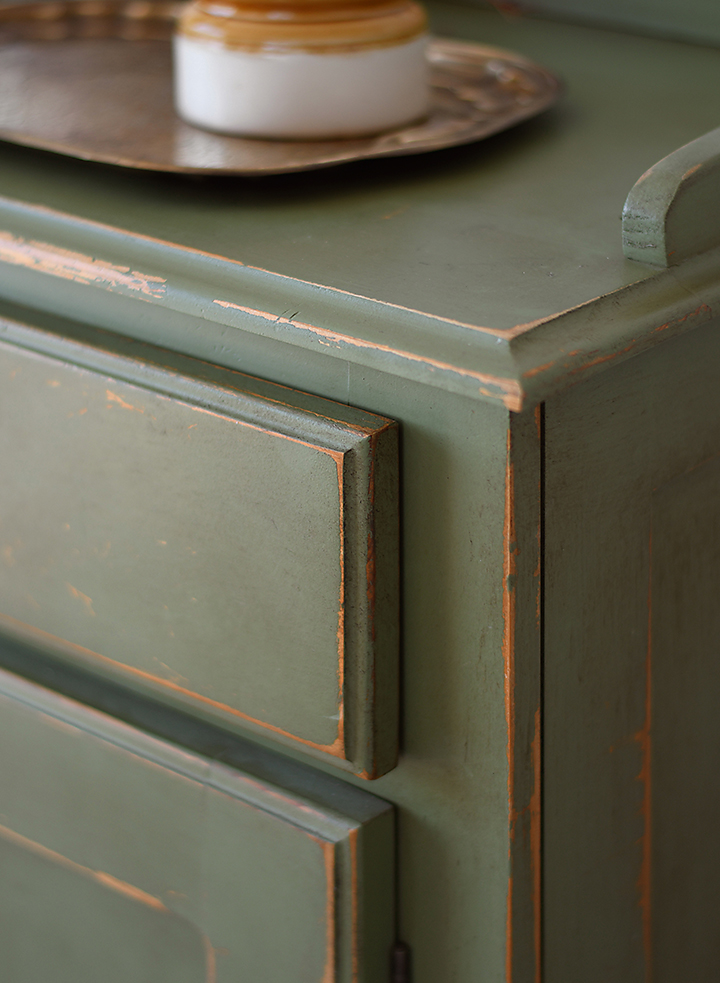
So, after removing the hutch section, we added some trim to the base to create a more prominent plinth (just so it wasn’t so straight up-and-down – if that makes sense?), along with a raised apron to the top.
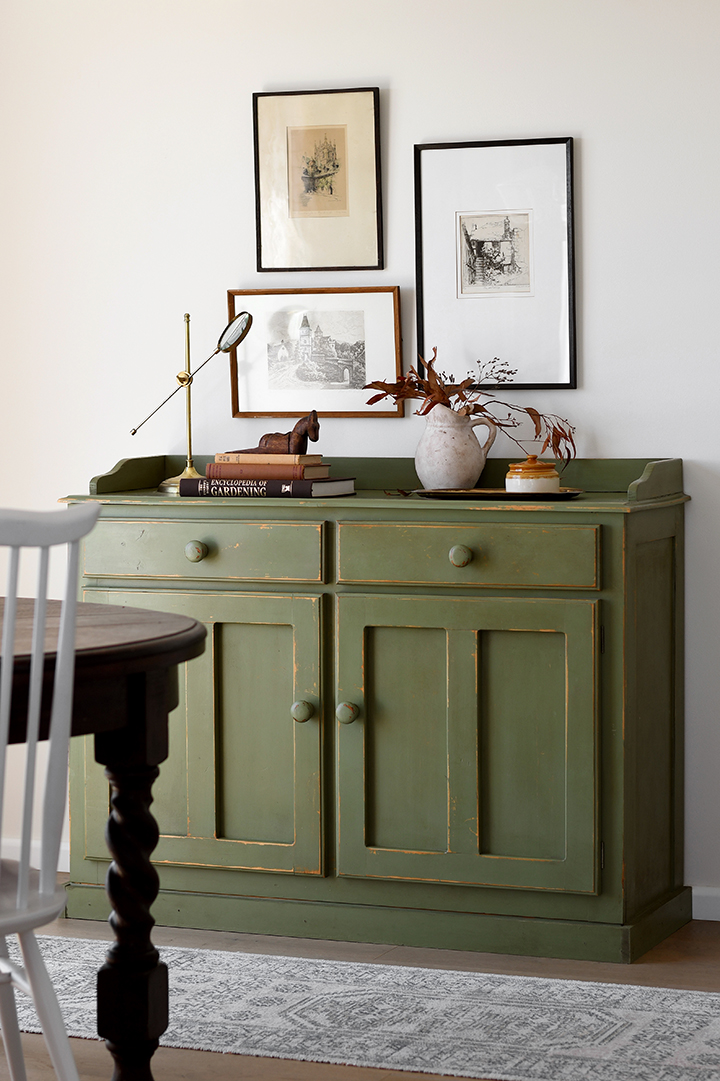
I love the way the apron gives it a ‘servery’ type feel.

Both the plinth and apron were made from left-over pine we already had. They were simply cut to size (for the sides of the apron we used a jigsaw to create the curves) then glued and screwed in place. It was super easy.
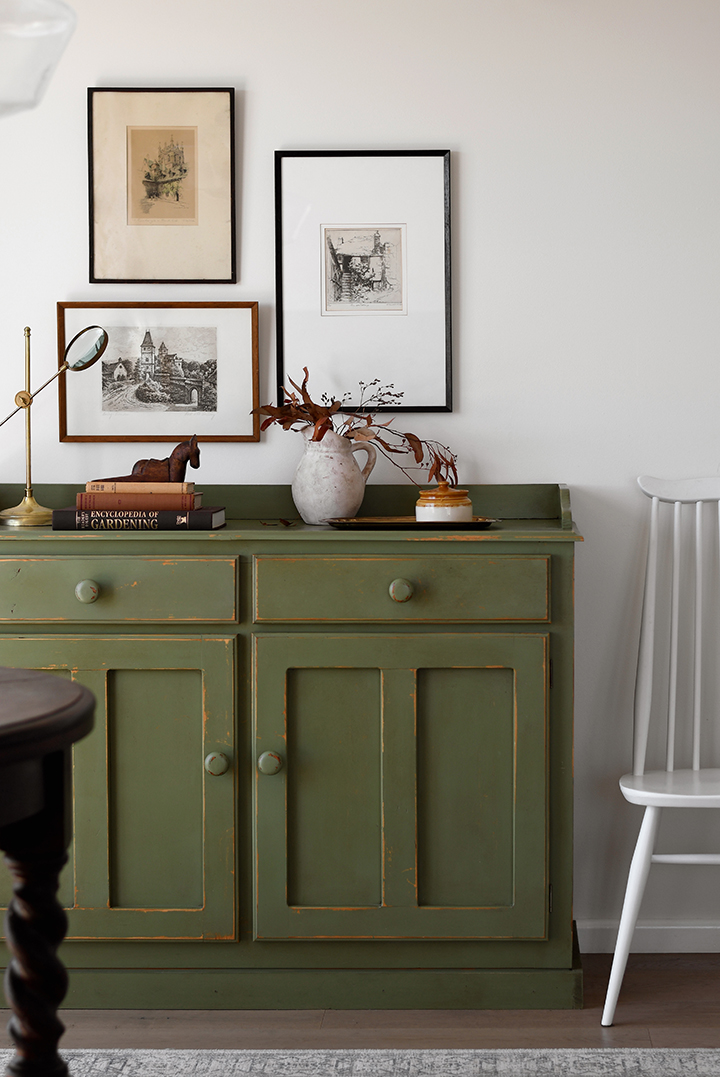
I always planned to paint this piece, and after contemplating the obvious choices of varying shades of white or black, I opted for a deep olive (this was a custom colour I made using paints I already had though it’s very similar to Dulux ‘Gunmetal Green’).
I know, I know, you’re probably sick of seeing me use green, but setting aside the fact it’s my favourite colour, it really made the most sense here. It compliments the prominent undertone in the kitchenette cabinets, and works to reference the powder room walls (I’ll be sharing that soon!) along with the bathroom stool I upcycled a few years back.
Teamed with the rolling hilltop views, and other splashes of green in the decor, it really helps create a sense of harmony in the suite extension overall.
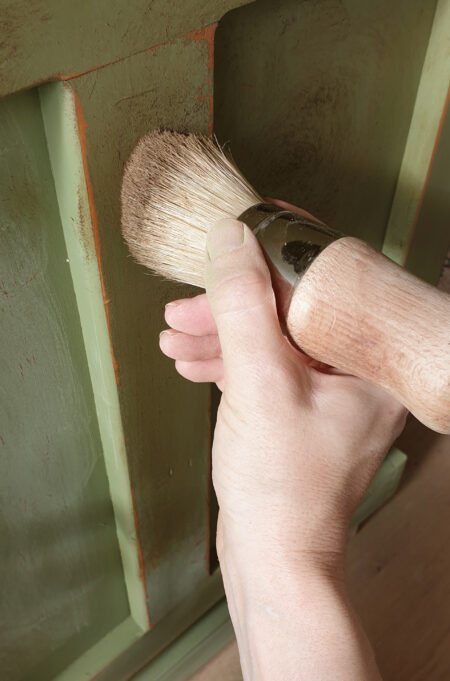
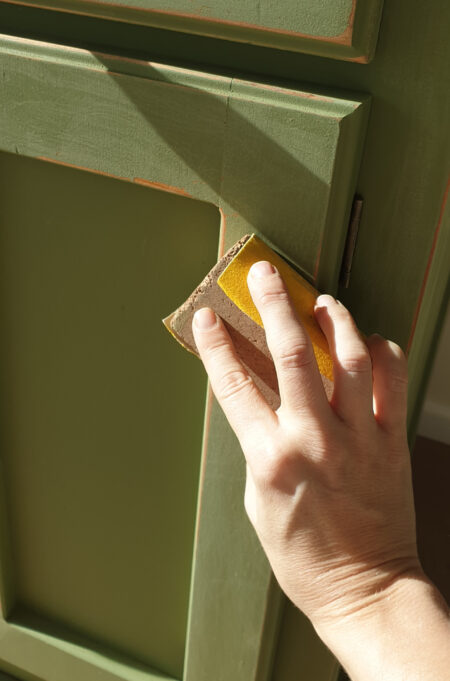
As mentioned earlier, I wanted to balance the clean new kitchenette with something with character so I also decided to distress and dark wax the sideboard.
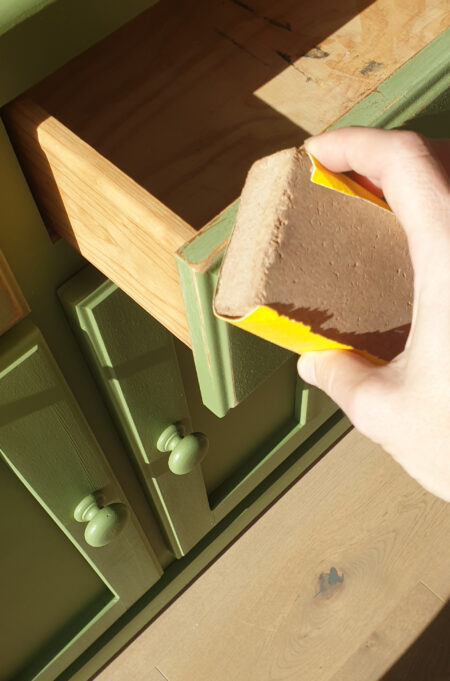
Yes, I realise distressed finishes aren’t exactly “in” at the moment, and some of you are probably rolling your eyes right now, but I’ve never been one to worry about trends. I’m really happy with the way it came together and love the rustic patina.
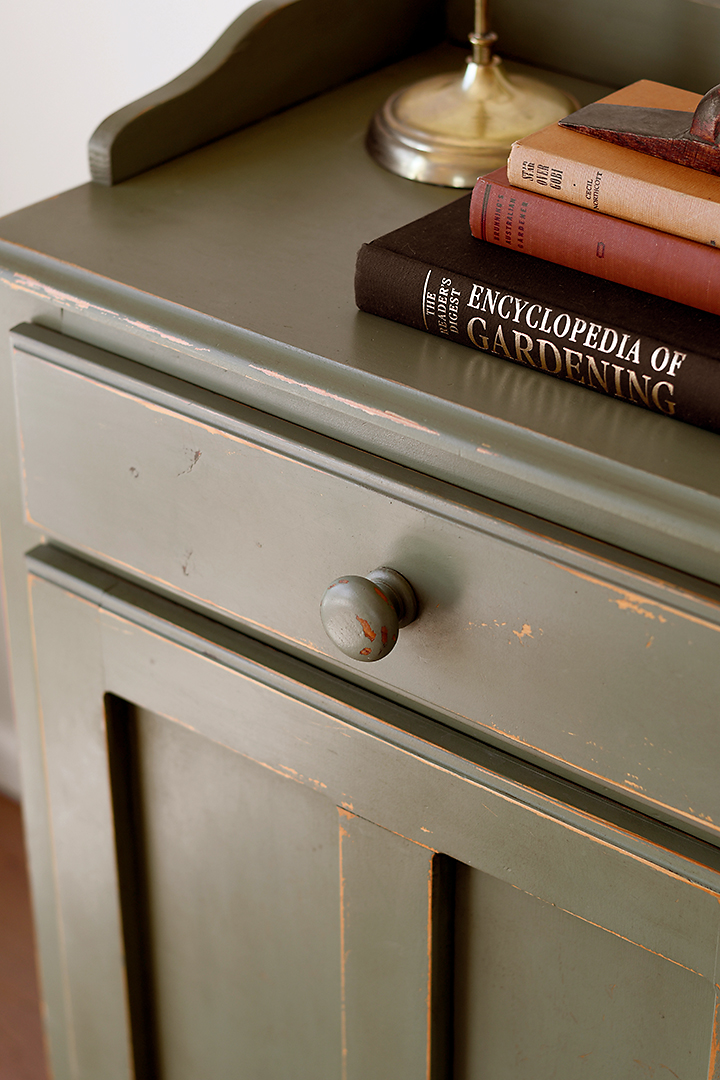
In terms of styling, I began with the collection of antique artworks then went from there. A hint of brass and some books (as per normal) then, rather unusually for me, some dried brown leaves in place of the fresh foliage I generally opt for. I guess I figured the paint colour provided enough green!
Here’s the before and after…
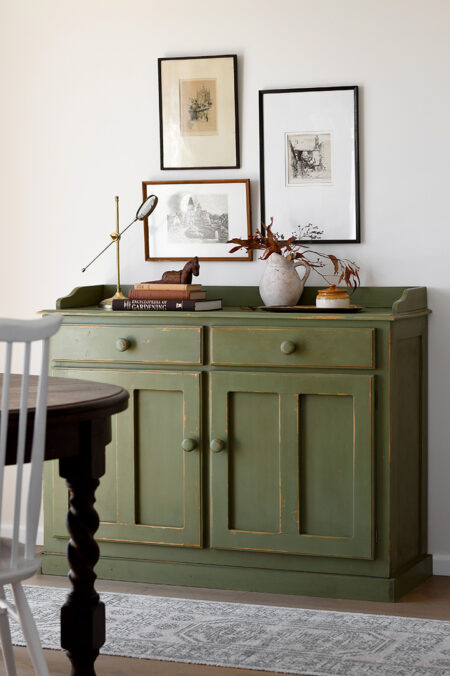
And here’s a wider shot which gives a sneak peek of a few other pieces in the room…
As always, feel free to ask questions if you’re after more info about the process or any featured items.
Catch up on all the Suite Extension posts HERE.


Beautiful. Your redos always are superb!!
Aw, thanks Karen. Really happy with the way this one turned out.
Great job. Love that timeless classy look. There’s a fair amount of that ‘90’s wooden furniture to be had being dumped by fashion followers …. they’re a bargain and mostly solid timber unlike most furniture available today. . I wouldn’t touch a genuine antique though.
You’re right. There are so many solid timber pieces being overlooked because they present as dated but the potential is definitely there.
I love how you incorporate green in your designs! Please don’t stop! Green is such a great accent colour.
Yep, I don’t think I could stop if I tried. Definitely my favourite colour!
Looks gorgeous Kristine, & I also love green. What type of paint & wax did you use, eg chalk paint needing no prep, then wax, or did you sand the piece back first & use a primer then acrylic or oil based paint? Guessing no primer as this is not visible in the distressing! Thanks, Cate
Okay, let me try and remember. I painted it about two years back!
I think the paint was probably just acrylic sample pots I had leftover from trialling colours in the powder room. Sample pots are substandard quality as they are purely designed for colour testing but I actually use them often on furniture – generally in conjunction with some kind of sealer – and have never had an issue. Because I knew I was going to distress this piece from the start it was never a huge problem if the paint wasn’t perfect or continued to wear over time. I would have given it a light sand though to be honest it probably wasn’t necessary as, again, I wasn’t too concerned about the paint sticking perfectly. And given I was going green with the intention of distressing it in sections, definitely no form of primer (white, grey or otherwise) so only the timber came through. Tannin/stain bleed wasn’t a concern either due to the dark paint colour and fact I was going for an intentionally mottled finish anyway. I used Annie Sloan Dark Wax because I was given a massive tin several years back and still have heaps (a little goes a loooong way). Hope this helps :)
It looks great! You removed the paint in just the right places. I have never attempted bc I always think I won’t be able to make it look realistic.
You should give it a go! Just start small at the corners and edges and stand back every now and again to assess. It’s easy to get carried away and over-do it but at the end of the day it’s only paint and you can always touch things up and try again.
Beautiful job! The distressed finish, when done right as you have, will always be in style because it looks honest and well-loved. And absolutely love the green -never apologize for green, it’s the best color!!
I think you are generally ahead of your time rather than behind. I find myself looking at some of your older posts to update my space now! The green is definitely on trend in the US and distressed/loved will never go out of style. Combining old and new is inherent to ANY livable space. Also, my own opinion…I don’t need a step by step tutorial on exact specs involved on each element. I just like the inspo you provide. I can execute the details on my own pieces with my own measurements, so don’t worry about all of the in between pics. That’s what youtube is for! ;) you provide beautiful content….once a month, or once a year. You do you! Hugs!
This is such an uplifting and comforting comment Michelle – thank you! I really like to try and go above-and-beyond for my readers when I can because I know many of them lack confidence and clarity when undertaking projects. I feel that providing plenty of info can help inspire and motivate! But I have to admit that developing incredibly in-depth tutorials isn’t exactly my favourite thing to do. I’ve definitely leaned away from it over the past several years in favour of more creative pursuits.
All that said, I’m still more than happy to answer questions as needed and offer guidance as requested. I’m super flattered you think I’m “ahead” of the times.
A fabulous update on a tired piece Kristine. Most of us are NOT here for fast fashion – in today and out tomorrow. Your style is “timeless classic” which is never really out of date. Your generosity and creativity are appreciated. Keep doing what you are doing.
Thanks Linda :)
I love this! what a beautiful colour, and i think that distressing it gives it a little age but also highlights the lines of the piece too. Gives me a great idea for a similar cupboard I have. I always enjoy your posts so much – you have amazing ideas, timeless style and are always so good at explaining everything. Thank you so much for sharing this!
Thank you so much Leslie.
I LOVE this redo!!! Love the color, shape, distressing, and the additional items you added it’s just fabulous. Green is also my favorite color, so I am right there with you. Thanks so much for sharing. I love your attention to detail and your timeless style.
Thank you Julie.
So glad you’re back! I follow a couple of US blogs but being a kiwi in NZ, I love that your design ideas are more accessible for me(love me some Bunnings!).
The hutch looks fab, great colour and styling, I love it!
Thanks Sandy. That’s great to hear.
Amazing job on upcycling the hutch. Love the shade of green you chose and the distressing looks so natural. I love your clean, natural style.
Thanks Pat :)
I would have walked past that buffet unit if I had seen it for sale but your transformation is amazing. It looks so homely and pre-loved and as if it had always been there. I get so inspired when I see your work. Thank you
Thanks Carol. That’s lovely to hear :)
As always, I love your style and vision Kristine! I would love to know what you’re going to do with the upper hutch part? ;)
Thanks Nikki. We don’t really have a place for it at the moment so Dad is using it in his garage workshop.
I’m sure it will be very useful there, and still available should you ever need it. :)
Gorgeous–as always!
Thank you so much :)
This transformation is a good example of giving a new life to old furniture and creating our personal style in home decor. Thanks to creativity and dexterity, it is possible to turn an outdated part into an indispensable part of a modern home. This transformation story is an inspiring resource for anyone who values sustainability and personal expression in home decoration.
I absolutely love what you did to that awesome piece – what a deal, too. I LOVE green and can never see it enough. It seems to be one color that transcends time.
It is fresh, earthy and gorgeous. You did a remarkable job. I am new to your blog coming over from Diane’s Style Scouting where she featured this – and I am so glad to have found you!! What did you end up doing with your top piece??? So curious!!
Thanks for popping by Michele! Green is my absolute favourite too. I love the way you described it as transcending time – this is so true! My Dad is using the top in his garage workshop.