
Catch up on all the Suite Extension posts HERE.
One of the most common questions I received during my blogging absence was, “When are you going to come back and finally share your parent’s completed suite extension?”
The short answer is soon, however I must confess it’s still not entirely complete!
Although it’s been “finished” for a while, and is perfectly nice and livable, it’s not quite at the level I would like.
You see, after COVID lock-downs threw a big fat spanner in the initial works, the suite extension was hurriedly thrown together out of necessity in order to accommodate my sister’s family of five (for nine months!) during a renovation of their own home.
Add my recent three month trip on top and there hasn’t been much time to focus on finessing it.
Yes, I do realise most normal people would have had it done-and-dusted ages ago, but I guess that’s where I differ!
So it probably comes as little surprise that I actually started writing this blog post over two years ago! Yep, I checked the edit history.
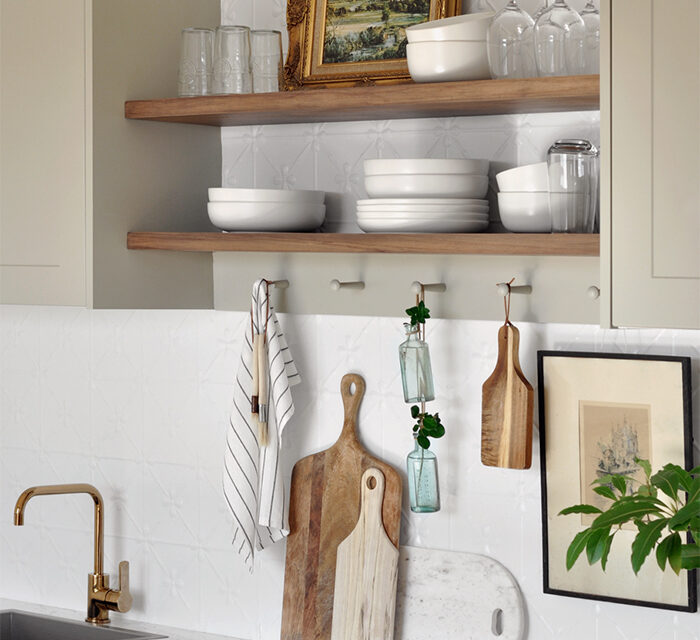
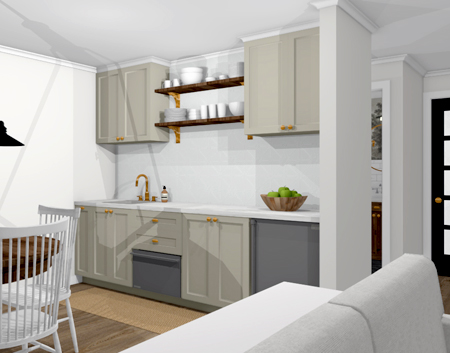
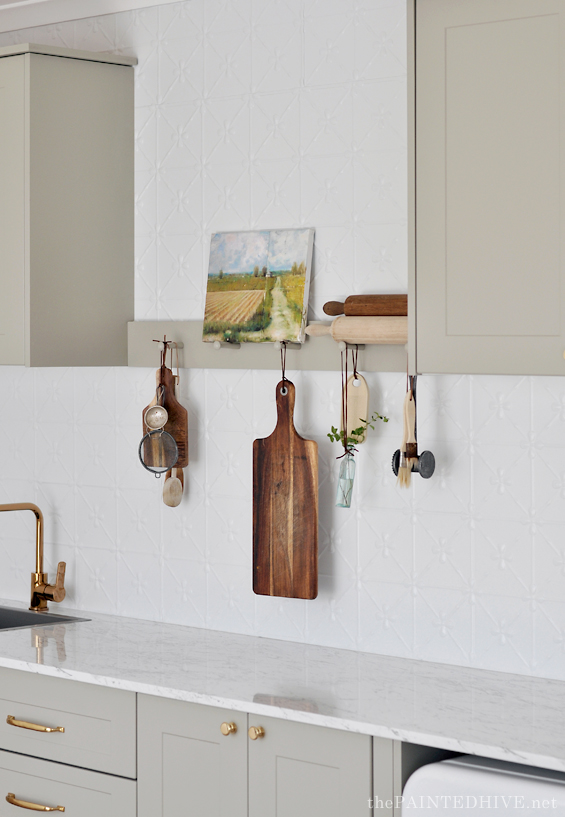
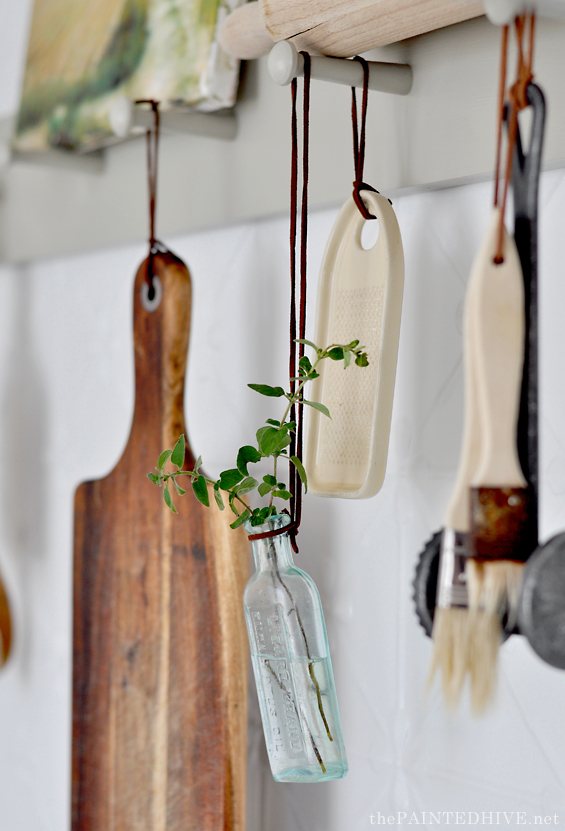
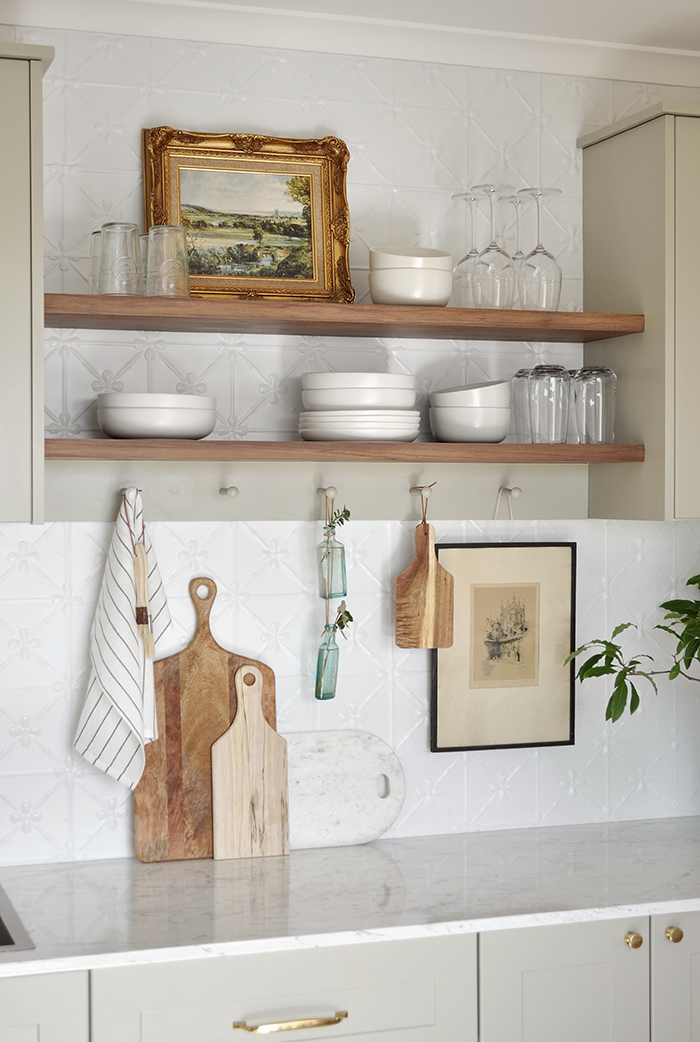
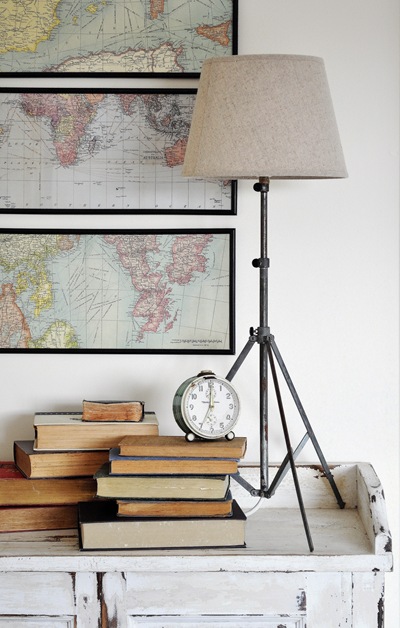
One element I was committed to in the DIY kitchenette was some open shelving. Do you remember the (rough) original design concept?
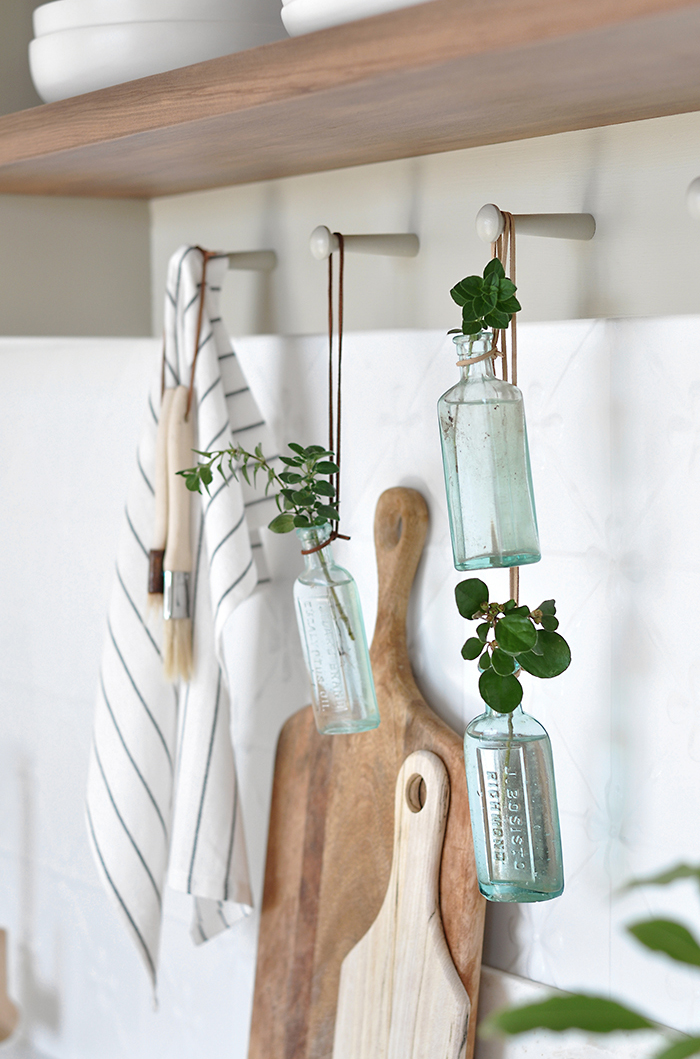
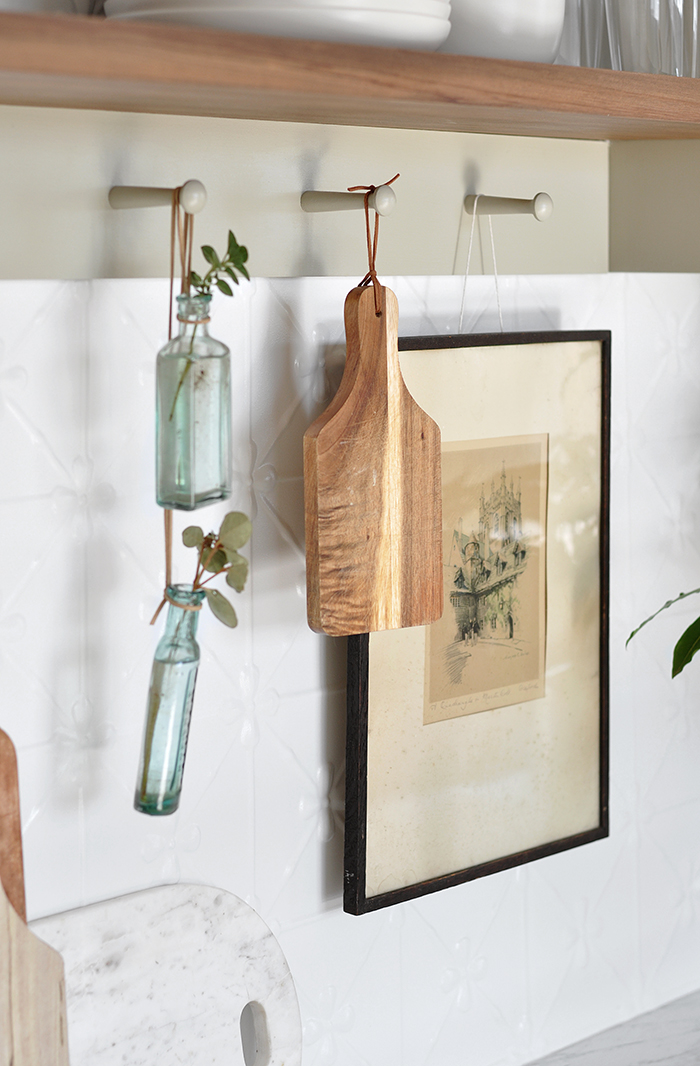
And my previous post where I’d already built and installed this shaker peg rail?
I considered, and thoroughly researched (in my usual manner of over-thinking things), lots of options for the shelves. From basic pine planks from the local hardware store, to reclaimed timber from a salvage yard, to discarded wood sitting in the paddock behind my parent’s house (literally!) and even fancy custom made. They were all not quite right, tricky to source, difficult to work with and/or overly expensive.
And then I had an idea…
At the same time I was considering the suite extension shelves we were working on staging my late mother-in-law’s house. She had an old coffee table we didn’t need and nobody wanted. Hmmm, maybe I could repurpose it?
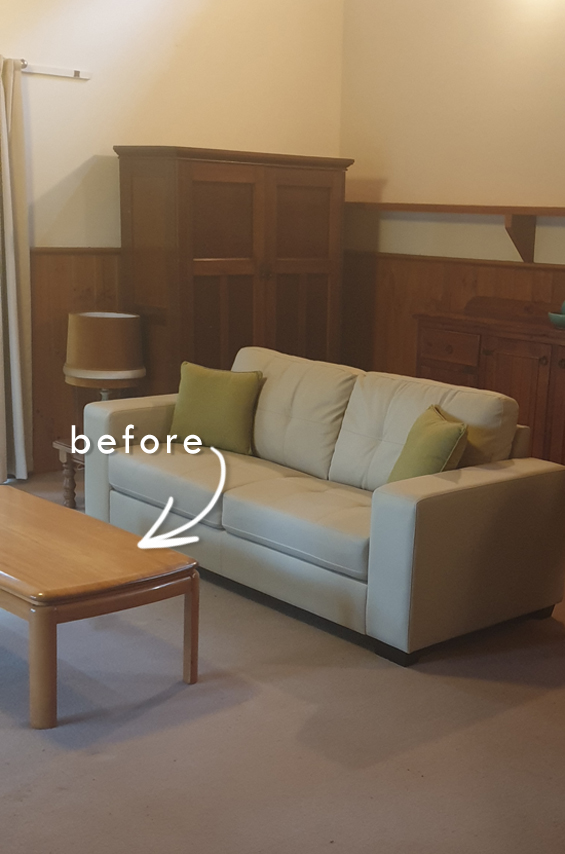
It had a nice solid timber top which was thick enough to create shelves with substance, wide enough to divide into the two shelves I needed and long enough to span the overhead cabinet gap.
So…FREE floating shelves coming up!
TIP: Whilst I was lucky to already have this table, if you’re looking to create your own affordable floating shelves don’t hesitate to shop second-hand, scour the curb and check out online stores for your own adaptable furniture options. So much beautiful timber unnecessarily ends up in landfill.
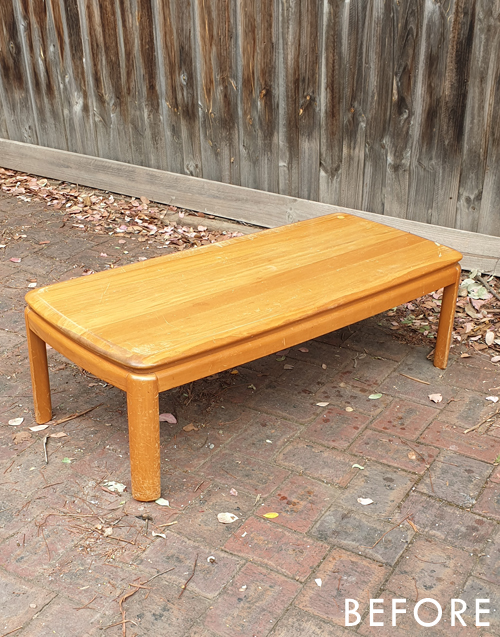
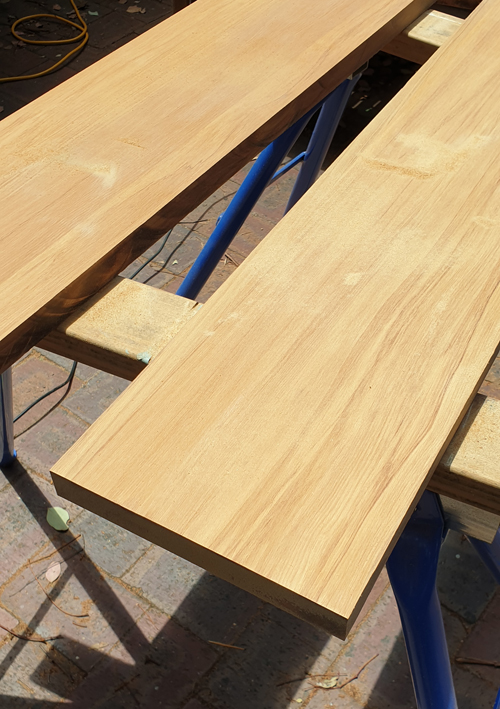
The first thing I did was isolate the top. This meant removing the legs and apron. Which was easy enough though a little bit fiddly because there was a copious amount of glue and about two thousand nails!
Due to the fact my table top was curved and slanted at the perimeter, I also needed to square it up by trimming off the edges. Of course, if you’re working with a square-set table then you get to forgo this step. Yay you.
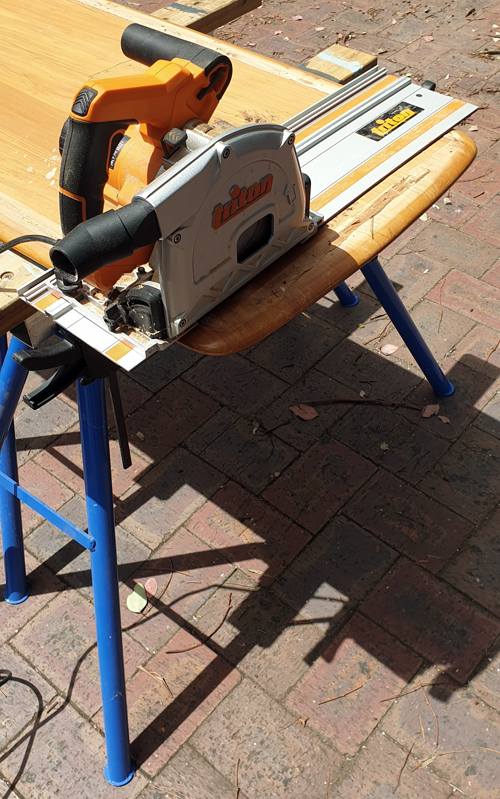
Once I had a nice rectangular slab, I cut two planks at the length I needed (to fit snuggly between the upper cabinets) and at the depth I wanted (which I decided was 25cm/10″).
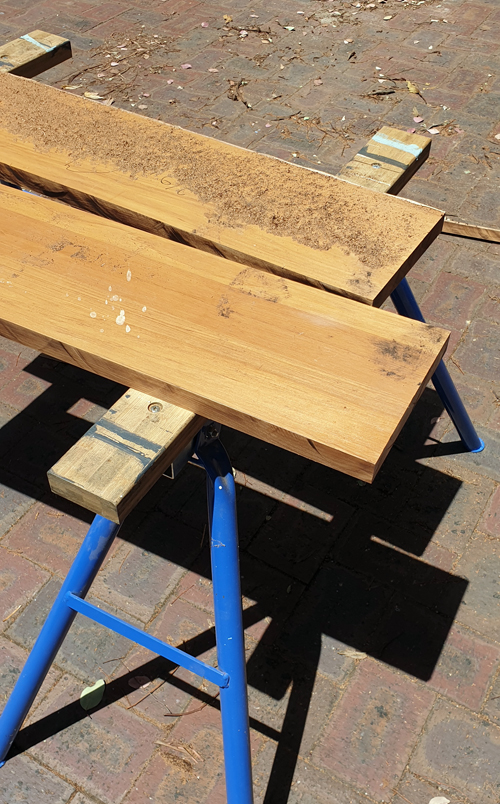
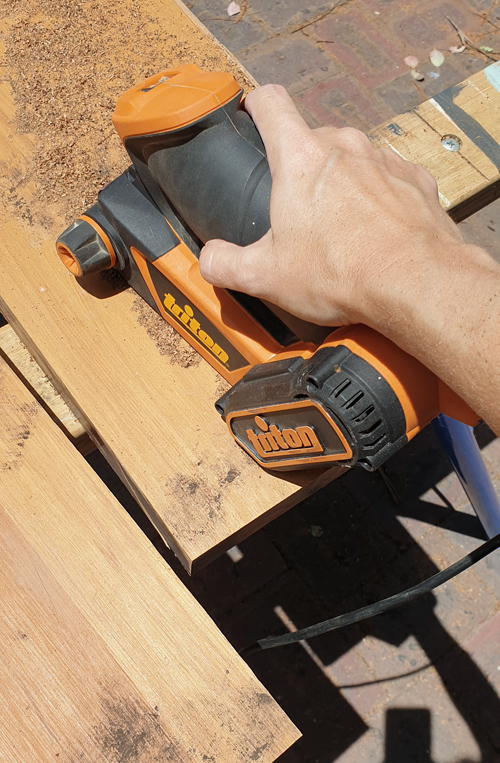
Then I gave each plank a really good sand to remove the orange varnish and get right back to raw timber.
Here you can see what a difference the sanding made.
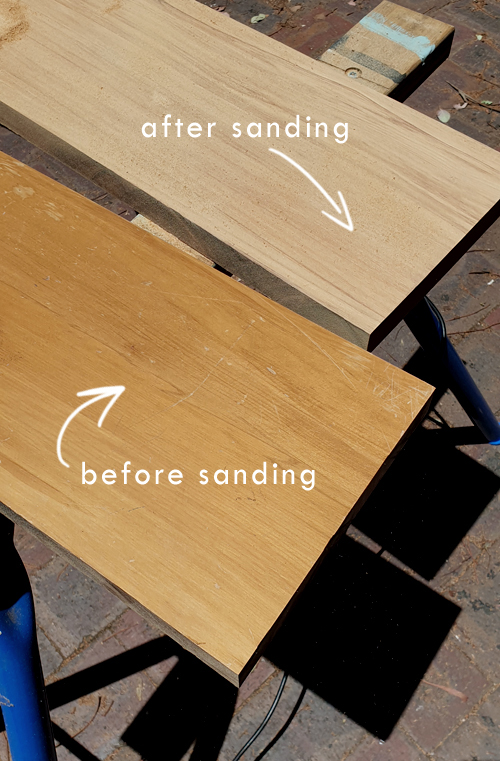
I’m not certain what type of timber it is though it’s really lovely. Nice and dense with a long subtle grain.
Under different circumstances I may have kept the shelves natural, though they were a tad yellow so I applied a warm slightly ashy stain to tone better with the oak flooring in the room. I’m sorry, though I can’t recall the name of the stain I used!
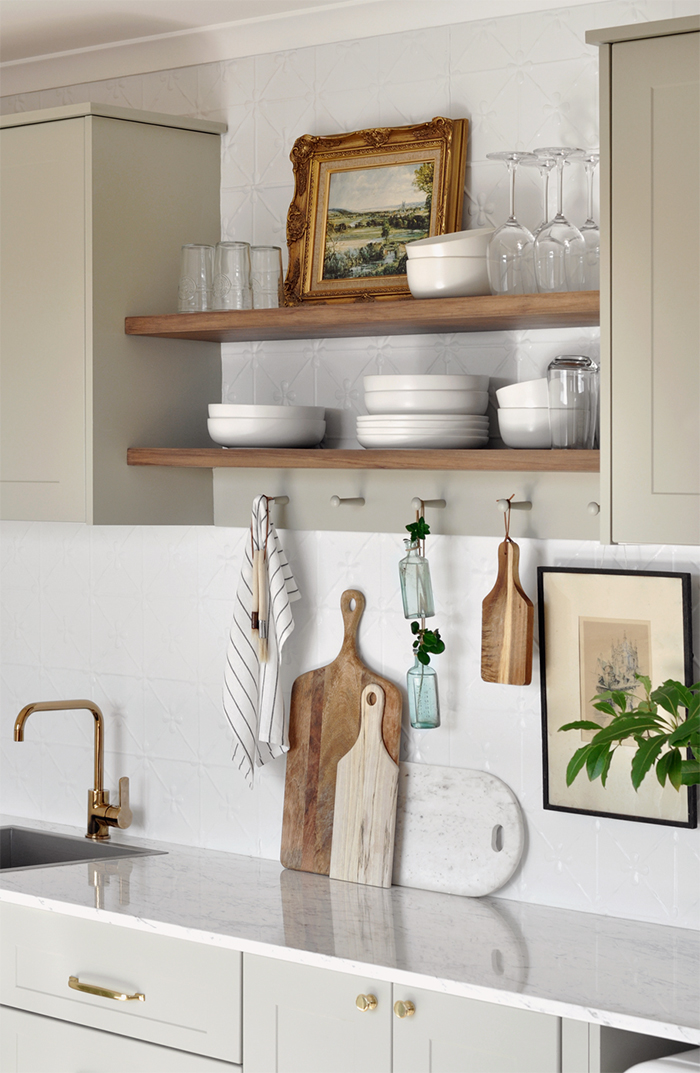
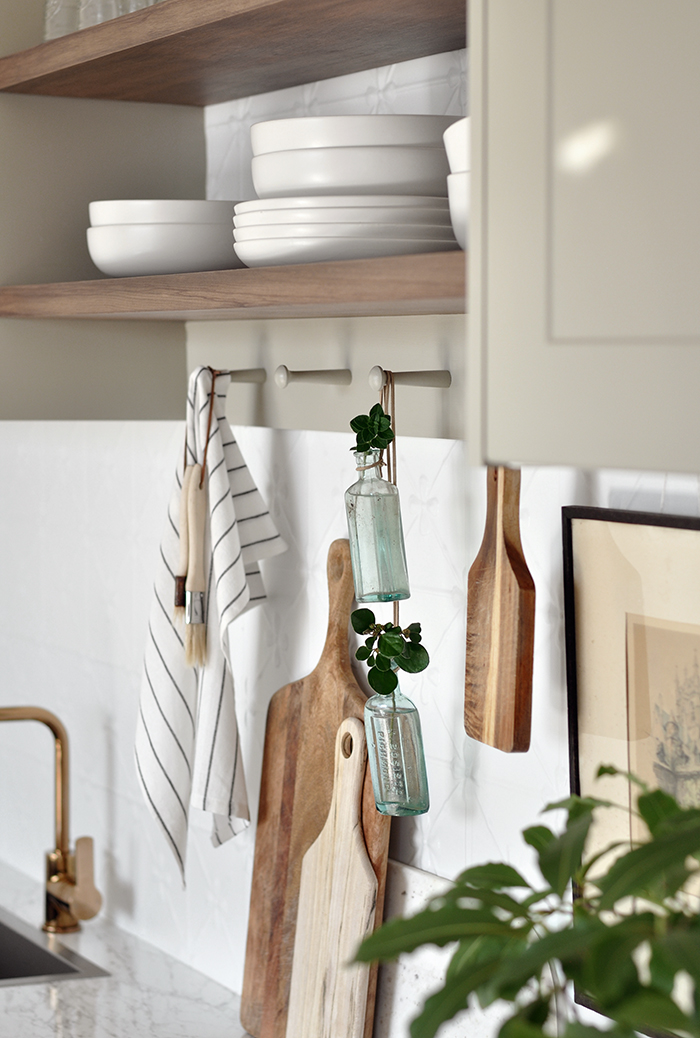
To float the shelves, rather than drill through the pressed tin backsplash, they are actually attached via the flanking cabinets (which are affixed to wall studs). Not only does this give them fantastic strength, it saves them from dipping at the front, which can be a common issue with floating shelves.
Of course, if you don’t have flanking cabinets to attach your floating shelves to they can be successfully affixed via the rear wall. Just ensure it’s done well.
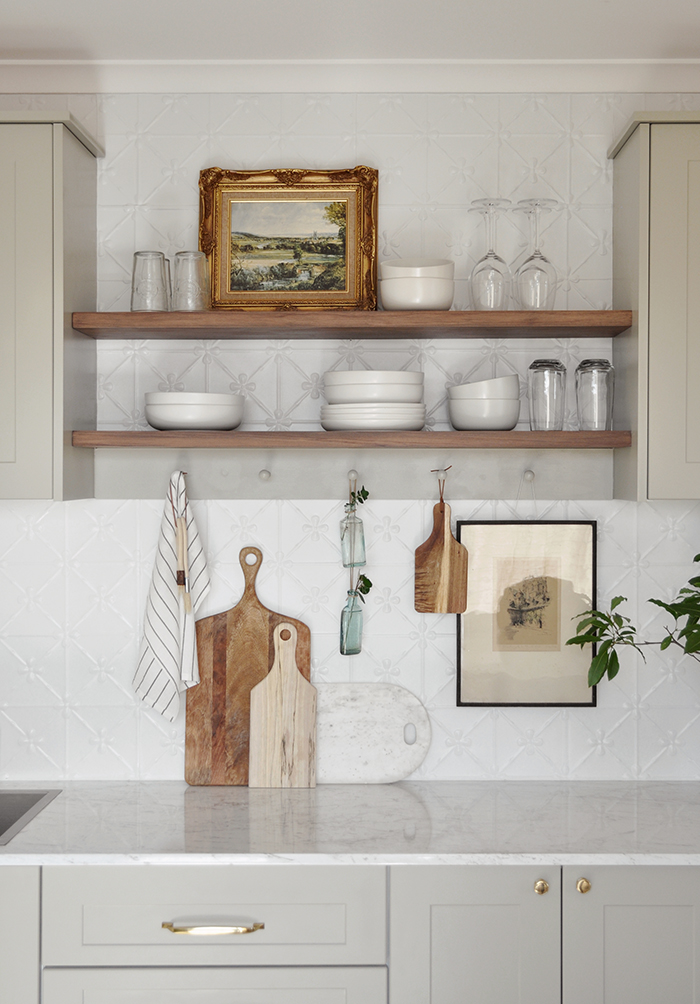
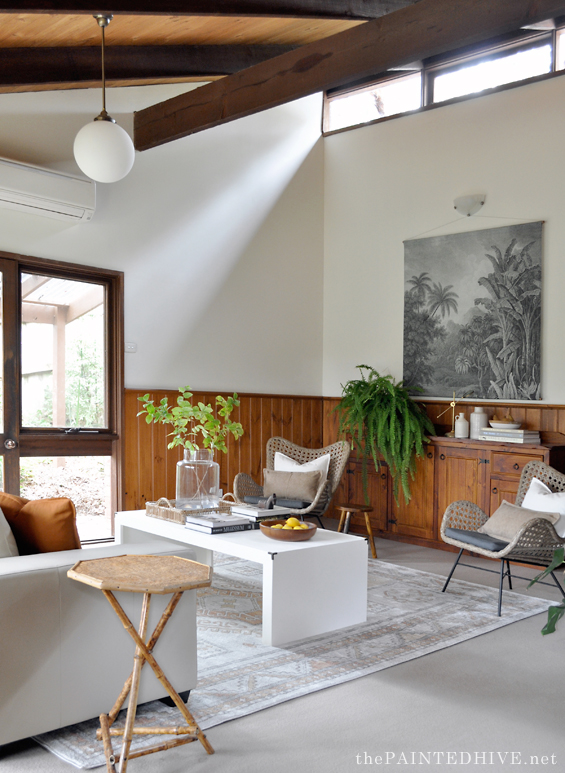
I could have filled the shelves with lots of pretty decor, though given the kitchenette isn’t huge it makes sense for them to house mainly functional items such as crockery and glassware. This allows more cabinet space for groceries, and so on, when the suite is in practical use.
And whilst I certainly don’t expect them to always be super neat and tidy, choosing simple and neutral items makes it hard to go wrong from a cosmetic perspective.
Most of what I’ve included are basics from Kmart and Target, with my usual spattering of vintage finds for a bespoke feel on a budget.
I’ve seen quite a bit of talk in the past from people who are hesitant about installing floating shelving due to the expense. Hopefully this concept of repurposing a pre-loved item provides a basic DIY avenue which makes it attainable for everyone!
Catch up on all the Suite Extension posts HERE.


Kristine you could never be “normal people”; you’re extraordinarily talented. Upcycle stories are my favourites.
You’re too nice Julie! Thank you 😊
I am so happy to see your posts again! I have always admired your style and imagination!
Thanks Valerie :)
It makes my day to see you on the computer… You are just amazing and have never done anything I didn’t LOVE. You really are incredibly talented and I wish you could come to the U.S. and be my advisor/friend. :)
Ha, ha. Thanks Sara. Happy to be a friend and advisor from afar :)
It’s beautiful! What a great way to repurpose the table. Once again, I’m in awe of your creative talent!
Thank you Leslie. It was simply serendipitous so I can’t take much credit.
Looks great! (And such a smart way to make use of what one has–without compromising on vision!)
Thanks Elayne.
Yay! So great to see your post. Honestly I did miss your posts, but really was excited to hear about your adventure. You make everything look so easy. I love your style. The pegs and the shelves look so good together. Can’t wait to see the reveal of your moms house.
Thanks Sheryl.
Great post and use of the old coffee table. I agree it’s great to see you back posting. Thanks for sharing.
Aw, thank you so much Celia.
Is it wrong that I get excited when I see your email in my inbox? I think not! Nice, very nice shelves and excellent reuse of old furniture. PS where do you find all your vintage frames they are so hard to come by right?
Thanks Anna. I love that you get excited – that makes me feel very special!
Most of my vintage frames are from Op Shops. I find that antique markets/warehouses etc. can be a bit too expensive, especially if you are looking to buy several. Sometimes I get lucky with a great frame complete with a great artwork, though more often than not it’s a matter of changing the artwork. They can be hard to come by so it’s a matter of checking often, scouring lots of different Op Shops and being patient. When I have a client project on and suddenly need lots of frames at short notice I will often spend a day or two (well, parts thereof) travelling around until I’ve found enough! Otherwise, I just buy them when I see them and add them to my collection until I have the right spot.
Patience being the key word! Thanks for taking the time to reply I will just have to invest more time on this important project! x
Thanks Anna :)
That was a great repurpose and your shelves look amazing!!
Thanks Susan :)
How do you think of it all?! I don’t think it would ever occur to me to use an unloved piece of furniture for material. You’re brilliant as usual and see solutions where others only see issues. It turned out great. And who would’ve thought that beautiful wood was hiding underneath that varnish?
And stop it with the man-hand! Your skin looks like it belongs to a 20 something!
LOL, thanks Anna.
Yes, the timber was beautiful. I wish I knew what it was. I’m pretty good at identifying some species, though this one is new to me.
This idea for using and cutting up old pieces of furniture is GRAND!! I would never have given this piece a second thought but now I will. Obviously, it would have to be all wood, but I will keep my eyes open for pieces like this in the future! I feel like I have turned down or left items that I could have used in this manner. Thanks for the great ideas!!
Thanks Julie. It’s really easy to overlook the material value in old pieces. With the cost of new dressed timber it can be a really budget savvy, and not to mention environmentally friendly, way to go.
So many people just overlook old pieces of furniture all the time! I absolutely love this pos , thanks so much jULIE!!!!!!!!
Thanks Julie.
Your attention to detail, from the careful removal of the table legs and apron to the precise trimming and sanding of the table top, showcases a commitment to quality craftsmanship. The warm, slightly ashy stain you applied complements the room’s oak flooring beautifully, tying the entire aesthetic together. Keep up the fantastic work!