

Those of you who are members of my private Facebook group may recall seeing a glimpse of this makeover several months ago.
Back then my daughter was heading away on school camp so I decided to surprise her with a bedroom transformation…whirlwind style over a three day span!
At the time I did get most of it done (and she was over-the-top happy with the result!) however there were still a few elements missing.
Well, after slowly adding bits and pieces over the past few months, last week I installed the long-awaited-for-no-reason-other-than-procrastination curtains, and finally feel like I can call the space finished!


If you know my usual style, which has a subtle vintage eclecticism, you can probably see a slight departure here. The main impetus for this shift was, of course, due to my daughter’s vision.
Before she left for camp we’d been discussing her “dream bedroom” and the clear direction was neutral boho, neutral boho, neutral boho!
So, whilst it’s not my go-to style I did my best to bring it to life for her, and I’m happy to say that I love the way things came together…and more importantly, my daughter does too!

Given boho is rather “on trend” at the moment, I was a bit concerned the room may run the risk of being somewhat short-lived. As someone who values spaces with a sense of longevity (it’s clear to say that redecorating every five minutes is NOT my thing) this meant keeping the canvas simple and using mainly decor to create the right vibe.

The first thing I did was establish the layout so I could determine the main pieces. If you’ve been following along with me for a while, you will probably be familiar with Charlotte’s bedroom and just how teeny it is. Here’s how it’s looked for the past six or so years…

As you can see, it was definitely time for a tween transition!
When I originally put her “big girl” room together there was a clear configuration winner, and it didn’t take me long to decide it was best to stick with it!
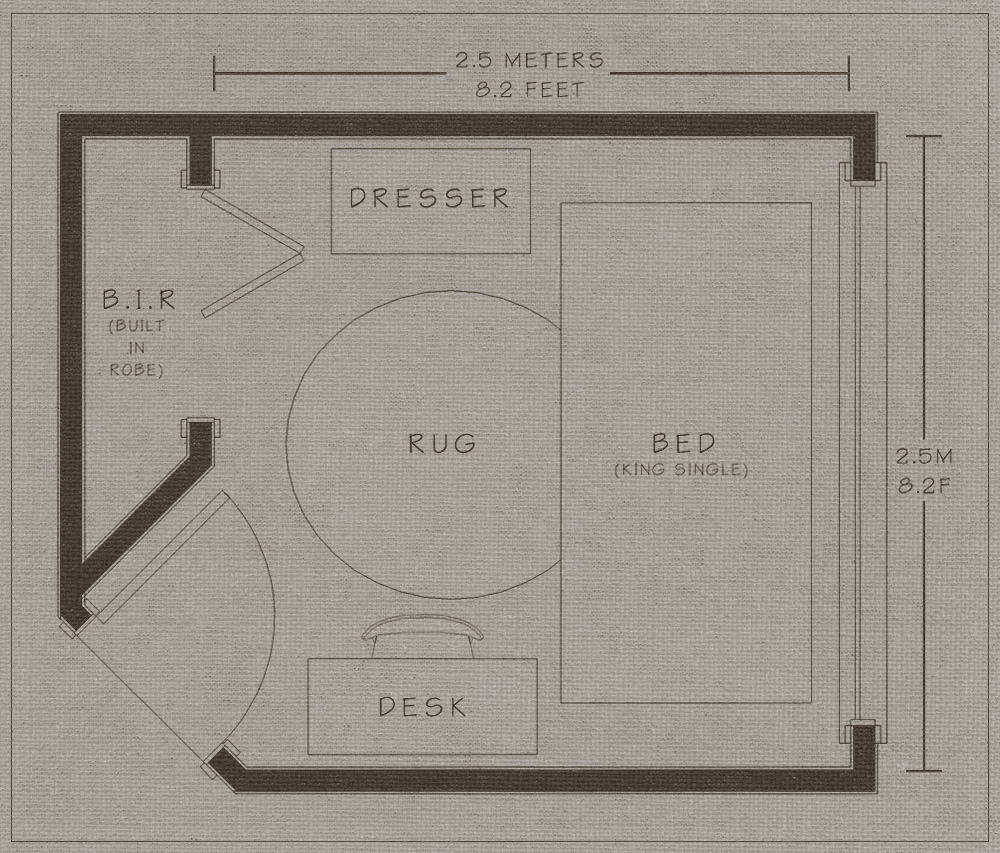
The only location for the bed is in front of the window, which essentially dictates the positioning of the remaining furniture. I did consider switching the desk and dresser, though due to the angled doorway the bulk of the dresser just felt too imposing beside the entrance.
Originally, I contemplated keeping and upcycling the existing bed and dresser, though upsizing to a king single bed seemed like a good idea (unfortunately it’s not practical to go any bigger). And although relatively minor, the additional width of the king single bed meant the current dresser was going to be too squished. Every centimeter counts in such a petite space! Although it can be tempting to jam furniture into a small room in the name of maximisation, I find some space between items really helps everything breath and feel considered. Yes, it can be frustrating finding pieces which have just the right dimensions though it can also make a really big difference.
The bed was a bit of a happy accident in that I’d been scouring second-hand sites and happened across one I loved that was perfect but a tad too expensive at $450. Luckily, the seller had referenced the original source, and when I checked it out it was on sale for 50% off (originally $700 down to $350 – with FREE delivery!).
I’d love to share a link though it’s been discontinued. It was the Bungalow bed from Freedom furniture.
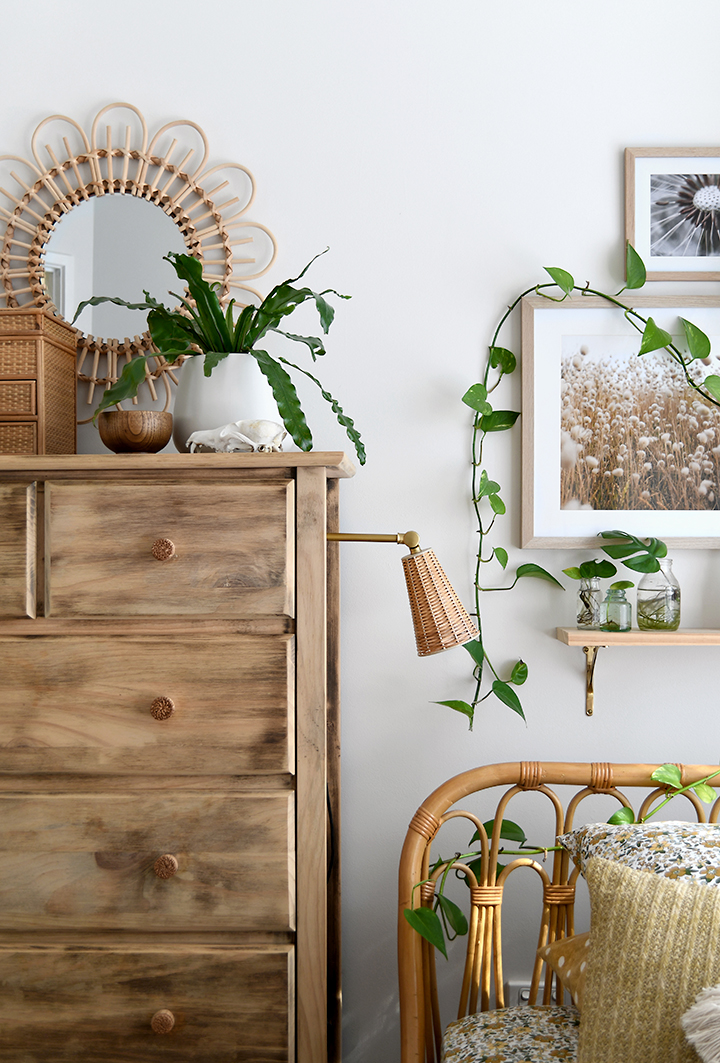
Given the original dresser could no longer work, I decided to find something with additional height in order to provide more storage. Whilst Charlotte didn’t need to house as many toys anymore, it’s fair to say that all of her clothes had certainly gotten bigger! With only a small built-in wardrobe they needed to over-flow somewhere.
I would have loved something antique with lots of character, though most of the dressers I came across were too wide. Given I was on a tight time-frame I compromised with this basic chest of drawers from Marketplace for $50.

After stripping off the varnish and sanding back the dark stain (which really wasn’t fun and took forever – hence the slightly rustic finish because I was running out of time!), I added some new basic knobs from Kmart.
I actually purchased the desk before I started the makeover because she had already outgrown her original mini one.

In keeping with my proportion problems, I couldn’t find the right desk to fit so this is actually a hall table. I found it on Marketplace for $40.

I didn’t like the bulbous feet so I cut them down and added little brass castors for some extra character. Clearly I also painted it white to suit the neutral boho theme, and attached the same knobs I used on the dresser.
The chair was a last minute buy from Kmart. I had been searching for a really cute vintage chair though I ran out of time.
Although it’s not an obvious change, I did paint all of the walls and refresh the architraves. Aside from the fact the original paint was a bit tired, the walls had a distinct yellow undertone which felt a little dated. This new colour, which is Dulux White Duck Quarter, is a soft greige which has more depth and an earthier look.
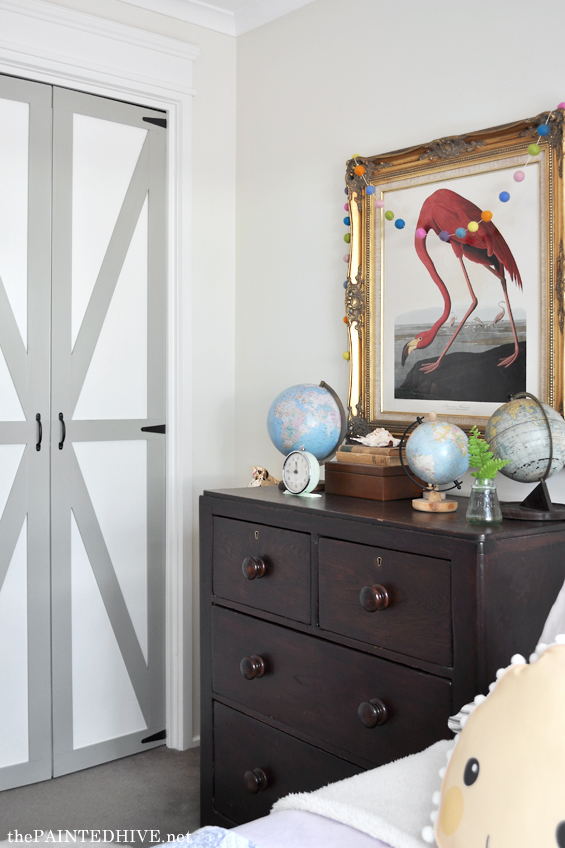
I know this is only boring, though to make the most of the space behind the door I added a mirror, some wall hooks and a pin board.
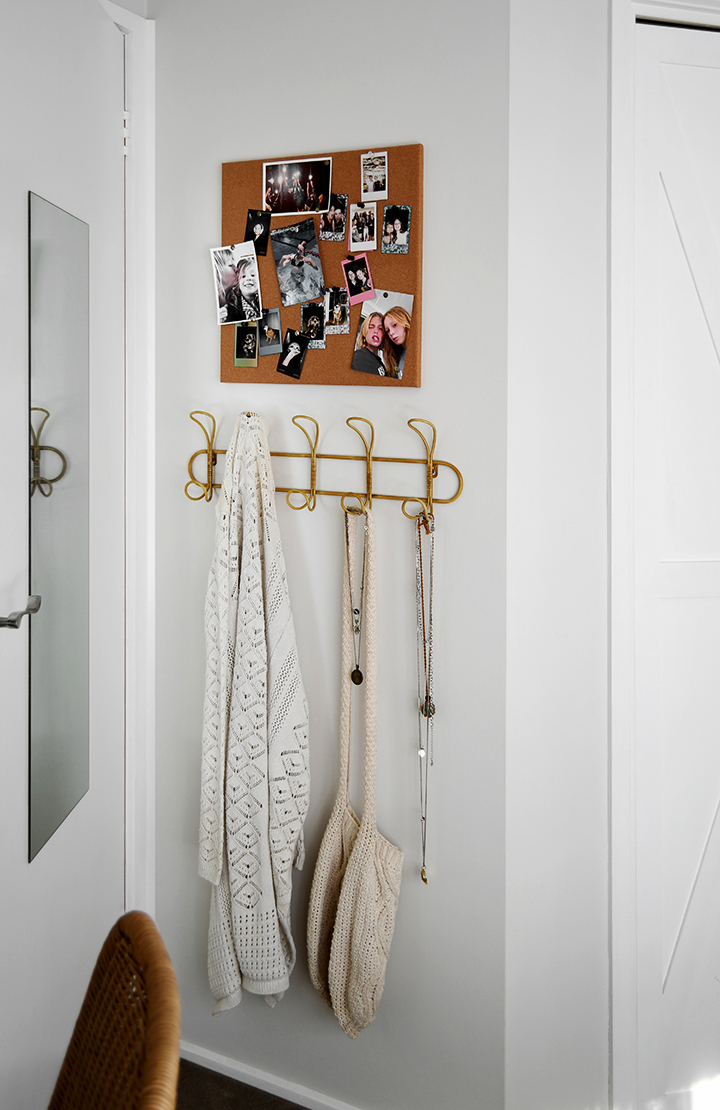
This is often an overlooked area, but when you’re working with a small room it really pays to look at using all available space! I had plans of making it fancy, though this basic set-up does the job.
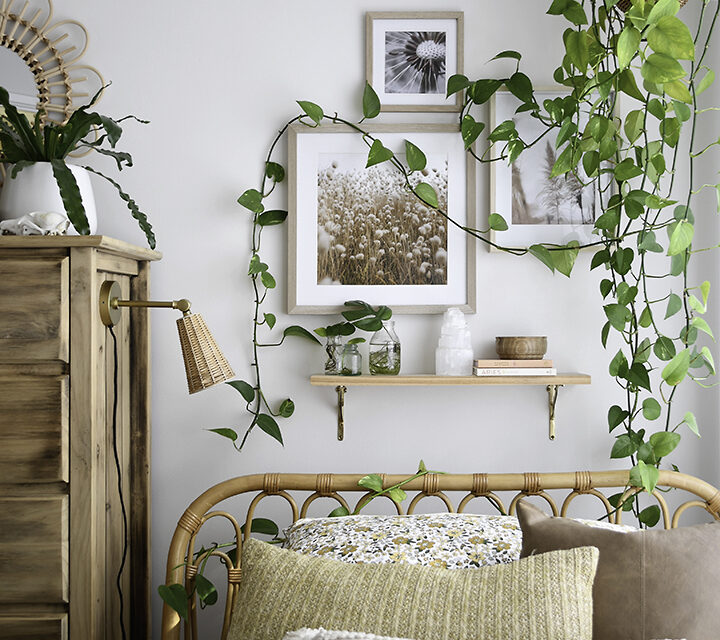
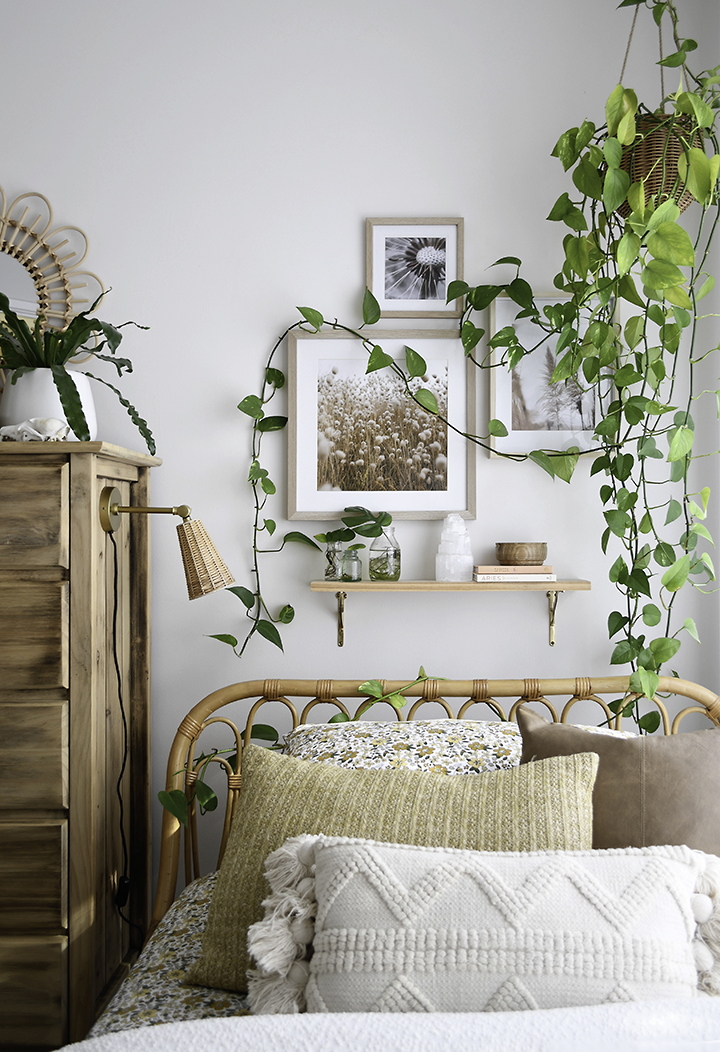
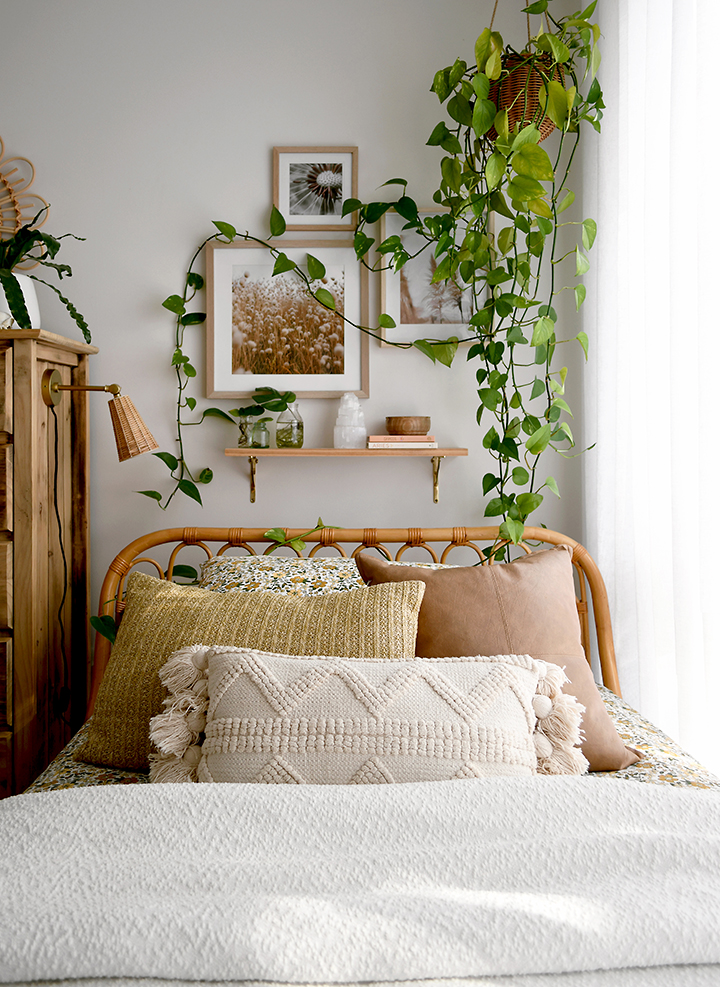
Because there is no bedside table as such, I added a cute little wall shelf behind the bed which provides the perfect perch for a book and drink.
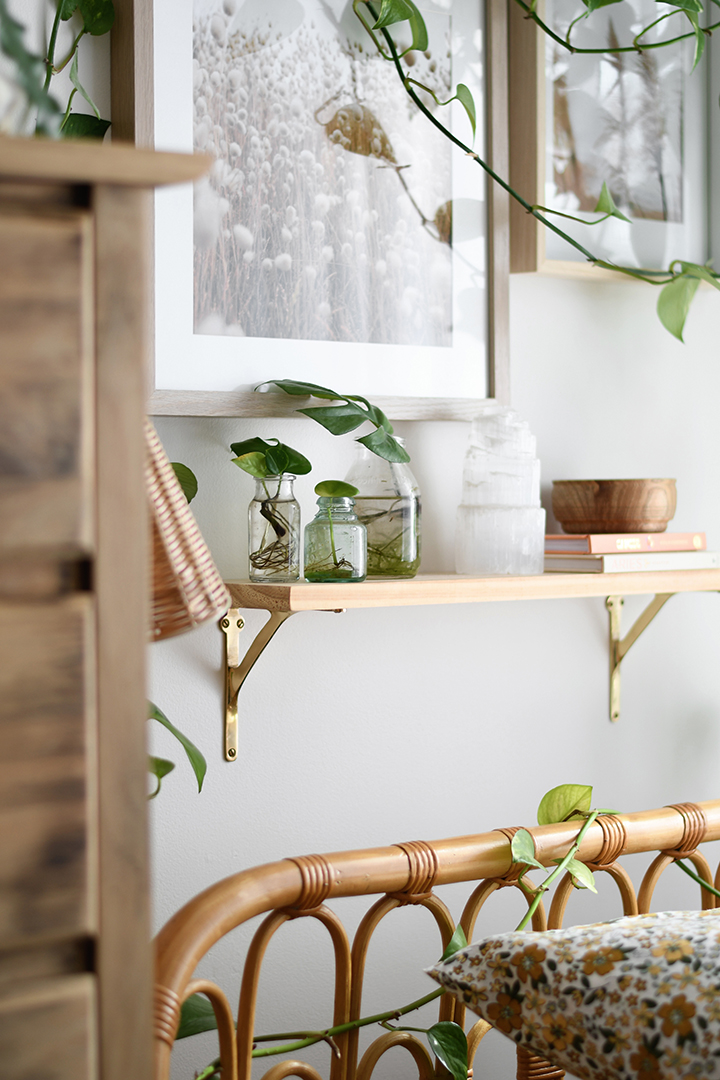
I used the same brackets which held the desk shelves in her original room, and simply cut down a plank of pine to fit.
I also attached a cute plug-in lamp to the side of the dresser.

For me this was a bit of a splurge at around $100 though it was a Christmas gift for my daughter and is just the most perfect little light!
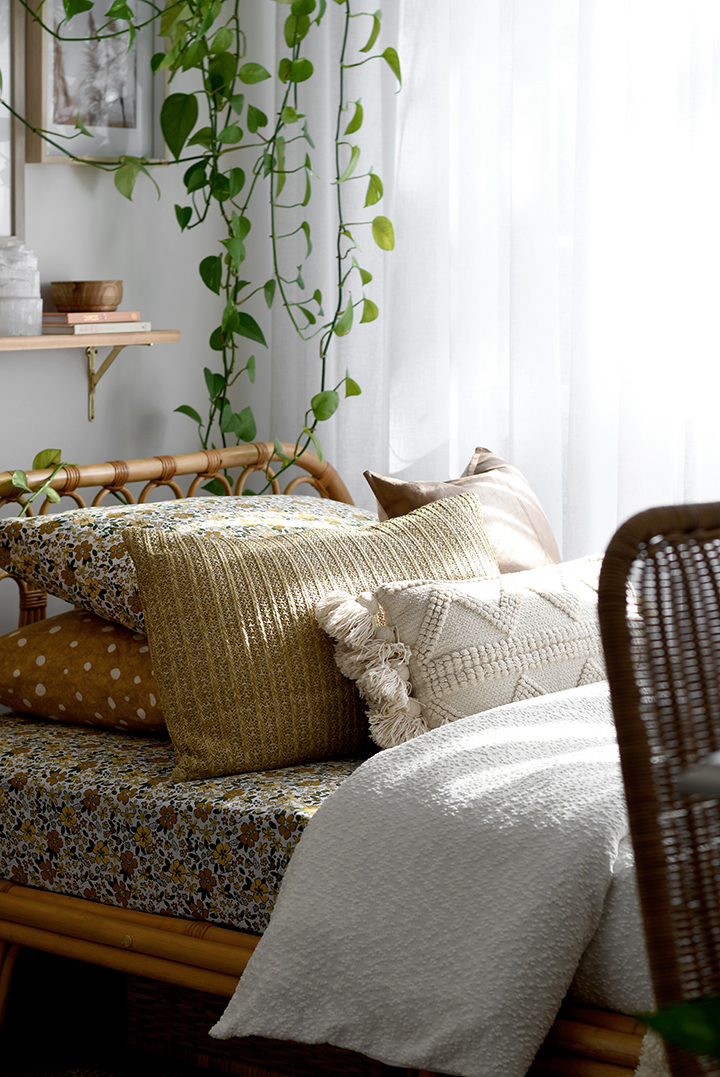
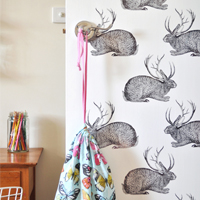
The jute rug was an inexpensive Kmart find, and the window sheers are from Bunnings.
It was my first time installing s-fold curtains and whilst it was a little bit fiddly it was easy enough. I decided to ceiling mount the track and I used two panels so they are nice and full and can be opened in the center if desired. There is a block-out roller blind behind the sheers which does the heavy lifting in terms of light and climate control.
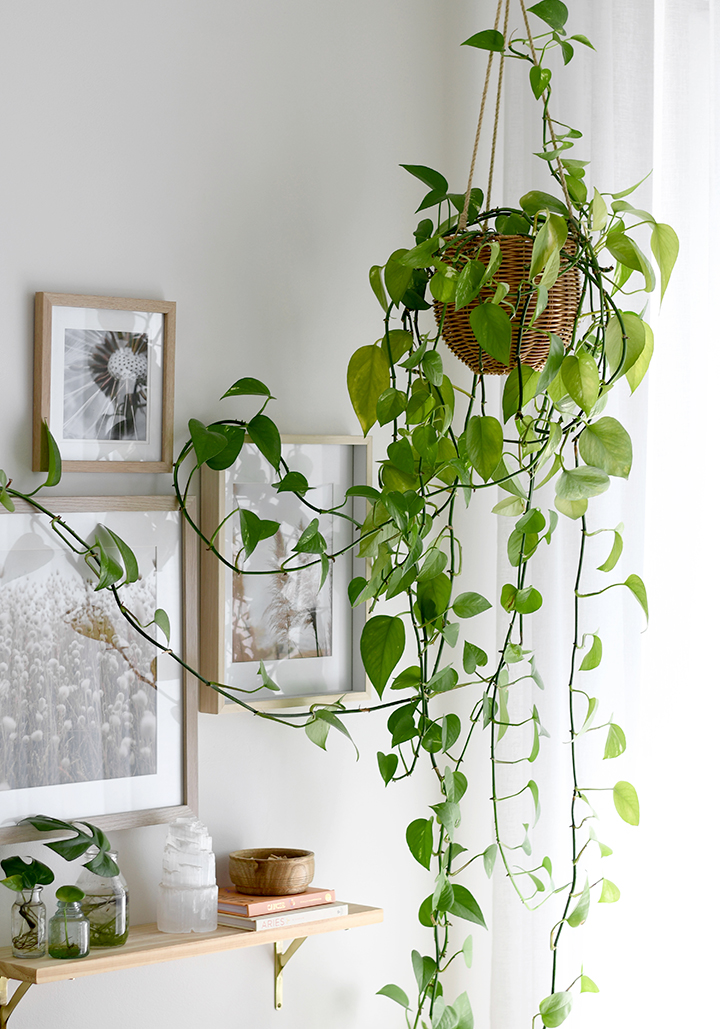
The decor is all pretty straight forward.
Clearly the heroes are the plants, especially the large Devil’s Ivy at the bed head.
The wall art prints are free downloads I found on Unsplash and had printed through Officeworks. The frames are just cheapies from Kmart.
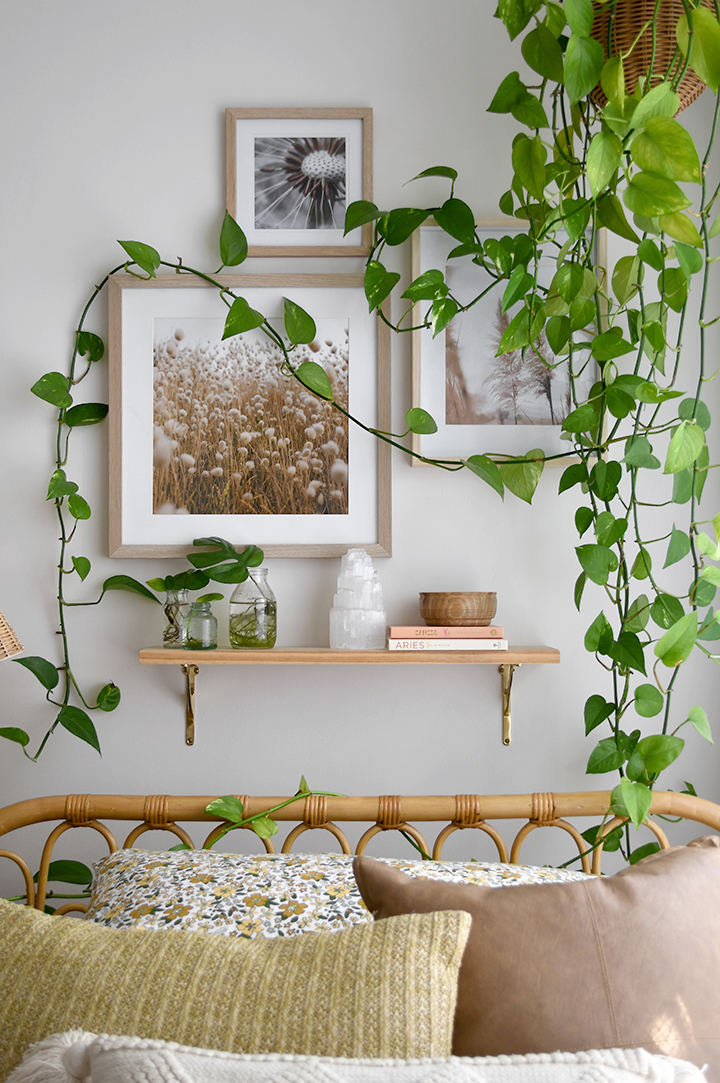
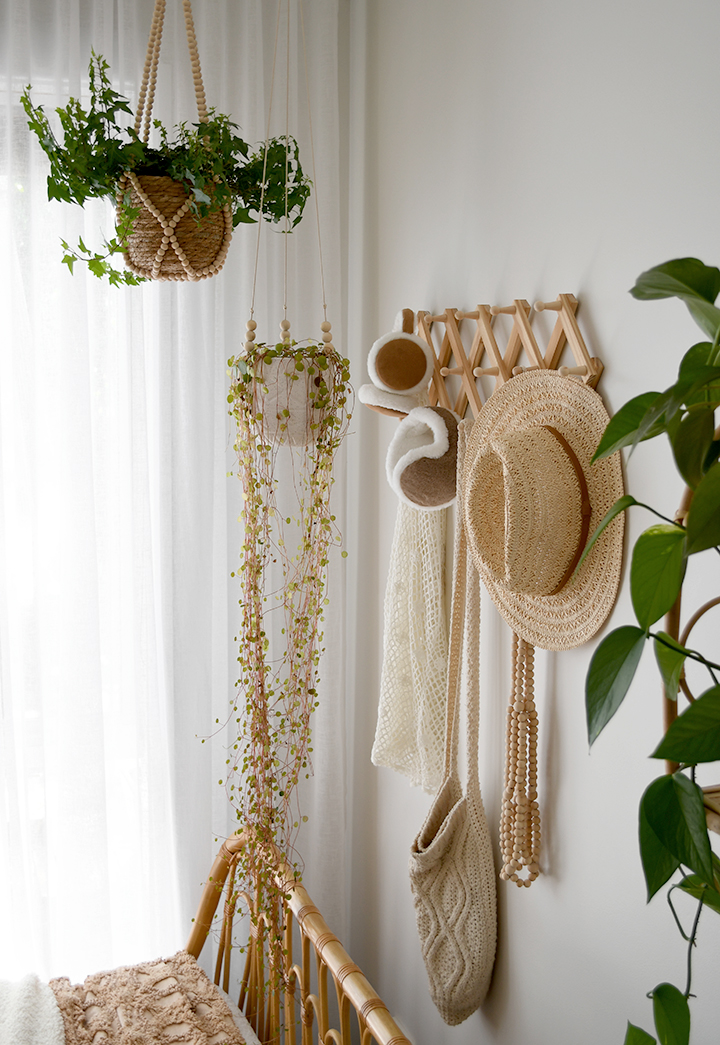
The cane wall shelf and accordion hooks are also simply from Kmart.
The smaller accessories are a mix of sentimental, practical and decorative items. The little jar on the cane shelf holds Cooper’s fur, the urchin was a find from our trip around Australia and the giraffe was a travel gift from Africa. There is also a fox scull on the dresser which my daughter found in the paddock behind our house (she loves bones and stuff!).
The assortment of bowls hold shells and rocks she’s collected, along with some of her jewellery. They are perfect for corralling little bits and pieces rather than having them strewn all over the place! And just in case anyone is wondering, “Maddie” is her favourite cousin.
The bedding is a mix of things I already owned and some new pieces. The botanical sheets teamed with the rust polka dot (all found at Spotlight) is such a charming combo and works really well to add warmth and interest. Things are kept fresh with a simple white quilt cover (from Kmart).
As always, feel free to ask questions if you’re after more info.


Lovely.
I’d quite happily live in that bedroom! It’s gorgeous! Did you really do all this in the three days she was at camp? Or did you manage to collect the furniture and prep it in secret before she went? Regardless, you’re a MACHINE and your daughter is a lucky girl.
My daughter Grace just started high school (Charlotte as well?) and she also got a new tween room but her requirements were “all white, everything needs to be white”, and it’s so boring. If she had gotten her way it would’ve been all laminate furniture from Ikea as well. Now, I like Ikea but am not a fan of laminate. Managed to at least steer her towards some actual wood furniture. I think I’m allowed to put a plant in there but part from that… white white white, sigh.
Thanks Anna. Like I mentioned at the beginning of the post, I didn’t quite have it to this level when I first revealed it to Charlotte, though it was close. The bed and a few of the decor pieces were sourced prior, though everything else happened whilst she was at camp. I cleared and painted the room on the first day. On the second day I collected and refinished the dresser, painted the desk, assembled the bed, and did some shopping. Also sourced and edited the prints. On the third day I collected the prints, did a bit more shopping and put the room together. At the time I didn’t have the curtains (she just had a roller blind), the little shelf above the bed wasn’t mounted and I also didn’t do anything behind the door.
Yes, Charlotte just started high school this year! I hope Grace is enjoying it. Charlotte loves it!
Wow, a big few days for you! Amazing result.
Grace has settled in well and even made a few new friends. She does like being considered bigger, which has me sniggering being that she’s 12! Glad to hear Charlotte is enjoying it too. xx
I remember my mum redid my room when I was away one time at the start of highschool and I loved it so much! This looks fabulous. Another beautiful project!
Thanks Alix. So happy with how it came together.
I just sigh each time you mention and show finds from Kmart. It has gone defunct in the States, and I didn’t know it even still existed, yet I’m now wishing it was back. Ha
LOL, I wish we had your Target! Our Target is okay but nothing compared to what I see in the States! Kmart can be great for affordable pieces, but you do need to be considered. Because they offer so many on-trend items at such low prices it tends to contribute to the ‘throw-away mentality’ as the quality generally isn’t fantastic. Still though, like I said, they do offer great opportunities if you’re considered with your purchasing.
Always a happy day when there is an e-mail from The Painted Hive in my inbox. Love-love-love the result.
Amanda, thank you :)
Great job!
A new post; hoorah! I love when I get an email from you. Your style and sensibility (let’s upcycle!) inspires me. Thank you for explaining your thought process and what you did each step of the way. I enjoy hearing where you found your items (your Kmart is much better than ours ever was in the USA). I am a huge fan of buying second hand and am not too proud to do a curbside rescue. I’m glad that your daughter is happy with her room. The white curtains are perfect.
Kristine, thanks for sharing your talent!
Brenda
Thanks so much Brenda. Yes, our Kmart offers some really great options, though I do wish we had your Target which seems amazing!
Super CUTE!! I am sending this to my 18 year old niece to get some ideas, and let me know if she loves this style as much as I do.
I hope she likes it! Neutral boho has such a fresh and youthful vibe.
Yes, and your design takes me back to the 70’s in some ways for sure :)
ABSOLUTELY beautiful, but I would not expect less! It’s unbelievable she’s a tween! I still remember when you had to cancel my makeover due to light duty while pregnant with her. Time flies! :)
Ha, ha. Yes, it goes soooo fast! Where did that little baby go?
A lovely and soothing space! Great work!
Thanks Elayne :)
Beautiful, as always.
Ho comme cette transformation est réussie et très jolie… Bravo
Thank you so much. I love the way it all came together :)
Kristine, you have a number of strengths which cause you to stand out from other designers. While your “subtle vintage eclecticism” style is evident in the rest of your home, this room and many others done for family and clients prove that you can produce outstanding work in any style. As well as that you’re incredibly skilled in upcycling (that dresser is truly inspired) and manage to produce the most amazing results on a minimal budget. However, I think your greatest skill is in creating a cozy, homely feel in everything you do. So many of the rooms I see on blogs and Instagram etc. are beautiful and probably expensive, but they don’t look like a home.
Aw, thanks Julie. I really appreciate that because it’s definitely something I spend a lot of time on in my designs…creating a true sense of connection.
Always so happy to see a post from you! You did an amazing job on that room…absolutely adore it!
Thanks Valerie :)
J’aime beaucoup votre travail, bonnes idées pas chères. Je vous suis depuis la naissance de Charlotte. je ne parle pas anglais (donc traduction Google) Bravo Linette de France
Thank you Linette. It’s great that Google translate helps us connect with people from all over the world. Thanks so much for following along with me all this time!
Gorgeous! Those sheets are divine, I never find anything nice when I go to spotlight!
lol, I love the dresser, the remnants of the stain make it look like a Pottery Barn piece, so not having the time to fully remove the stain worked out great! The room looks so great, I can imagine your daughter’s delight when she first saw it. Such a great feeling to re do a space while they are away and then see their reaction! I love that you’re just over the ditch from NZ and I can actually find a lot of the items you describe over here as well. It’s so disheartening to fall in love with the decor of the wonderful American bloggers, then sigh with disappointment because Serena & Lily don’t ship here😂
Welcome back, I’ve missed your great posts!
Thanks Sandra. Yes, I think since I started blogging we’ve come a long way in “catching up” with a lot of American products, though there are still quite a few gaps in the market down here.
A neutral boho tween bedroom makeover sounds like an amazing idea! The blend of earthy tones, cozy textures, and playful accents is perfect for creating a space that feels stylish yet age-appropriate.
Lovely post
What a sweet surprise for your daughter! A three-day whirlwind makeover sounds intense but so rewarding. I totally get the procrastination with those final touches, like the curtains – it happens! Can’t wait to see the finished neutral boho space you’ve slowly perfected over months.
What a lovely surprise for your daughter! I love the idea of a neutral boho style for a tween room. It’s great that you took your time to finish it with those curtains. The three-day whirlwind makeover sounds like a fun challenge!