I’ve coveted barn style doors for almost as long as I can remember. Something about their exposed hardware, diagonal trim and gracious nod to yesteryear just gets me.
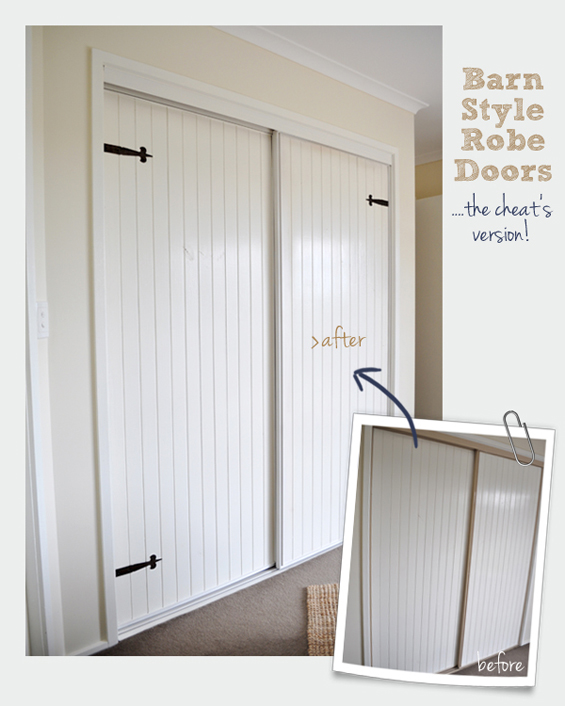
A few years back I tried quelling my desire for them with a simple barn door-esque update of my built-in master bedroom wardrobe…
…though still my craving lingered.
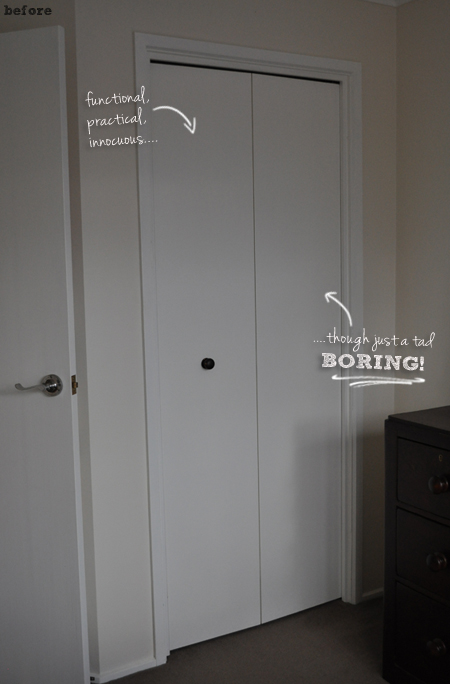
So, when it came time to transform our neglected guest room into a proper ‘big girl’s’ room for Charlotte, the boring bi-fold was high on my hit list. Though, rather than reach straight for the concrete boots, I thought I’d ‘take care of it’ in a more sustainable way with a little cosmetic rehab!
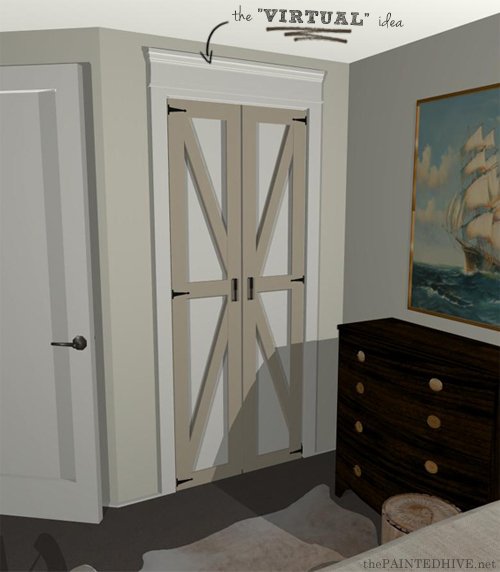
I’m going to keep the existing door, which is still in perfectly good nic, and simply clad the plain exterior in a decorative, yet simple, barn-style manner using trim, cosmetic hardware and a fresh lick of paint. I also plan to customise the outer frame with the seamless addition of some crown moulding.
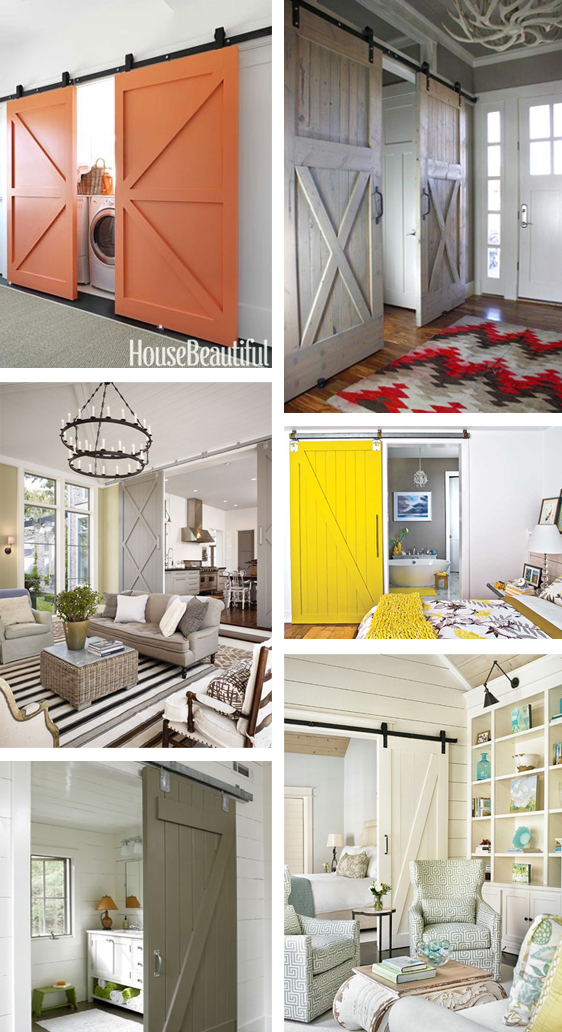
Here are a few inspiration pics…
Clockwise from top left:
House Beautiful | Design Sponge | Southern Living | Tillman Long Interiors | Decorpad | Dillon Kyle Architecture
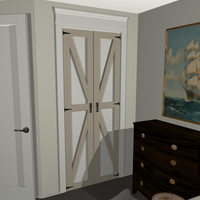
And here is my rough rendered concept…
You can catch up with my previous posts about Charlotte’s room here.
Yep, I’m aware that barn doors are typically, though not exclusively, on sliding tracks though as I have no provisions for that I’m making the most of what I’ve got :-) And I’m not totally certain what’s going on with the whole dual tone thing…for whatever reason it’s just the vision I’ve had from the beginning.
My first port of call for this project was, of course, the hardware store. I’m fortunate to have a Masters within fifteen minutes of my home though before I dragged two unpredictable kids in-store I first jumped online to do some preliminary scouring.
I know from past experience that ideally proportioned timber trim can be pretty elusive, so I was kinda excited to see that Masters offers a completely FREE cutting service (which is also handy for minimizing those otherwise overly large lengths and panels to fit in your car). I also took advantage of their Live Chat (which I found via their Facebook page) to ask whether the cutting service extended to MDF (as, due to health concerns, this is no longer commonly practised). Not surprisingly, the answer was no. Though that’s okay, there’s always plywood instead.
Anyhoo, after a quick* visit to the actual store, here are some of the project materials and supplies I decided on (*warning: there is really no such thing as a “quick” visit to Masters. Home improvement distractions abound – in a very welcome way!)…
TIMBER
There were three good options for the decorative cladding:
1 Primed MDF (64mm x 11mm x 2.4m long) $3.77 each.
2 DAR Poplar (64mm x 6mm x 1.2m long) $4.46 each.
3 Raw Plywood Board (1200mm x 900mm x 9mm) $16.89 each.
To keep costs low, and because I wanted something reasonably thin, I decided to go with the plywood board which I had cut (for FREE – awesome!) into 60mm wide lengths (15 in total).
PAINT
I bought a $5 sample pot in a colour called ‘Lyndhurst Castle’ by Wattle. It’s a soft, yet warm, brown-green-grey.
LIQUID NAILS
No explanation needed :-)
And here is the splurge item I just couldn’t resist…
One of the best things about undertaking a project like this is having a somewhat legitimate excuse to finally purchase some of those loooooong desired DIY toys. Like this totally awesome sliding mitre saw which doubles as a hovering spacecraft when not in conventional use – handy. Can’t wait to try this baby out!
I’m still yet to choose hardware (hinges and handles) and am not totally certain how to go about the crown architrave though will be sure to divulge all in an upcoming post (which will feature a full tutorial and, of course, after pics!).
So, whada you think? What type of barn door would you opt for? You can find some amazingly gorgeous options in the White Shanty closet barn door collection which has a huge range to choose from.
This is part one in a three post series sponsored by Masters Home Improvement.
All opinions expressed are my own.






Gee, your virtual rendering is awesome. Can’t wait to see the real thing. You are so clever.
I love all of the inspiration photos. The lattice style in the Dillon Kyle room is lovely though I like a color pop so would paint them aqua.
I’m not fussy, I love all barn doors! Your idea about the painted trim is interesting as most barn doors I’ve seen are finished in a flat all-over colour. Looking forward to seeing the project and reveal.
Genie
BTW Always love your renderings.
This is prefect timing for me. My son just moved out and we are turning his old room into a guest bedroom. I have almost the exact same bi-fold which I was thinking about replacing with a fabric curtain. This is a much more interesting idea. Thanks. I am looking forward to the tutorial too.
Rose
You just gave me an idea to get rid of my French doors in my living room, and switch them out for barn doors! It’s a look that will never go out of style especially where I live here in the country.
Can’t wait to see your reveal!
Keeping it thrifty
Ooh, sounds exciting. Be sure to let me know if you do it!
I like the look of the Dillon Kyle door in your inspiration pics and can’t wait to hear more about your new toy!
Those Dillon Kyle doors seem to be an all round favourite! They have that slightly more refined edge – very pretty.
Can’t wait to try out my hovering spacecraft :-)
Cant wait to see it all come together! I dont know anyone who can’t appreciate the beauty of the barn door.
Too true Libby.
“I hate those ugly barn doors”, said no-one, ever!
Ooh, there is a new-ish Masters near me and I’m yet to visit. What do you think of it compared to the others?
Love your concept for the bi-fold doors.
Masters is the best in my opinion. Aside from the fact the stores are just more pleasant to be in, there is certainly a better range of decorator items (which, of course, is perfect for me!).
I love Masters myself. They could do with a better range of hardware in my opinion though. You should try and leverage this :)
I love those tangerine laundry sliders.
Hi Trish
Yep, Masters is pretty awesome. I agree that hardware stores here in Oz could improve their range of furniture fittings and fixings (I assume that’s what you mean by ‘hardware’). It would be great to have a true ‘one stop shop’ rather than having to rely on speciality stores for items that should really be readily available.
OMG! You are so freakin cool! You went and bought (or is it meant to be brought……?) a sliding mitre saw! I get so much smiles and fun from your blog! Keep it up and can’t wait to see the door reveal :)
Thanks so much Sandy. I get smiles from sweet comments like that too :-) I’m just hoping my vision for the door actually pays off in reality!
Kristine
BTW You were right the first time – bought is to buy, brought is to bring.
Hi Kristine
I love barn doors…& your virtual design is fantastic!
I do have a suggestion, what if you first liquid nailed mdf planks on to the doors to create a planked look (mimicking the ones in the photos) and then attached a maybe slightly thicker decorative cladding on top for a more authentic look? Just my opinion, but have a think. Either way your creations always turn out just gorgeous! Cant wait to see the finished barn doors!!! :)
xx Rani
Great minds think alike! I did consider this Rani though decided against it because; I want to keep it pretty simple (in both appearance and effort), I don’t want the door to weigh a tonne as the bi-fold tracks aren’t engineered for too much weight and the door jam is quite narrow and I don’t want the trim to protrude beyond it.
I do think it would look awesome though perhaps it’s something to keep in mind for a future project.
Kristine
xoxo
This is amazing!!!! So smart! Adding it to our to-do list STAT!
I love them all! I have a thing for barn doors too although they wouldn’t quite fit in my tiny cape house.
Nice rendering! Can’t wait to see the finished doors.
I don’t have anywhere appropriate to put sliding barn doors in my tiny home either Joselyn. That’s what I like about this option. You can give any regular door a barn style makeover!
I have the same mitre saw and it’s love,love,love! Too much love… never. I hope you have as much fun with yours as I do with mine!
Wooow … looks quite catchy and beautiful … appreciate your vision :)
Genius – I love those sliding barn doors too but I always enjoy a great simple cheat!!
Kelly
Love these ideas! Thank you for sharing these pictures too!
WOW! completely blown away by this idea!!! I rent an apartment and I’m sure I can swap out some of the elements for temporary decor. Insane… thanks for sharing!
Taylor @ www,trendycheapo.com
I live in an apartment and your design has given me inspiration on how to do this. I have one question…..how can I attach the board to the existing doors without using something permanent? I have thoughts but would rather go with experienced suggestions.
Hi Nancy
You could try strong double-sided adhesive strips or silicone caulk? I’m not certain where you’re based though I found this link which might be helpful: http://www.protapes.com/products/uglu.
What were you thinking of using?
Kristine