
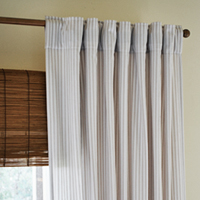
Remember when I posted about my parent’s made-over bedroom (a month or so back now) and promised to share my tip for creating those neat looking curtain ripples?

Well, here’s the little trick (in all its unspectacular glory) and how those lovely waves came to be…
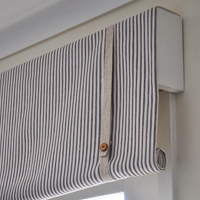
On the day of the photo shoot (of my parent’s room) I decided the flimsiness of the curtain heading was irking me a little too much. Here’s how it looked to begin with.
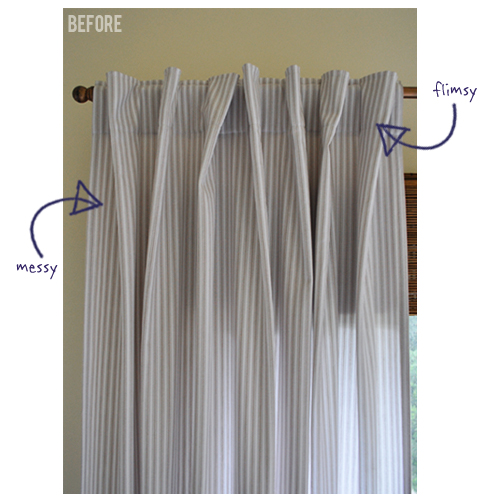
Don’t get me wrong though, I get that in the right setting slightly messy curtains can look relaxed and casual, though in the context of my parent’s semi-formal-ish bedroom to me they just looked plain untidy.
Anyhoo, keeping in mind that the curtains are merely decorative (that is, they don’t need to be opened and closed – you can read why in my original post about the make-over) I got to thinking about an easy way to make them look less dishevelled. Emphasis on easy (as in lazy ;-)
Something that instantly came to mind was this roll of wired paper ribbon (blue-grey in colour if I recalled correctly) that I remembered from my childhood. It had been part of my mum’s gift wrapping stash. Hmmm, something like that could work, maybe.
So, pushing the silliness of my overly fastidious need to have unnecessarily neat curtain tabs aside – anyways, as a part-time perfectionist by definition surely I have the undeniable obligation to be overly fastidious at least part of the time – I headed to a local store to buy some said wired paper ribbon.
None – of course!
Hmmm, maybe flimsy curtain tabs would just have to do.
A little dejected, I drove to my parent’s house and, with low hopes, decided to rummage through mum’s current gift wrapping stash anyway. Just in case.
And, guess what I found?
Yup, the very same roll of blue-grey (my memory served me well!) wired paper ribbon from twenty-odd years ago!
Hoarder much Mum? :-)
Okay, tale now told, onto the tute.
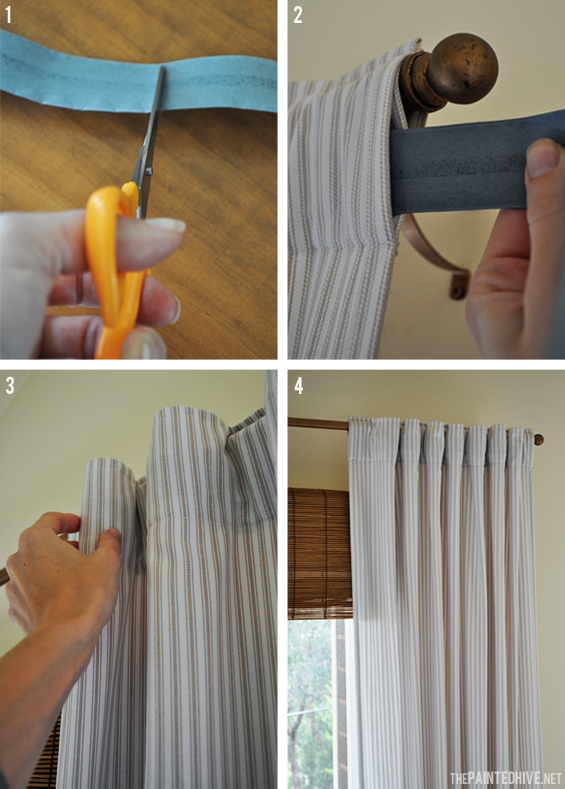
1 To create the neat tabs I first cut a strip of wired ribbon slightly longer than the curtain panel width. Of course, you don’t have to use wired paper ribbon. Wired fabric ribbon, or anything with similar bendy properties, would suffice.
2 With the curtain in the ‘closed’ position (extended along the rod), I then threaded it right through the front pocket until it protruded slightly at both ends. This sounds fiddly and time-consuming though it was actually really quick and easy. You may need to fold the leading end of the ribbon over slightly to create a nice smooth edge for optimal glide.
3 Finally, I carefully pulled back the curtain into the ‘open’ position and went about manipulated the now pliable semi-rigid tabs into smooth looking ‘waves’ before trimming off any excess ribbon still visible at the ends.
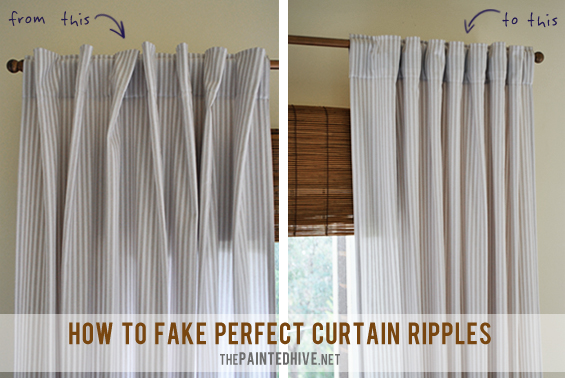
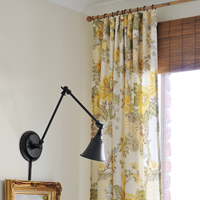
4 Once complete, I climbed down from my little step ladder, stood back and prepared to be totally underwhelmed. Surprisingly, it seemed to have worked! I must admit, I was totally impressed with myself (insert immodesty curtailing blush here).
Of course, they’re not totally perfect (I’m not sure there is such a thing where curtains are concerned) though they are approximately 112% better. And around two months on, even with billowing in the breeze, they have held their form beautifully.
Obviously, this type of solution is not an option for ‘working’ drapes which need to be opened and closed though for stationary curtains which are being used purely for the purpose of decoration or concealment it’s a simple and effective fix.
I know, I know, it would have made more sense to stiffen the flimsiness of the heading during the actual making of the curtains, though for whatever reason (impatience I’m looking at you!) that didn’t happen. Plus, I think this make-shift method actually provides greater control and the ability to create nicer waves.
I hope it might help those of you who, like me, have issues :-)
![]()


Ha, ha, thank you for sharing this. I am one of those with “issues” too. We have dummy drapes in my great room and their heading is always driving me nuts. I am so doing this tomorrow.
I agree that in the right room messy curtains can look lovely and relaxed. Though I think you made the right decision to tidy them up in your parent’s bedroom. Great tip.
You are a genius! I like the neat look and love your solution. Brilliant.
Clever!
Where are you going to get the paper ribbon , from her Mothers stash ?
Wired ribbon, whether fabric or paper, is actually pretty common. I was simply hoping to find some at my local party supplies store because I didn’t have the time to go hunting it down. It is easy enough to source online or buy from large party supply/haberdashery stores.
brilliant! easy and successful…gotta go try it!
Now this is seriously genius! I have tried the trick of “training” your curtains by using clothes pins on the folds, but it never quite did the trick for me. THIS is a winner! I don’t think I’ve ever seen wired paper ribbon, but I’m guessing regular old wired ribbon should work. Thanks so much for a great idea. :)
Yep, any wired ribbon, or anything with the same kind of pliable quality really, should work. I even contemplated simply using a length of wire (not sure how successful that would be though).
Iron-on curtain tape (called buckram) is the proper thing and is easy to use and cheap. It comes in different weights, as well. However, I love your frugal ingenuity! It gives me hope that all MY hoarding will come in useful someday.
Thanks Teresa.
I agree that using something (like buckram) to thicken the heading in the first instance is a good idea though for concealed tabs might still require some fabric ‘training’ as it can over-stiffen the soft ripples. In this case I was simply after an easy fix that didn’t involve having to take the curtains down. What can I say – lazy ;-)
Teresa, how does buckram work. Where do you sew it onto?
Hi Laura
Buckram is usually iron-on. It is simply fused to the underside of the heading to stiffen the fabric. Although it does work to counteract flimsiness it is not pliable so some amount of fabric “training” to achieve soft waves might still be needed.
Hope this helps.
Kristine
What a clever idea! :) BTW you can usually get wired Christmas ribbon easily these days.
Exactly. Anything thin that bends should do the trick!
Found your tutorial link on Apartment Therapy. What a terrific bit of inspiration. THANK YOU for being so inspired!
Great idea!…and most stores that carry any kind of deco fabric will have plain crinoline or buckram that is not iron-on. It comes 3 or 4 inches wide and you can cut it to length and slip it into the heading if the ends are loose like those pictured. Don’t waste your money on the iron-on kind..it’s overpriced and doesn’t hold up in humidity or laundering.
Or…one could make there own version with wide masking tape and some 18 gauge wire. Great idea! Thabks for helping me solve my droopy drape problem!
Absolutely Robin! Love me some DIY ingenuity.
Enjoy your perky drapes :-)
Great tip! My mom is a seamstress and she makes lots of curtains and I am going to pass this on to her, I am sure she has never thought of this. :)
Genius. Totally doing this! Thanks!!
Could you slide this through the hem also to create folds on the bottom so they don’t flare out. ? I would think it would have to be a neutral color ribbon
Definitely Cheryl. As long as the hem had open ends and was wide enough for the ribbon. My mum even sometimes uses a long loose stitch to keep the hem of her stationary drapes in position.
:)
Pool noodle works as well 😁
I have curtains that hang from rings. Would this work if I just attach the wired ribbon to the back side of the drapery panel and moved them into the correct position? I’m thinking that I’d just leave it in place. No one would see it as it would be behind the panel.
Yes, I believe this would work. Should be fine.