
I know it’s been a long time coming, though the most protracted bathroom makeover in history is ready for its close up…or wide angle…or medium range shot…or whatever sort of photo it takes to finally get this bleeping room up on the blog!

There’s really no good reason it’s taken me several months to complete. I mean, it’s not astoundingly brilliant, we didn’t run into any issues. I guess, as a low priority project, it just took as long as it took. If you’ve been waiting for the reveal, I’m really sorry for how bad I suck at time management, and hope the room is decent enough to somewhat make up for it.
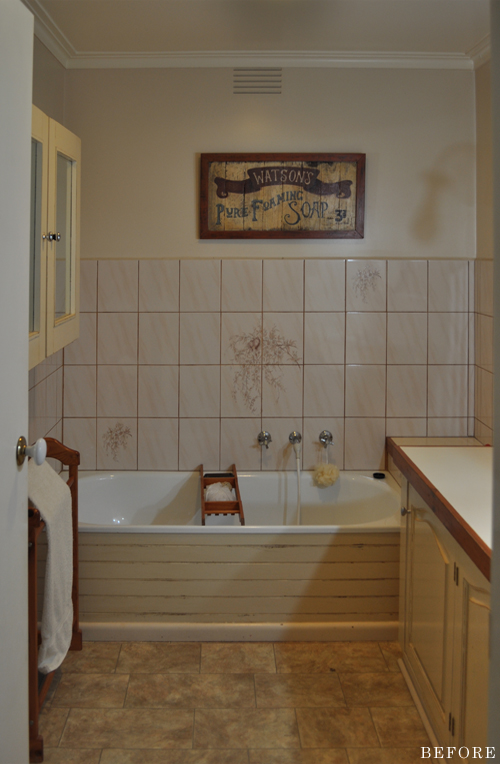
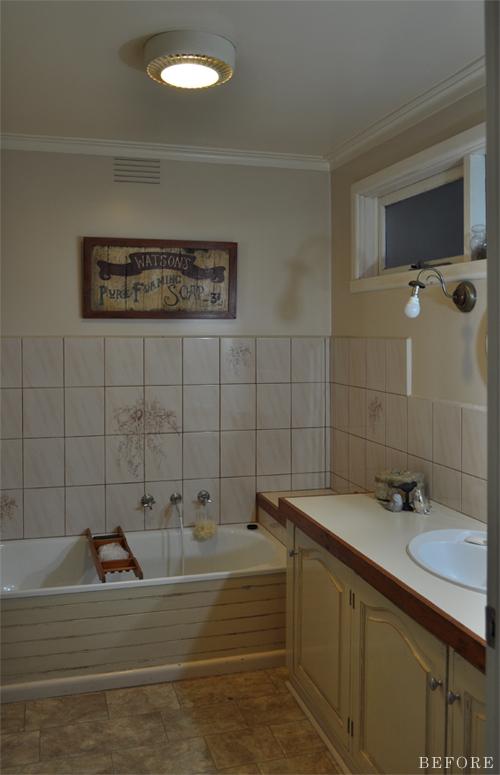
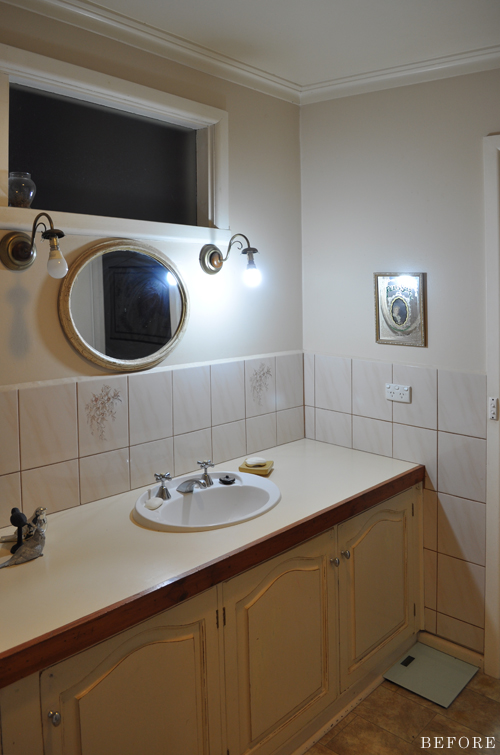
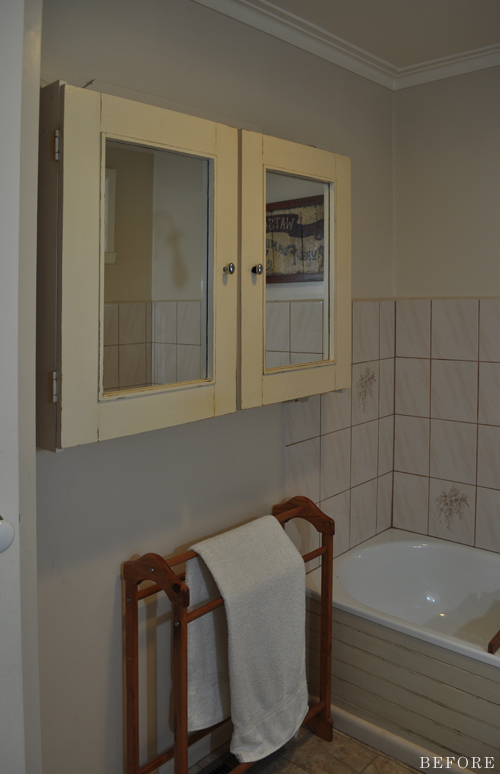
This is the main bathroom at my parent’s house (as they’re now empty nesters it’s rarely used – hence my lack of urgency in getting it done!). They originally renovated it around 25 years ago and, as you can clearly see, it was badly in need of an update.
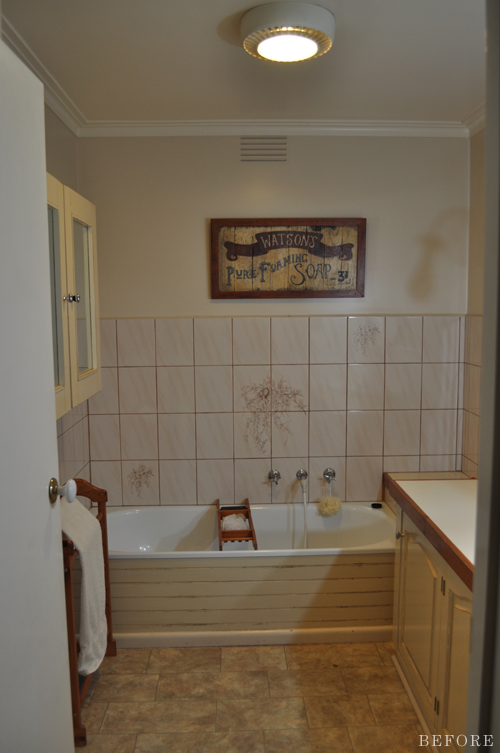
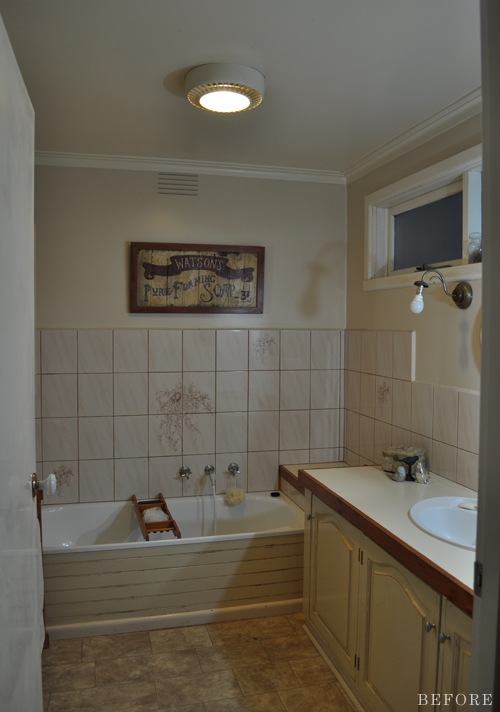
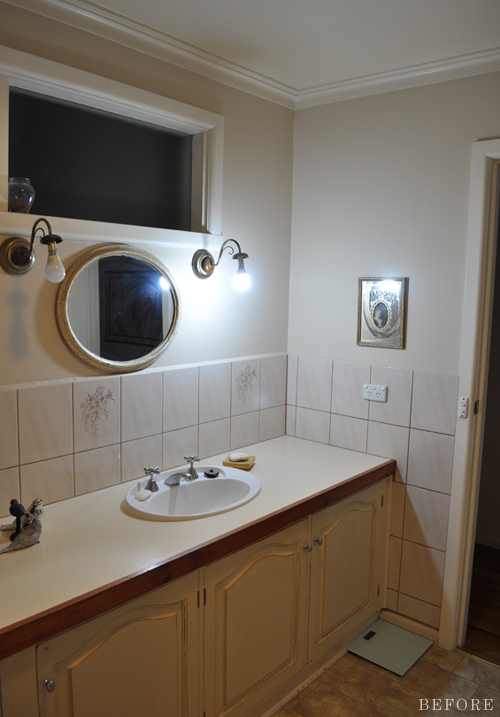
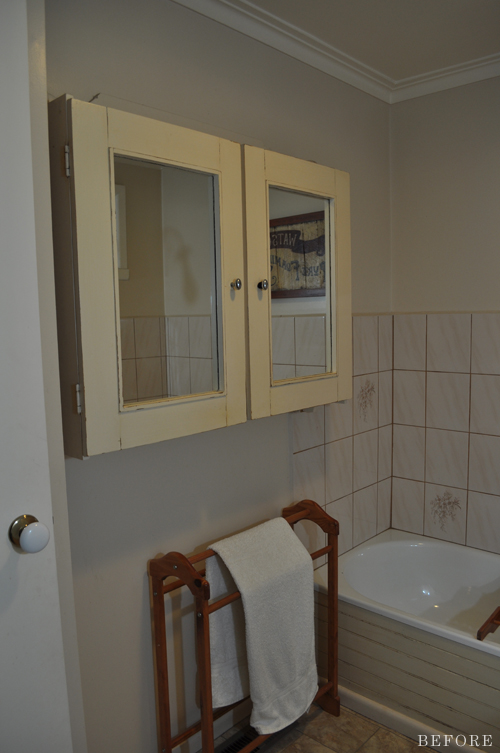
Sorry, had to take the before shots at night before we started working on it.
Hello beige and cream!
Aside from looking pretty darn ugly, there wasn’t anything really ‘wrong’ with the space. I mean, nothing was badly broken or overly damaged, it functioned well and had everything it needed (there’s a toilet in a separate room). Although a major renovation would have been nice, it also would have been unnecessary – not to mention super pricey. Besides, there’s just something incredibly rewarding about transforming what you already have.
So that’s what we did!
Aside from the shower base and vanity top, which mum chose to have professionally refinished, the installation of a new shower screen, and some minor plumbing and electrical work, which some friends helped with, my parents and I did everything ourselves.
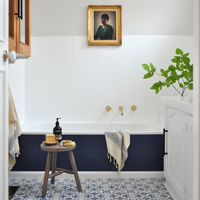
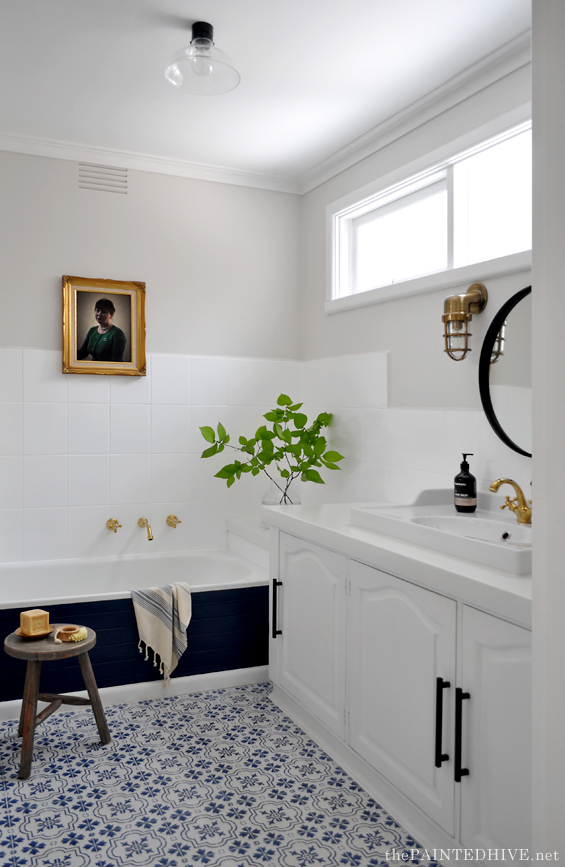
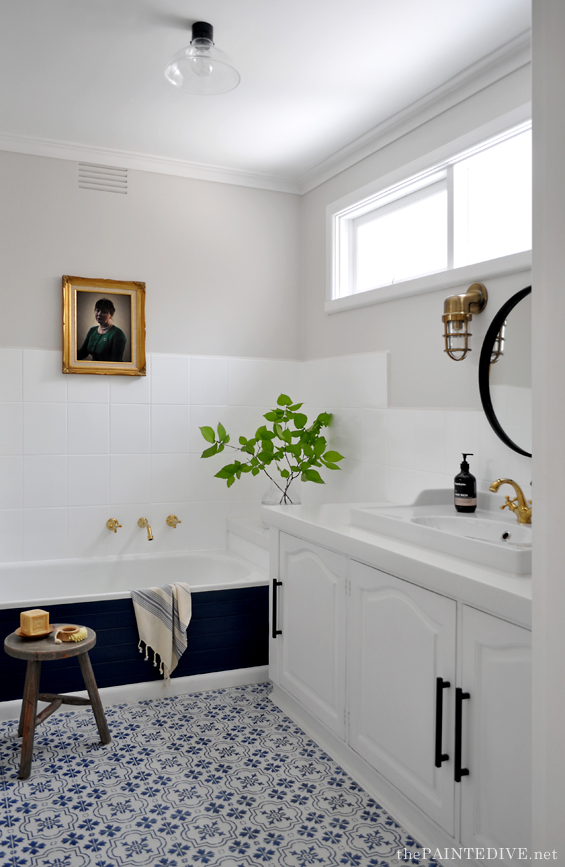
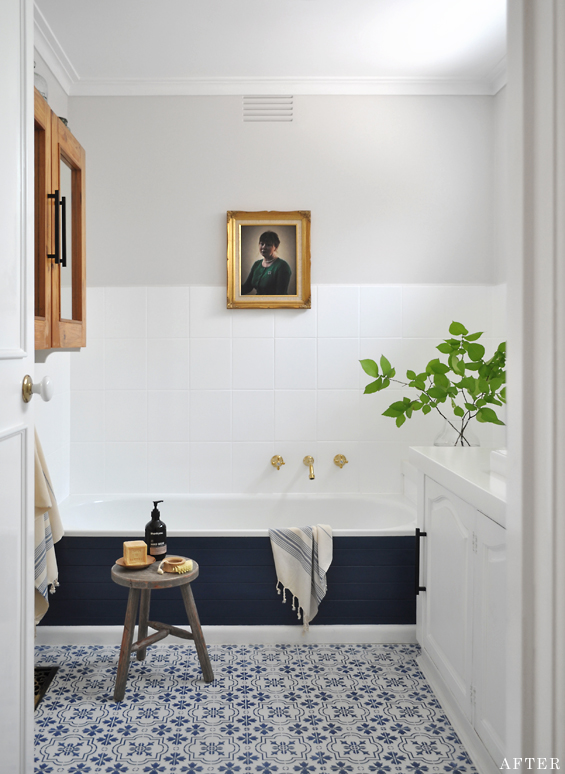
It’s funny, though we never had a distinct design plan. Our main objective was simply to give the room a fresh, bright, sophisticated-yet-comfortable feel. And because mum loves blue and white we decided to start with that and go from there. Luckily, for some strange reason, she trusted me and it all seems to have worked out!
Paint was a MAJOR player in this transformation! The floor, tiles, walls, ceiling, vanity, bath panelling, door and architraves were all freshly coated.
The vinyl floor was hand-painted using a tile stencil from Etsy, Rustoleum chalk paint (in ‘Coastal Blue’) and Cabots CFP sealer (you can find my basic floor painting tutorial here). It was completed several months back and has held up fantastically.
Note: The faux tile sheet vinyl which can be seen in the before photos was pulled up to reveal an older layer of plain vinyl beneath. This is what we painted.
Mum painted the wall tiles using Rustoleum Tub & Tile paint. Brightening those dull tan tiles and losing the dated feature mural made a huge difference!
The vanity base was painted in a crisp white semi-gloss. As mentioned above, the top was professionally refinished and although it’s hard to see in the photos, has a faint stone-like fleck (you can just make it out in the above pic – it cost around $350).
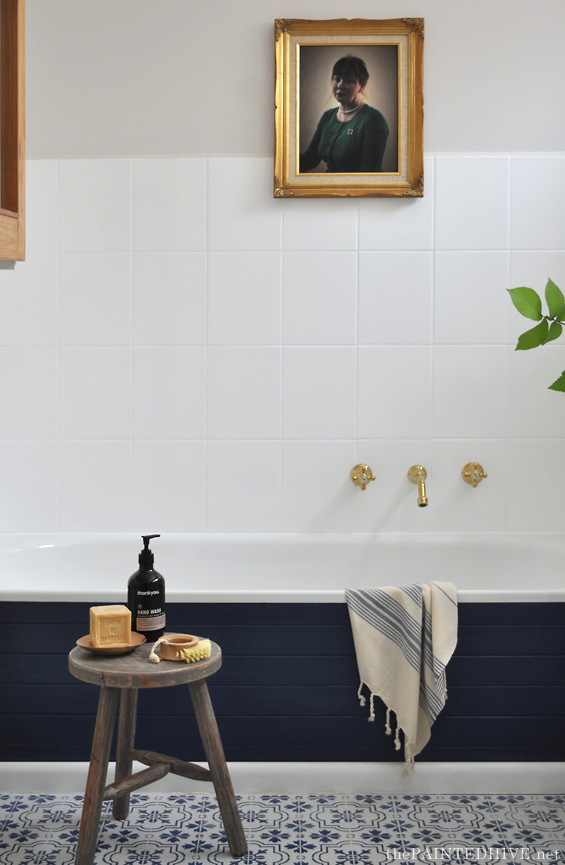
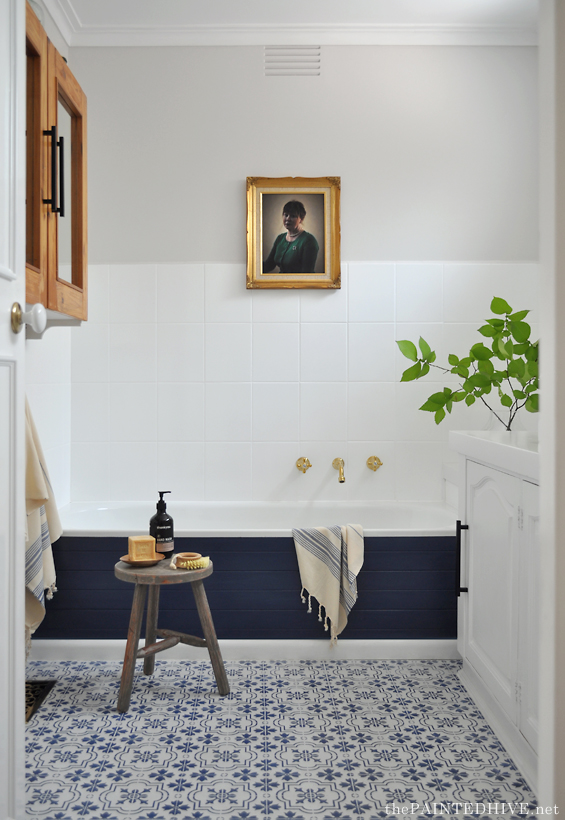
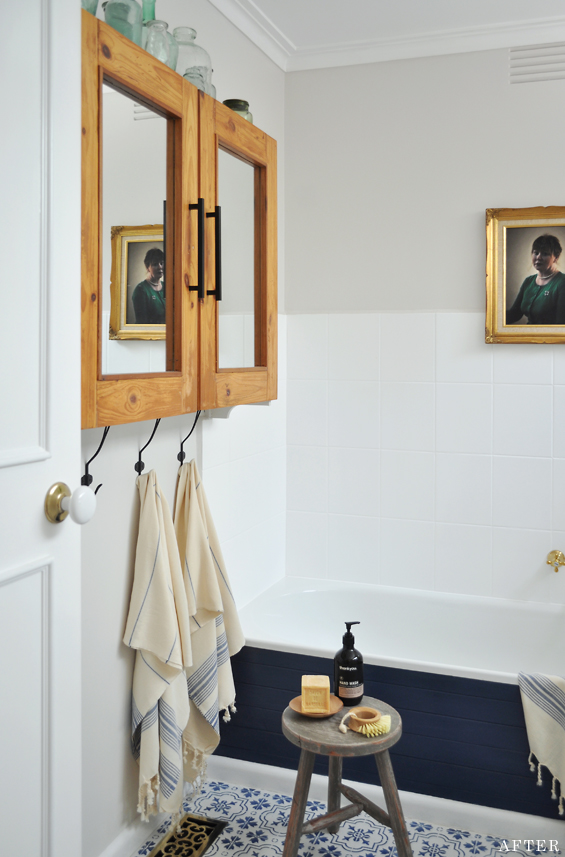
Mum wanted to paint the bathtub panelling white too though I convinced her to use the navy we had left-over from the floor (we added a bit of black to make it a tad darker and less saturated). It references the stencil, adds depth and creates a bit of drama. I think it was the right move.
The bath itself was in great condition so wasn’t touched.

To provide a subtle contrast for all the white we went with a smokey grey (Dulux ‘Limed White’ Quarter) on the walls.
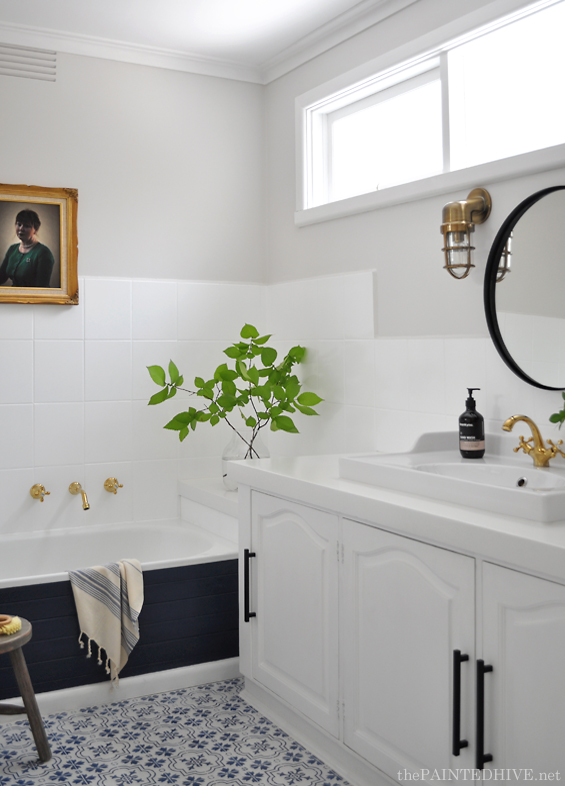
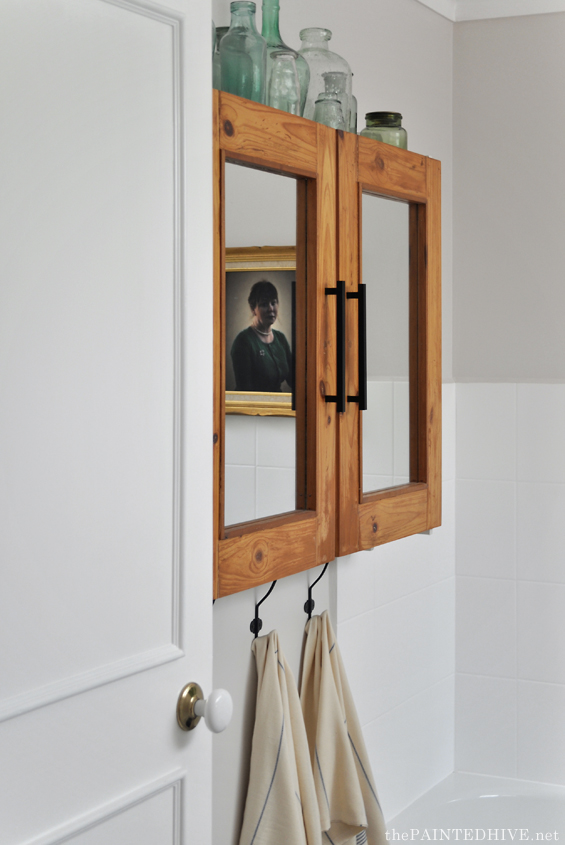
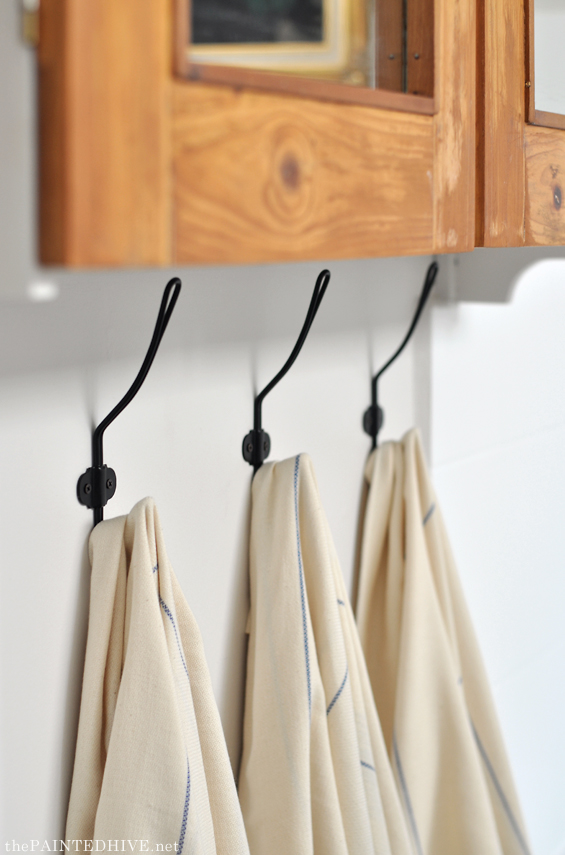
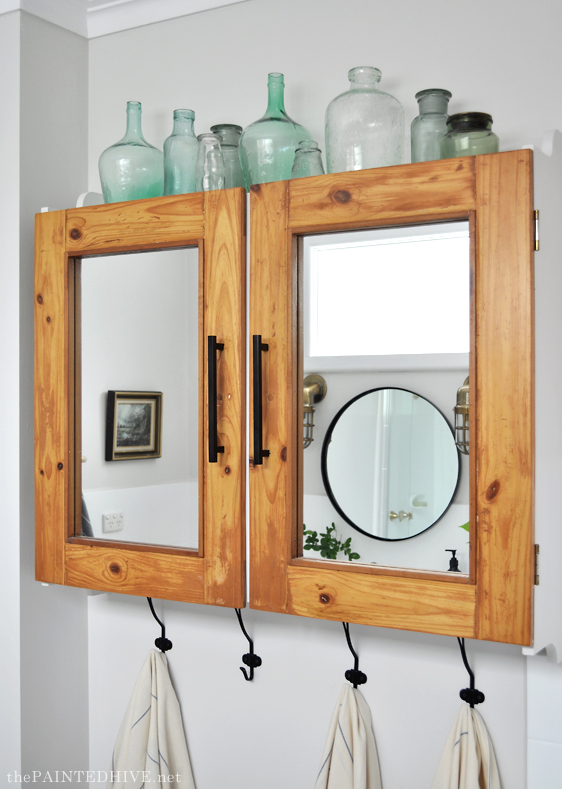
As things were coming together it became apparent to me that we needed some wood! Nothing brings warmth and depth to a space like natural timber. It took some coaxing, though I eventually convinced mum to strip the cabinet doors rather than re-paint them. Their rustic golden finish is just perfect!
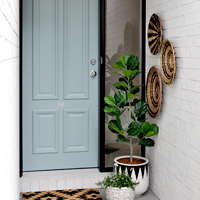
The entry door got a little makeover too with some new trim and fresh white paint (you can find my tutorial for adding trim to plain doors here).
I know some people probably consider it dated, though we kept the ceramic handle. I think it’s classic and understated.
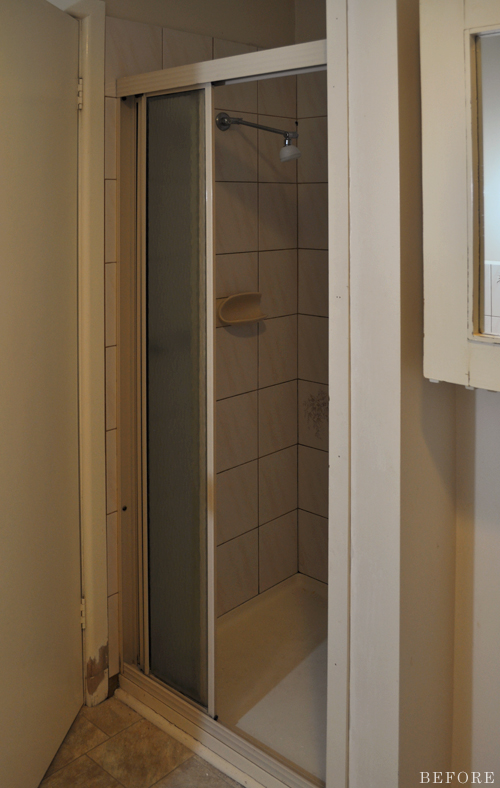
As mentioned above, although I like to work with what’s already in a space, there are some things which are best replaced.
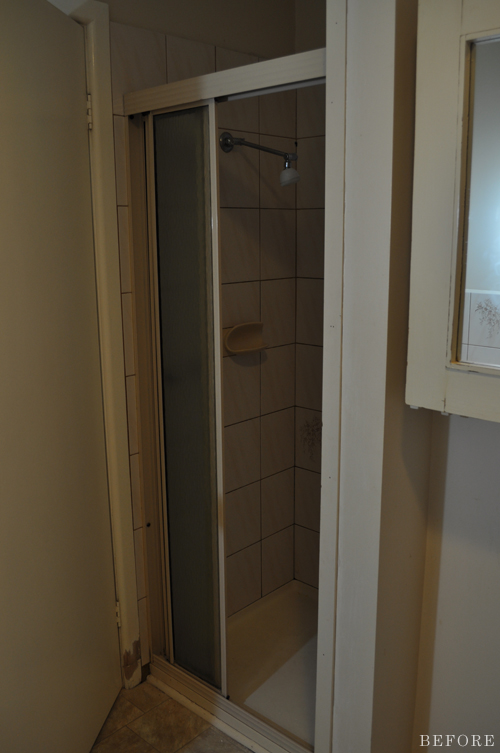
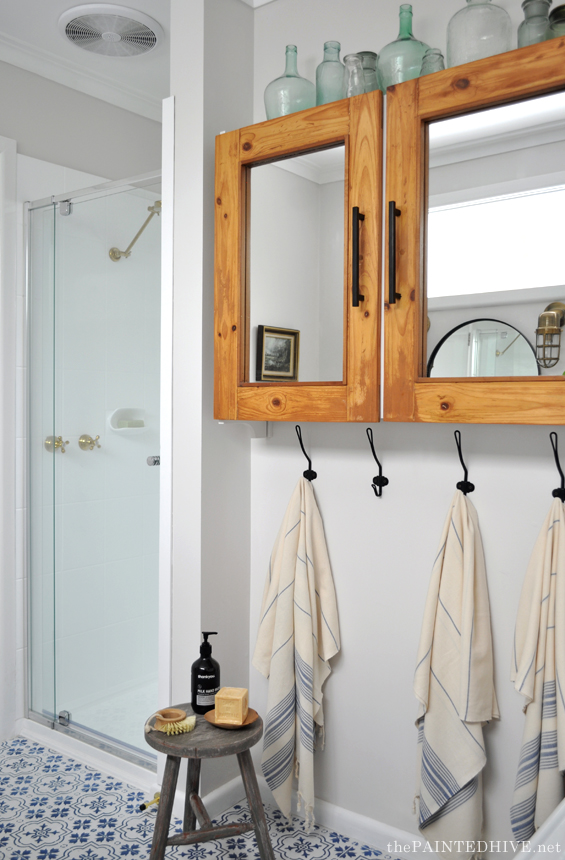
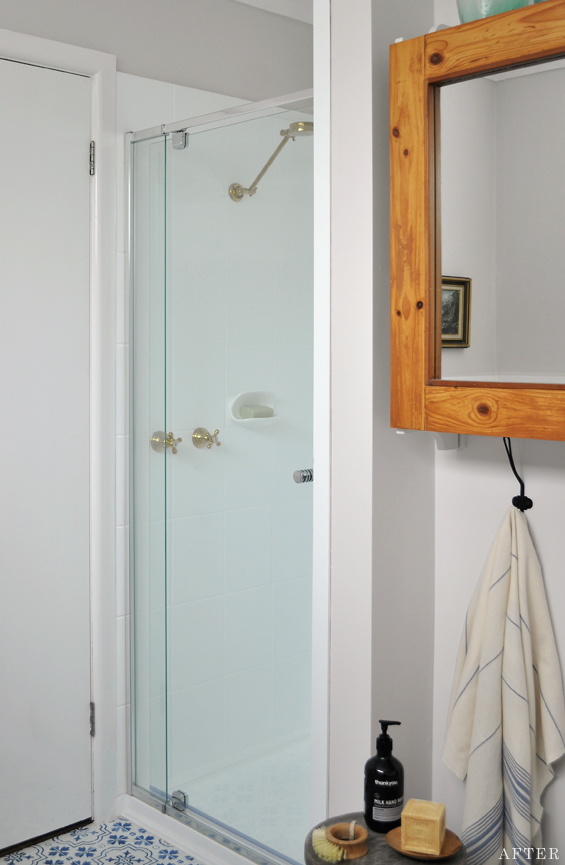
The shower screen had seen better days so was switched out for a new glass door (it cost $450). It looks soooo much cleaner.
And as mentioned above, mum had the shower base professionally resurfaced for $350.
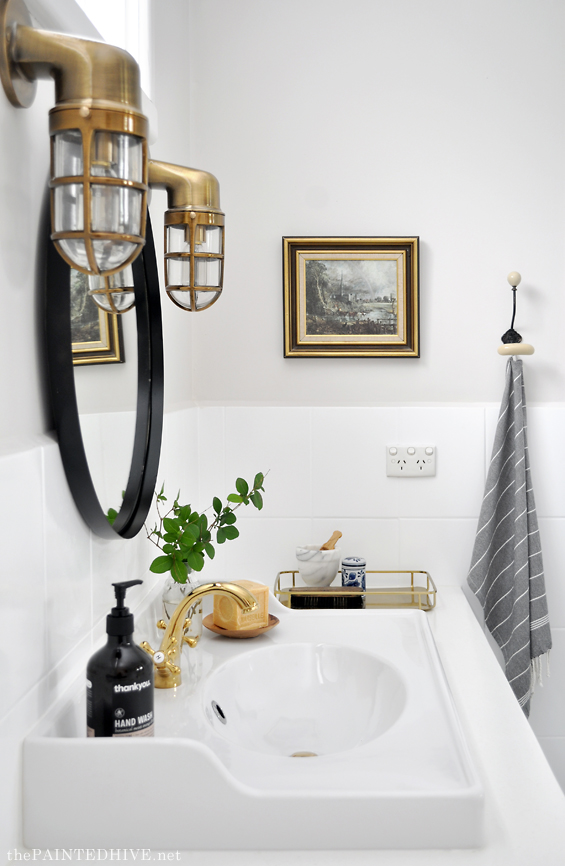
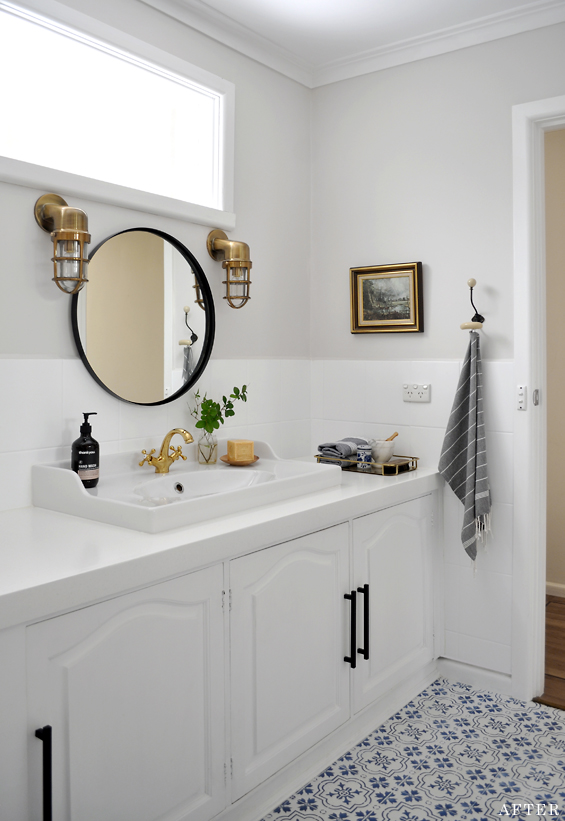
The original basin, which was pokey and off-center, was upgraded to a RATTVIKEN from Ikea.
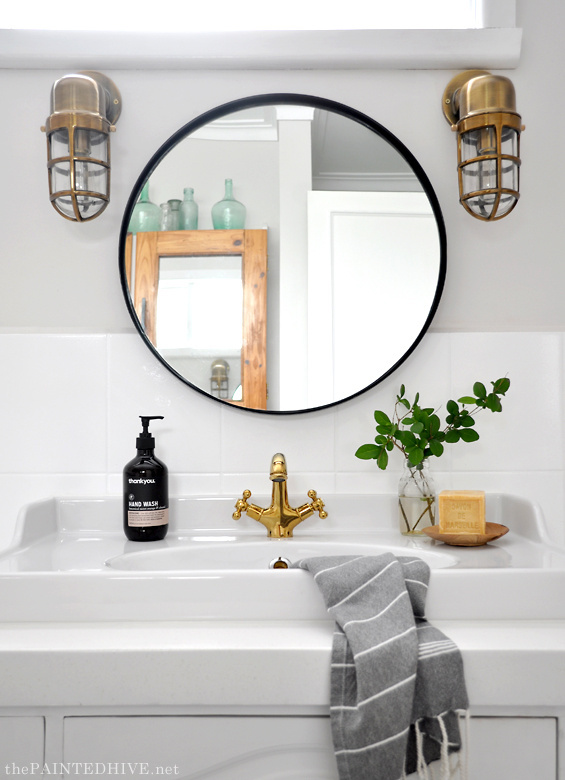
Although these basins are really designed to sit atop a wash stand, we like the uniqueness of it on the long vanity and the character the collar provides.
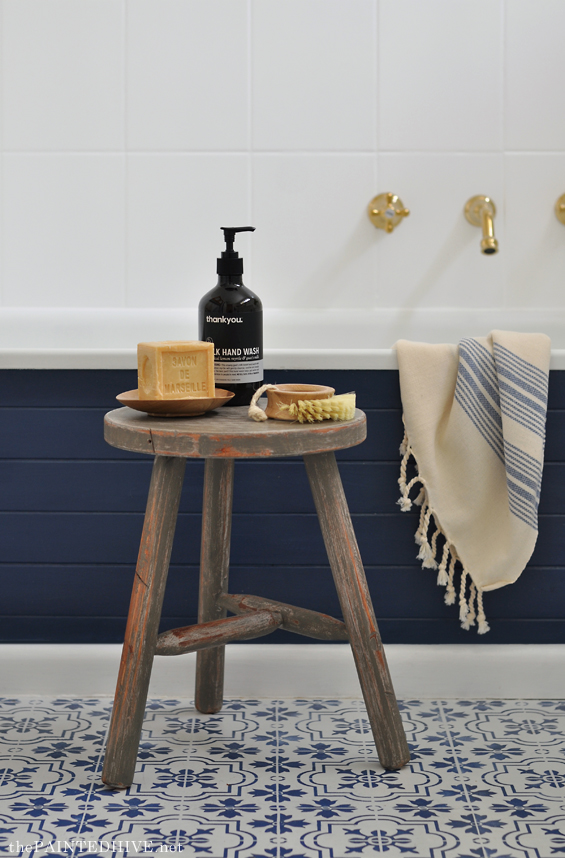
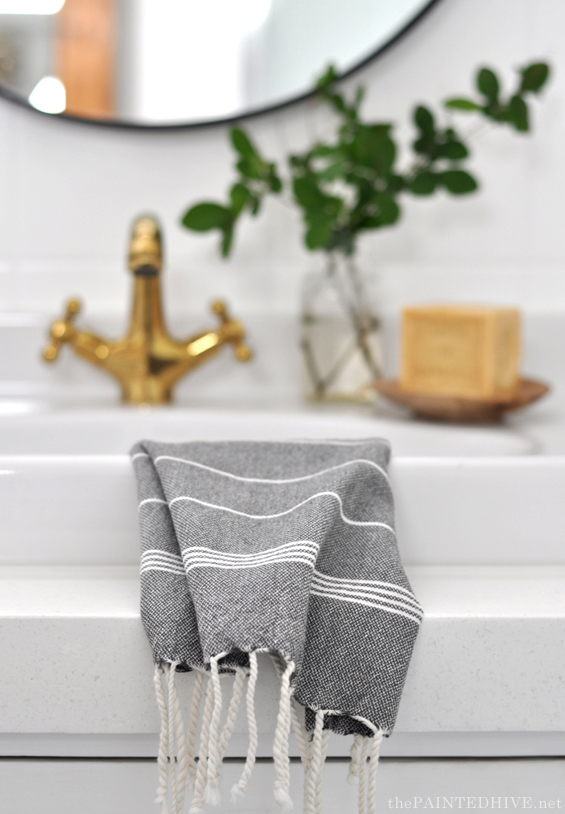
All of the old chrome tapware got updated to brass which compliments the navy accents perfectly. The shower and bath fixtures are simply from Bunnings (around $80 per set – sorry, I can’t see them on the website anymore) and I found the basin mixer on eBay for $60.
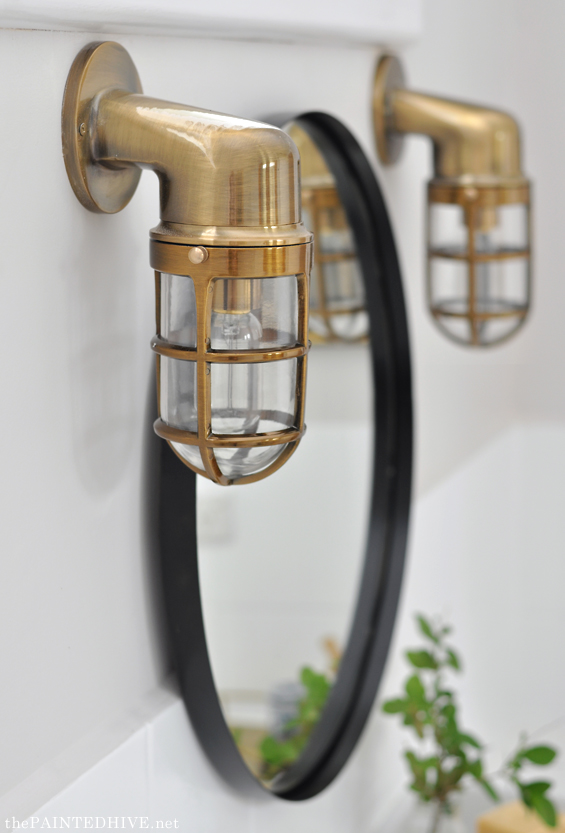
We toyed with lots of DIY ideas to upgrade the existing sconces though then one day I happened to stumble across these ones on eBay…for $25 each! How could I say no? I’d seen similar ones for almost $400!
The ugly old ceiling exhaust was replaced with a simple $50 glass batton fix light from Bunnings (dad installed a new extraction fan above the shower). We considered using a fancy pendant though the ceilings aren’t very high and we figured there was already enough going on in the room.
The vanity and cabinet handles were on sale from Bunnings for just $4 each! They were originally silver so we spray painted them gold. “Gold?” I hear you say, “they look pretty black to me”. Well, yes, I decided I didn’t like the gold so we tried matte black instead – much better!
You’ve actually probably noticed there’s a mix of metals. It wasn’t our intention to have brass, gold, black and chrome though it just kinda worked out that way – mainly due to cost and availability (for example, the shower door fittings were just offered in silver or white, and the sconces came in antique brass only). Though far from detracting from the overall scheme, I think it actually adds interest. So, if you’re agonising over mixing metals, I say chill.
Everything else in the space is just ‘dressing’.
The little stool is a hacked Kmart piece (find the tutorial here). All up it cost less than $20.
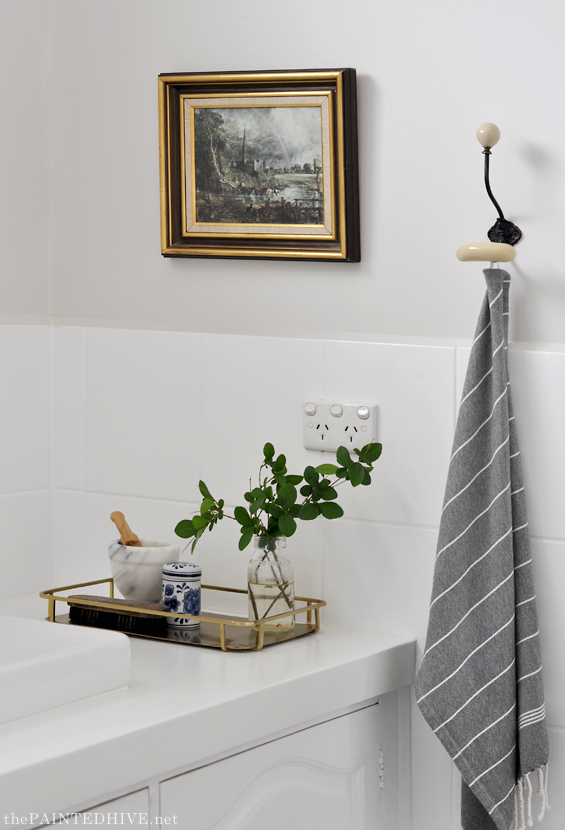
The lovely turkish towels, which hang on $3 SVARTSJON hooks from Ikea, were a bit of a splurge at $28 each. I justified the expense by gifting them to mum for her birthday.

From the beginning I envisioned a single portrait on the rear wall. This one, of my mum, was a fun DIY I shared a few years back. You can find the full how to here.

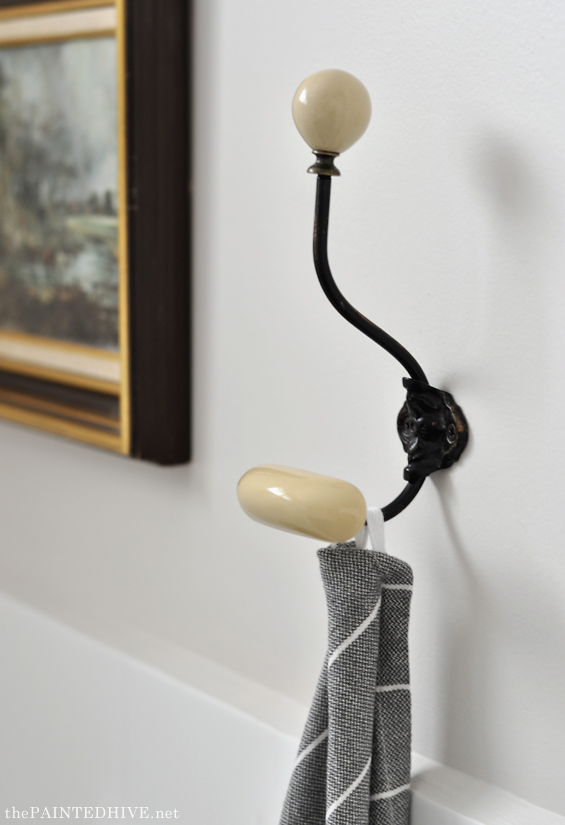
The other artwork is a sweet vintage print from the op shop.
And beside it is this lovely washroom coat hook from Abodent.
I was going to leave the top of the cabinet empty, though then I started filling it with our collection of green glassware and couldn’t stop!
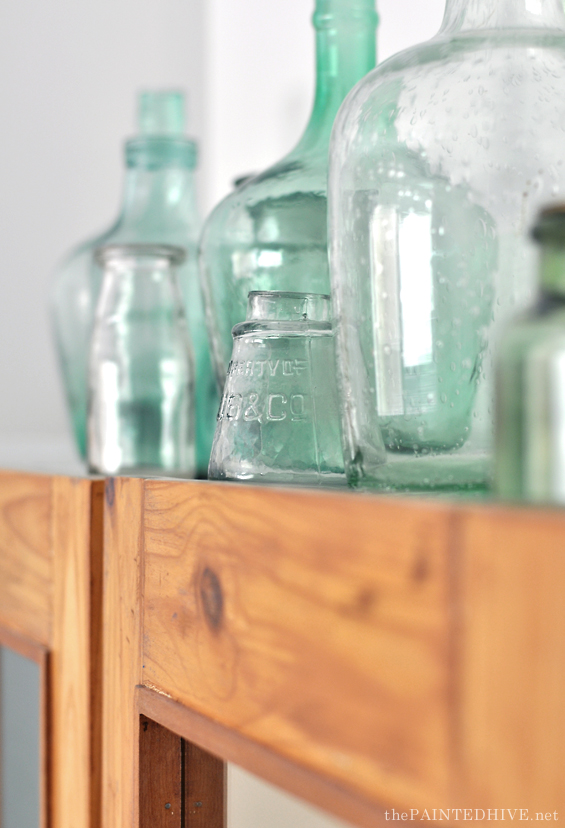
I get like that with green glassware!
The round mirror is an inexpensive Ikea piece (I can’t find it on their website anymore though mirrors like this are available in lots of places nowadays). It was originally silver so we spray painted it gold. “Gold?” I hear you say, “it looks pretty black to me”. Well, yes, I decided I didn’t like the gold so we tried matte black instead – much better! Is anyone else having deja vu? He, he.
Finally, on the vanity a $12 gold metal tray from H&M holds a few vintage finds.
Okay, I think that’s it. Man, that was a looooong post. Now I see why I procrastinated over writing it – ha, ha.
Sorry I don’t have step-by-step tutorials for all of the projects though my parent’s did a lot of the work whilst I was home wrangling my kidlets. If you have any questions, please ask away.
As always, I really hope this has motivated you to have a go at working with something you have. It’s easy to give up on an ugly room, or to get hooked on the design minutiae, though with some imagination, adaptability and your very own hands, reinvention is totally possible.
Now, to finish, some before and after comparisons just for fun.

I just did some rough calculations and the ENTIRE makeover came in at well under $2,000. Not bad!
I hope you like it.
![]()

In other news, I recently started a home decorating Facebook group!
With a focus on stylish, budget-friendly, DIY interior decorating, it’s a positive community of home enthusiasts designed to enlighten, encourage and empower everyone to craft a home they truly love!
You can share information and find creative ideas, ask a question or offer advice, or inspire others by showing-off your latest project or product find.
I’d love to see you there!
JOIN MY HOME DECORATING GROUP HERE


Lovely job, and I don’t think it matters at all about mixing all the different metals.
Me too! Thanks.
How has the tile held up after being painted? I’m considering doing this but want to make sure it’s durable.
It’s all still perfect. Though bear in mind this is the main bathroom in my parent’s house. They are empty nesters who use their ensuite so it is rarely used.
Just fan-bloomin-tastic!
Ha, ha. Love it! Thanks Sharon :)
Kristine, this is particularly lovely considering that you didn’t go to the great expense of a total bathroom renovation. Can i make a suggestion to your Mum?
TAKE this bathroom as your own! I too am an empty nester, and I couldn’t see the point of having a full bathroom sitting there idly waiting for guests. I totally girlied/gussied up our main bathroom for myself and it is now my private spa/retreat/glamour station. She should use this lovely space for herself (separate bathrooms does wonders for keeping the “mystique” and romance alive! No need for anyone to see the other partner’s stray hairs/stubble/hair dye evidence/toothpaste residue!)
That’s such a great idea!
Margo: My husband has taken (neatly) over the main bathroom here. THat way he has his stuff handy while getting ready in the morning (to go downstairs to his home office!) without waking me up! As long as it stays neat, I don’t have a problem.
Fantastic update!!
Feel free to say ‘mind your own business!’ ;) But how much do you reckon you got away with it for all up?
Good question. I was going to total it up. Will work it out and add it to the post.
According to my rough calculations, the entire room, including EVERYTHING, was under $2,000. If you take away the decor, the room itself cost around $1,500. Not bad!
Absolutely stunning! Every detail is so beautiful.
Thank you!
Really amazing transformation! Well done! I love the mixed metals, totally agree, it works! I am very intrigued by your floor painting, was contemplating doing this but am apprehensive of how well it will wear!
If you do it properly, it wears exceptionally well. We painted the floor in my parent’s master bedroom retreat several years ago. It’s basically a storage/sewing/ironing room so the floor gets a lot of rough use and still looks amazing!
Lovely, as always!! Would love to see a tutorial on the stool. Your design aesthetic is very inspirational, thanks for sharing.
Thank you :)
The floor started the whole project off in the right direction- I love it! Great job.
Thanks. It was the first thing we did and, thankfully, it set a great tone!
Your parent’s bathroom makeover is STUNNING!! It really came alive with your color choices and fixtures! LOVE the navy tub!
Thanks :)
This is really fantastic! Kudos to you and your parents for transforming the dated bathroom in such a budget friendly, lovely way! It’s refreshing to visit your blog, and I really appreciate how practical, in a very good way, you are and your designs are spot on without spending thousands.
Well done!
Thanks so, so much :)
Wow! I love the navy contrast and the eclectic mix of metal colors. The bathroom looks so much bigger and the floor is beautiful. I didn’t know you could do so many things with paint. Great ideas!
Fantastic makeover. I so appreciate posts about using what we have and making it work on a reasonable budget with the occasional splurge over these blog posts with crazy complete gut jobs and outrageously expensive updates because they have sponsors!! I’m loving the new FB group as well!
Thanks Marcie. I’m loving the Facebook group too – so many amazing members already!
Beautiful! What a transformation. It’s amazing how much paint played a role and what a difference it can make. I’m definitely pinning this for all the great ideas. Great job!
Thanks Karen :)
It’s all really nice but my favorite part is the stencil floor. It looks fabulous!
This is a beautiful re-do, Kristine! I am inspired by so many elements…can’t wait to try some!
Fantastic! Thanks Linda :)
Gorgeous! Even though the room was light colors before, the transformation seems so much brighter and bigger! I absolutely love the stenciled floor! You are very brave to try that. I don’t think that I would be so brave! It is so nice to see updates to a bathroom that are “down to earth” and affordable instead of makeovers that are financially so far out of reach! Great job!
Thanks so much. We had nothing to lose with painting the floor and tiles. If it didn’t work out we could always just replace them completely. I say go for it!
Brilliant, Kristine! Absolute perfection. It’s difficult to believe it’s the same space. And, amazingly, on a budget.
Wow! Exceptional to say the least, its stunning and I’d want to use that bath anytime just to spend time in that room!
I love the stenciled floor, thanks for the tutorial to give me the courage to attempt this. I have a question , if you have time. I want to do a bathroom/laundry room. Would you move the washer and dryer and paint underneath? I think being a mom is important and children require time. I appreciate you taking the time to share this with us. Please don’t be so hard on yourself, children grow up and don’t pause for decorating. Thank you so much for this fabulous and economical way to beautify my home.
Hi Sheryl. Aw, thank you.
To answer your question, yes, I would move anything free-standing and paint underneath. I think it would just “feel” better.
Kris
This is one of the most beautiful bathroom re-do’s I have ever seen! I have no blue in my house, but if I did, this would be my choice for a bathroom. I love everything about It, especially the navy blue tub side, the gorgeous tile floor, and the wonderful sink! I just the other day read that a blue bathroom raises the value of a home by thousands when it comes time to sell! Were it not for the expense of replacing dishes, expensive comforters, towels, throws and pillows, as well as numerous other things too costly to replace, I would change to blue in my home. However, it’s just too expensive for me to do as a Senior, and since I’m happy with my greens, I’m okay. But this bathroom is it! I enjoy seeing remodeling projects when it’s mostly all done by the people who own the house, not professionals, so thanks for sharing with us. It gives inspiration to the everyday DIY’er!
That is an amazing transformation. I couldn’t believe the floor and tile behind tub were painted. I never would have thought it possible. We will be buying a new fixer upper house in the next 3 to 6 months and I am sure I will be referencing this post!! Thanks for such useful information and inspiring pictures – and all the links. Really enjoyed it and showing my husband what is possible.
Oh yay! So thrilled to have helped inspire you Kathy :)
Inspiring transformation! Off to check out your floor painting tut
This is an amazing project and beautiful outcome. When I noticed the door knob I was thrilled to see an old ceramic knob. Adds charm along with the bottle collection.
Fairly new to your blog
Cindy
Thanks so much Cindy. So glad to have you here! It’s lovey that you didn’t think the knob was dated and boring. You’re certainly in the right place then!
Gorgeous! I’d love to see how you achieved the little stool from KMart.
Thanks. Will do a tutorial soon :)
WOW! I love what you have done, it has given me the confidence to go forward with my own bathroom make over.
Oh yay! This is one of the best comments I can hope for :)
Very beautiful! It’s so bright. Wish I had that kind of vision for my BR. Congrats!
Thanks so much. Seriously, you can do it!
Wait! You stenciled over linoleum? Did I read that right? How awesome is that! It looks amazing! I need to show this to my daughter for her kitchen floor! The whole design is beautiful. I think the wood cabinet adds just the right touch of warmth and character. Thanks for sharing.
Thanks Karen :) Yep, straight over the linoleum. So easy! Just give it a decent sand and clean first, seal it thoroughly and it will be fine. So fun!
This was definitely worth the wait! I adore your floor and the navy bath against it is pure brilliance.
Oh, thank you :)
I LOVE everything about this makeover! Most of all the sconces! What a deal! Your design is exquisite! Everything came together so well. Thank you for the inspiration.
What products were used for the tile paint?
Hi Victoria. As per the article, we used Rustoleum Tub ‘n’ Tile :)
What a stunningly beautiful transformation!! I am so impressed with the job done here.
AMAZING!!!!!!!!!!
I just love it! I am blown away with your before and afters Kristine!
Remarkable redo–I love everything about it!! (the green bottles are a wonderful touch…and love the natural wood on the cabinets!) I’m curious about your experience with painting the tiles: is it difficult? toxic to do? How does it hold up? Overall a great inspiration!
Hi Cynthia
Painting tiles isn’t difficult per say though it’s more tricky (and perhaps more daunting too!) than painting a wall. The paint is quite thick and sticky and you need to work relatively quickly and with confidence.
Regarding the toxicity, I just found this on the product specification sheet:
“CONTAINS: XYLENE, BUTYL ALCOHOL AND POLYEPOXIDE. Prevent build-up of vapors by
opening all windows and doors to achieve cross-ventilation. Use only with adequate
ventilation. Ensure fresh air entry during application and drying. If a window or fan is not
present in the room, place a general room fan 5 feet outside room doorway to blow
fresh air into room.”
Obviously I can’t comment on the longevity yet though I can let you know that several years ago we painted the tiles in my brothers kitchen and they are still in excellent condition (except for just above the stove where they have been discoloured due to heat – of course this isn’t an issue in a bathroom though).
Cheers
Oh I just love your style, and how you pull everything together. Well worth the wait friend!! And good job mum and dad!
Thanks so much Ashlea :)
Fabulous job, Kristina. I’ve never trusted my DIY abilities as I grew up in a home where my parents valued high-quality, which meant new purchases. However so much has changed and new products for DIY are of such high quality now – plus upcycling is good for the planet. Your post has given me confidence to give it a go. Thank you. And well done on a gorgeous makeover :-) Cheers, Penelope
Hi Kristine, absolutely beautiful job as usual. Would love a tutorial on the stool, is it the K-Mart dipped stool? Also wanted to ask if you have ever painted a tiled floor? My daughter’s main bathroom has a purple floor, and we keep talking about painting over it (would include the shower stall), but not sure how it holds up. It’s their main bathroom so not used a lot yet. Thanks for sharing your beautiful work.
Hi Cheryl
Unfortunately I don’t think painting floor tiles is recommended. It seems the paint just isn’t durable enough to withstand that kind of use. I guess you could always try it if she’s planning on replacing them anyway. Otherwise, could you try something else? Like peel and stick planks or sheet vinyl straight over the tiles?
Wow! Just wow! Unbelievable transformation. Love it all! Goid call on the navy bathtub, looks fantastic. Thank you for sharing.
Fantastic design on a budget–that’s your signature. This bathroom looks so high end! You are so inspiring!
You’ve done it again Kristine! It looks ace. Nice job for your Ma & Pa.
Amazing job! I am always daunted by trying to update things that look so dated (other than a complete renovation) so thank you for the inspiration!
Would love a recommendation for the resurfacing for the shower pan and vanity – the shower is often the thing I think is impossible to make look new!
Hi Jacqui
Thanks, glad it has inspired you.
The shower base and vanity were professional resurfaced for a total cost of around $700. It’s not cheap though it’s cheaper than buying new (especially considering the labour costs involved with installation).
Sorry, not sure this was what you were hoping for?
Cheers
Would you be ok to share the company’s details? I am also located in Melbourne :)
I would absolutely love to see how you changed the Kmart stool to look like this. I assume it is the Nordic looking stool for $12? It looks fantastic with the brown and red through it. Can’t wait to see. You are amazing 😉
Will do. Yes, it’s the $12 kid’s stool with the dipped legs :)
Your Mum and Dad’s house must be looking pretty schmik now!
Yep, it’s getting there :)
Hey Kristine, amazing job, I think you could give Tara Dennis a run for her money!
Kristine, I love the floor and would like to recreate a similar version in my laundry. However, it has ugly brown ceramic tiles now. I have seen some tutorials online that use chalk paint and some use patio paint. There is also a tintable tile paint product at Bunnings (Rustoleum total transformations) that is stated as suitable for a floor. I see you used the tile and tub version of the paint – I’m assuming the total transformation would have a similar texture – do you think it could be stenciled? I think there is a quick drying time – perhaps that would make it unsuitable? Also, have you any experience with floor tile stickers?
Hi Sara
From what I’ve seen and heard about painting floor tiles, I wouldn’t recommend it. Of course, if you hate them and are planning to get rid of them anyway, then there’s not much to lose (a bit of time and money). The tile paint I have used is quite thick and sticky – I don’t think it would be suitable for stenciling. You could try an acrylic paint and several coats of floor grade sealer. Or could you maybe lay a sheet of vinyl/lino over the tiles and then stencil that? I haven’t used tile decals though have always wanted to. They aren’t cheap though they look pretty amazing. I wonder how they hold up?
Wow! Beautiful!
Perfection – as always!!!
Aw, thank you :)
You have an amazing talent and striking visual to create such beautiful rooms, I am in awe….thankyou for sharing your beautiful creations…! x
Aw, thank you. Glad you like it :)
It doesn’t even look like the same bathroom, I wanna ask if you’re sure you didn’t move to another house or something like that, hahah. Looks incredible, congrats on the revamp!
LOL!
Hi Kristine, This looks fabulous. I wanted to ask about the resurfacing on the vanity bench top. is that just with paint or did you use something like granite transformations? Thanks!
Hi Sally
You might have missed the bit where I mentioned that my mum chose to have the shower base and vanity top professionally refinished. Cost about $350, so it’s not cheap, though it looks pretty amazing.
Kristine
soo soo cute! I love how the tub looks with the navy facade and the floor tiles. All of the little touches make the bathroom extra cozy and special. Beautiful job!
Do you have a tutorial of the stenciling you did in your parents blue bathroom floor?. Tried to find on your blog, but, not finding it. Did find the one you did on the particle board in your parents sitting room. Just wonder how you prep vinyl etc. Thank You.
Teresa
Hi Teresa
I don’t have a dedicated tutorial for the vinyl bathroom floor though it’s basically the same method as the particle board retreat floor. The only real difference is the paint type. We used chalk paint for the vinyl because it has good adhesion.
Cheers