
Firstly, I have to express my gratitude for such an amazing response to my last post. Given I almost didn’t publish it I was completely overwhelmed by the comments and emails. Thank you all.
When I shared my parent’s bathroom refresh last month many of you asked to see a tutorial for the kids’ stool hack.
I’d been looking for an affordable rustic “display” stool for ages though just couldn’t find one. Eventually I decided there was nothing to lose by having a go at making my own!
This was one of those experimental projects I wasn’t sure would work so I didn’t document the process first time around.
When I created the second stool for my tutorial I made some slight changes to streamline the process a bit and because I wanted a slightly different finish. I’ve referred to both methods in the supplies section of the tutorial for those of you who are seeking the same look as the original stool.
YOU WILL NEED…
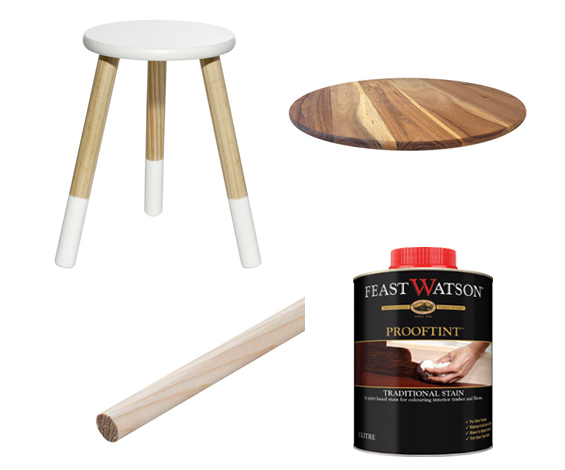
STOOL
I used the Kmart Dipped Stool ($12). Any similar stool which is constructed in the same manner (with brackets which allow the legs to be easily removed) will suffice. Otherwise, it wouldn’t be too difficult to start from scratch with some angle brackets, metal thread and a length of dowel. In fact, it might seem like starting from scratch may be the better option, though according to my calculations at just $12 the Kmart stool can’t be beaten for price, and ease.
CHOPPING BOARD
To create a new top (I decided to replace the original top because it was quite small and made from MDF). I used a 30cm/12″ chopping board from Kmart ($5). I liked this one because it had a slightly irregular edge which suited the primitive look I wanted to achieve. Any similar bread/cheese/chopping board should work fine, or you can always cut your own, or use a natural wood slice.
Note: For the original stool I used a slightly thicker bread board which I found at one of my local discount stores.
DOWEL
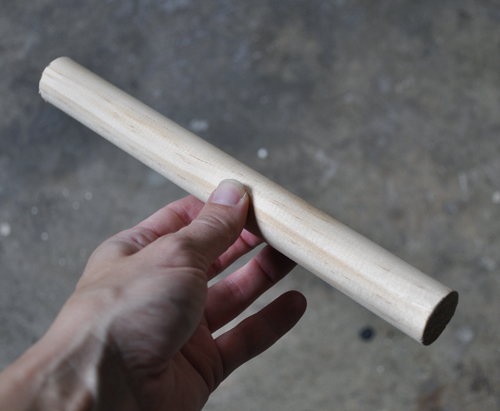
To form the ‘braces’. I used 26mm/1″ pine dowel ($8) which was similar in girth to my stool legs. You can use anything round with the right proportions – sometimes old broom handles work well. Just bear in mind that some shaping of the dowel is required (refer to Steps 4 & 7 for further information) and for this a soft wood is much quicker and easier to use.
Note: For the original stool I actually used three little rolling pins! They had tapered ends which provided a nice shape, though for the purpose of this tutorial I wanted to use something a bit more universal.
STAIN/PAINT/SEALER
I used teak stain and danish oil. I wanted a rich finish with lots of tonal variation and a nice natural lustre. Danish oil brings out the warmth in timber without creating too much of a sheen – plus it’s super easy to apply.
Note: For the original stool I used a jarrah stain (because the original bread board was quite red) followed by a grey wash. To finish, I distressed the grey wash to reveal some of the red stain beneath then sealed with white wax.
THE PROCESS…
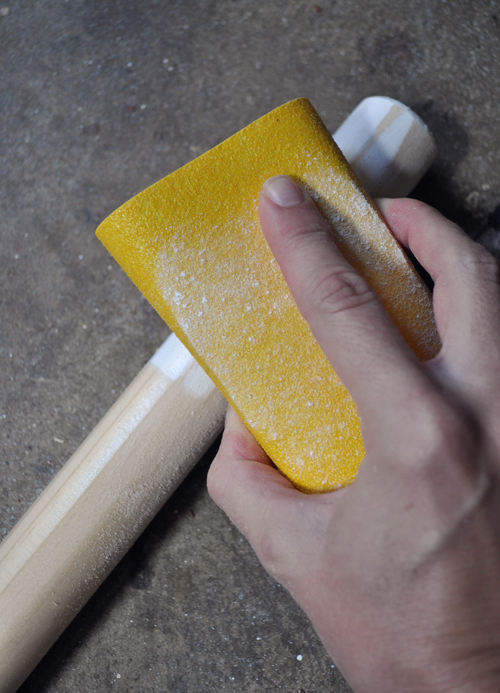
STEP 1 SAND LEGS
Remove the factory paint using some sandpaper and elbow grease.
I realise sanding is nobody’s favourite job though this paint comes off really easily. It only took me a few minutes.
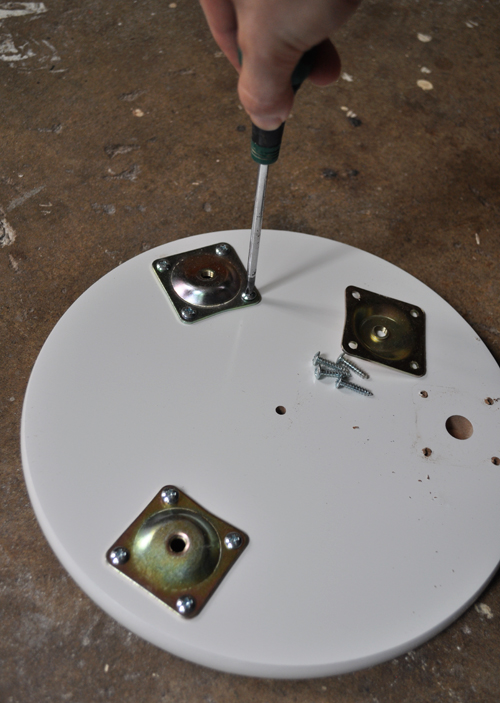
STEP 2 RELOCATE BRACKETS
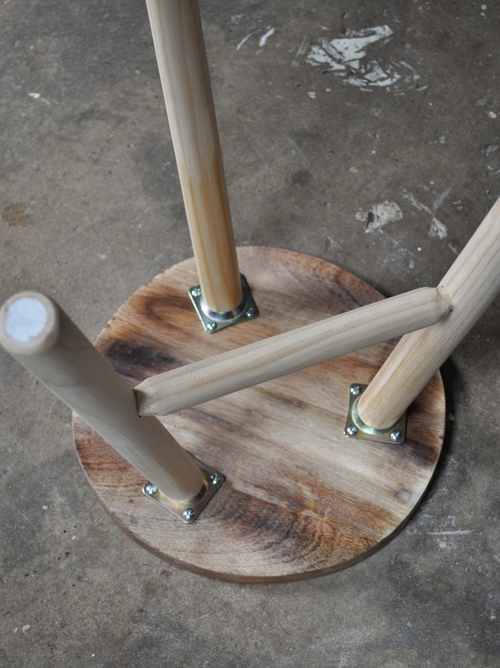
Unscrew the angle brackets from the original stool top and attach them to the underside of your chopping board.

You will need to measure to ensure your spacing is somewhat even (it doesn’t need to be perfect) and drill pilot holes; four small ones for the screws and one large one to accommodate the leg thread (as per the original top). Don’t overly tighten the screws at this stage (some movement in the brackets is useful for the following steps).
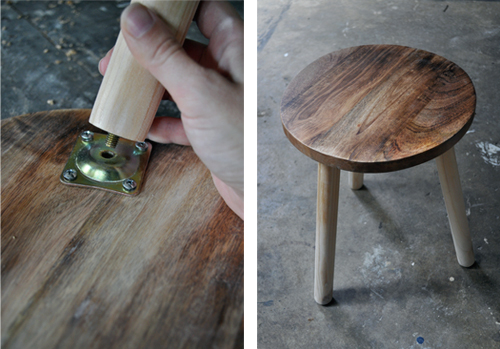
Once the brackets are attached, screw in your legs.
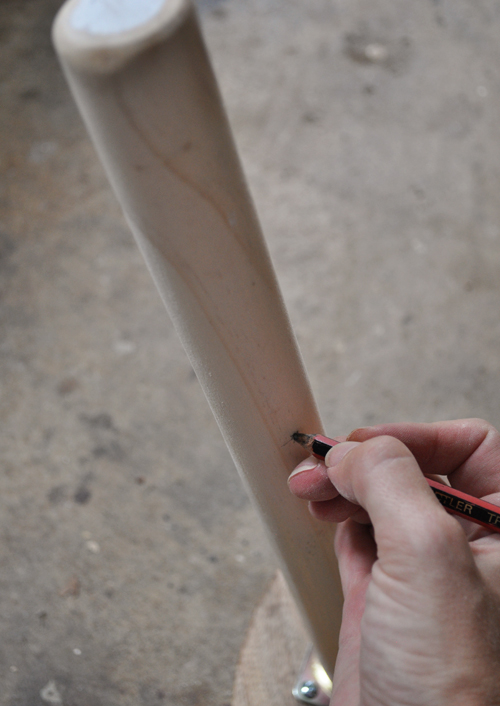
Note: At this stage it may be useful to number each bracket and leg (just with a pencil) to keep track of which one goes where.
STEP 3 CUT FIRST BRACE TO LENGTH
Decide at approximately what height you’d like your braces to sit (mine are 16cm/6″ from the floor). Flip your stool over, measure down two of the legs and make reference marks at your desired height.
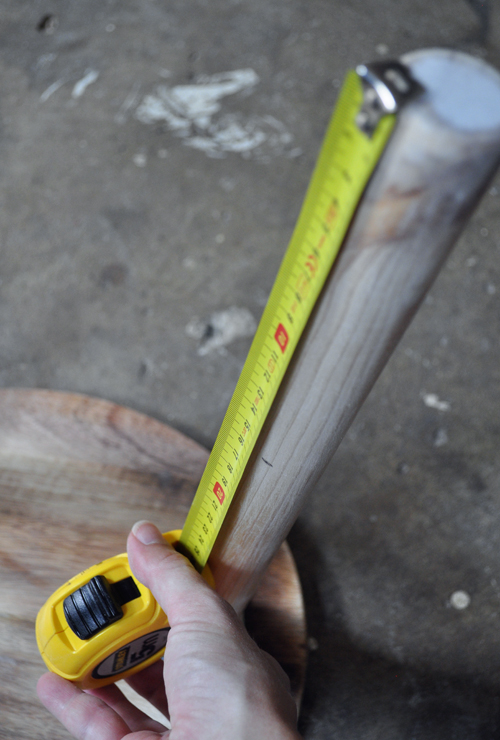
Next, measure between these marks from the approximate center point of each leg – this is the length for your first brace (mine was 24cm/9.5″).

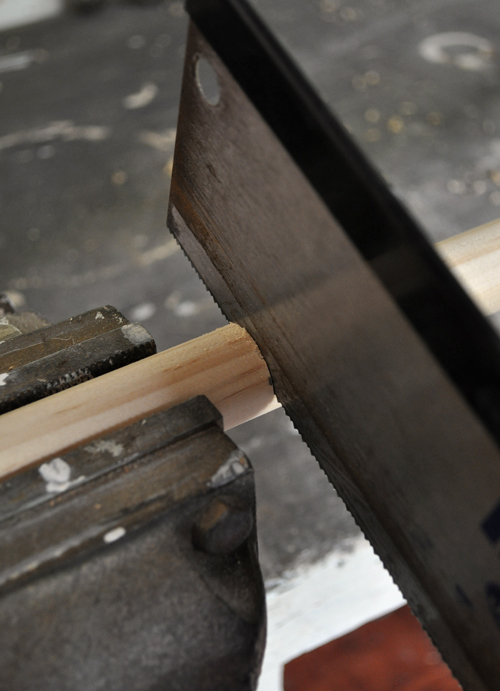
Transfer this measurement to your dowel and cut it to length.
Note: Don’t be too concerned about precision. This isn’t a millimeter perfect kind of project. As long as you don’t cut your brace too short, you can always trim it down later if you find it’s too long.
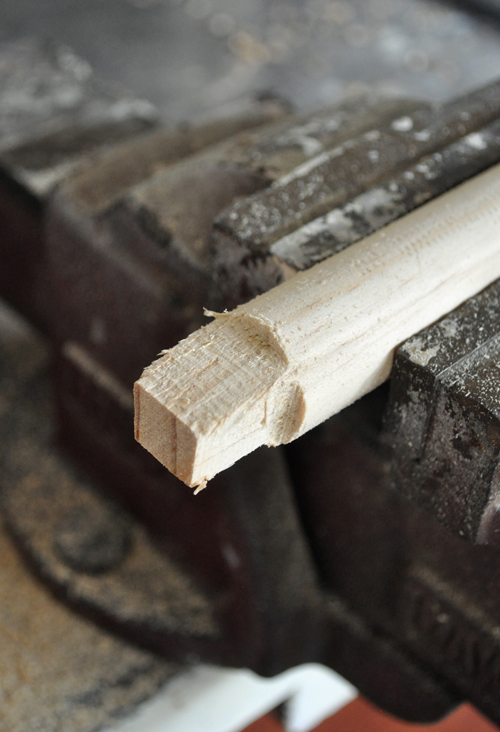
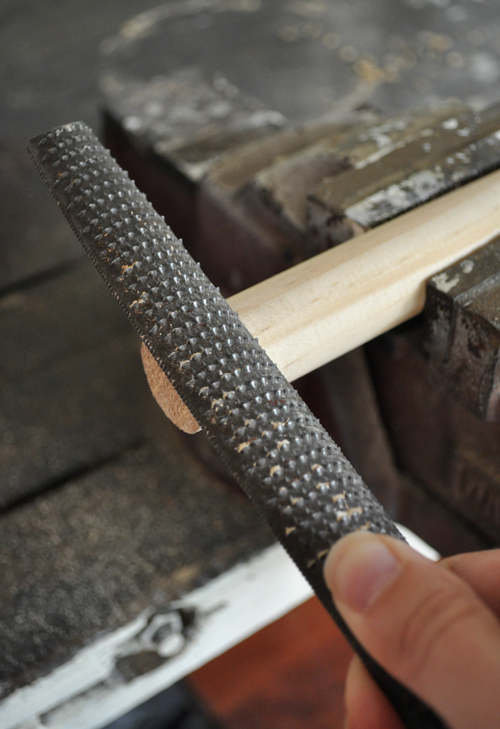
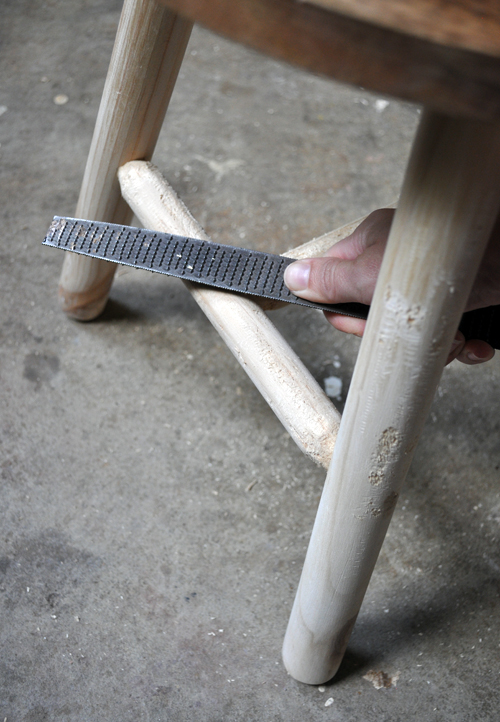
STEP 4 RASP FIRST BRACE ENDS
In order to slot the brace into the legs the ends need to be whittled down. There are a few different ways you could go about this though I decided to use a rasp. If you’ve never used a rasp before it might seem daunting or difficult though it’s actually pretty quick and easy.
With the dowel secured in a vice (or similar) begin by rasping out a rough square.
Next, round off the corners to create more of a cone shape (sort of like an over-sized pencil). It doesn’t need to be quite this pointed – this is just the shape I ended up with.
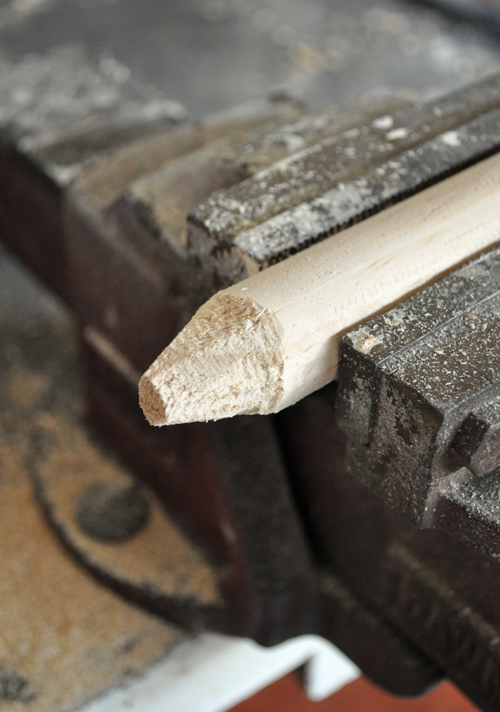
You can be as rustic or refined as you like. I wanted a somewhat rough, hand-crafted look so wasn’t too fussy. You can create a smoother, more tapered finish using a finer rasp, some sandpaper and a bit more time and care.
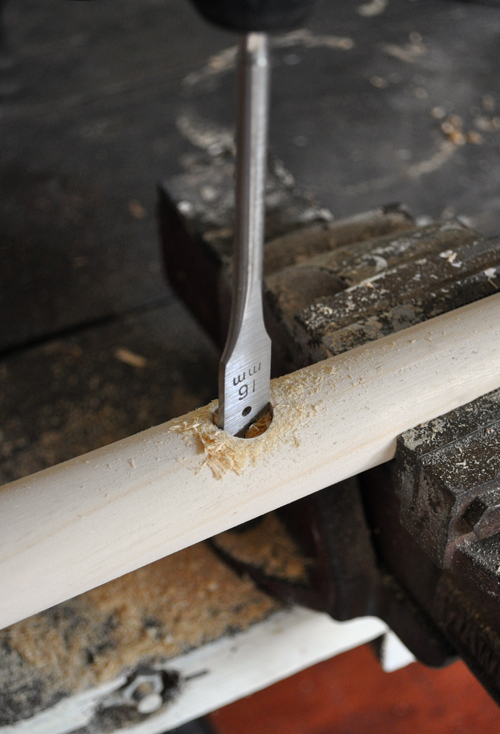
STEP 5 DRILL HOLES FOR FIRST BRACE
Mark the inside points on your stool legs where the brace will be inserted (ensure the legs are screwed in tightly as this will dictate their final position).
Unscrew the legs and secure in a vice (or similar). Select a spade drill bit a few sizes smaller than your dowel then drill a hole, stopping just before you go right through the leg.
This was the first time I had used a spade bit and it was really easy. Ensure you hold the drill nice and straight and apply steady even pressure. You can stop every now and again to check your progress and feel the underside of the dowel for the tip (this is how I ensured I didn’t drill too far through). Just be careful not to force things as the bit can easily bite into and gauge the timber. Let the tool do the work.
With the holes drilled, check that the brace fits okay.
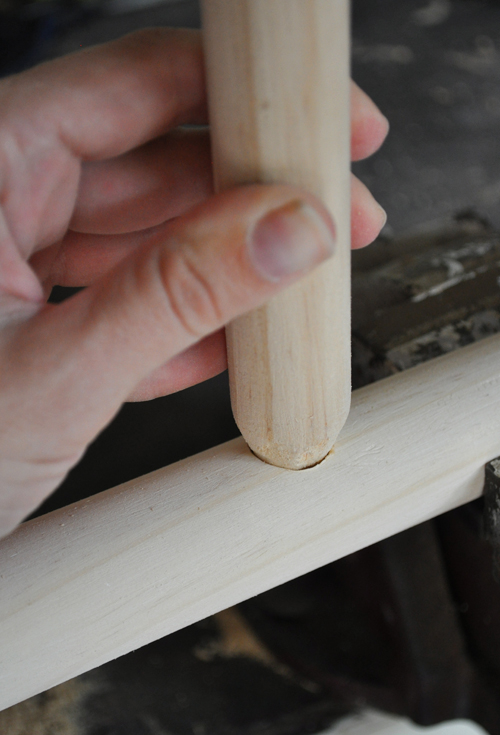
Again, things don’t need to be perfect. You just need to be able to insert enough of the brace so it can be secured with glue later on. If your holes seem too large you can always use excess glue and fill any gaps. If your holes seem too small you can re-drill them with a larger spade bit or rasp the brace ends further.
Once you’re happy, screw the legs back into the stool and test the brace in position.
There should be enough movement in the legs to splay them as needed to insert the brace (given the screws for the angle brackets haven’t been secured too tightly – as mentioned in Step 2). Don’t worry if things look a little imperfect. Everything will come together – promise!
STEP 6 CUT SECOND BRACE TO LENGTH
With the stool still assembled, determine the position for the second brace. Measure the remaining leg from the floor up (again, 16cm/6″ in my case – as per the height of the first brace) and make a mark.
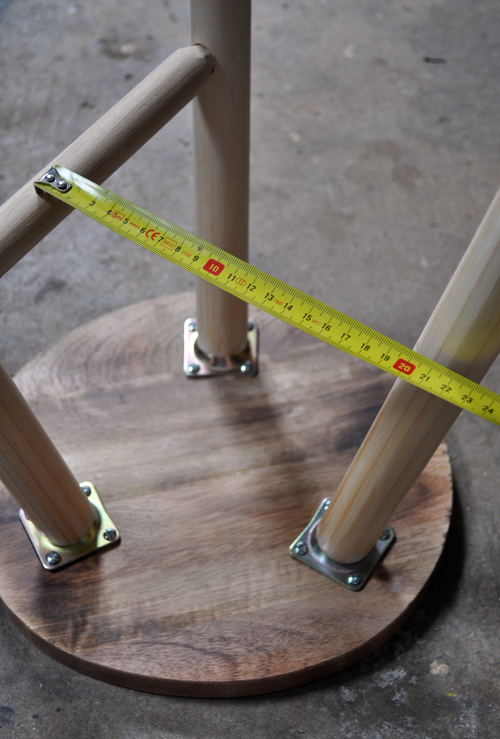
Next, measure between this mark and the approximate center of the first brace from the mid-points of both the leg and brace – this is the length for your second brace (mine was 22cm/8″). Transfer this measurement to your dowel and cut it to length.
STEP 7 RASP SECOND BRACE ENDS
Repeat the process from Step 4 by rasping both ends of the second brace.
STEP 8 DRILL HOLES FOR SECOND BRACE
Mark the inside point on the stool leg where the second brace will be inserted (the first brace can be swiveled as needed so there is no need to determine its inside point). Unscrew the leg and remove the first brace then drill two holes following the process from Step 5.
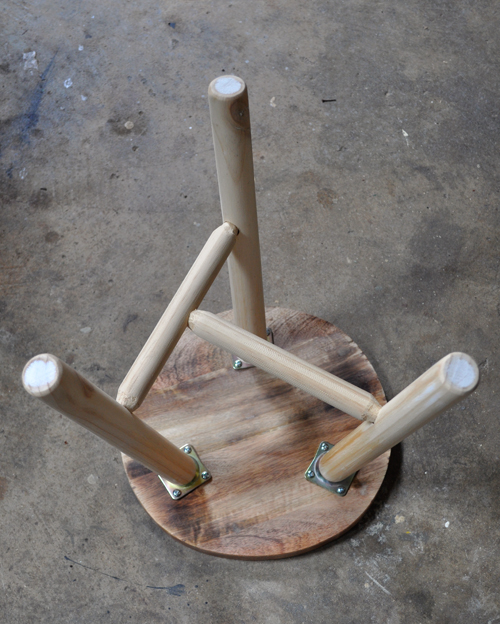
Once you’re happy that everything fits okay, dry assemble the stool to check it all goes together well enough. Remember, we’re not going for precision here so don’t be concerned if things aren’t ‘craftsman’ standard. The primitive imperfections will be this stools triumph!
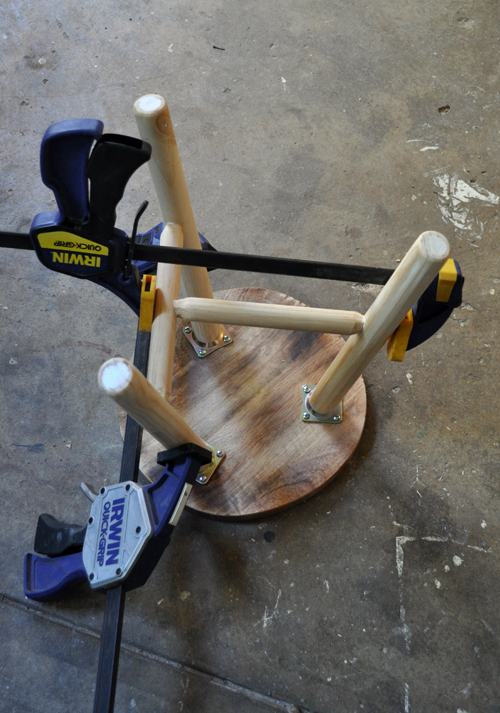
STEP 9 GLUE & CLAMP
Remove the braces and place a generous amount of wood glue in each hole.
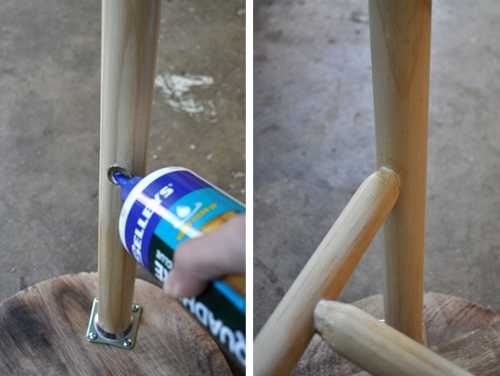
Insert the braces again, wipe away any excess glue then fully tighten the bracket screws. Clamp everything in position until set.
STEP 10 STAIN & SEAL
There are a heap of different ways the stool can be finished. I wanted an aged, rustic, primitive look (which I think suits the nature of this hack) however you can create whatever look you like.
Remove the clamps and fill any gaps around the braces if needed (I personally didn’t bother). If desired, use some tools (I just used my rasp) to randomly distress the stool all-over before lightly sanding everything to smooth any overly rough areas and create a good surface for the ensuing stain.
Note: Given the braces were purposefully imperfect, distressing the whole stool gives everything a sense of intention and unity.
Wipe clean then apply your choice of paint or stain (I used one coat of teak stain).

This is where the magic happens. Because my stool was only partially raw and had heavily distressed areas the stain produced a lovely inconsistent finish with lots of tonal variation. This is what I wanted and is one of my favourite looks. If you’re after a more even finish, sand the entire stool back to raw first. To bring everything together and provide some protection, finish by sealing the stool (I used one light coat of danish oil which is super easy to apply, enriches the timber and produces a subtle lustre).
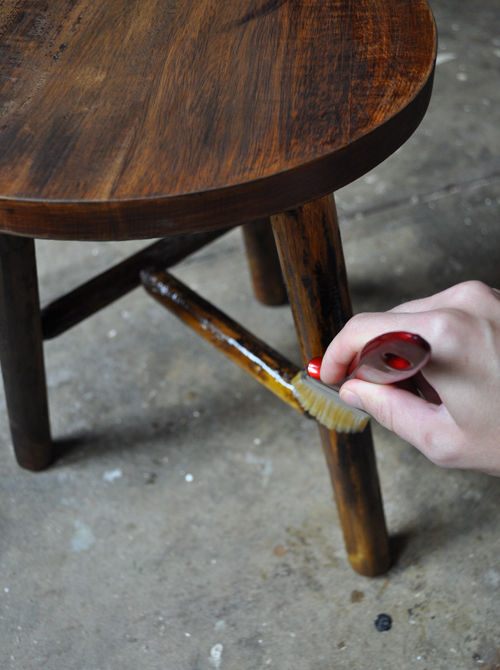
It looks quite glossy in the above pic because, obviously, it’s wet. Danish oil mellows beautifully as it dries (conditioning you don’t apply it overly thickly as it needs to somewhat penetrate the timber).
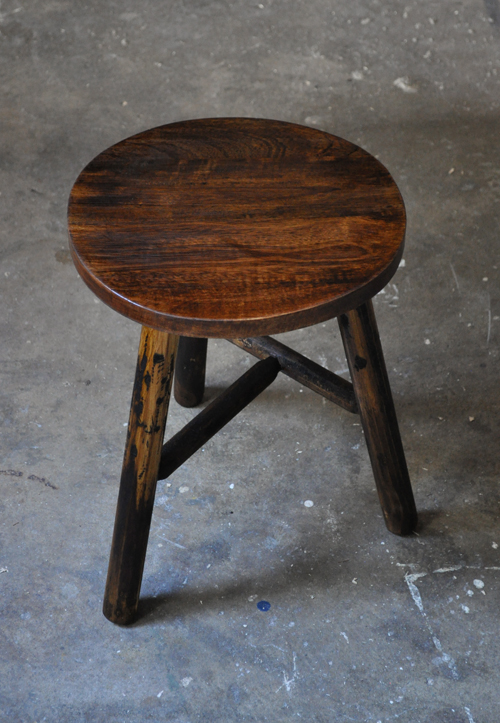
DONE!

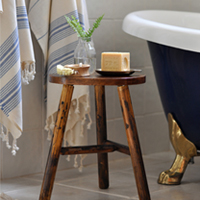
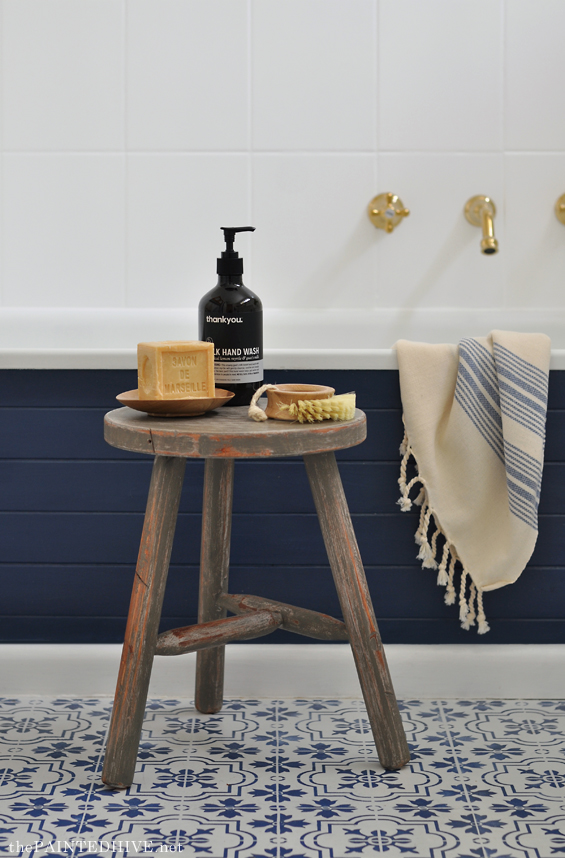
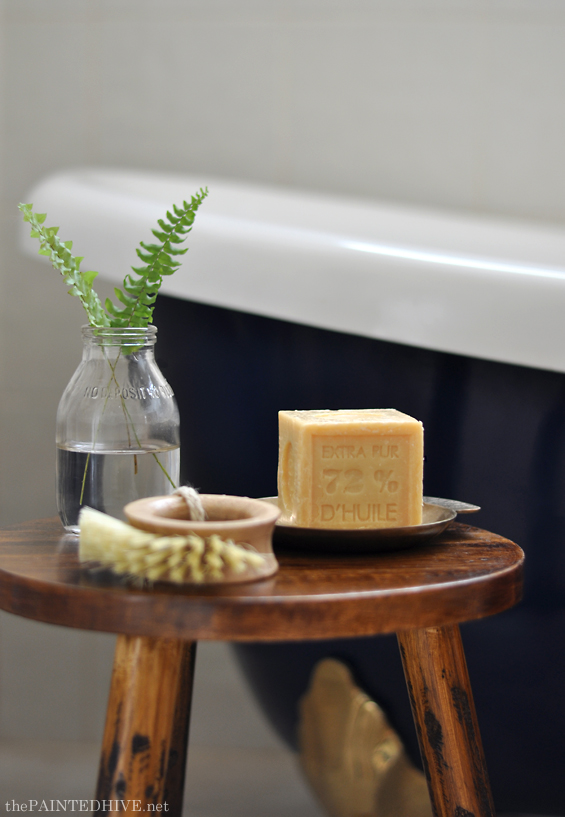
These pics are taken in my bathroom – which I’ve never shared on the blog before!
I love it!
I realise this hack might seem a little lengthy and complex (that’s likely due to my penchant to thoroughly explain processes!) though it’s actually quite simple. Still, if you want to avoid the whole rasping side of things you can use a much thinner dowel and insert it into the legs.
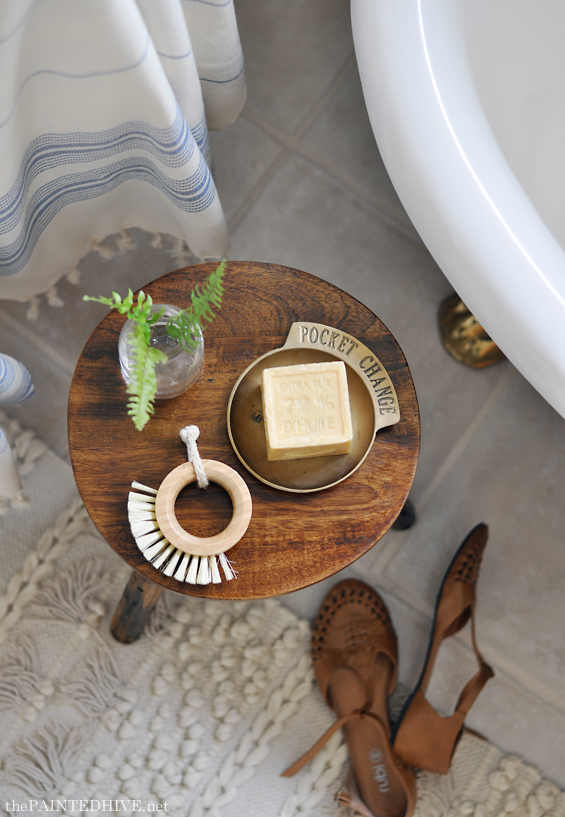
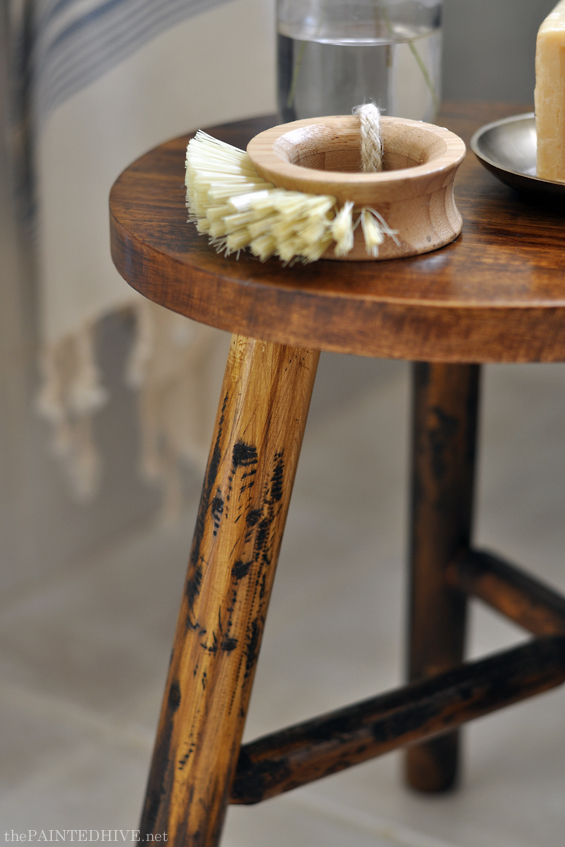
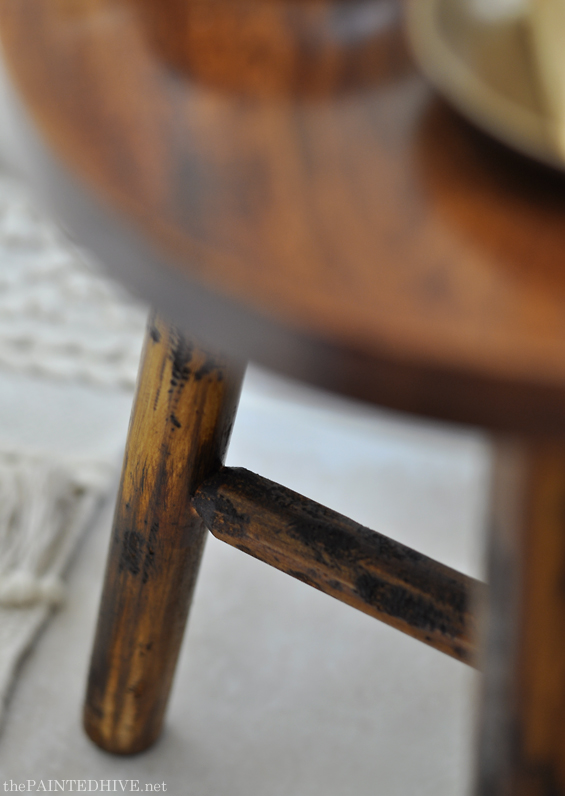
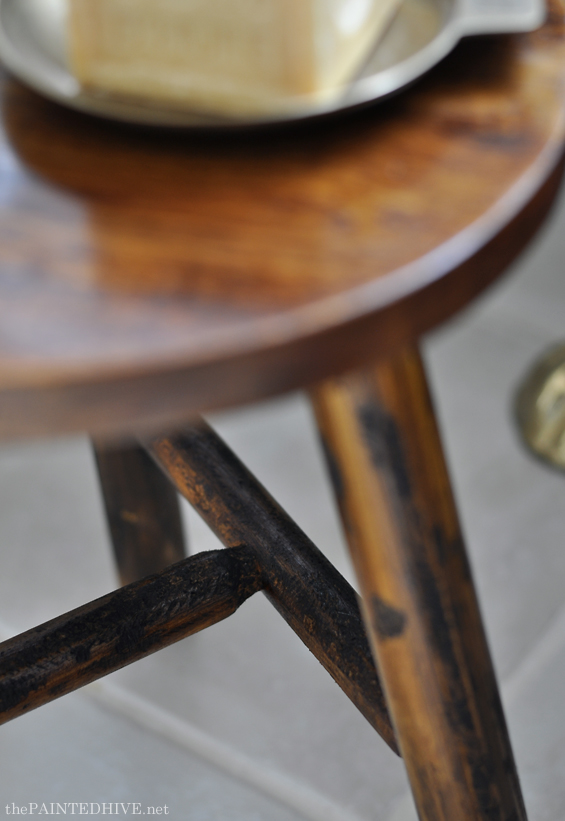
Here you can see where the braces adjoin the legs and how the fact they’re not perfect doesn’t matter one bit.
To make things look pretty I dressed the top with a vintage glass bottle holding fern sprigs, a simple nail brush and an old brass ‘pocket change’ dish cradling a cake of the world’s most photogenic soap.
I hope this project helps inspire!
![]()


Love it. A perfect little stool. And I’m digging that gold dipped claw foot tub!
Thanks Deb. Yes, the original home owners did some bathroom renos prior to selling. They made a few lovely choices – like the claw foot tub – and a few ‘interesting’ ones – like the free-standing plastic shower cubicle!
That is funny about the shower, can’t wait to see what you do with it!
Yikes!
Gorgeous photos of the after. Love your tutorials as always.
I love that you have found the world’s most photogenic soap!! And I love the stool – it is perfection.
Thanks Sherylee.
What a fantastic little project Kristine. Thanks for sharing the ‘how to’. And I love it that your instructions were so detailed. You wouldn’t have a pic of your final clamp placement though would you? I wish either of my bathrooms were roomy enough for this. I guess I am just going to have to find somewhere else for it.
Hi Kylie
There is a photo of the clamp placement just above Step 9.
xo
Excellent instructions, love the finished product. Thanks for posting!
Thanks Lesley :)
Love this little stool! Great project and tutorial. Thanks for sharing on To Grandma’s House We Go!
love this. seeing your work makes me wont to try more projects.
Thanks Peggy :)
I just found THE SAME pocket change dish at a school rummage sale in Ireland!! I paid one euro for it and I love it to pieces! Small world.
Isn’t it sweet? I stumbled across mine on eBay.
Though I don’t quite enjoy working with wood, I love anything rustic! This stool is sure worth the work!
Thanks Kelly :)
Oh golly gosh – i just love the look of your bathroom xx
You are absolutely amazing… I wish I had 1/100th of your talent/taste/hacking skills.
Just wondering if you sanded the chopping board back and stained it or just left it as it’s comes?
It came with the finish I was after so I just left it as is :)