
When I mentioned to my son that I was planning on painting just the tops and bases of these chairs, I described it to him as giving them all hats and socks. I thought that was kind of cute until he went on to add that “the hats will eat the socks and then the chairs will poo them out.” Five year olds are certainly hilarious.
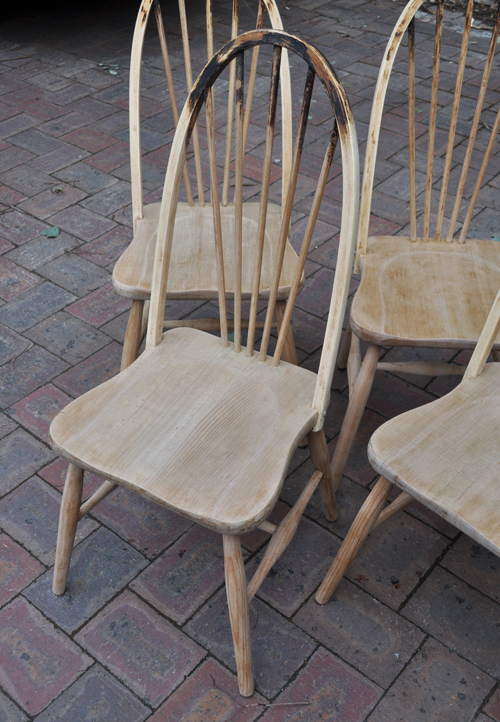
Of course, these are the Windsor style chairs I picked up for my sister’s dining room.
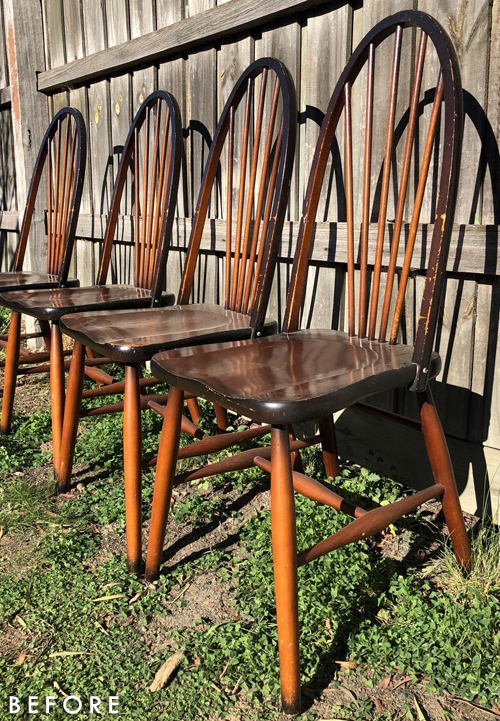
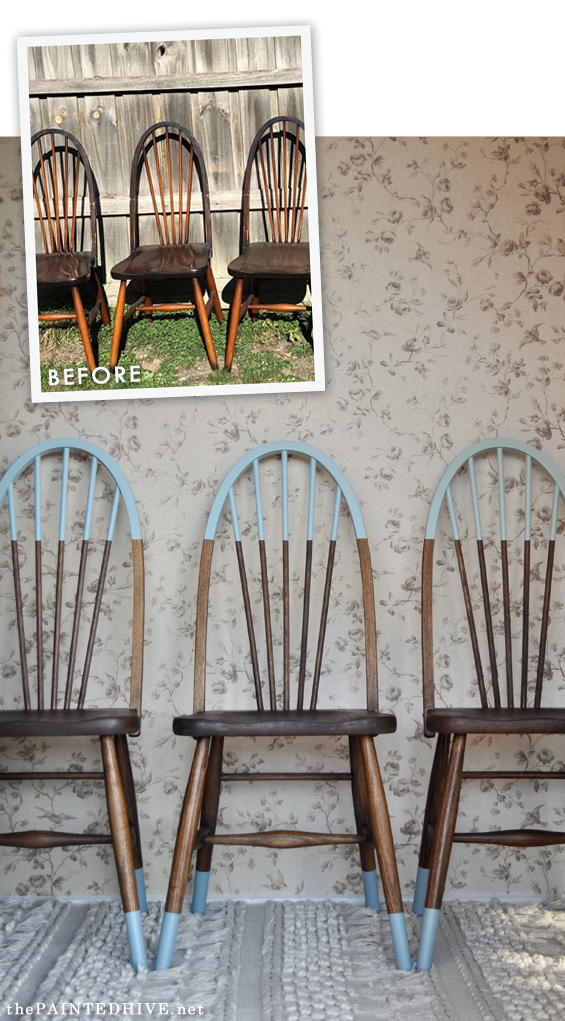
Photo from the Gumtree listing.
Originally, they had a worn and dated two-tone stain complete with plenty of chipped, shiny varnish. The finish was so opaque you couldn’t even see the lovely timber grain beneath.
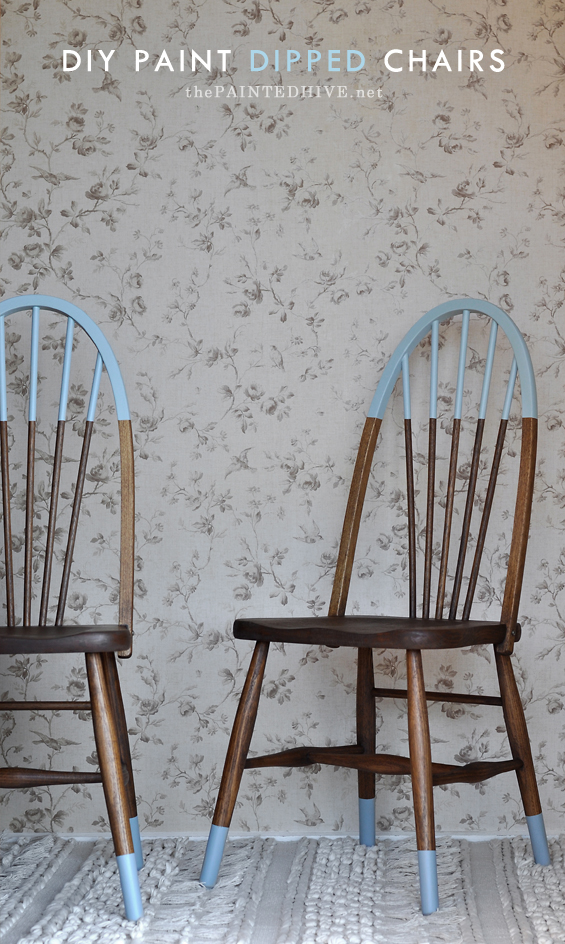
I had visions of a much more natural and contemporary look, using a simple mid-brown stain with some soft blue-grey accents.
Getting to this point wasn’t exactly simple!
Sometimes old varnish flakes off really easily – and, of course, that’s exactly what I imagined this old varnish would do when I optimistically decided to buy these chairs. Though the existing finish was incredibly stubborn! Each chair took two coats of stripper followed by copious amounts of electric sanding (I used a palm sander with medium grit paper) followed by lots of fiddly hand sanding (again, I used medium grit paper then fine paper to finish). All up, it probably took around six or seven hours to take the entire set of chairs back to raw timber.
I left some of the more obstinate stain and varnish around the tops because I knew I was going to be painting over it.
I know it probably seems like there must be a better way, though short of using a professional dipping or blasting service, there’s really no other option. I was so desperate at one point I even went out and bought a soda blaster! Sadly, it was no match for the gummy varnish. In case you’re interested, I did try it on some other old furniture and it worked okay, though it’s certainly no magic bullet. I found it left the timber very rough, plus it’s slow going, messy and the soda is pretty pricey.
Anyhoo, with the chairs finally ready, I gave them each one coat of stain (Feast Watson Prooftint in Oak – which I had left-over from a previous project). I chose to stain them, rather than leave them natural, because I wanted a nice contrast between the timber and the paint. Plus, although it’s hard to tell from the above pic, the natural timber has quite a bit of orange in it which I didn’t want clashing with my sister’s honey-toned floors.
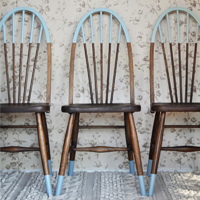
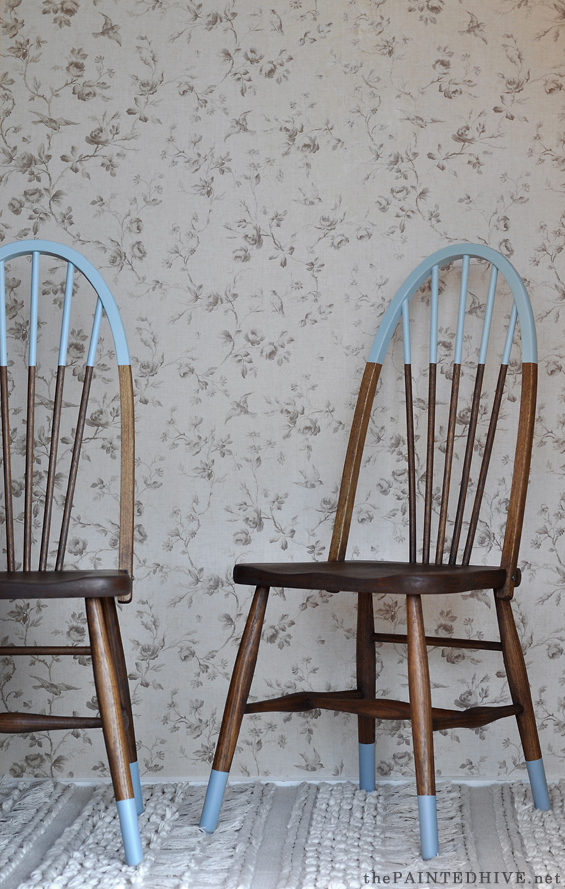
Once the stain was fully cured I added the “hats and socks”.
Creating a paint dipped effect is a pretty straight forward process…
STEP 1 | TAPE
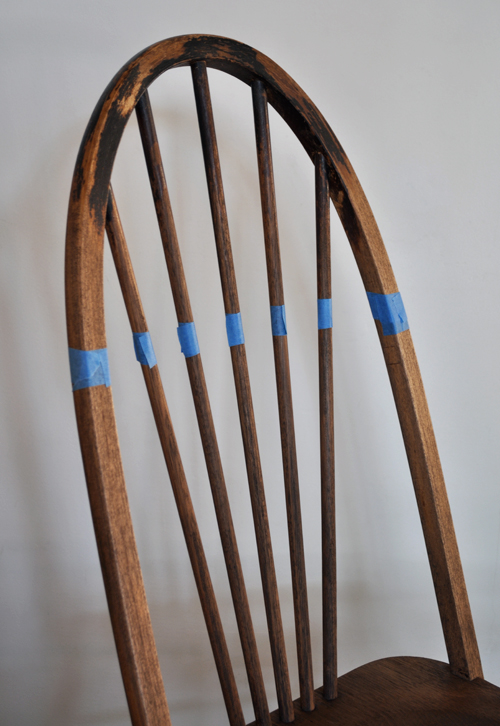
First I taped off the lines, ensuring the tape edges were smooth and well adhered. Getting the lines perfectly straight along the back rests was a little tricky due to the offset and angle of the spindles which creates a bit of a visual illusion.
STEP 2 | PRIME
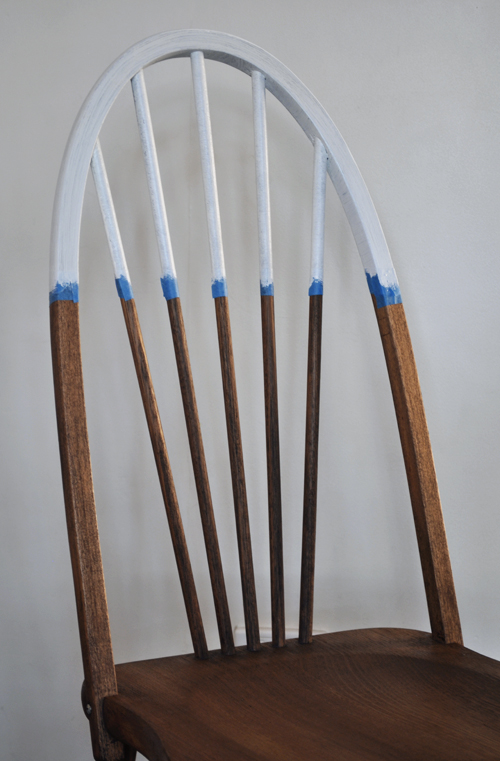
Next, just to be safe, I used a stain blocking primer. I probably wouldn’t have bothered if I didn’t already have some in the shed.
Note: I’m sure most of you have heard about the “perfect line” trick which suggests using the base paint colour first to seal the tape and conceal any bleed. Of course, my base was stain, not paint, so I decided to experiment by using a similar toned brown craft paint. I actually found that it made no difference. My lines were all nice and crisp regardless, which I think can be attributed to the smoothness of the wood. I imagine on a more textured surface there would be more chance of bleed and this technique would be beneficial.
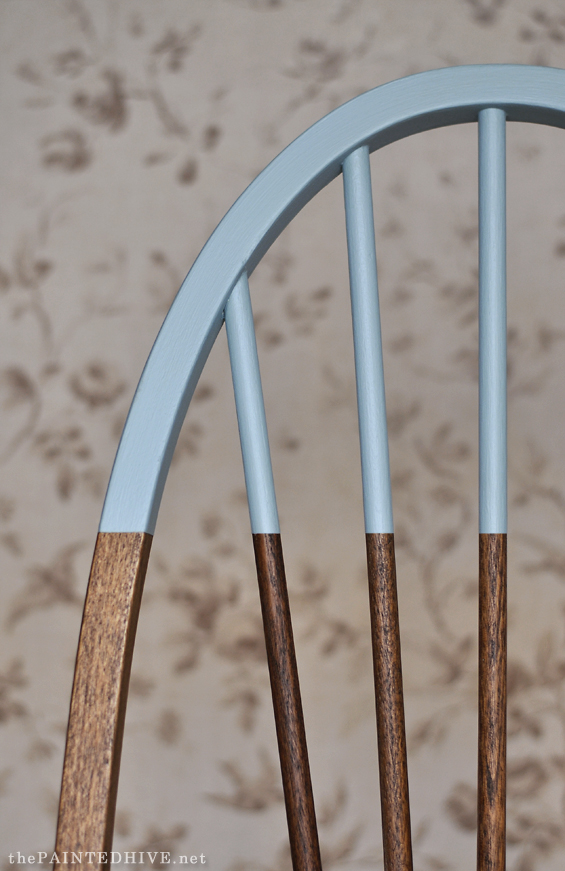
STEP 3 | PAINT
Once the primer was dry I applied two coats of paint. I created a custom colour using a variety of water-based paints I already had. The major component is Annie Sloan Chalk Paint in Duck Egg Blue.
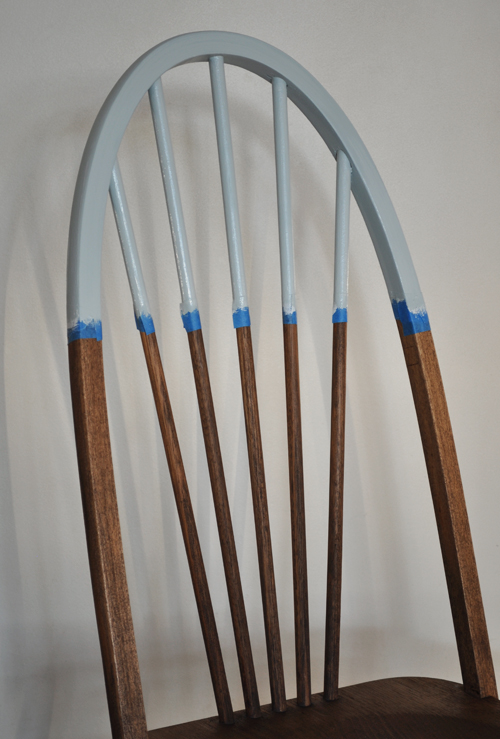
I went slightly deeper with the socks by adding a dash of charcoal to the paint. The difference is only subtle though creates a bit of interest.
STEP 4 | PEEL
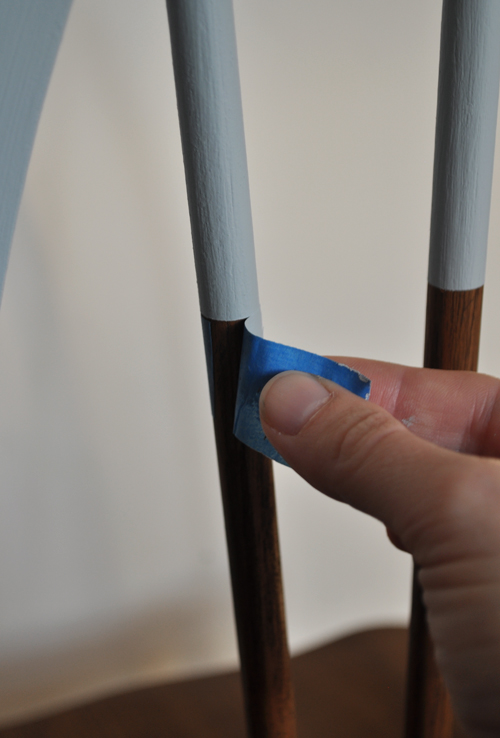
With the paint still wet from the second coat I carefully peeled the tape away. It’s important not to let it dry as once it ‘bridges’ over the tape there is a high chance it will chip as the tape is removed.
![]()
To finish the chairs, I sealed them with a few light coats of clear spray poly.
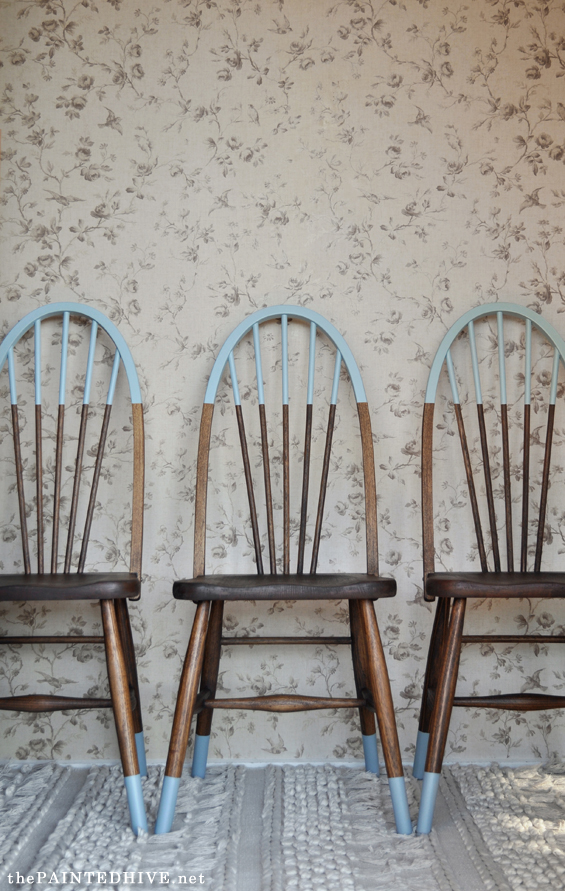
Am loving the way they turned out! Here’s hoping they work in my sister’s dining space.
And speaking of my sister’s dining space, I now have everything needed! Will try to pull the room together and hopefully share next week.
![]()
PS I haven’t forgotten about the table base tutorial. Stay tuned for that too!
![]()
UPDATE
You can now find the completed dining room HERE.


So packed with useful info! Thanks a lot!
Thanks. You’re welcome :)
Thank you for sharing – the chairs look so different from what you started with. Can’t wait to see the dining room!
Thanks Leslie :)
I’m glad she likes them.
They look great! We have 4 old doors that we are trying to make into a bench seat and the old paint is stubborn, my hubby went out and bought a sand blaster and even it didn’t work. We(he) has temporarily given up because he has no patience, lol. I can’t wait to see the finished dining room!
I totally get his procrastination. It has got to be the least fun job when it comes to refinishing furniture. Stripping these back took me a few minutes here and there over the course of around two weeks. I just couldn’t bring myself to focus for longer than that at a time.
Stunning results as always Kristine! I love the blue-grey paint and the subtle difference in the colour of ‘hats’ and ‘socks’. And those spindle backs are amazing! Thanks for sharing your tips. I’ve dipped with paint on a stained stool before – let’s just say the chair legs must have been ‘textured’! Lol.
LOL! Yes, I had no idea how crisp these lines were going to turn out. Think I got lucky this time around!
Amazing redo! I love the idea of hats and socks and they look fantastic! Great job😉😊
Thanks Carol :)
Very pretty.
Thanks Ann :)
very cute chairs mmmm thank you
So clever!!! Your sister is most lucky to have you!! Love the hats and socks on chairs…. LOL…. Bravo…
Thank you Susie :)
I’m sure I’ve said this before but; you never cease to be an inspiration! The chairs are amazing and I hope your sister appreciates the work that has gone into them. On another note; as the mother of 30 and 27 year old boys I can assure you that the comment from your son had nothing to do with being five; boys are obsessed with orifices! X
LOL! Thanks for the insight :)
And thank you for the too kind words. So glad you like them.
Absolutely gorgeous!
Thanks Deb :)
These chairs are so gorgeous, what a great way to add color to them!! Love them!
Thanks Katrin.
Brilliant. I absolutely love this painting style. And so easy to do!
They are beautiful AND fun. I have stripped a set of chairs before, it was horrendous, all those rungs!!! You must REALLY love your sister. I hope she realizes how lucky she is!
These are gorgeous!!! I repainted our dining room set about a year ago, but I am totally going to use this idea for some legged nightstands I have. Question… They are already painted but I am planning on repainting them a different color and adding socks. Do you think I need to add a coat of polyurethane to the under coat before adding “socks”? Really love the look of crisp, clean lines. Thanks!
Hi Rachel
To get crisp lines, I would suggest painting on the “undercoat”, allowing it to thoroughly dry, adding the tape then going over the tape line with the undercoat colour first. And then allowing it to dry again before painting over with the topcoat colour. This will seal the tape with the undercoat colour and avoid the topcoat from bleeding through. Does this make sense?
Cheers
Yes it does- thanks so much for the advice!
So unique – I love the pop of color