
Thank you so much for all the love on my flip house facade reveal! I was a little bit nervous to share (as I usually am before any major post) though I needn’t have been. Of course, nothing is for everyone though the overall response was super lovely and positive and I’m incredibly grateful.
Now, I know it probably seems like I’ve been doing little more than painting exterior bricks and mulching garden beds over the past few months, however there has been progress inside too!
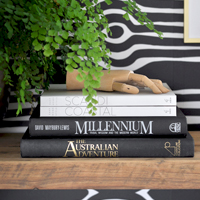
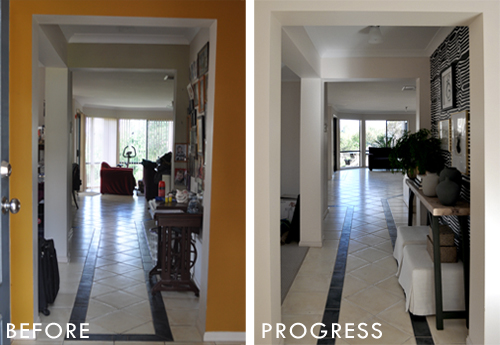
Of course, if you’ve been following along then you’ll know that the little entry had its makeover…
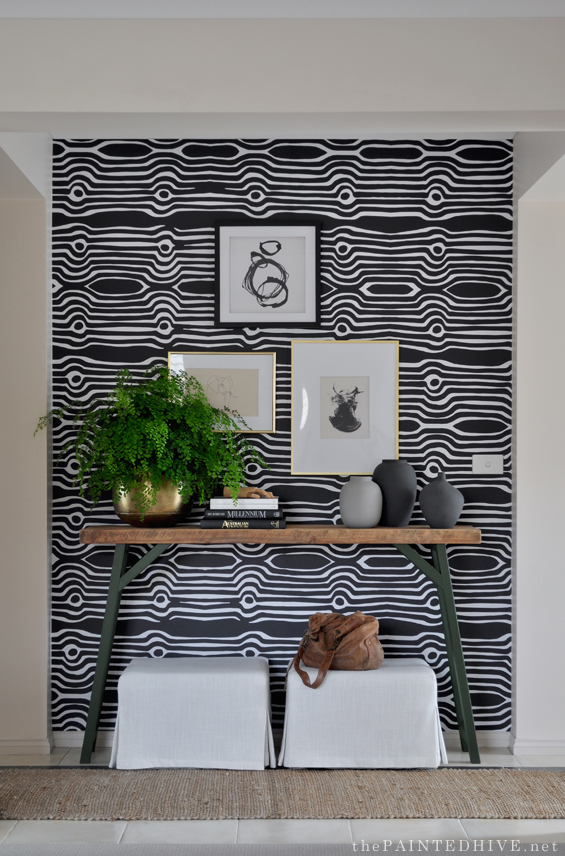
And whilst the rest of the house is still far from finished to this level it’s looking quite different.
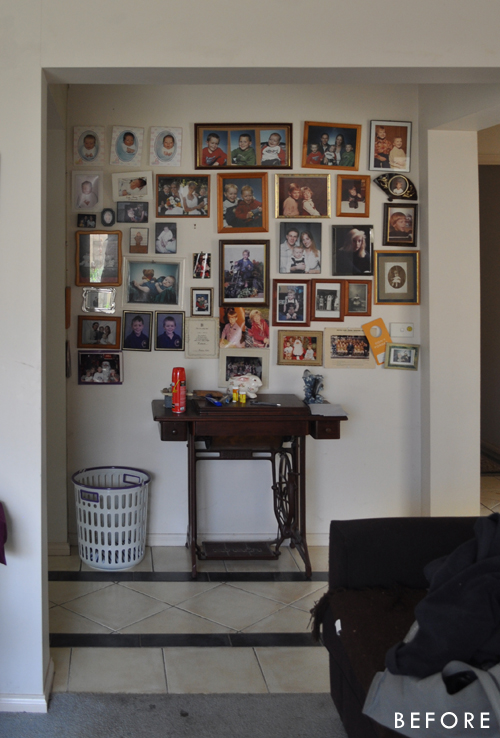
Do you remember where we started? Here are a few spaces…
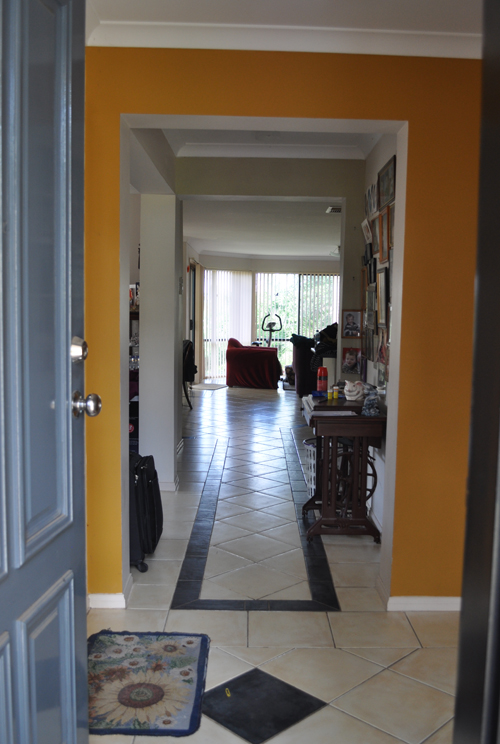
ENTRY
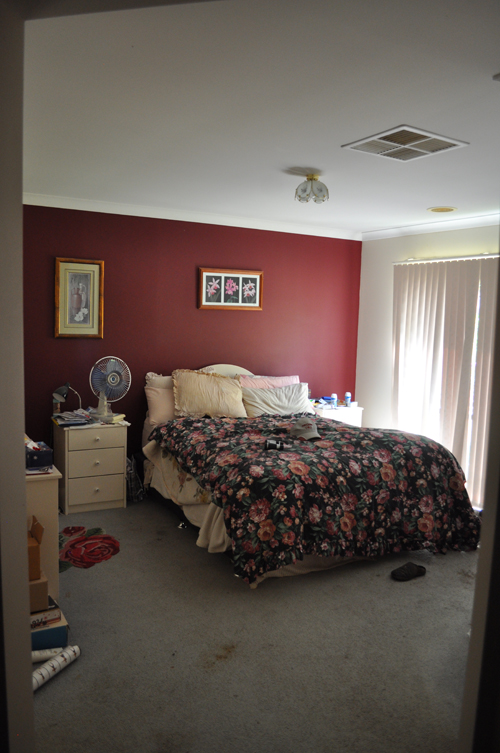
MASTER BEDROOM
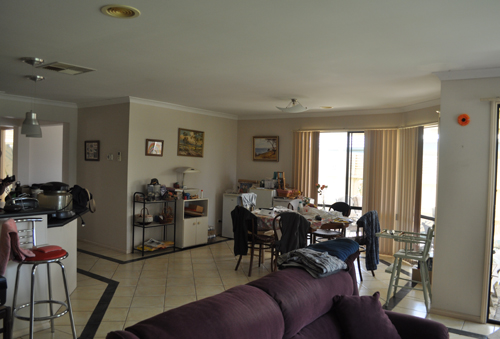
DINING
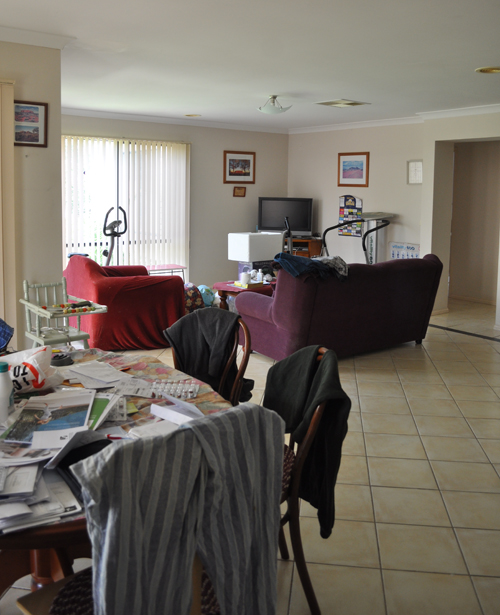
LIVING
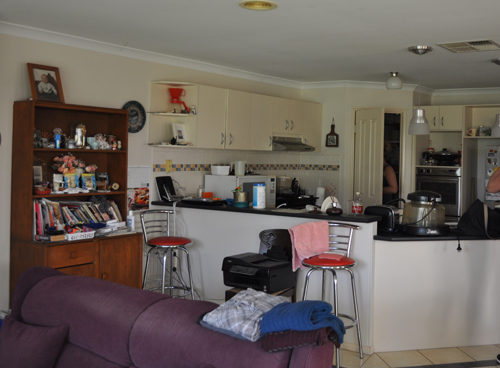
KITCHEN
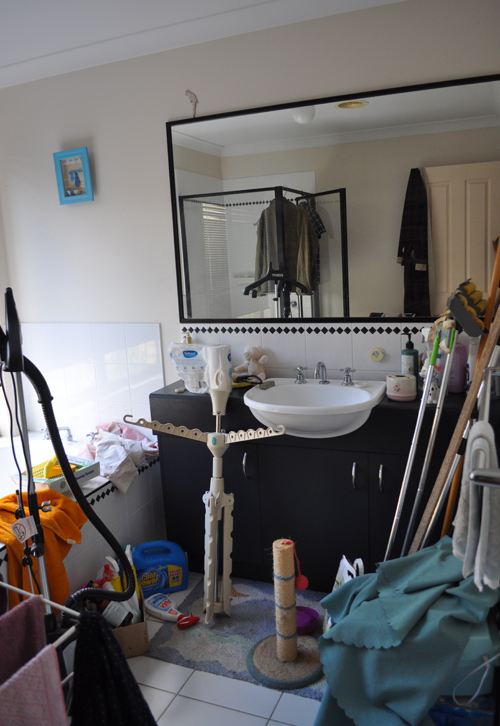
MAIN BATHROOM
As mentioned in my very first post about the flip house, my friend had no desire to take on any major works and wanted to keep the total budget at around 12K so our plan was simple…strip it down then dress it up!
At this point I’m super glad to say that the “strip it down” phase is pretty much complete.
The entire house has been cleared of all furniture and decor, plus most of the dated or ugly fittings (such as window dressings and light fixtures), which we don’t intend to keep. It’s also had a rough preliminary clean. So, here’s where things are currently at…
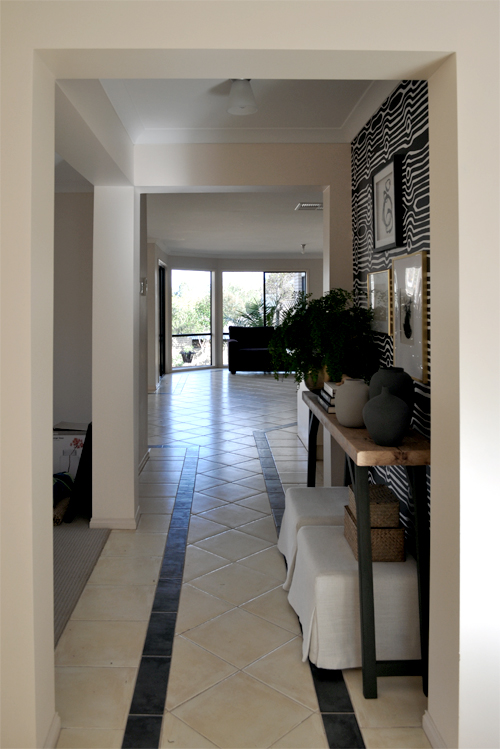
ENTRY
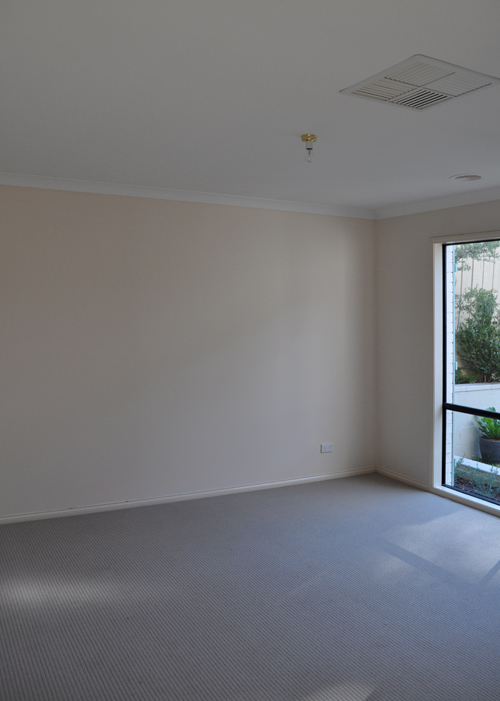
MASTER BEDROOM
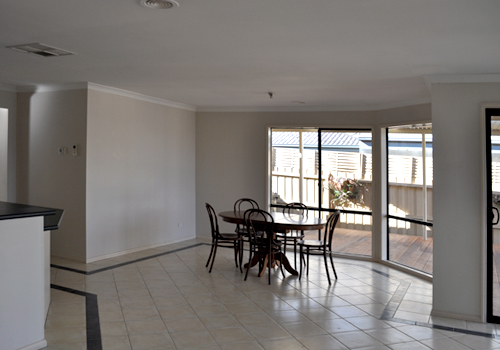
DINING
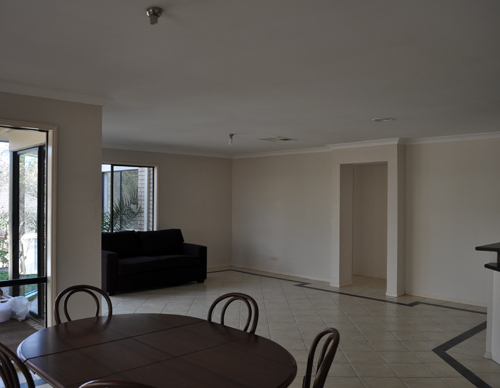
LIVING
KITCHEN
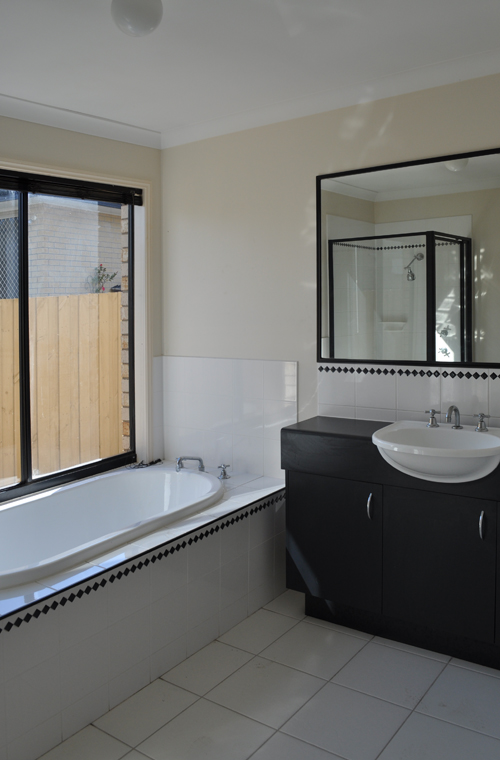
MAIN BATHROOM
Clearly, these are merely progress pics so please excuse the photo quality and just ignore any mess and grime.
And although the “dress it up” stage (also know as “the fun bit”) is far from finished we have made a few significant changes to help create a fresh blank canvas.
CARPET
There was no denying the fact the old stained and damaged carpet had to go.

It was present in four bedrooms (two of which are quite large and one of which has a walk-in-robe) and one living space.
To keep things on budget I went with an affordable Beaulieu carpet called Daytona in “Green Beige”. Clearly, it’s not really green, it just has a subtle undertone. Although the majority of the house is cream, I didn’t want anything too yellow which might come across as dated and overly monotone. This has enough warmth to harmonise well though presents as a neutral grey for a nice modern edge and dash of contrast.
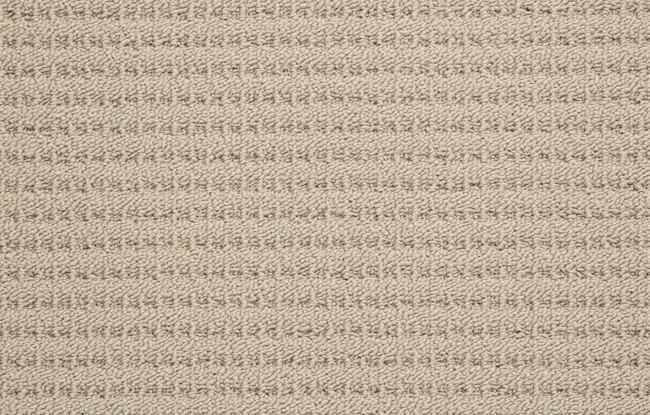
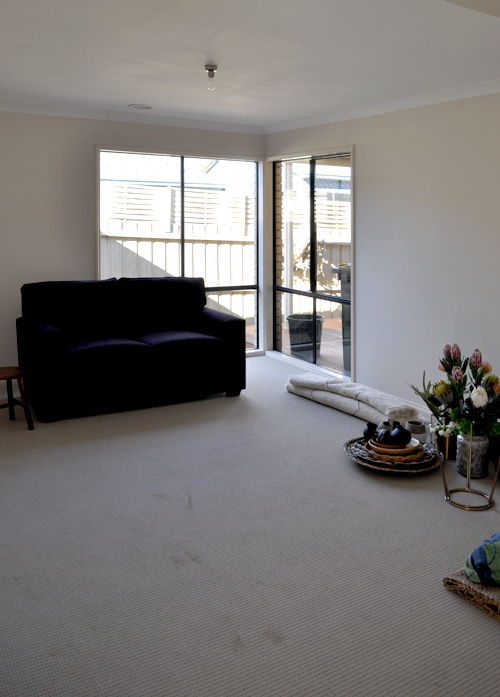
Ignore the dirty marks. Don’t you love it when you get new carpet installed then someone walks across it in muddy shoes!
We had all spaces re-carpeted for a total of $2,300. By ripping up the old carpet ourselves and retaining the existing underlay, which was still in great condition, we were able to save a bit of extra money. I used a similar Beaulieu carpet when we flipped my gran’s house last year and was incredibly happy with the quality and price.
PAINT
Although it would have been really nice to re-paint the entire interior, it just wasn’t going to happen. I had no-one willing to help and wasn’t exactly thrilled with the prospect of tackling the whole house on my own. Plus, the existing colour scheme, albeit not exactly on-trend (peachy cream walls with peachy cream trim), was neutral enough and all of the paint was still in fantastic condition.
We didn’t know the wall colour so I took a sample and had it colour matched so we could patch a few holes and paint over some feature walls to give the entire interior a sense of cohesion.
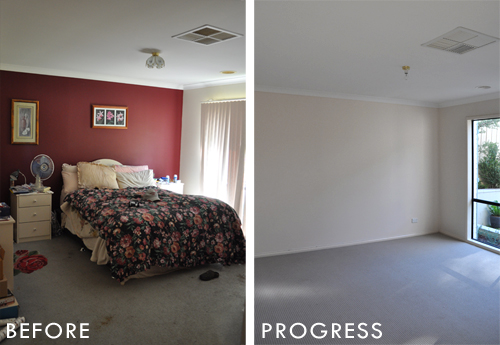
We also spray painted all of the ceiling vents white (they had badly yellowed) to make them look fresh and crisp.
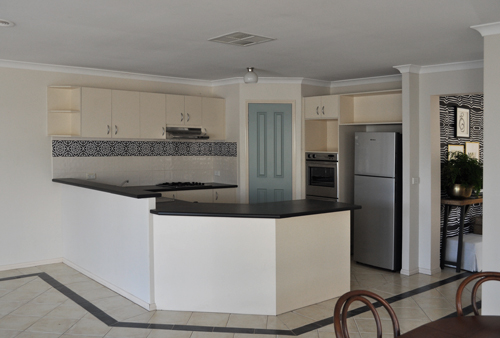
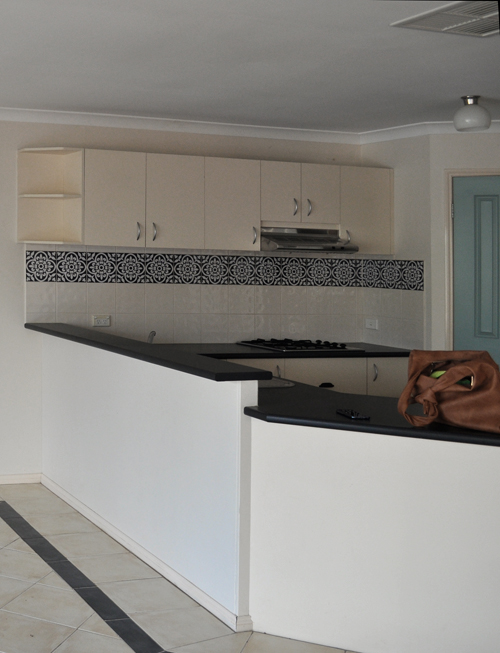
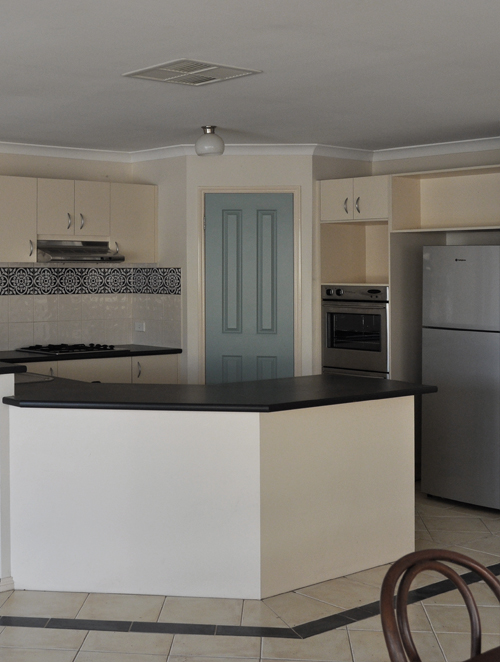
KITCHEN
Although a little tired and dated, thankfully the kitchen is relatively neutral and simple so only needed a few cosmetic changes to freshen it up.
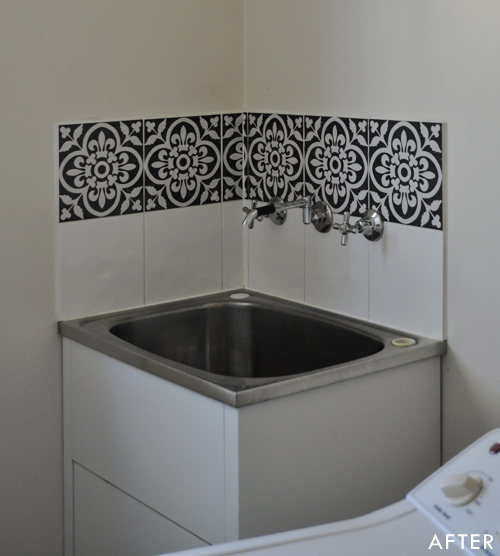
The most jarring component was the multi-coloured feature tile in the backsplash.
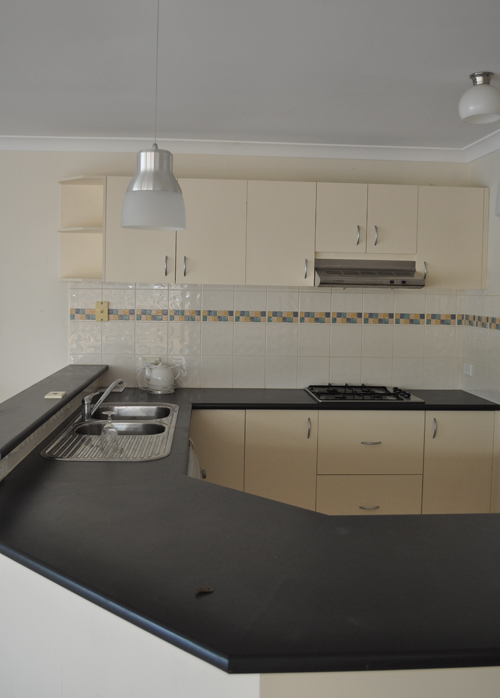
I’ve been wanting an excuse to try tile decals for several years now and this seemed like the perfect opportunity!
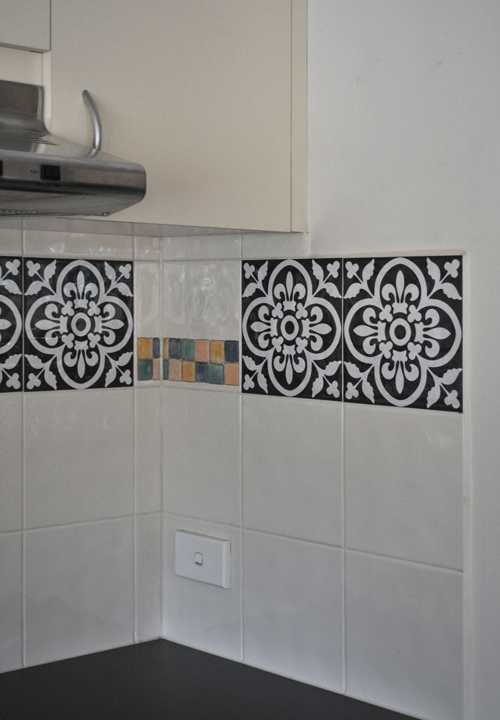
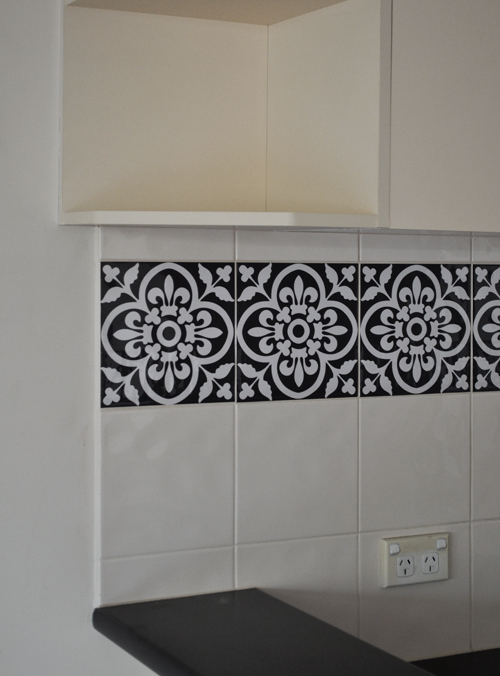
There are HEAPS of different tile decals to choose from (mine are from Etsy seller Bleucoin and cost around $120 – though I have left-overs!). I decided to keep things simple with a traditional design in classic black and white (love the way the black and white ties the kitchen in to the bathrooms and entry!). I must admit, I was somewhat skeptical about how easy they would be to apply though once your surface is nice and clean it’s literally just a matter of ‘peel and stick’. My tiles have a raised pattern and rippled texture which I think caused a few issues with air bubbles though they were easy enough to smooth out. On certain angles you can make out the raised texture beneath the decals though it definitely doesn’t detract from the overall effect.
I considered applying them to the entire backsplash, which could have looked pretty cool, though it would have been quite expensive. Plus I figured it was a bit unnecessary given this was more about simply eliminating the dated feature tiles.
Of course, I’m not trying to pull the wool over anyone’s eyes and am more than happy to disclose they are merely “skins” – personally, I’d much rather have pretty stickers than ugly tiles, you? They just look sooooo much better!
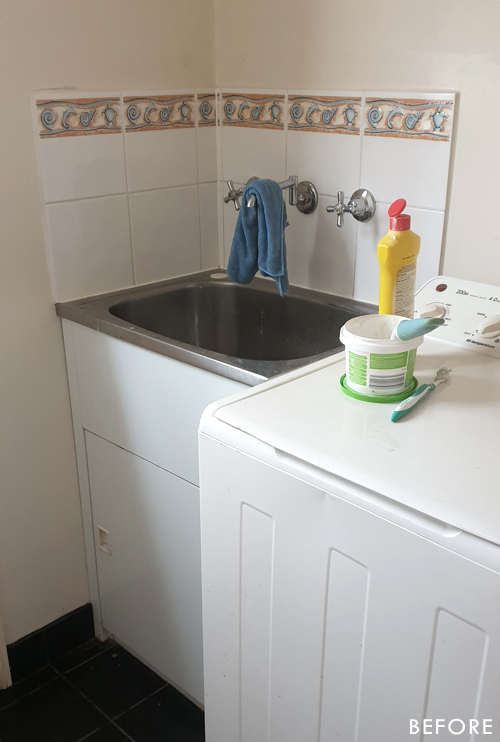
I even had enough to cover the strange ocean-themed tiles in the laundry (“strange” because the nearest beach is at least an hour away).
To break-up all the cream in the kitchen I decided to paint the pantry door. I originally went with black though it felt a bit too monotone, almost checkerboard-like. So, I tried the Duck Egg Blue we had left-over from the front door and it works well.
I still need to add a new long black handle.
Speaking of handles, I’ve also replaced the generic silver drawer pulls with stylish black cup pulls, and I’ve ordered new bar pulls for the cabinet doors (just waiting on shipping). I got them all from eBay for a total of around $150 (there are 22 handles in total). I wouldn’t normally spend that much on handles though unfortunately I couldn’t get the cup pulls I wanted in the size I needed any cheaper.

I’m not a huge fan of angular shelf units (to me they instantly date a kitchen) and looked into removing the one at the end of the bank of overheads though it’s glued to the wall and adjoining cabinet.
I can’t risk damaging anything so guess it will have to stay. I did consider a few ideas for cosmetically altering it though I’m not sure it’s worth it. Hopefully some pretty styling will make it work.
In addition to the visible changes we’ve made in the kitchen, we’ve also had to repair a cupboard doors which was broken, replace a drawer front which had been cut down and switch-out some shattered oven glass.
TOILETS
I initially thought we were going to have to replace the toilets though after they were thoroughly cleaned we realised they were actually okay. This was a bit of a relief because there is always a risk of damaging floor tiles or being unable to find a compatibly sized/shaped bowl to cover the previous footprint. And of course issues like this can cause a bit of a project snowball and budget blowout! In the end we simply replaced the cisterns and seats for a total of $350 (for two toilets) which makes them look brand new. Unfortunately I don’t have pics.
DOOR
One of the most recent changes I made was having a new frame and door fitted to the open study.
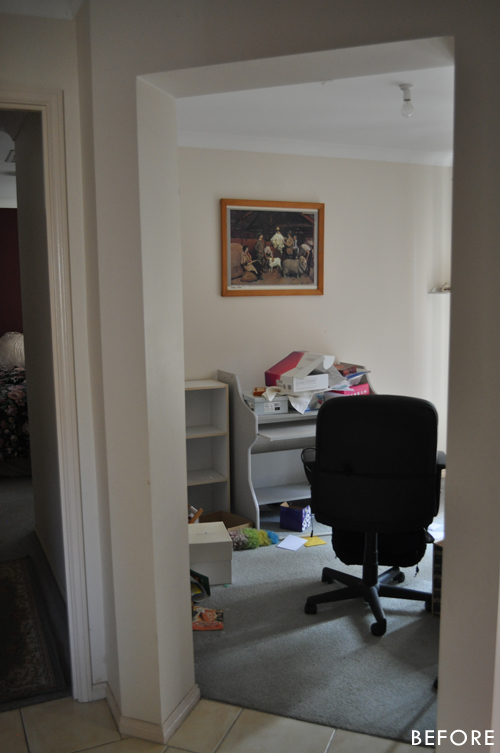
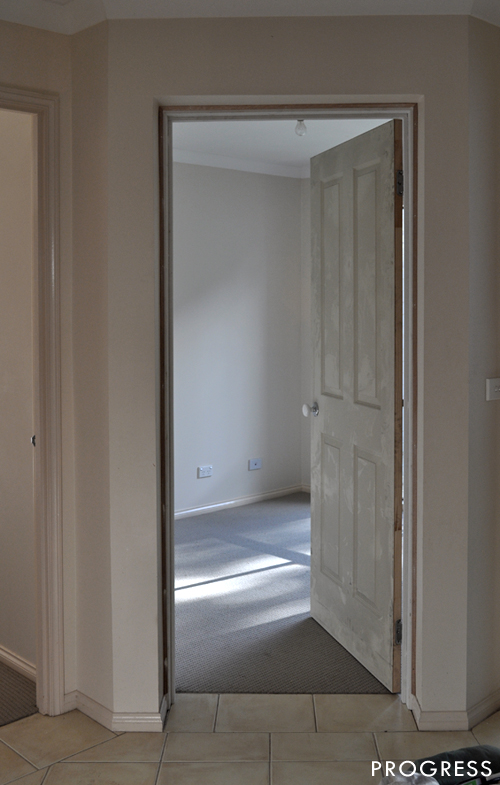
Although it’s a do-able DIY it is a bit of a tricky project so I chose to have a builder friend install it for us. The total cost was $585 though in reality is almost priceless given we can now market the property as having four bedrooms, rather than just three bedrooms and one study. It’s a game changer.
Of course, the builder didn’t paint the frame and door so that was up to me. As with the walls, I needed to colour match the paint to the existing trim so took a section of skirting (which the builder removed to make way for the new frame) to a Dulux Trade Center. I chose Dulux Aquanamel in Gloss to co-ordinate with the existing trim and the shop assistant expertly colour matched it whilst I waited.
I haven’t gotten around to painting the frame and door yet though will share more once it’s done.
![]()
So, that’s pretty much where we’re currently at with the interior. My friend is keen to have the house finished within three-four weeks (yikes!) though isn’t keen to spend much more than 1K on staging (double yikes!). Lucky I love a challenge!
![]()
Find all of the previous flip house posts HERE.


Looks amazing. Love the tile transfers, makes such a difference. Changing the yellow colour on the entry side wall lengthens that whole area. Lots of other great things going on too. Look forward to the staging.
Thanks Megan. Can’t wait to do the staging!
Fantastic to see the house all cleared out, it’s very satisfying seeing the before and after. The house has great sized rooms, gosh the clean out would have been exhausting. You are amazing Kristine.
Thanks Carol. Yes, the house has good proportions. Fortunately most of the clean out was done by my friend and her family. It was a HUGE job.
I’m always so inspired by your ideas! Can’t wait to see this one all “tricked” out. :)
Thank you :)
What a great difference! I love seeing the before and after pics. You have done SO MUCH work – you really are amazing!
And even though I’ve seen that entryway before – every time I see it, I think I love it even more!
Thanks Leslie. Well, I can’t take too much credit for the clean-out. It was mainly done by my friend and her family. A lot of work.
You are amazing!! 🙂 Nothing more needs to be said!
LOL! Well, I’m sure there are people who could say much more though I like your slant :)
Nice work as usual Kristine !! It’s looking amazing. Love the tile choices and carpet too.
Thanks for sharing.
Thanks Julie :)
Amazing! Great progress and very inspiring!
You’ve done an amazing job on such a limited budget. Extra props for the tile make-over. Stunning!!
Thanks Vikki :)
You are a one woman wrecking crew…(in the most positive way)! The tile stickers are brilliant and did not even know such a thing existed. The black and white theme throughout looks sleek, intentional and very current. Well done. Can’t wait to see what’s next! Just beautiful!
Thanks Diane. I can’t credit for the clear out though – that was mainly done by my friend and her family. Such a lot of work!
We have many of the same dates features; loving the tips for disguising and minimizing as we are not keen on ripping everything out. You should consider a online service for DIY design input :) For those of us with skills but no design streak.
Thanks Deborah. Yes, I’d love to be able to offer a service of some kind. Just not sure how to get my foot in the door.
Love what you’re doing $1k for staging I can’t wait to see what you do with that.
LOL! It’s freaking me out! Really hoping I might be able to get a few brands on board to help support the staging though I’m running out of time!
You explanation and insights are invaluable to the home decorator. I love how you explain your thinking its really informative. Thanks so much for sharing and keep up the good work. The home is looking fabulous.
Amazing how de-cluttering, cleaning, simple new carpet, paint touch-up and stick-on-tiles can make such a difference. The new entry is so inviting you’re drawing into the house and I think is a BIG game changer. I appreciate your explaining the thought process behind the selective decision that were made. I anticipate you’ll be raiding everyone’s house for staging piece. Can wait! :)
Thanks Pat. Yes, easy changes can have lots of impact. It’s been such a long process it was actually really eye-opening to look at the rooms side by side. You forget where you’ve come from!
What a difference there is after cleaning all the crap out made! You lucked out with the black shower frame or did you paint it?
Yep, super lucky with the black and white bathroom. If only the cream kitchen had the same colour scheme! Really makes you think about your own choices when designing for longevity – you just can’t go wrong with white.
It’s amazing watching the progress. I will look at decals very differently from now on!
Good idea making it a true four bedrooms. I think buyers will be able to imagine themselves living in this home. I am going to look into the tile decals. My kitchen has a row of 4×4 plastic tiles that are the really dated hunter green. Rough count there are over eighty of them. The price might be too much.
Hmmm, I don’t think it should be too much. Maybe around $120 USD.
Spray painting the vents was such a good call
Thanks. Makes a huge difference!
Honestly think you can stage this property for $1000.
Fabulous work, as always Kristine.
Shame you weren’t here in Sydney, I’ve just had a massive declutter, jugs, toasters, cushions etc you could of had it all.
Love to know in total what you have spent so far x
Thanks so much.
Yes, I could stage it for $1,000, and I love that kind of challenge, though I do really want to elevate this property. Looks like I might be lucky to have some brands loan me a few pieces – fingers crossed as it will definitely help ease the financial/time pressure!
At this stage we’re sitting at around $10,500 all up. This includes absolutely everything with the most costly items being a $4,000 brand new deck in the backyard, the $2,300 carpet, and $1,300 for the garage door.
This is certainly coming together well! Let’s hope the pressure of the short time frame works in your favour. Your idea of closing in the study is quietly brilliant. That decision alone is sure to bring your friend’s reno investment back into her pocket. Would you mind emailing me your ebay link for the black handles? I was about to order via Kethy but they charge about $10 per handle. Your thriftiness would really help me out!
Thanks Sam.
Do you mean the cup pulls? Are you replacing existing handles so need the hole centers at a particular distance? Or do you have the freedom to choose your desired size?
That duck egg pantry door looks great. And I really like the tile decals.
AMAZING! I love the “Before and After” posts. The black and white theme looks great.
I love the tile decals! What a great way to freshen up a dated kitchen/bath! Question- have you ever placed them over drywall and how easy was it? Have you ever needed to lift them off of drywall and how difficulty was it? Thanks!
P.S.- I love all your work, too!
Thanks Rachel.
This is actually the very first time I have used them. They went on and peeled off the tiles easily. I’ve never used them on drywall (plasterboard/gyprock) though according to the Bleucoin website they can be used on walls and I know people often use them on stair risers too. Otherwise, have you considered peel and stick removable wallpaper? That’s what I used in the flip house entry and it was easy to apply and could be easily taken off without causing damage.
https://thepaintedhive.net/2019/05/the-flip-house-entry-reveal/