This is one of the easiest pillows you’ll ever make. There’s no hemming, seaming, measuring, or even cutting! And, if you use fusible tape, then there’s no sewing involved either!
The trick is using a cute tea towel. I know, I know, it’s not a revolutionary idea, though it’s one I reckon can often be overlooked. Conveniently hemmed, perfectly sized and usually affordable (especially when compared to comparable fabrics – hmmm, is it wrong to use a differentiation of the same word twice in one sentence?), tea towels are just right for creating quick and easy folded envelope lumbar cushions.
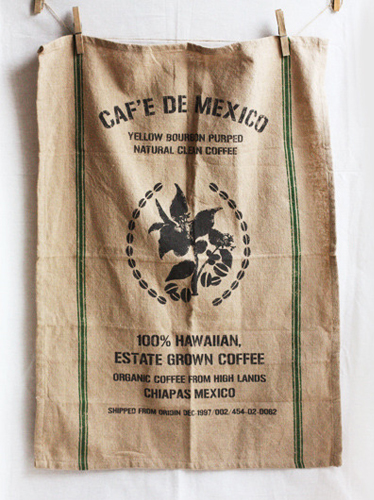
About a year ago I was lucky to stumble upon an imitation coffee sack tea towel for just five bucks in Bed, Bath n’ Table. I loved it so much I bought it with no intention of actually ever using it to dry a single dish – the rustic textured cotton and bold typographic print made it far too awesome for the kind of abuse I subject my kitchen towels to.
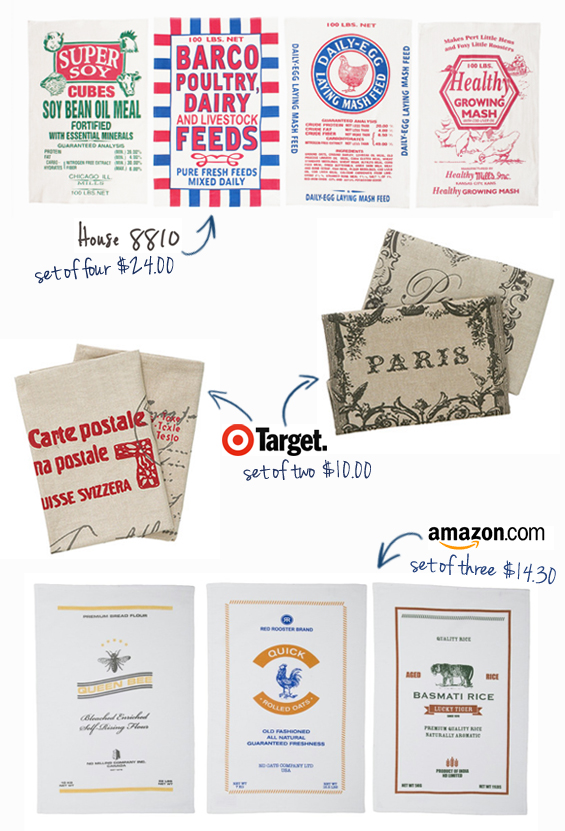
Suffice to say they no longer sell them though if you keep your eyes peeled you can find similar (or completely different though equally as cute!) tea towels in lots of places. Here are just a few I found via a quick online search…
House 8810 | Target | Amazon
Of course there are loads of different methods to create pillow covers from tea towels. This is simply the lazy-girl way I decided to make mine…
1 Lay your tea towel right-side up on a flat surface.
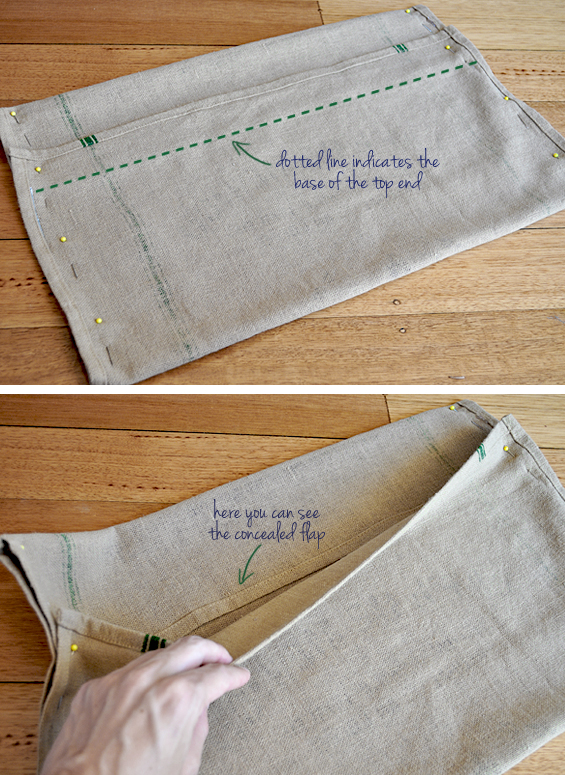
2 Fold the top end down – around 12cm (3″) – then fold the bottom end up so it slightly overlaps the base of the top end – by around 3cm (1″) – then pin both sides in place (refer to photos).
In theory this step sounds a bit convoluted though as per the photos it is actually really straight forward. Essentially you are just creating an inside-out envelope with a concealed top flap. Of course depending on the appearance (graphic size and placement) of your particular tea towel and the depth you want for your envelope flap the dimensions you use may vary. You may even want your envelope closure to be at the rear of your pillow.
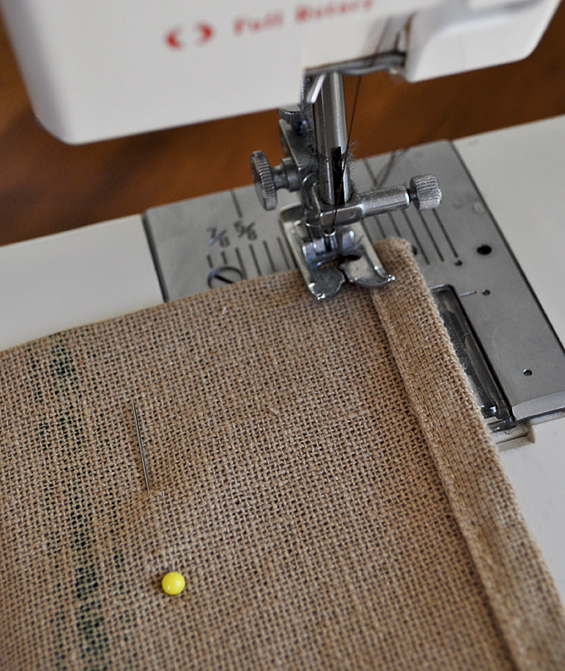
3 Sew (or fuse using iron bond hemming tape) your sides together.
I simply ran a straight stitch line inside the existing hem. If you find your tea towel’s existing hem is too bulky you can trim it off first. I didn’t have a problem with it.
4 Turn your pillow in the right way, stuff it with an insert and you’re done!
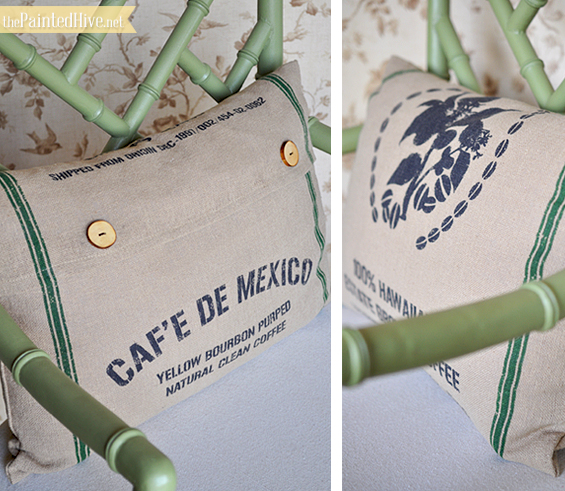
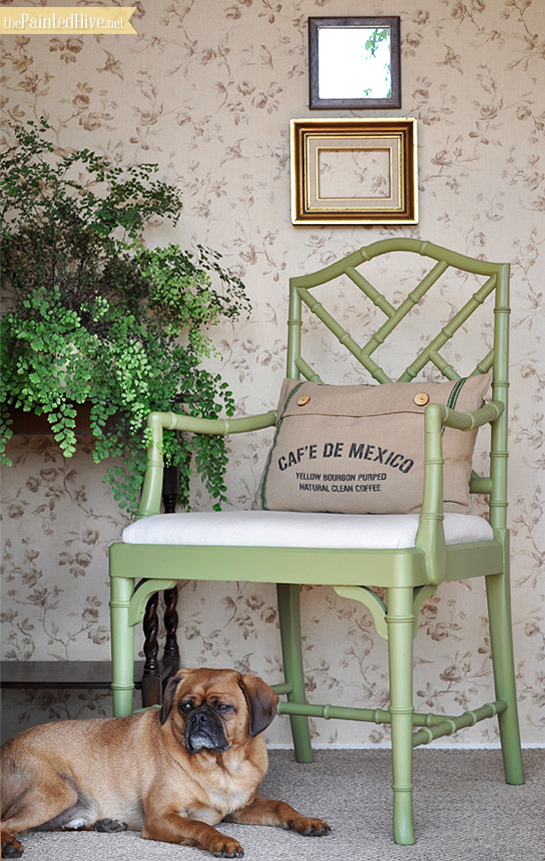
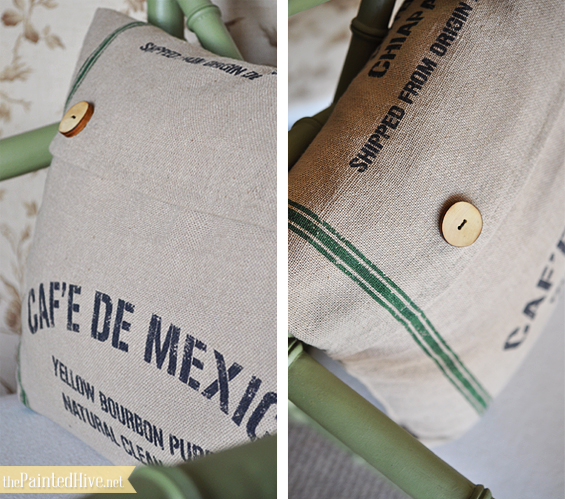
I used a toddler pillow ($5 from Kmart) as my insert because I found it was the perfect size. I also added some rustic timber buttons ($1 each from Spotlight) as embellishments (they are simply hand-sewn on to the envelope flap and are not actually functional). I am loving this style of button at the mo’. If you’re interested in finding some though are having trouble there are lots available on Etsy.
If you find the bulkiness of your insert causes your envelope flap to gape open (I didn’t have this problem) you may want to use some kind of fastener to help keep it closed. Velcro dots/strips or press studs are great no-sew options though of course you can also always make proper button holes or use cute ties or loops.
I am loving the texture, interest and comfort my little lumbar pillow brings to our new Chippendale desk chair. And, given that the chair is usually tucked under our desk I am totally digging the fact that the faux bamboo fretwork means the pillow, along with its lickable grain sack graphics, peeks through the rear of the chair too!
Having a decorative envelope closure at the front of the pillow (rather than a plain envelope closure in the centre of the back) makes the pillow completely reversible.
Don’t ya love those happy ‘accidents’?



Thank you for posting this. I have been waiting to read about this pillow since I first saw it in your upholstery post.
Thanks also for sharing some sources for alternate tea towels. I am loving the set of three from Amazon for less than $5 each. You are so kind to research this stuff for your readers.
xoxo
Thanks Katy :-)
I really appreciate your sweet words, though the truth is, I’m kinda semi-obsessed with finding great deals so it’s no real trouble for me to simply share what I discover…in fact it’s my favourite bit!
Oooh, love how you made this cushion. I would never have thought just to fold it up and sew along the sides like that. I think even I could do this, maybe with the hemming tape option though :)
‘Course you can do it Megan :-)
That is so simple yet effective. I love it!
Gemma x
I love this! I’m off to search for some for my family room!
I love how simple this is to make. You’ve inspired me! I might just get around to making my own interpretation of this instead of just enjoying the thought of making it. I have a thing for gorgeous tea towels. Thanks for sharing the instructions so effectively. This is only the second post of your blog I’ve read but I’m loving it. Looking forward to more inspiration. Many thanks Kristine.
Alischa :)
Hi Alischa
Thanks so much.
I’ve got a heap of ideas floating around my head. I just need to get around to actually doing and sharing them…that’s the tricky bit :-)
Very clever! And thanks for sharing resources! Can you help me find the tea towels at Target? Item name?
Hi Sandy
Thanks :-)
There is a link to the ‘tea towel’ page of the Target website at the bottom of the image (the tea towel sets are included there). Also, I just noticed they are now advertised at only $7.50 for a set of two!
I’m not certain where in the world you are based though just letting you know the link is for the Australian Target site.
Kristine
They look perfect. I have some of the same towels. I find them at the flea market every year. Lovey your tutorial and that is exactly how I do mine:)
Great minds think alike Dawn!
:-)
Hi,
I love your pillow. FYI, Ikea sells white towels with red stripes. I bought some and tea dyed them for my kitchen. They are only a couple of $.
Shelley
Hi Shelley
Yep, I have a few of the IKEA ones too :-) I actually had them included in my source list to begin with though took them out ’cause I thought maybe they were a bit too plain, though they are great if you want something simple or if you want to add your own graphic (or, like you, do something cool like tea dying!).
Kristine
What a great project! I think I will try this! Thanks for the great tutorial and beautiful images! :)
Loved the tutorial. You explain everything so perfectly! I have a load of burlap that, while not already cut to tea towel size, might still look nice as a pillow. If I can’t come up with a tea towel, I may try using burlap. Thanks for your inspiration!
Hi Nancy
I LOVE burlap pillows – so earthy and textural.
I plan to make some for my daughter’s ‘new’ room.
Kristine
Hi Kristine, This is so cute and perfect. I made a few cushions out of tea towels coz the prints are cuter and they are the perfect size, no cutting involved. But I love your front envelope style with buttons way more! I might have to give it a shot! too cute!
Thanks so much for the inspiration. Off to Target right now!
Adorable…I’ll be on the lookout for cute towels :)
i recently found some vintage linen tea towels – great idea for recycling them! Love the graphics on yours and I am still drooling over that green chair.
Ooh, Donna, genuine vintage tea towels would make adorable pillows.
I am so glad you saved this from the nasty kitchen dishes. It’s adorable :) I love the added buttons!
Just wanted to stop in from Tuesday To Do It
Mandy @ The Hankful House
Thanks Mandy :-)
Love this! And I love the added detail of the buttons. Great job!
Outstanding! The way you crafted the cushion makes it look very high end!
Thanks so much :-)
I just bought two tea towels with the intention of making little pillows. One became a table runner instead.
Your little boy is precious.
Thanks Carol :-)
Don’t ya love the versatility of a humble tea towel.
A soft green Chippendale chair? Yes please.
Sei bravissima! Complimenti!
Excellent blog you’ve got here.. It’s difficult to find
good quality writing like yours nowadays. I truly appreciate individuals like you!
Take care!!
This definitely redefines pillows in my mind now, now all you need to do is start a business on Etsy and sell them regularly!.
Throw pillows are something that always accents any couch, bed or chair. Being able to make one with no hemming, steaming, measuring or cutting is too awesome to pass up!
The pillow idea from a tea towel is a creative way for travelers to display where they have been.
Hi Jean
Yes, they would make lovely sentimental pillows.
Kristine
I just loved the idea. I see how simple it is to make. You have inspired me! Thanks for sharing!
Kenneth bordewick
Loved your pillow, and the very clear directions. I do have one question, though: What size is the toddler pillow from k-mart? I don’t have a nearby Kmart, but I do have other sources to shop at.
Thanks again ….. great project, and I have a Yellowstone souvenir dishtowel waiting!
Hmmm, I’m not totally certain Sharon as I no longer have the package though based on my measurements it is approx. 28cm x 45cm (11″ x 18″). Of course it is kinda difficult to measure a pillow accurately. Hope this helps.
Hi,
I’m from Australia, I love your website……
Is that a Pugalier I see in the shots?
I have a Pugalier, named Billy.
Keep up the great work…..
Regards,
Cathee
Hi Cathee
Thanks so much for letting my know you’re from Oz. I love hearing from my local readers.
That certainly is a little Pugalier you can see. He is named Cooper. Bet he and Billy would be great mates!
Kristine
BTW You don’t know of a magical spell to stop them from molting indoors?
:-)
Hi Kristine and to Cooper as well!
Unfortunately I don’t have any magic for the hair issue lol, I have though increased my tollerance of it because it just seems to be everywhere no matter how much vacuuming I do…
Cheers, Cathee
Thank you for this inspiration. I have a cloth with snowdrops flowers on that is wasted as a dish drying cloth and I will make it into a pillow! Snowdrops are very special for me – far too special for dish drying but perfect for pretty pillows. Thank you once again, Tess :)