
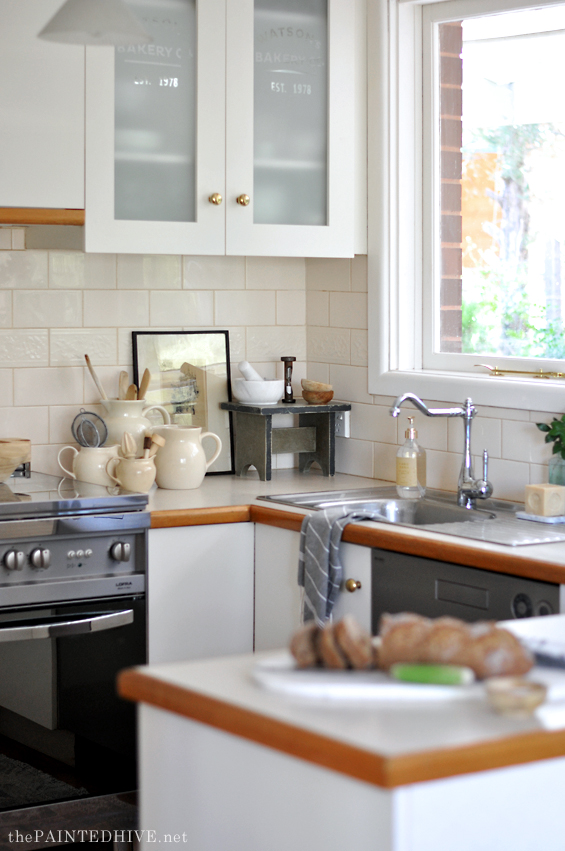
When I shared my parent’s $100 kitchen refresh a few weeks back the frosted glass doors were probably the most loved project.
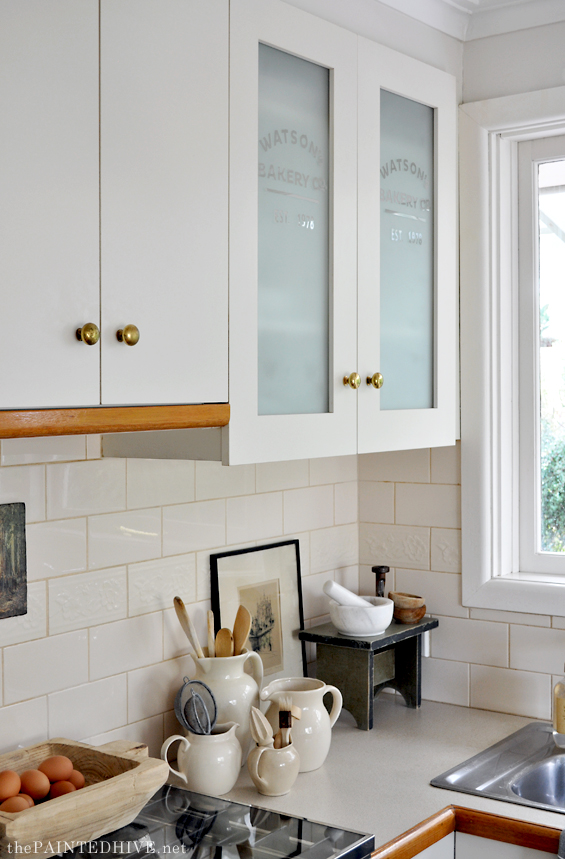
It was a quick and easy little transformation which anyone can have a go at. Although subtle, the graphic adds a little hint of charm and interest whilst the frosting works perfectly to provide concealment.
As mentioned in the original post, my mum wanted to hide the contents though rather than frost the glass entirely we decided to experiment! I was skeptical though the outcome is really cool. A few of you asked to see a tutorial so here it is.
![]()
I didn’t record the process first time around so for the purpose of this tutorial I’m using an old picture frame.
Ideally, you want to apply this treatment to glass which has either a light or dark cavity behind it, or is positioned in such a way it’s often viewed from an angle, in order to enjoy the full effect.
![]()
STEP 1 | ENSURE GLASS IS NICE & CLEAN
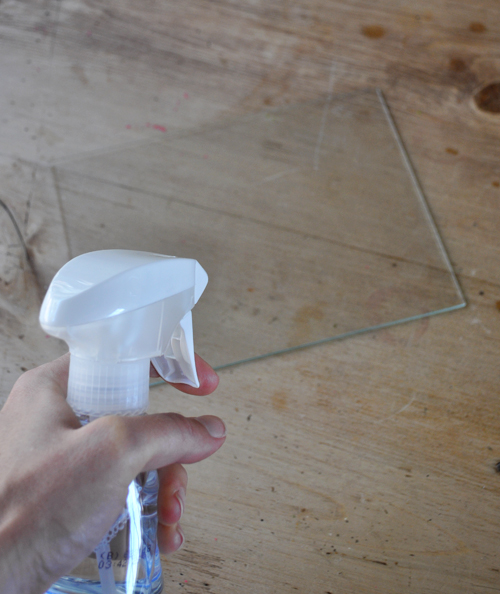
I simply wiped mine with some window cleaner.
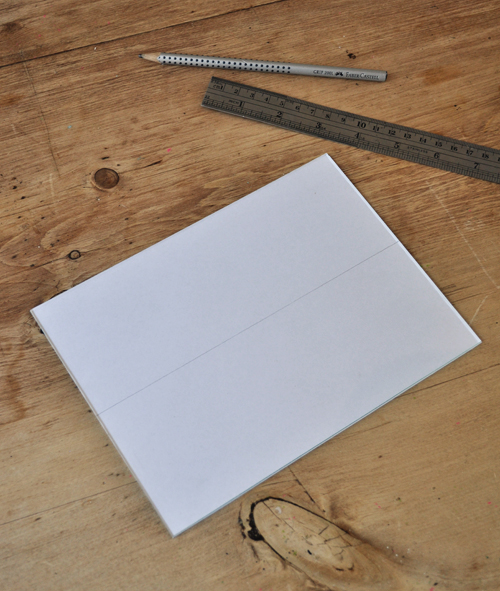
STEP 2 | DECIDE ON YOUR GRAPHIC

Of course, this is entirely up to you. For the purpose of this tutorial I went with something very basic. For the kitchen cabinet doors I wanted to create a vintage feel. It’s hard to make out in the photos though the door graphic states “Watson’s Bakery Co. EST. 1978” (“Watson” being my parent’s family name and “1978” being the year they were married).
Unless you’re feeling incredibly patient I would suggest avoiding anything too long, complex or intricate.
You can draw a rough sketch, create a template using a graphic design or word processing program, or simply wing it like I did! If you do happen to want a more intricate design, you could even use a vinyl cutting machine (if you’re lucky to own one) or engage a vinyl cutting service.
Of course, whatever your design, just ensure it works with the scale of your glass and size of your stickers.
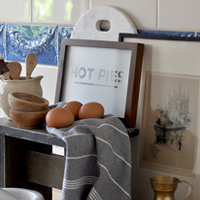
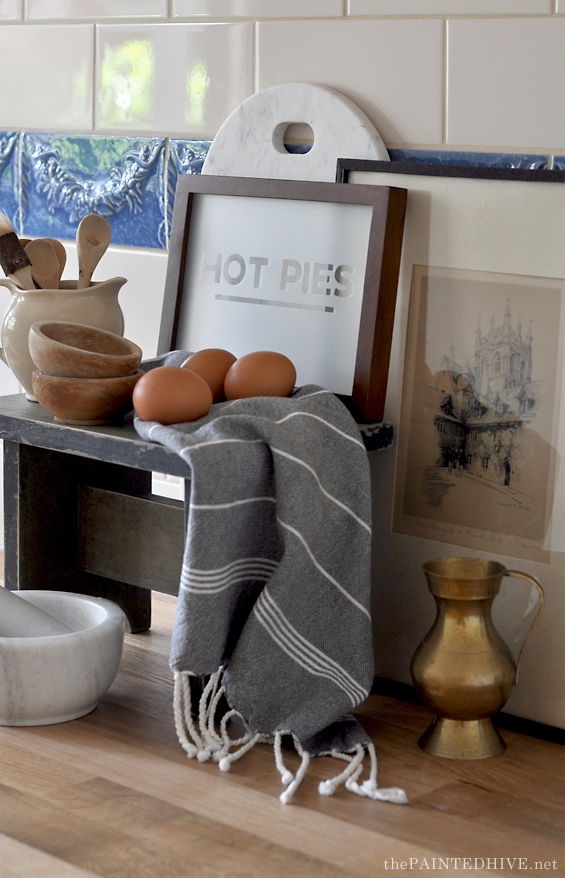
For my ‘Hot Pies’ sign I simply drew a straight line on a sheet of paper then placed it behind the glass to act as my guide.
I did the same thing for the kitchen cabinet doors however I drew an arch (using the rim of a dinner plate) and lines for each row of text. It’s pretty straight forward.
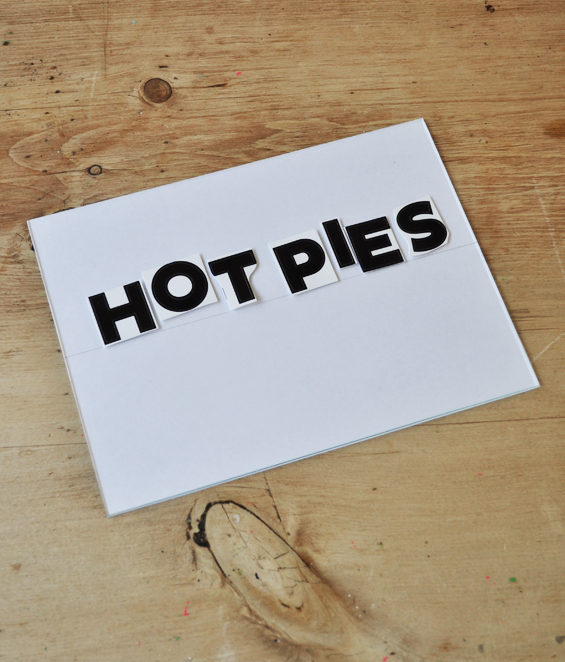
Before I attached my stickers I cut them out individually and roughly arranged them to ensure they would fit.
STEP 3 | ATTACH THE STICKERS

To keep the spacing nice and even, I started with the outer letters then worked my way back in toward the center. As mentioned above, I simply used a single line as my guide and just eyed the placement (fortunately stickers are pretty forgiving as you can simply peel them off if you make a mistake) however if you’d like to be super precise you can create a more detailed template. Once adhered, press firmly to ensure the edges are well sealed.
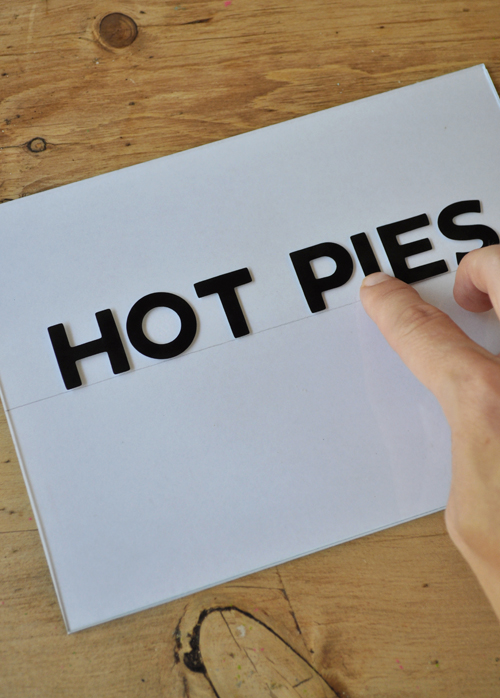
In addition to my letters I also added a simple line which I cut from a strip of painter’s tape.

STEP 4 | PAINT!
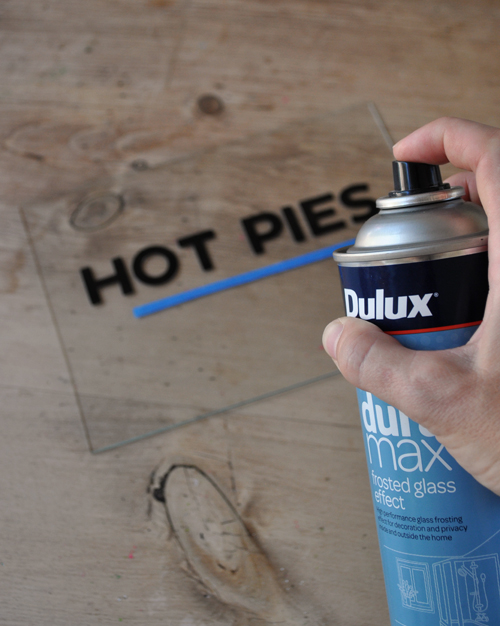
Mist the glass with a light coat of frosting spray paint. I used Dulux Duramax Frosted Glass Effect. At first it may appear quite clear though after a minute or two the effect should emerge. Repeat with a second coat if required.

Of course, I didn’t need to mask off anything for my picture frame glass however as we couldn’t remove the glass from the kitchen cabinet doors I did use tape and old newspaper to protect the casing from any over-spray.
STEP 5 | PEEL THE STICKERS OFF
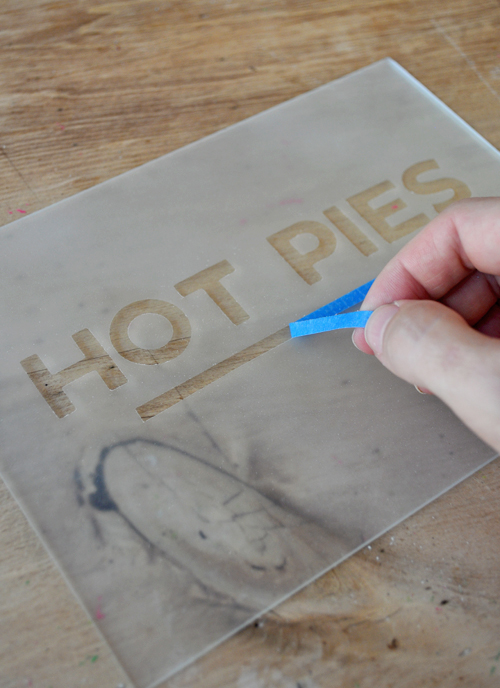
Once the paint is touch dry, slowly peel the stickers back. I used a pointy implement (a metal skewer) to carefully lift one edge of each sticker first.
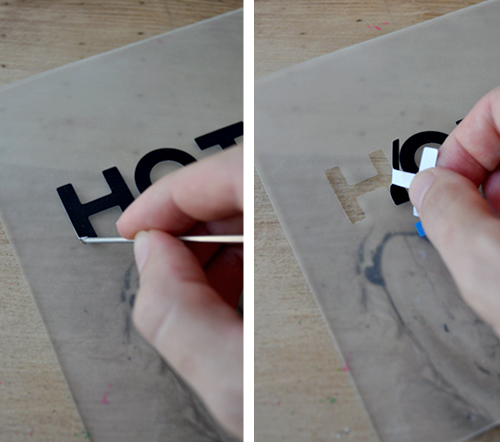
You may notice a very slight raised edge of frosting around the perimeter of the letters. This can simply be brushed back with a soft cloth or your finger.
DONE!
It’s as simple as that!
Depending on how the sign captures the light, at times the graphic looks quite bright and distinct whereas at other times it can be barely visible (and very difficult to photograph!). Though there’s something about that I like. It’s almost as if it’s a little mystery you need to view from the right angle. And it’s perfect if you’re wanting something subtle and simple.
Have a great week all.
![]()


This is the cutest little project. I have hepas of old frames I would love to try this on!
I love this, too! I would have never tho’t to spray over the letters like that. My idea probably would have been a lot more complicated yet wouldn’t have come out any nicer! Thanks for giving me my newest project idea! I’ve been wanting to do something like this for a pantry door!
Thanks so much. Have fun! :)
Great tutorial. Thanks Kristine. It is inspiring to see something so beautiful looks quite achievable to do!
You’re welcome. Thanks so much.
Looks great! Do you have a source for the sticky back vinyl you used? Thanks
Hi Anna. The letters are just regular paper stickers. I got mine from a craft store though you can probably get them cheaper online through somewhere like eBay or Amazon.
Thank you for the response!
You’re so welcome :)
Thank you for sharing this great idea! When I had seen the glass doors in your original post I was disappointed that i don’t have glass doors in my kitchen to do the same, so it’s great to have the idea to use a picture frame.
Your pictures – as always – are beautifully styled and so nice to look at!
Thanks so much Leslie.
The cutest idea i’ve seen in a while! Clever girl!! Lucky parents!!!♥
So cool – another project tool for my arsenal. It would seem your ingenuity knows no bounds! The styling is spot on, BTW.
Thank you so much Deb.
I love this project and many options and ideas. Thanks for sharing. Very cool. Enjoy your day
Cindy
Just a wonderful idea for your parents’ kitchen. I am sure they love it!
Thank you.
Lovely little diy project. I’m definitely going to do this on a bathroom cabinet. I love getting your emails.
Thank you :)
Thanks for the followup. It’s not what I thought it was going to be, but this seems easy.
It’s super easy. A nice quick and inexpensive project :)
Great idea. Is the frost paint washable? Can you use window cleaner on it?
I have stenciled vintage windows using auto paint so it can be cleaned without worry.
Thanks for the well done tut.
Hi Gail. The frosting paint adheres incredibly well so can be wiped clean just like regular glass however given it’s slightly textured I would suggest using a lint free cloth.
I actually signed up for your emails based on this idea. It helps that my last name is also Watson. We’re in the middle of a kitchen reno and I have a set of glass doors that I was going to just put grids in, but now it will be Watson’s Café, est. 1988. Thanks for the idea!
Oh cool! Be sure to email me a pic once finished – I’d love to see.
Thanks so much for signing up :)
It’s difficult to come up with new ways to compliment you Kristine! Stickers aren’t usually on my shopping radar but that has now changed; I’ll be on the look out for them. I mentor a little girl at one of the local primary schools and this would be a perfect craft to do with her using your photo frame inspiration.
Aw, you’re too nice! Glad it’s given you some ideas. It’s a great little project to involve kids in.
Thanks so much! I’ve been wondering how to frost the glass by my front door and don’t like the idea of those frosted contact sheets!
You are extremely talented and generous in sharing your knowledge! Much appreciated!
Didn’t knew it was that easy. I always thought that these type of glasses are specially designed, thanks for sharing Kristine
‘Meant to ask, “How many coats of the frost did you use?” I think the frost is just perfect…. not too light and not too heavy. And do you recommend that brand of frost over the Rustoleum? I’ve never heard of it and wonder where you bought it? Again, thanks much for the beautiful project!
I used around three light coats. Haven’t tried the Rustoleum frosting spray so can’t comment on how well it compares though I’m very happy with this brand.
Looks fantastic! I love your tutorials – always inspiring. I really appreciate how well you explain and photograph each step. Thank you :)
Thanks. You’re super welcome :)
Great blog! I have been decorating with the Handy Squad for about a year now and this blog is definitely one of the best around for lovely techniques and tricks. Let the creativity flow! Luke
I had no idea they even sold a spray like this! Thank you for the great idea! Your moms cabinets look great!
Can the texture on the glass be removed in case if someone sells the house and the buyer wants it taken off?
I imagine it could be scraped off, or dissolved somehow. Sure simple paint stripper would work.
Your work seems to be great. Continue the great effort!!
Thank you very much for the content as I didn’t know it is such easy.
Gorgeous project! How is this holding up now 2 years later? Just wondering as kitchens often get batter/grease spatters etc. and need wiping down – has it held up OK? no discolouring or flaking?
Thanks Jerri. It’s still in perfect condition. Just like the day it was done :)
thanks for information
This is an amazing project, congrats!
This is a great way to hide the interiors of a glass cabinet without having the expense of purchasing a new door. I’ve been re-modeling, refinishing, painting kitchen cabinets for over 25 years. One suggestion I would have is to do the lettering on the back of the glass. It will mean you’ll need to put the letters on backwards in order to be read correctly on the front. Simply remove the glass portion, if removable. If not, you can either open the door and do the back or remove the door from its hinges. This way the front remains smooth. Without a doubt you’ll be able to be clean the front as normal either way no worries. Hope this helps! Happy Transformations!