I know I’m supposed to have shared at least some of the pics from my mother-in-laws house staging project, though I’ve been so flat out with client work lately I haven’t even had a chance to properly look through the photos yet! So sorry!
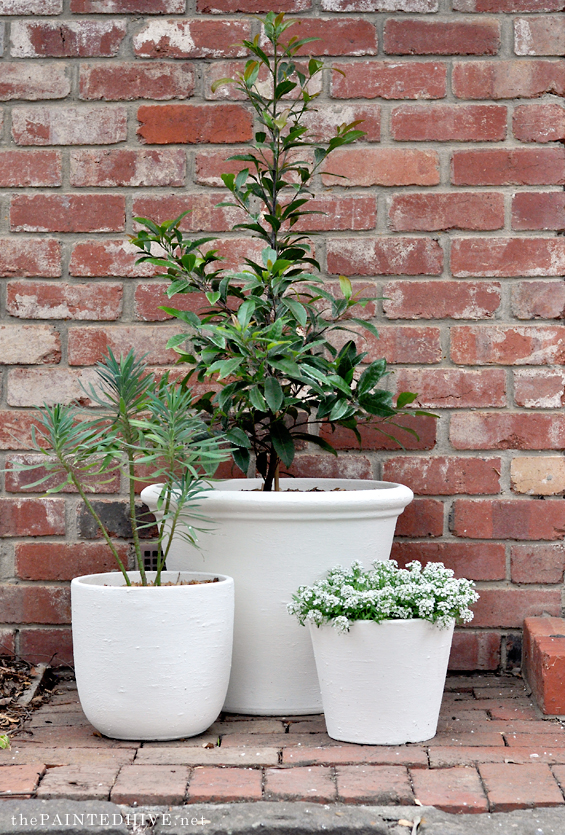
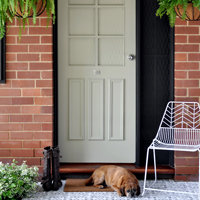
One project I can quickly share however is these plant pots I transformed to dress-up the front entry.
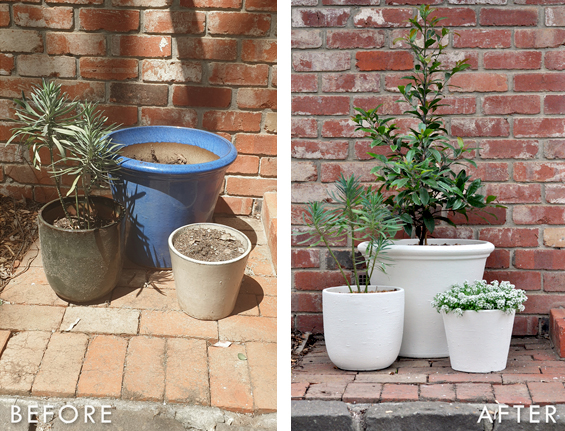
My mother-in-law had a heap of random pots laying around, but I wanted something cohesive for beside the front door. Of course, buying new pots would have been pricey and a bit excessive, so once again it was paint to the rescue!
I was on a tight budget and time-frame so simply used some supplies I already had on hand – regular house paint mixed with Plaster of Paris.
If I’d planned things out ‘properly’ I probably would have used something more suited for outdoor conditions, such as mortar mix and exterior paint instead. But, Plaster of Paris can be sealed for outdoor use and although I never sealed ours it has held up perfectly for almost three months now! Yay!
All I did was pour some plaster powder into a bowl then gradually add paint, stirring with a stick paddle until I had a toothpaste-like consistency. I wasn’t fussed about bumps and lumps so there were plenty – which I embraced!
To apply the paint I used a large brush which I haphazardly slapped around the pots until they were fully covered (around two-three coats). I undertook this project on quite a hot day so thankfully the paint dried fast which enabled me to layer it up quickly.
Sorry I don’t have step-by-step tutorial photos though I literally did this in a frantic twenty minute window right before I needed to collect my kids from school. That’s how quick and easy it was!
In terms of plants, as you can see the Euphorbia was existing, and I added a Prima Donna tree (Elaeocarpus Reticulatis) in the large pot for height and lushness, and some pretty Sweet Alyssum (Lobularia Maritima) in the smallest pot for a bit of fluffy cottage charm.
To conceal the exposed soil some fine Euchi Mulch did the trick.
Right at the beginning of this house staging project, when we were initially decluttering, no-one really knew what to do with these random pots. At one stage they even almost ended up in the trash! So it’s nice to have given them a fresh lease on life.
Catch up on all the previous posts about my mother-in-laws house staging project HERE.




Love the texture! How clever. I have SO many random pots (empty) just hanging around. This could justify me hanging on to them. 😁
It honestly totally transforms them!
Thanks! Exactly what I need to do with that green dripping painted pot that hadn’t turn out loved like most diys I did.
Go for it!
Love that idea and just discovered my next project! Thank you!
Thanks Bec. Enjoy!
Hey Kristen – l love the 3 pots together they look great.
A FYI for any of your readers who are thinking of trying this – plaster of Paris is quite toxic and should be handled really carefully and used with a mask. A much better option is finely ground Calcium Carbonate powder which makes ordinary paint into chalk paint and is readily available from pet shops or feed stores. If you want to make your paint smooth you mix the CC with a little warm water first, smooth out the lumps and then add your paint. There are recipes for the amounts of CC/water/paint online.
I painted a metal pot and a concrete stand both with Chalkpaint 3 yeas ago, I didn’t seal it at all and it’s still looks great.😊.
Thanks Denise. Yes, I was actually going to put a note in the post regarding this (even started typing it up, but ended up omitting it) though based on my research, Plaster of Paris is generally classified as non-toxic. That said, it can be hazardous under extreme conditions. Still, as with most fine substances, it should be handled responsibly.
Yes, I’m aware of the calcium carbonate alternative along with baking or bicarbonate soda options but, like I mentioned in the post, the POP was simply something I already had on hand. Perhaps these variations might help other readers though, so thanks for taking the time to share :)
This is such a great, quick and easy update and what a huge difference it makes! Thanks for sharing!
Super easy and loads of impact. The best kinda project for sure! Thanks Leslie.
Thank you for this info, I’ve got pots that need attention but kept putting it off as too hard.
It’s really easy!
Lovely outcome! I’m excited to hear that you’re busy with clients. ;) All the best, Debbie
Thanks Debbie :)
I love how you make trash into treasures. I will now be going after my mismatched pots and giving them all a new refresh. Very eco friendly as well. Reduce, reuse, recycle is always the best and you prove that with this. Thanks you for sharing your talents!
Such a simple and yet dramatic makeover. I’m definitely giving this a go to try and give my garden a more cohesive look.
Such a wonderful post. Thank you so much!!
Thank you, I just discovered my next project! I’m loving that idea!
What a lovely transformation. I have many random pots also. I never seem to be able to buy 3 of a kind, too expensive. But this is a wonderful idea I could do. Thanks! 😊 Gloria
Thanks Gloria. Glad it helped give you some inspo :)
This is a great idea. I have many old flower pots in the garden that I can’t bear to throw away. I will implement this as soon as possible. thanks
thank you for making this article very useful and keep up the good work