
I feel a little bit sheepish sharing this remodel because I know lots of you will prefer the before. And, if I’m honest, there is plenty about its prior form I really did love! But sometimes change is forced.
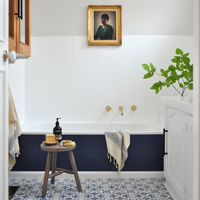
I’m sure many of you will remember this cosmetic refresh I carried-out on my parent’s main bathroom back in 2018…

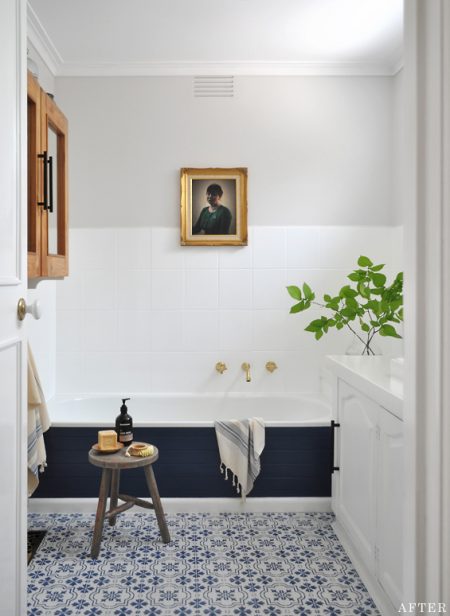

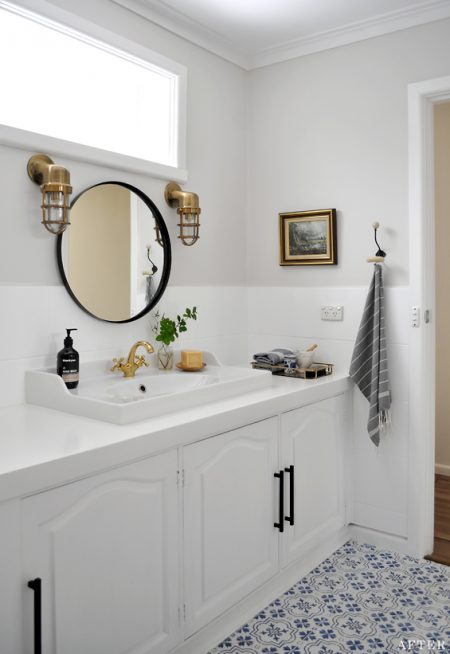

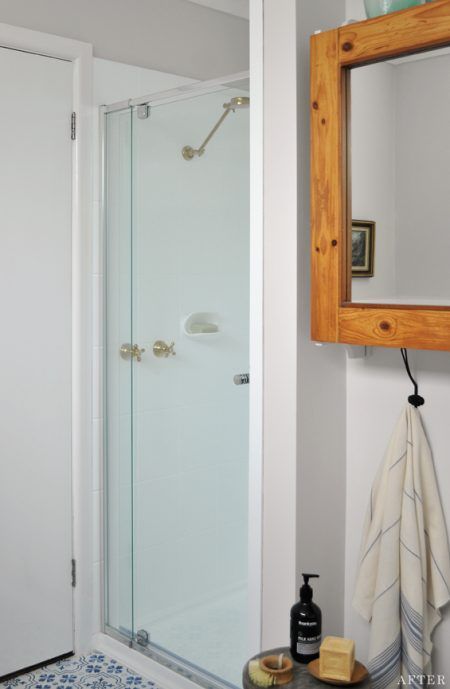
It was a really popular makeover, and a project I found super rewarding.
At the time it was a bit of a creative experiment, and intended as a somewhat short-term fix – as the room had some layout impracticalities and “old age” problems which would eventually need addressing – though five years on it was still going strong! The fact is, it would be unchanged today, had it not been for an unforeseen issue which eventually resulted in this…

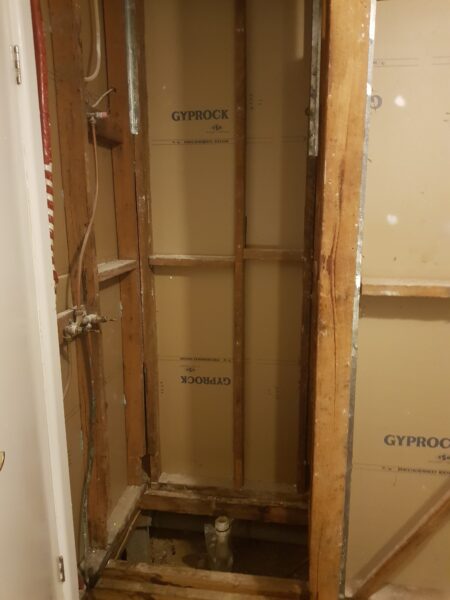
One day my dad was walking by when he heard a faint trickle coming from the direction of the bath. Turns out one of the old pipes had burst and was slowly leaking into the wall cavity! After lots of examination and some professional opinions, it became apparent that the only way to access it was to rip the entire bathtub out! This, obviously, has its knock-on effects!
Although the timing wasn’t perfect, my parents decided it was the catalyst they needed to properly remodel their 50 year old bathroom.
The first thing to determine was the new layout.
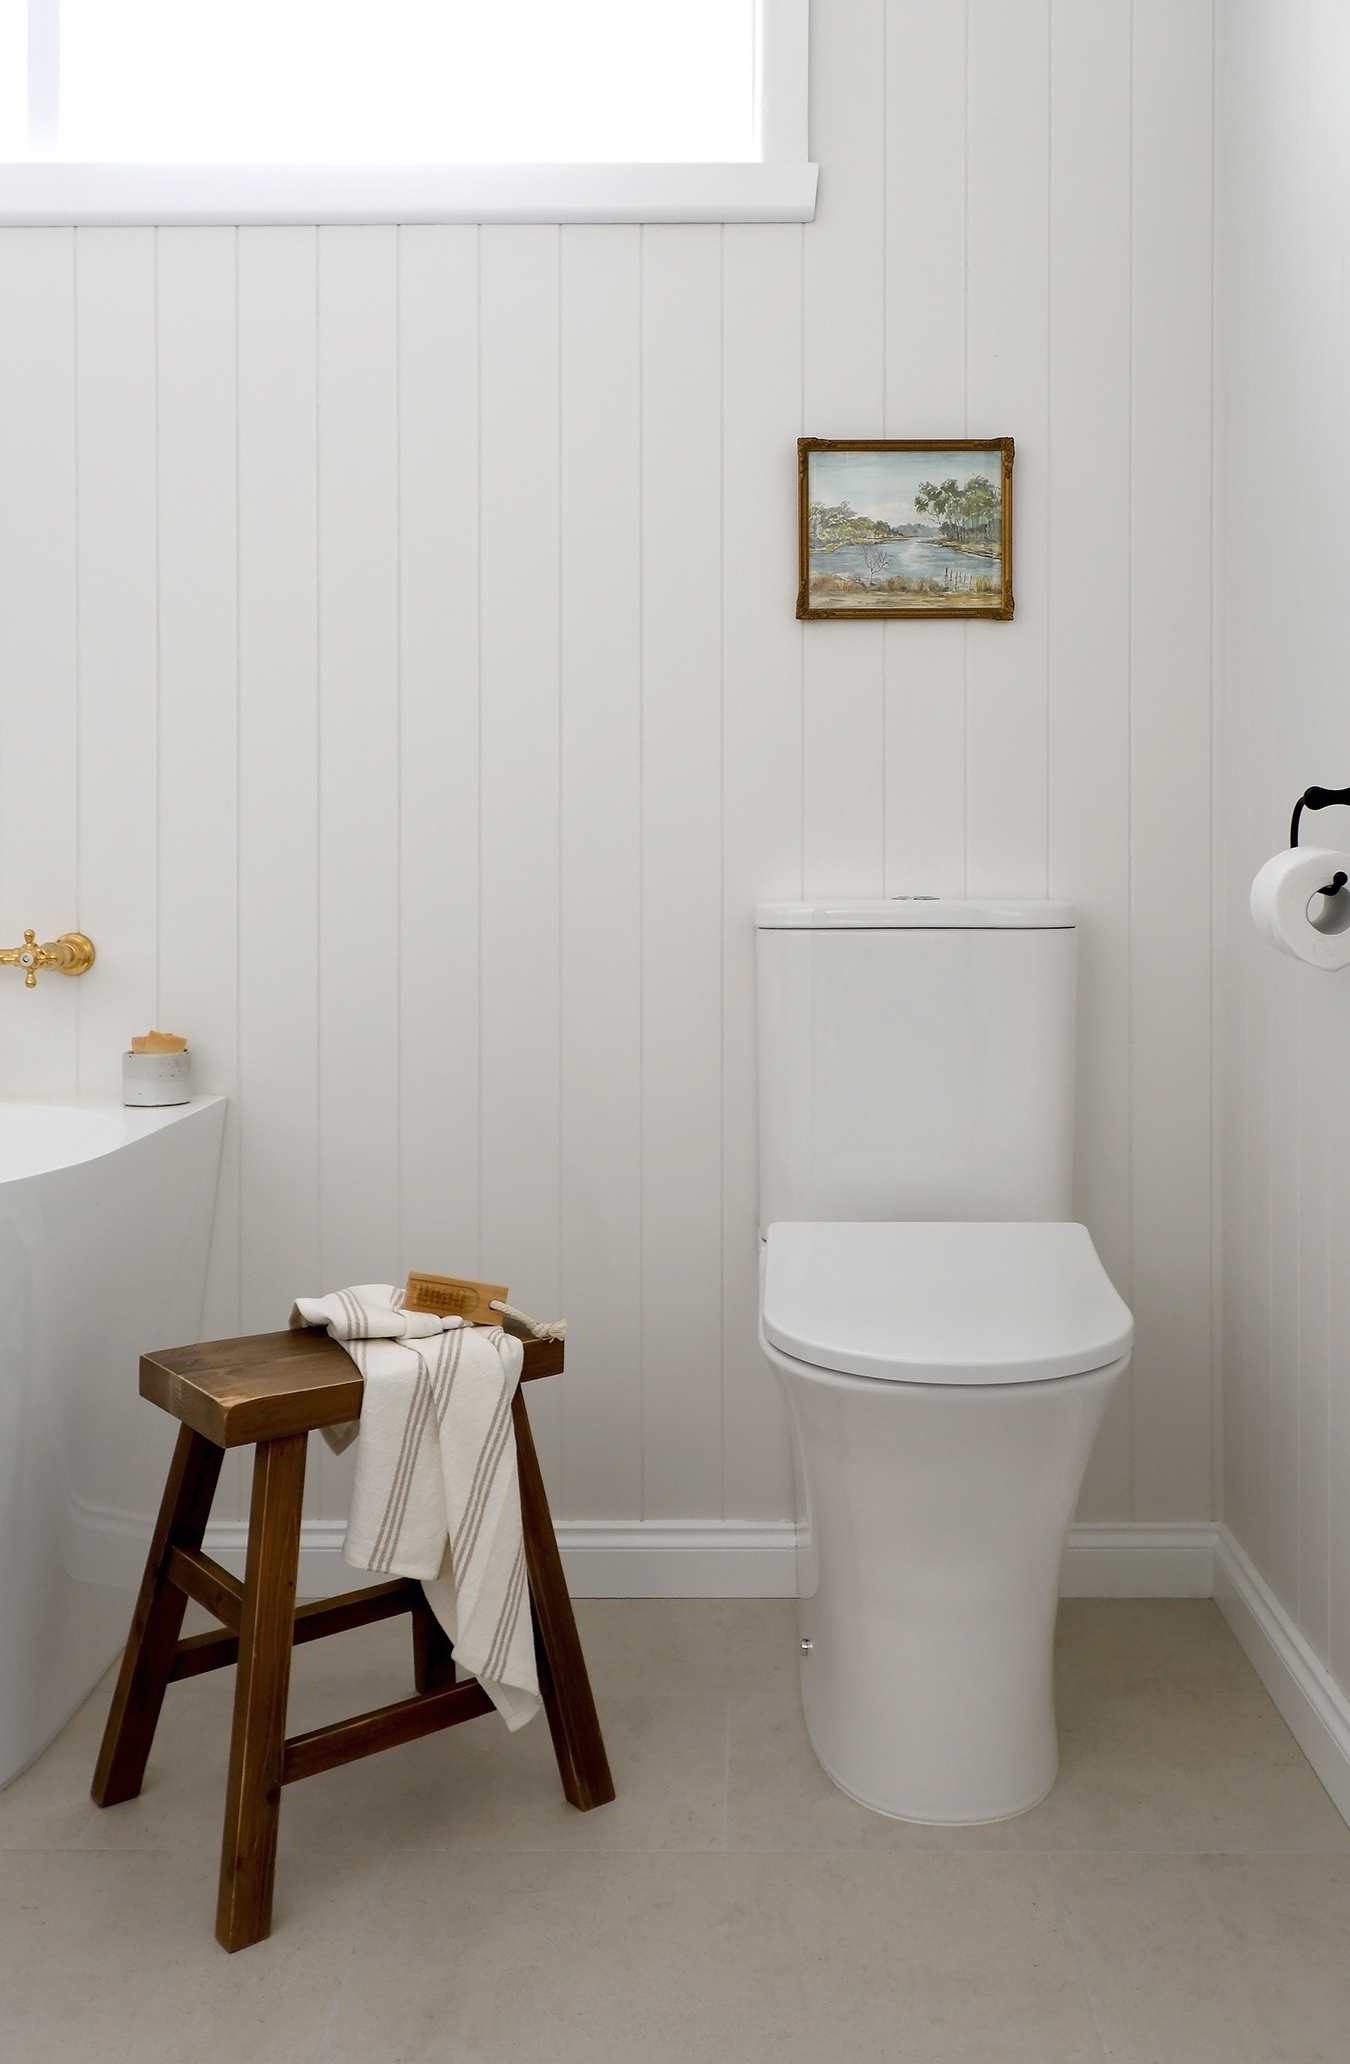
Having the vanity beneath the window was never ideal, plus my parents wanted to introduce a toilet (which does make sense because this bathroom services three bedrooms and the nearest toilet is on a different level).
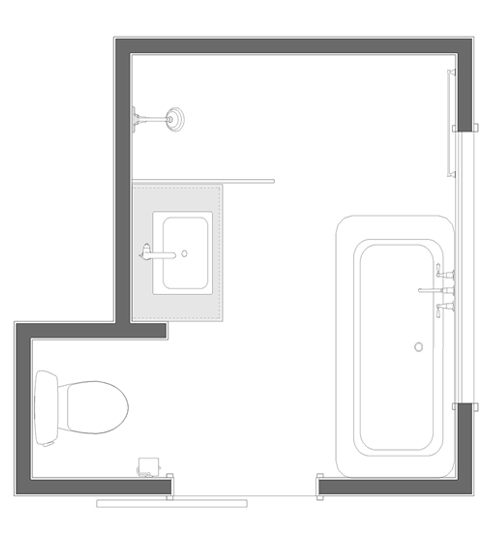
The position of the door, window and walls couldn’t be altered, so I played around with a few different layout ideas. These are just some of the options…
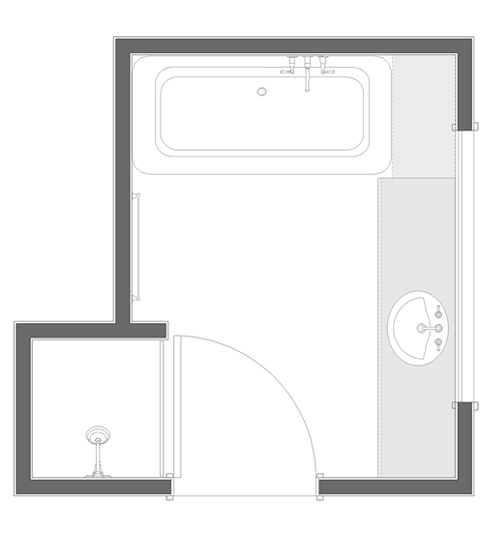
ORIGINAL DESIGN (ABOVE)
- Vanity beneath window not ideal
- No toilet
- Bath ledge a dust catcher
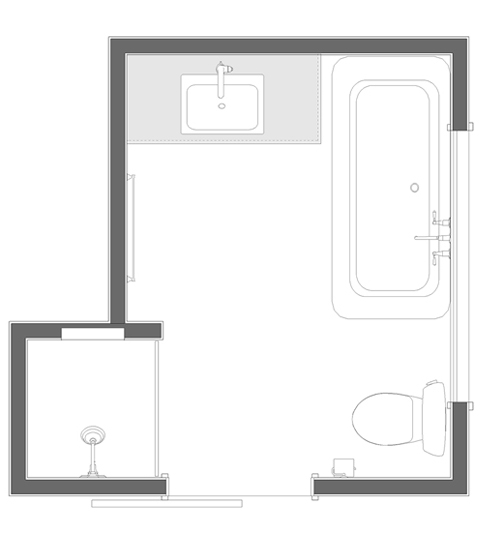
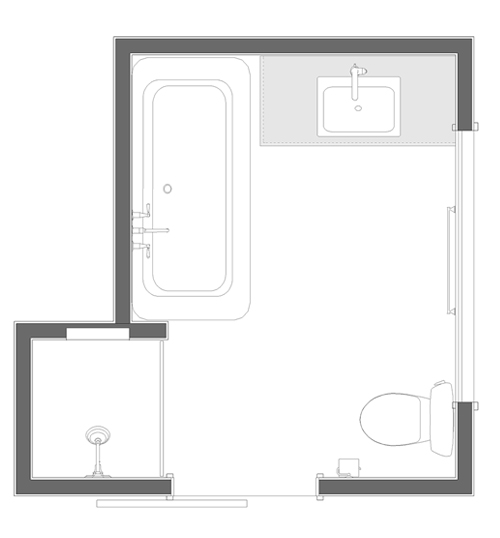
CONCEPT 1 – SELECTED DESIGN (ABOVE)
- Nice sight line to vanity and bath
- Toilet tucked in corner
- Ample floor space and good flow
CONCEPT 2 (ABOVE)
- Smaller vanity not ideal
- Distance between bath and shower glass too narrow
- Distance between bath and vanity not ideal for flow

CONCEPT 3 (ABOVE)
- Vanity positioned partly beneath window not ideal
- Smaller vanity not ideal
- Distance between vanity and shower glass too narrow
CONCEPT 4 (ABOVE)
- Alternate bath and vanity placement for Concept 1
- Sight line of bath and vanity not preferred
- Bath partly obscured by wall portion

CONCEPT 5 (ABOVE)
- Toilet quite prominent from doorway
- No sight line to vanity
- Distance between vanity and bath not ideal for flow
My initial thought was to “hide” the toilet in the shower nook, though this left limited options for the shower placement, mainly due to the window. And although it’s hard to tell from the layout plans alone, the width of the room makes circulation paths too squishy when main elements are positioned opposite one another.
After weighing up the practicalities, costs and aesthetics, the selected design came out on top.
Whilst the area beside the door seems like a prominent position for the toilet, the reality is you look forward toward the vanity and bath so it’s actually far from the first thing you see as you enter.
The next step was contemplating the style, and ultimately deciding on the selections.
Unlike the past iteration of this room, which showcased colour and pattern, I knew my mum would want to stick with simplistic neutrals. She is a conservative decorator who values longevity in design. It was really only the temporary DIY nature of the previous cosmetic refresh, paired with my “gentle” encouragement, which lent her the courage to go somewhat bold.
In keeping with the overall feel of my parent’s house, a light and airy scheme with a balance of classic and contemporary was the way to go.
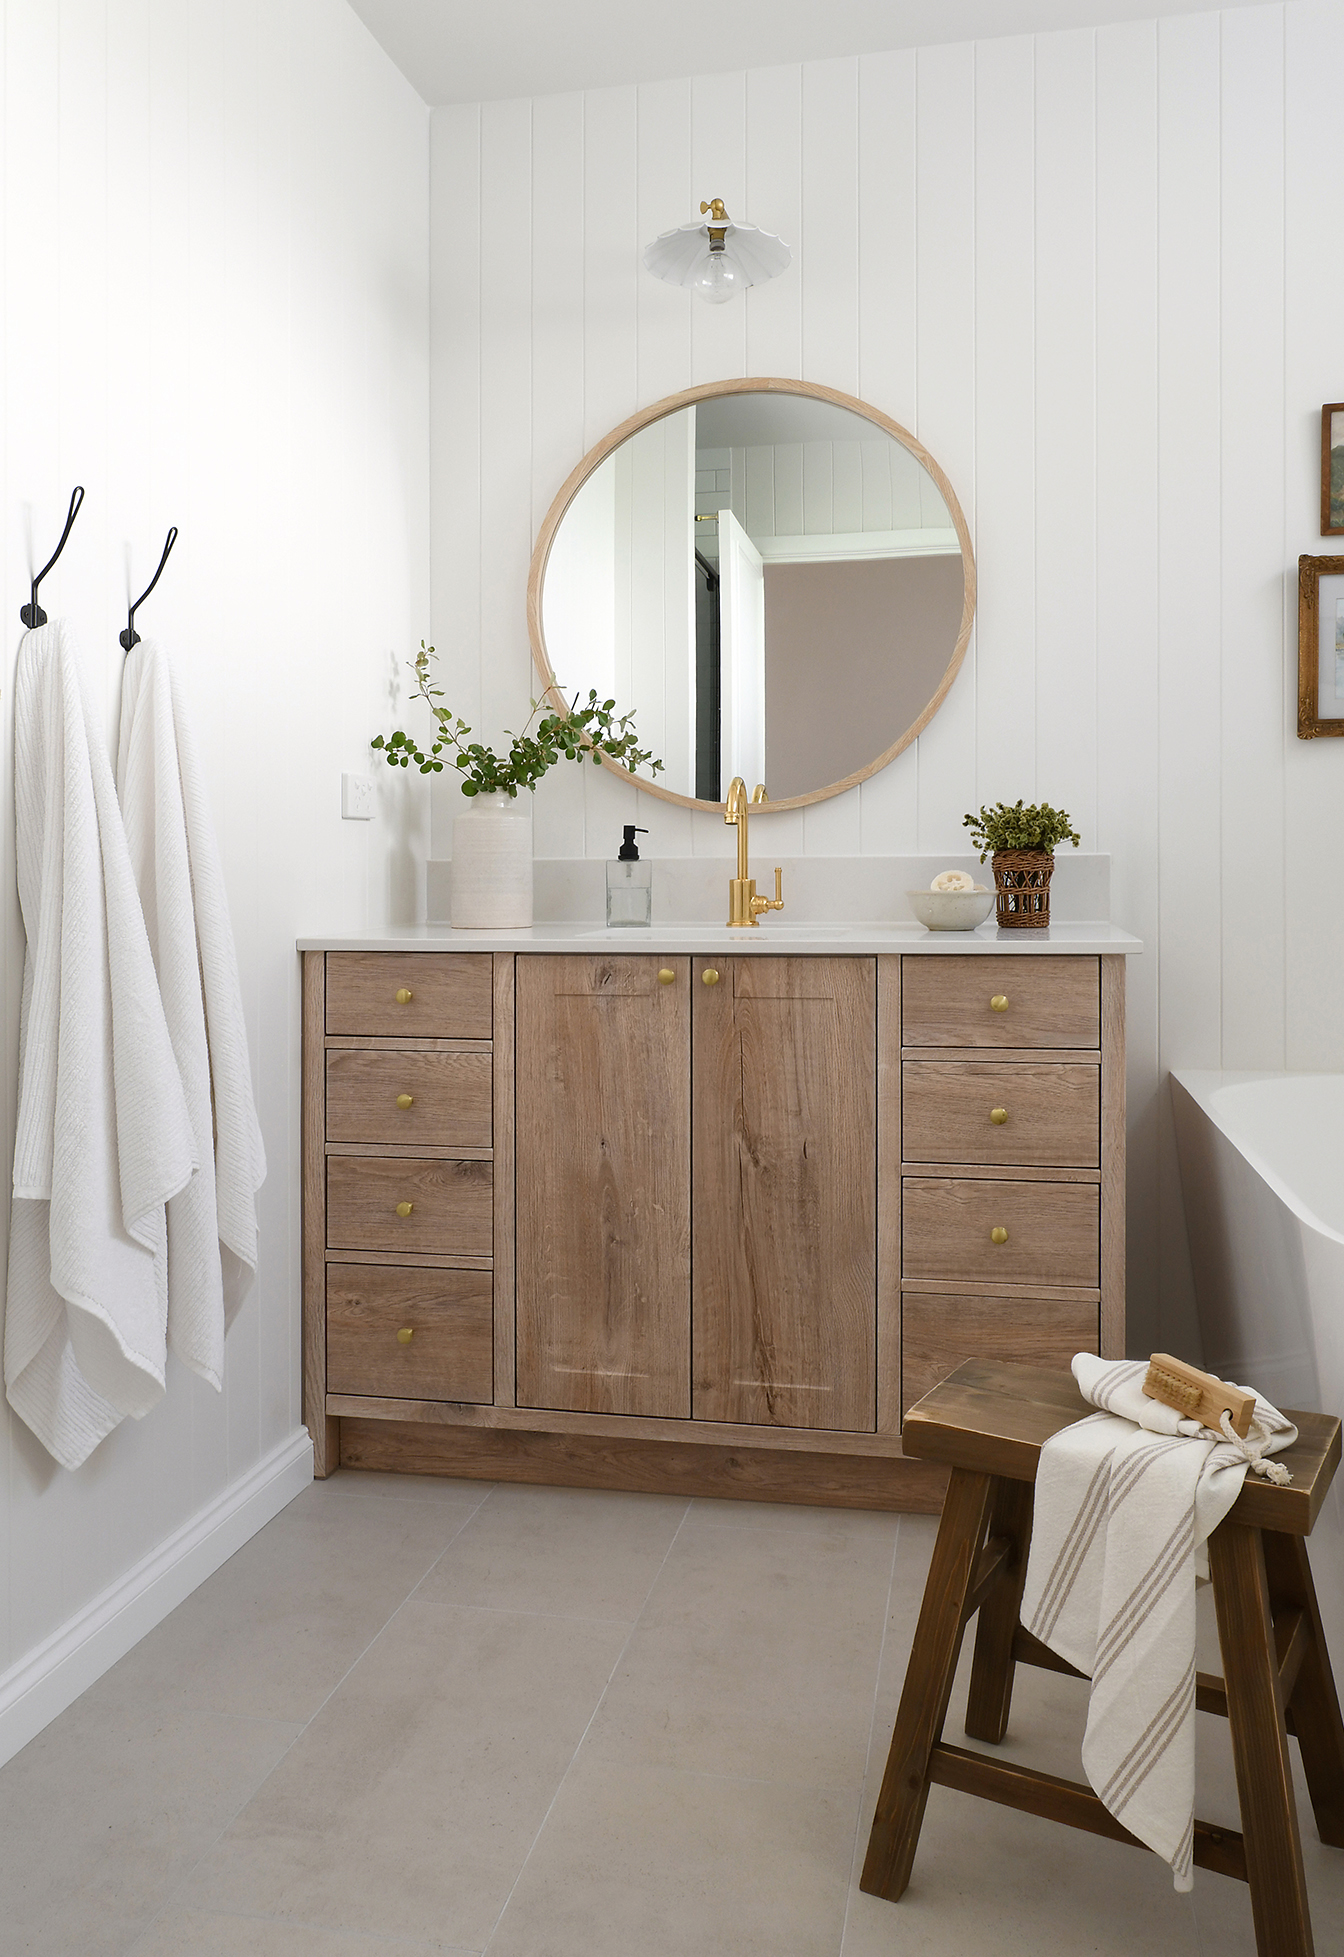
We chose warm whites, earthy materials, mixed metals and timeless elements for a crisp and welcoming vibe…

Although nothing we selected was super expensive, the tapware and vanity were items my parents were willing to spend a little bit more on. This was balanced with affordable products elsewhere. Plus the use of wall panelling in place of floor to ceiling tiles, which is a much cheaper alternative. So, whilst I wouldn’t call it a super budget savvy reno, it could easily have cost loads more.
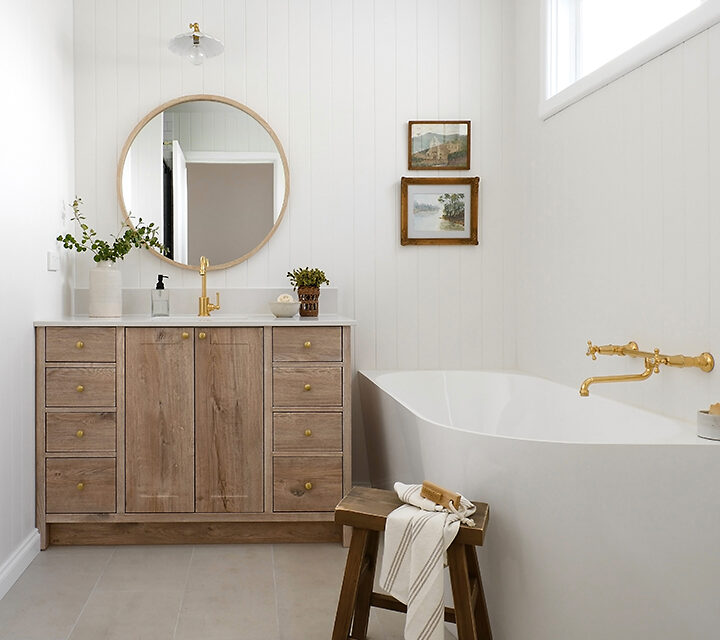
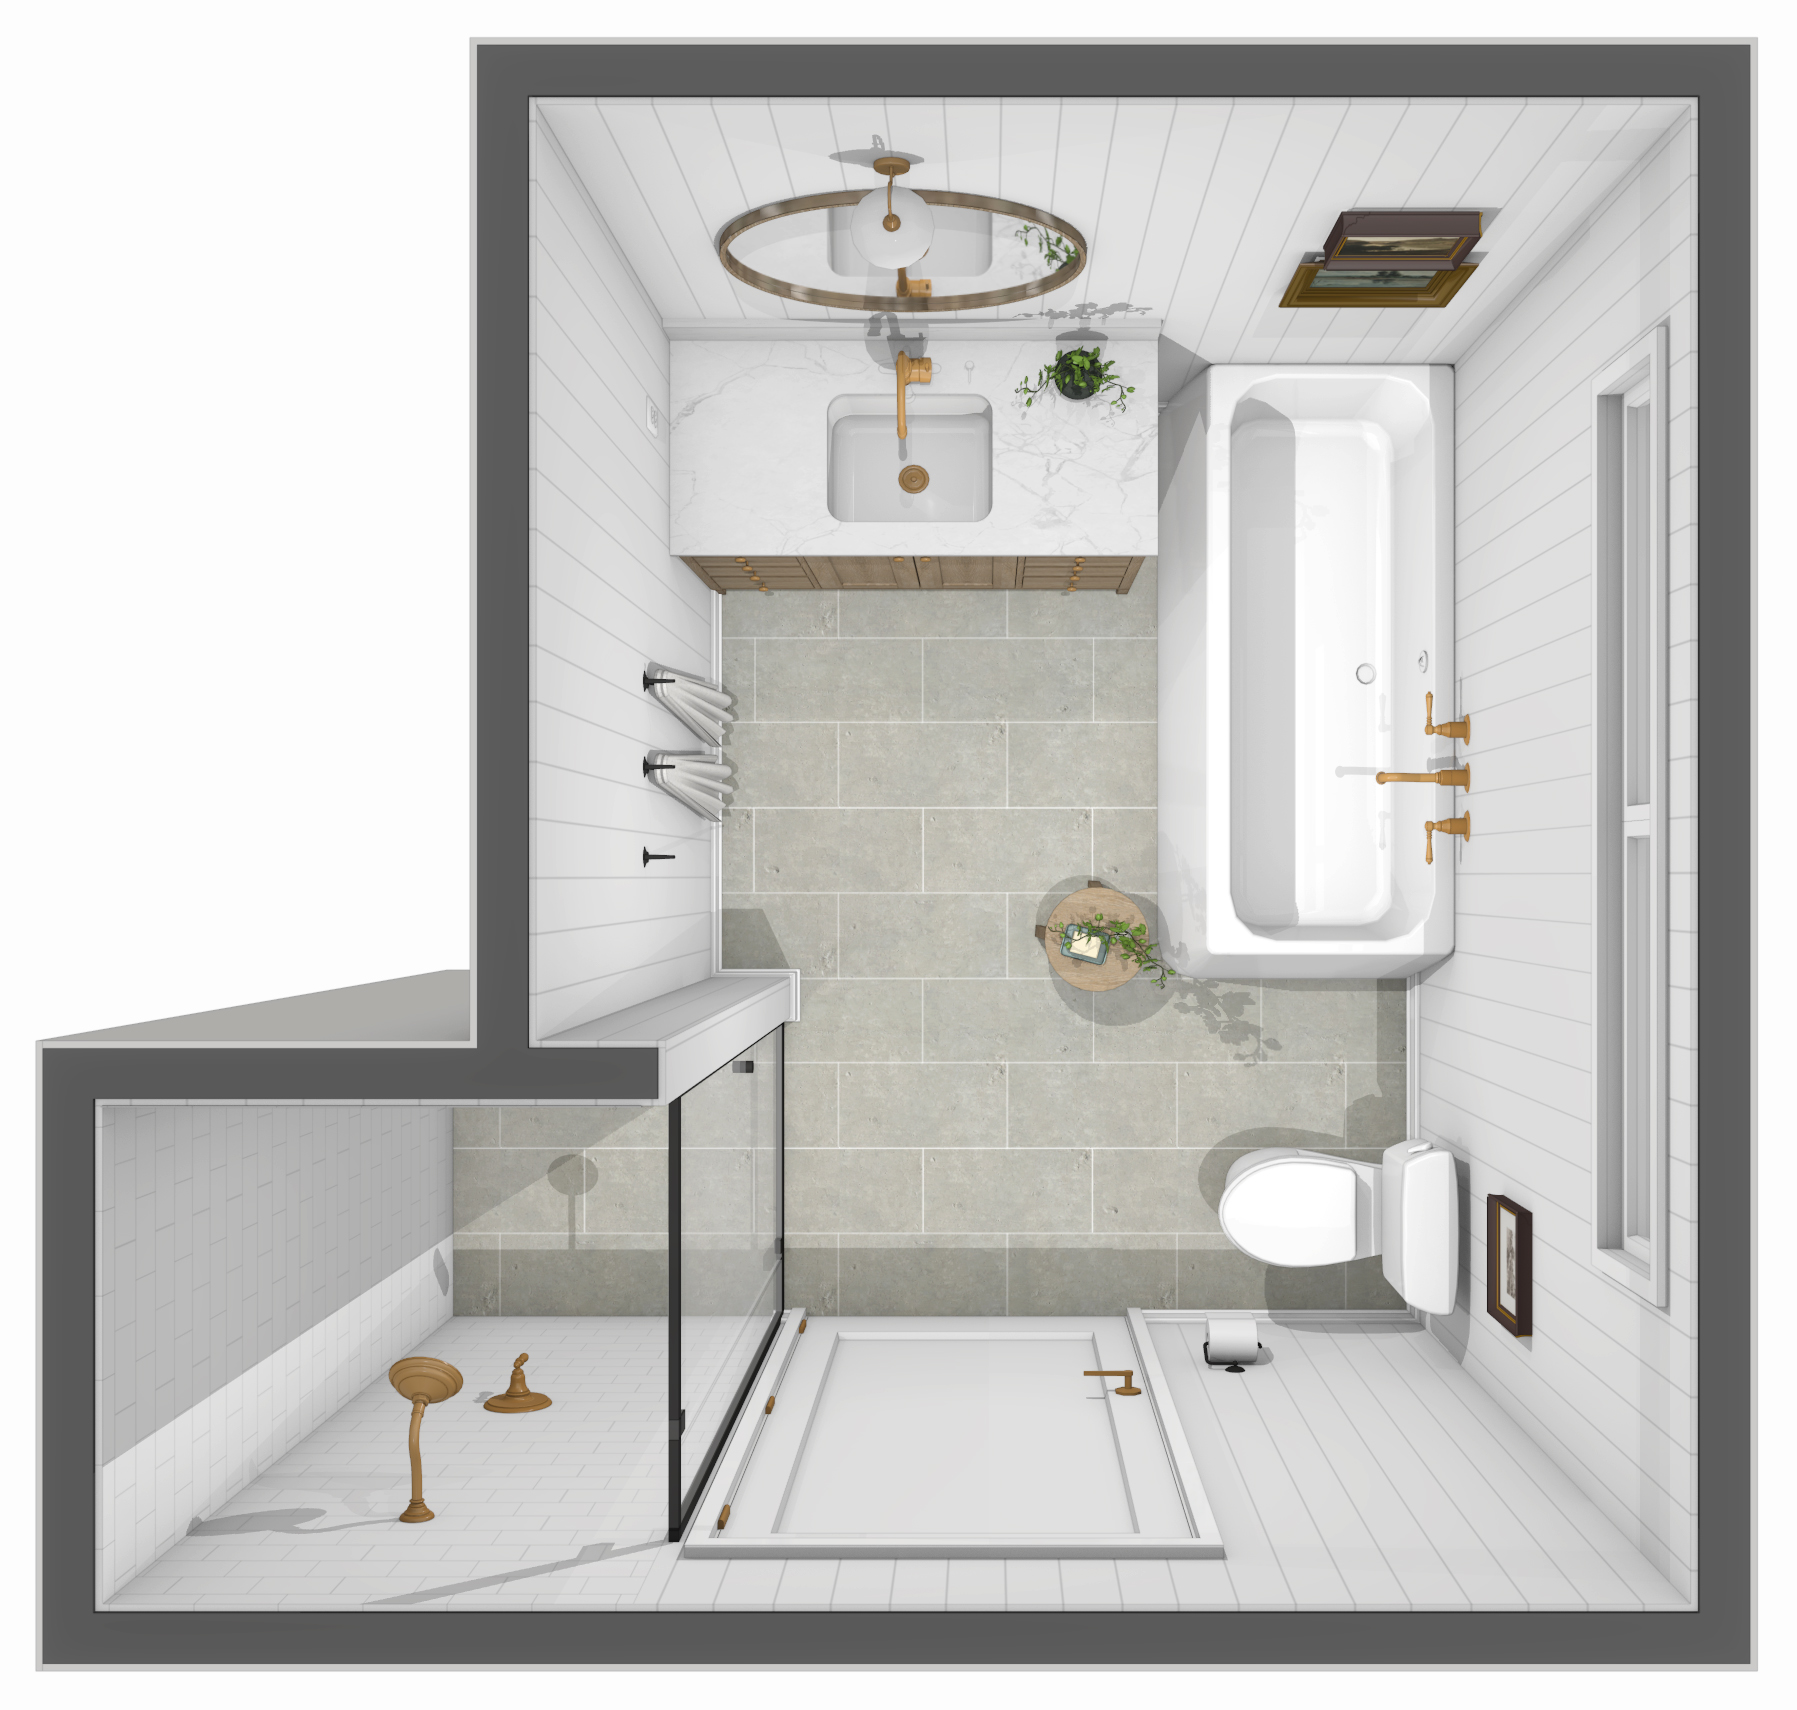
And here’s how everything came together…
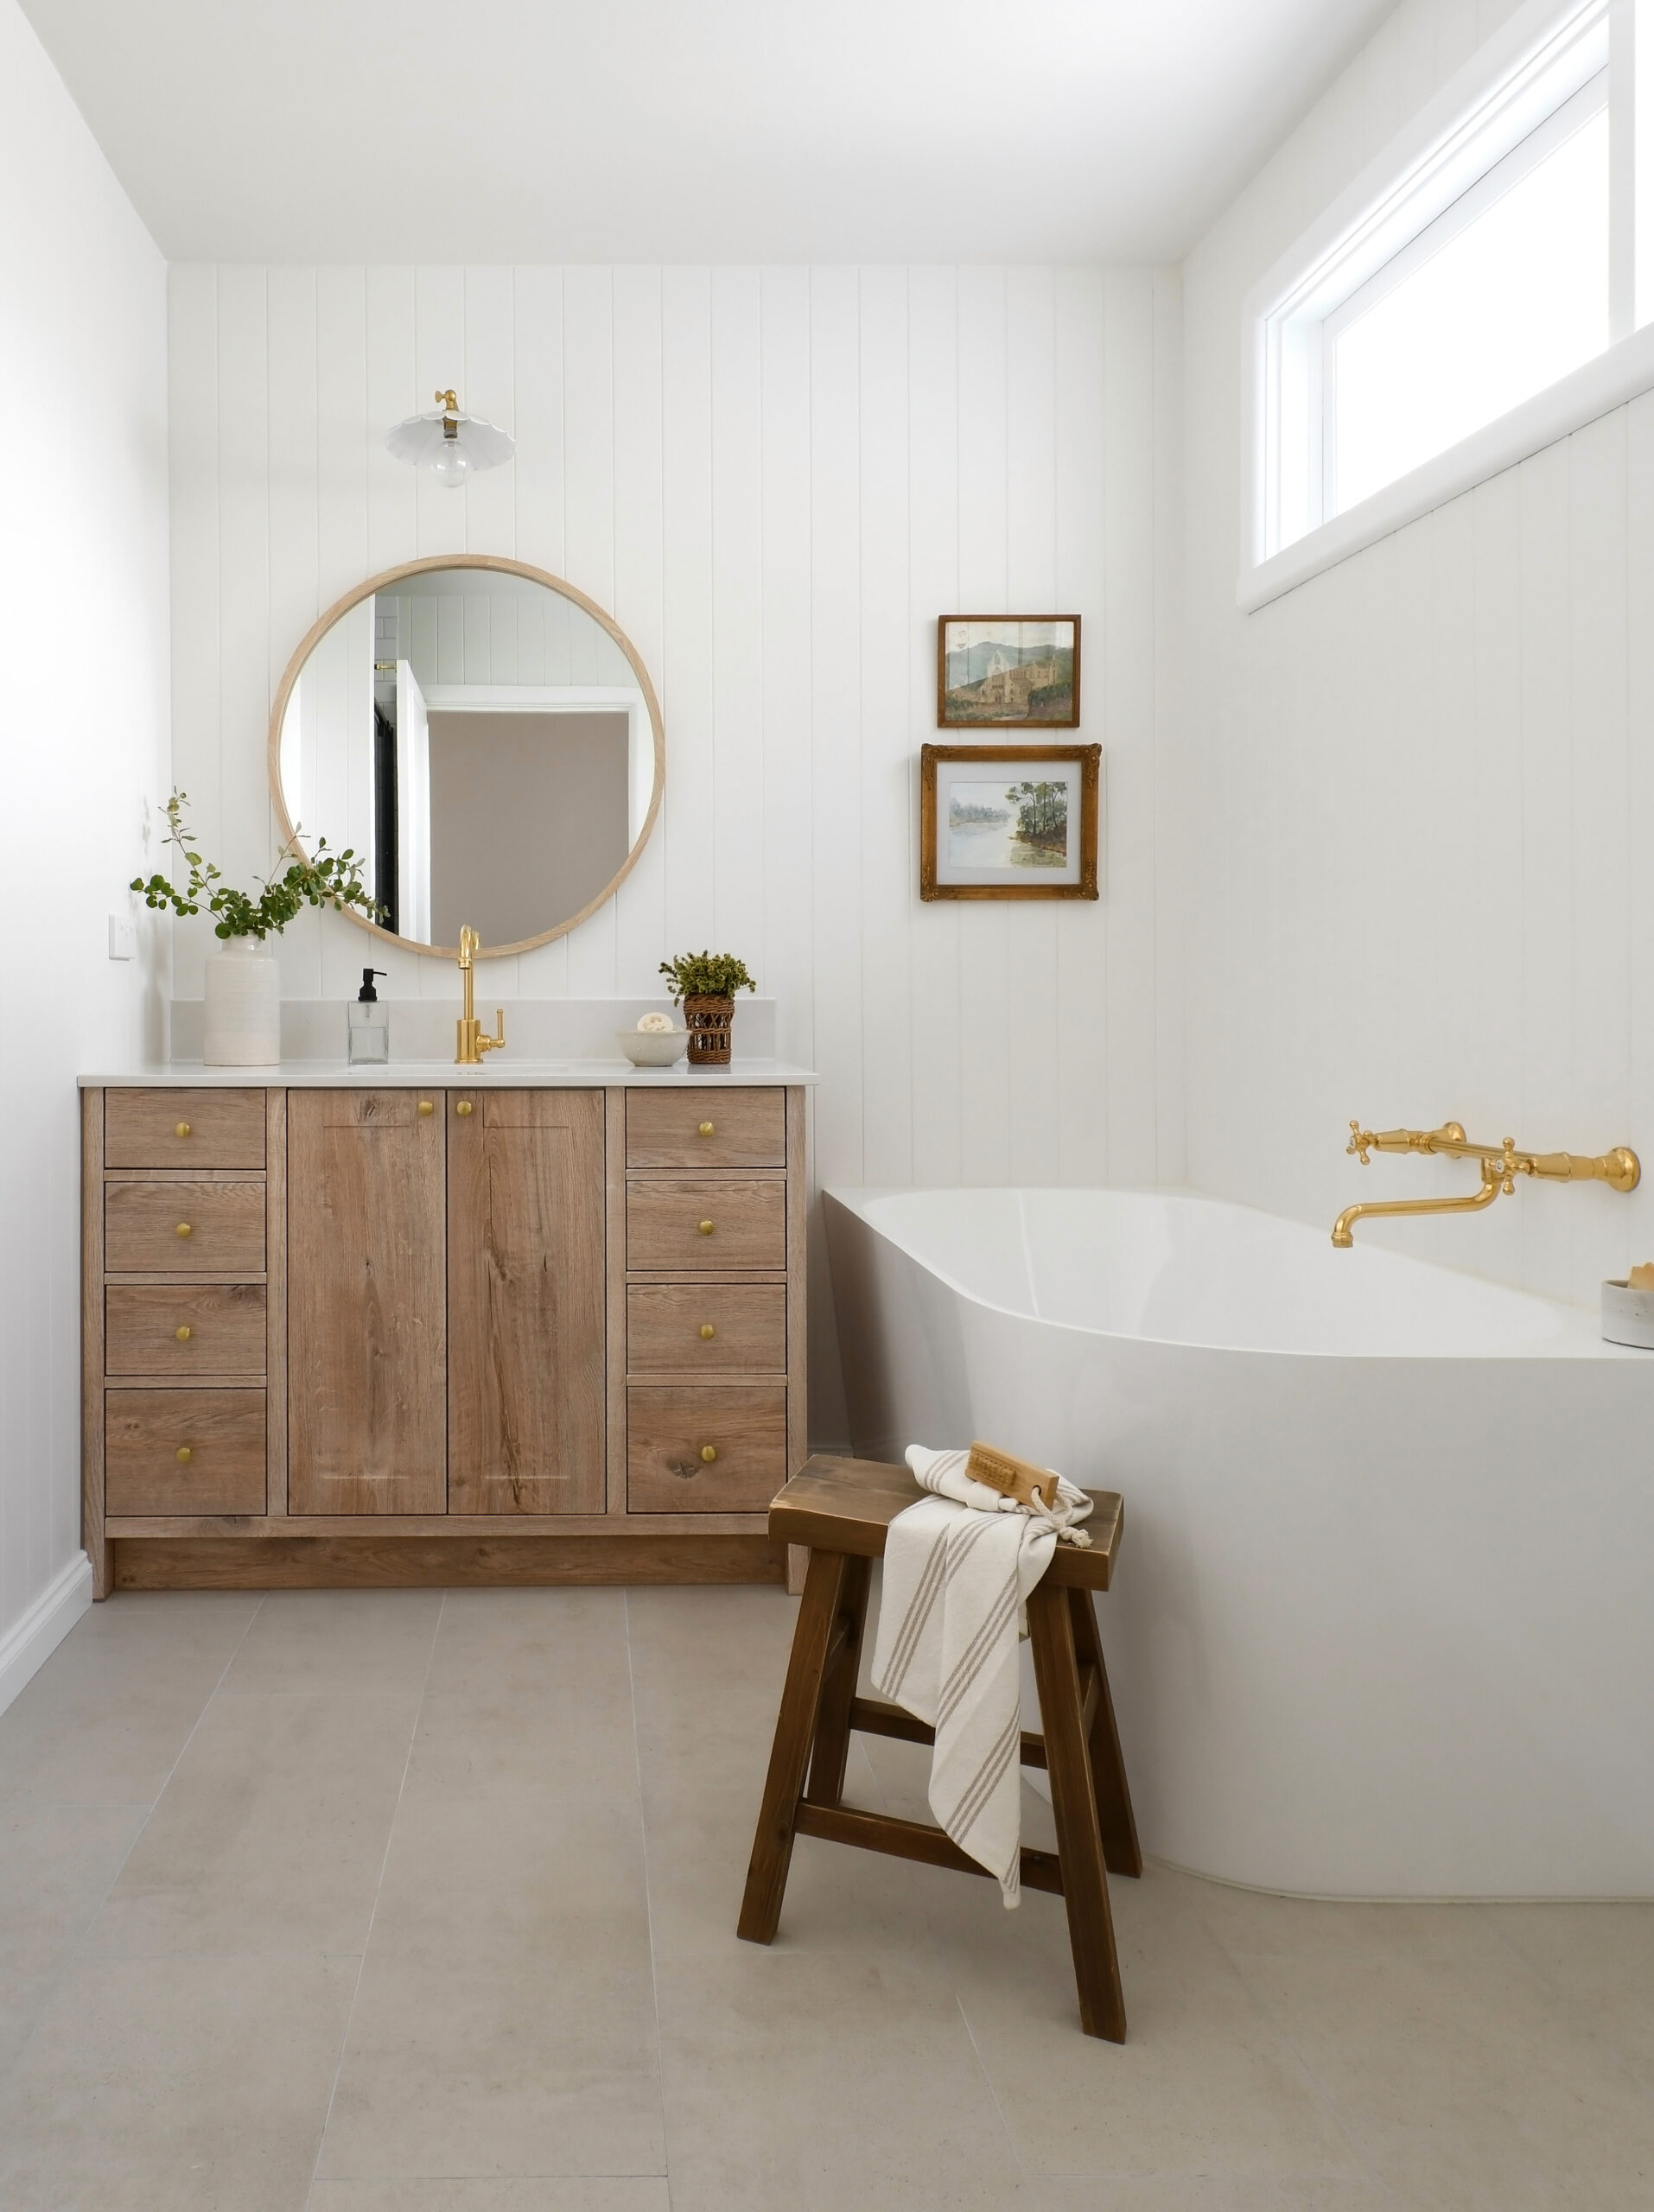
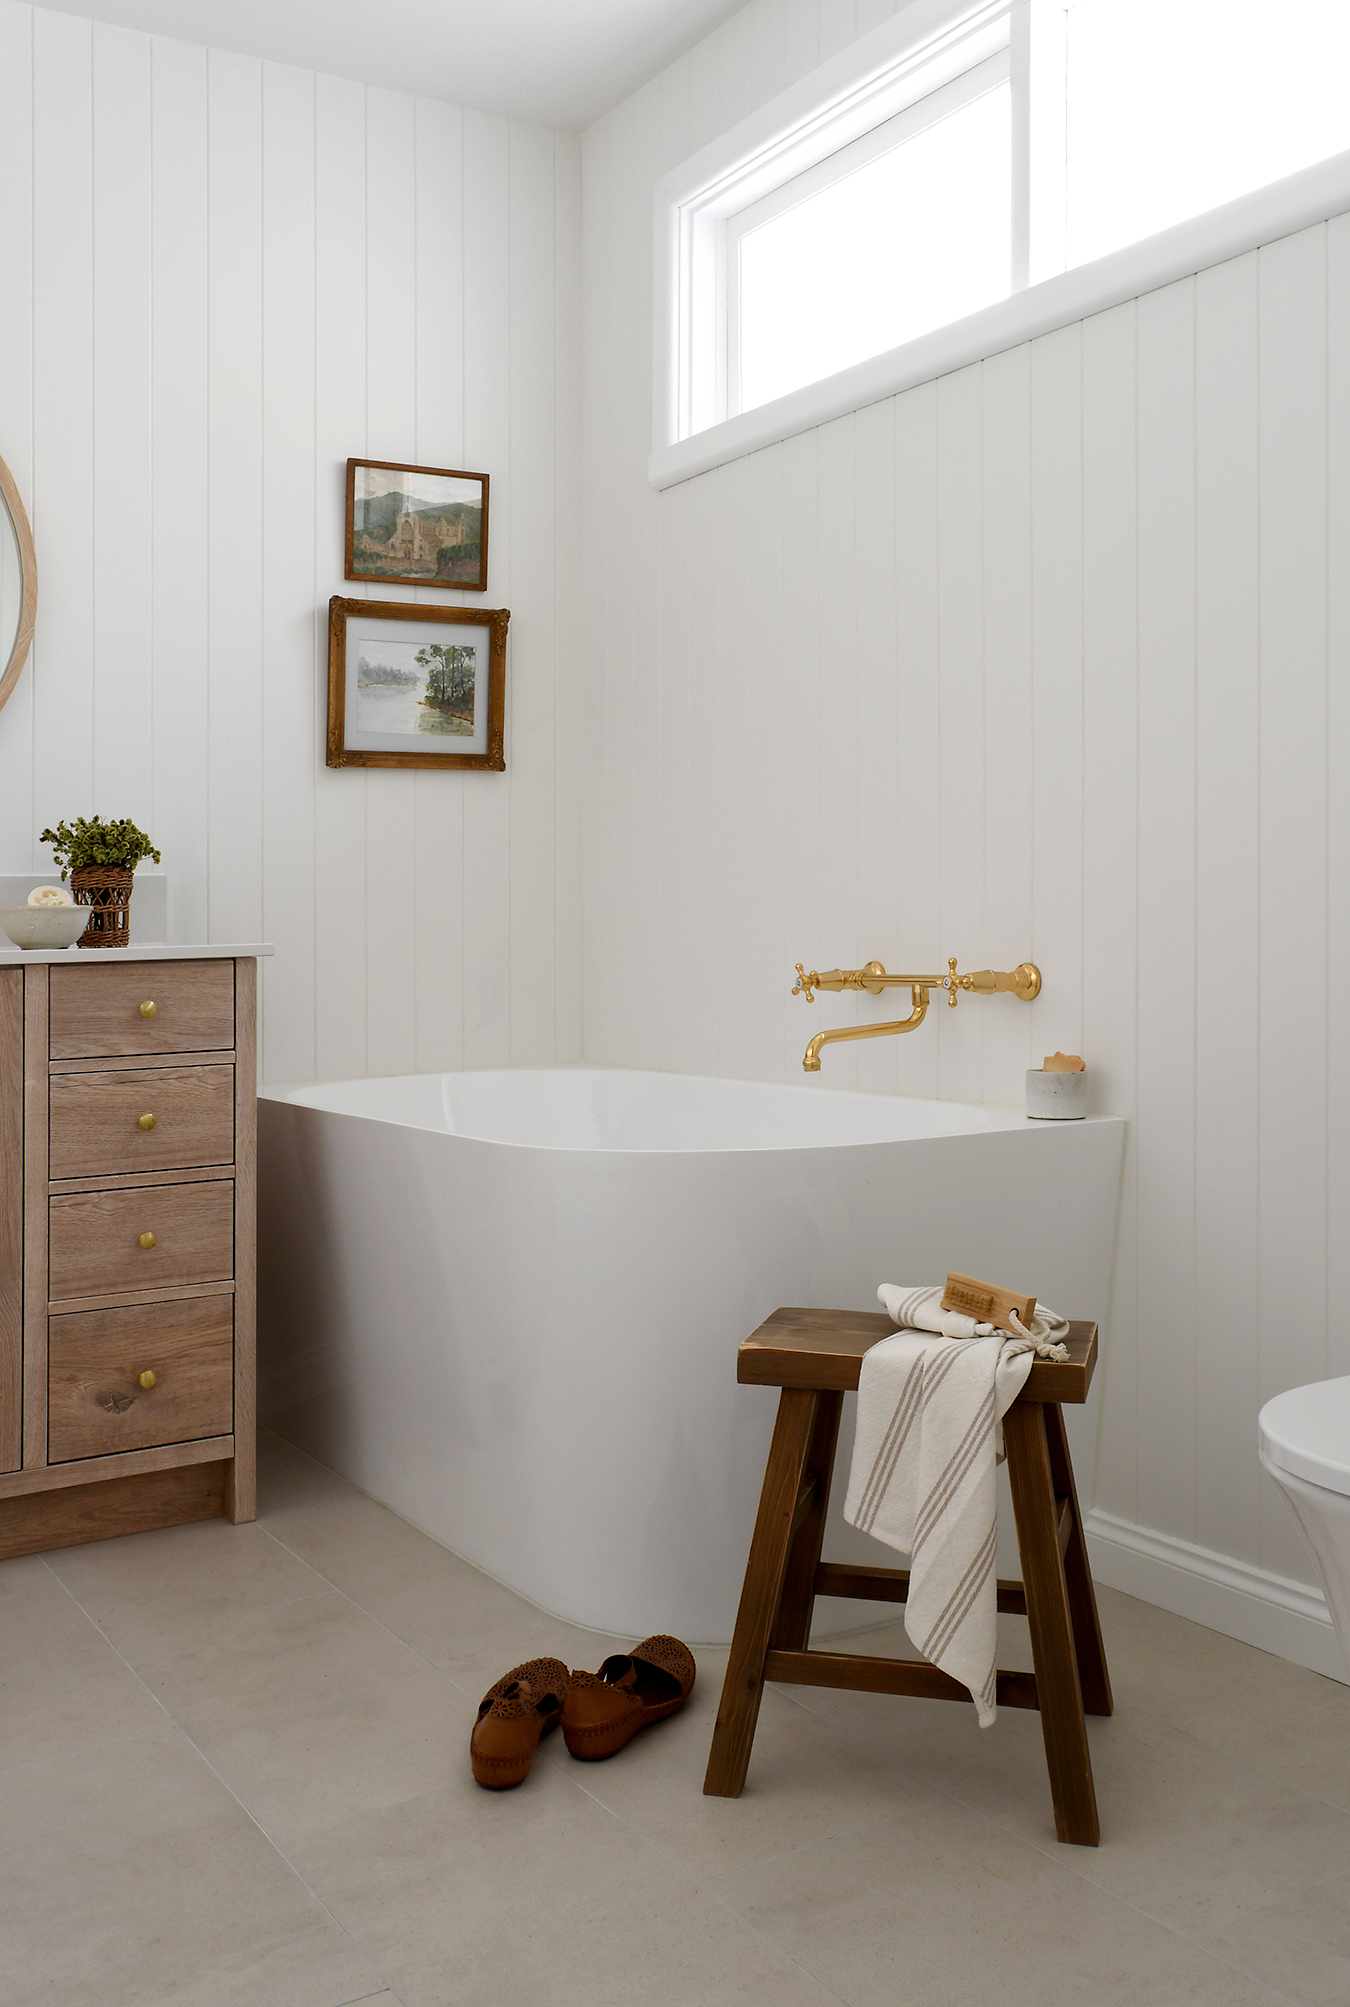
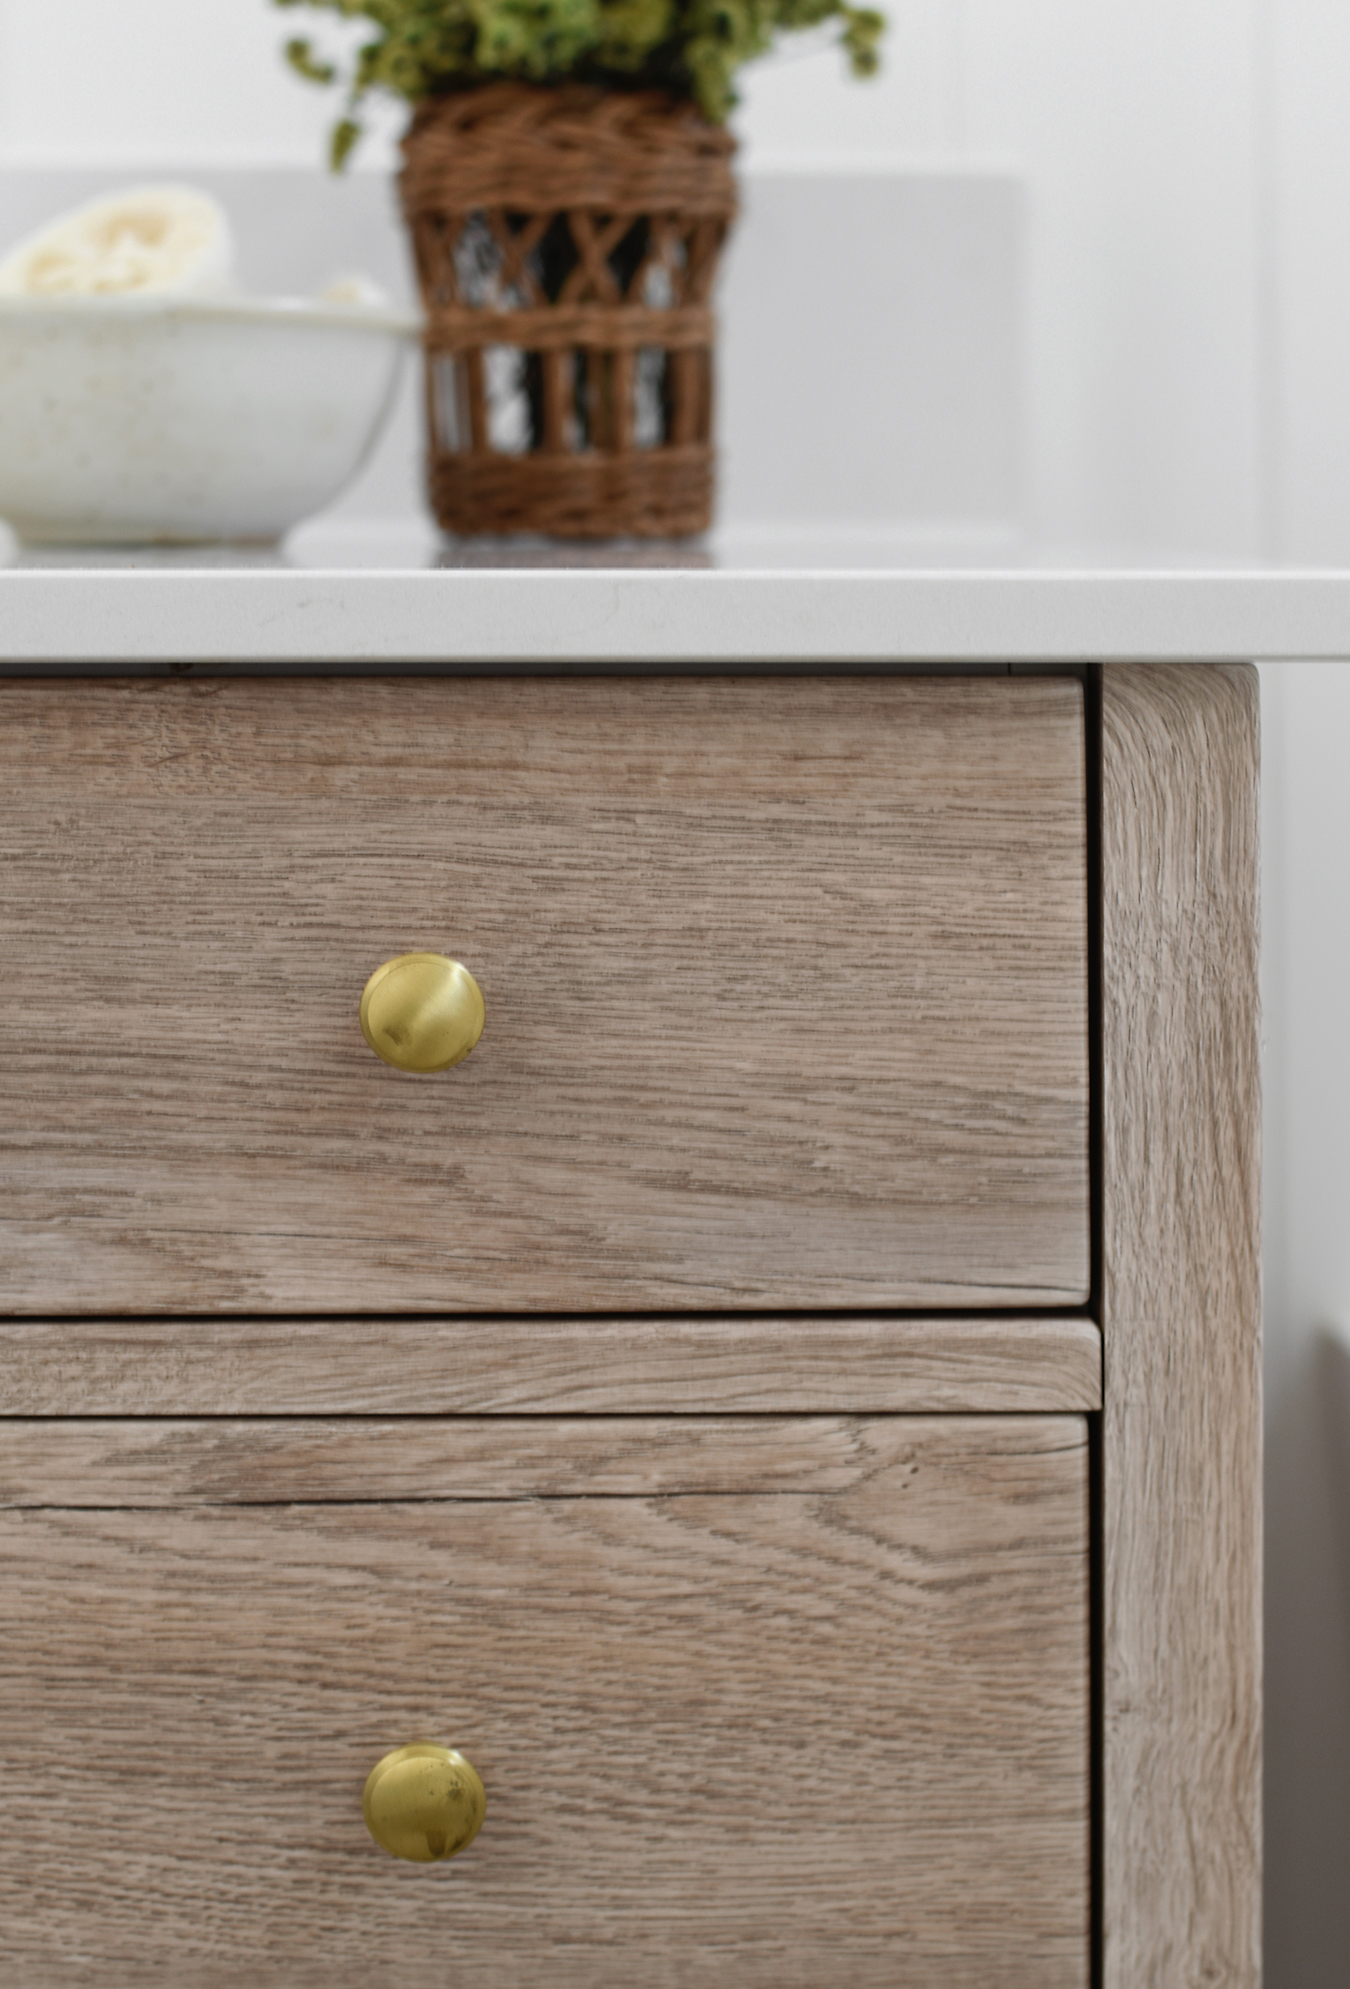
I really wanted to repurpose a vintage cabinet for the vanity, and whilst it would have saved us money, my parents weren’t keen on the idea. I ended up designing a custom piece which looks like timber though, to keep anyone from needing to sell a kidney, is actually vinyl wrapped.
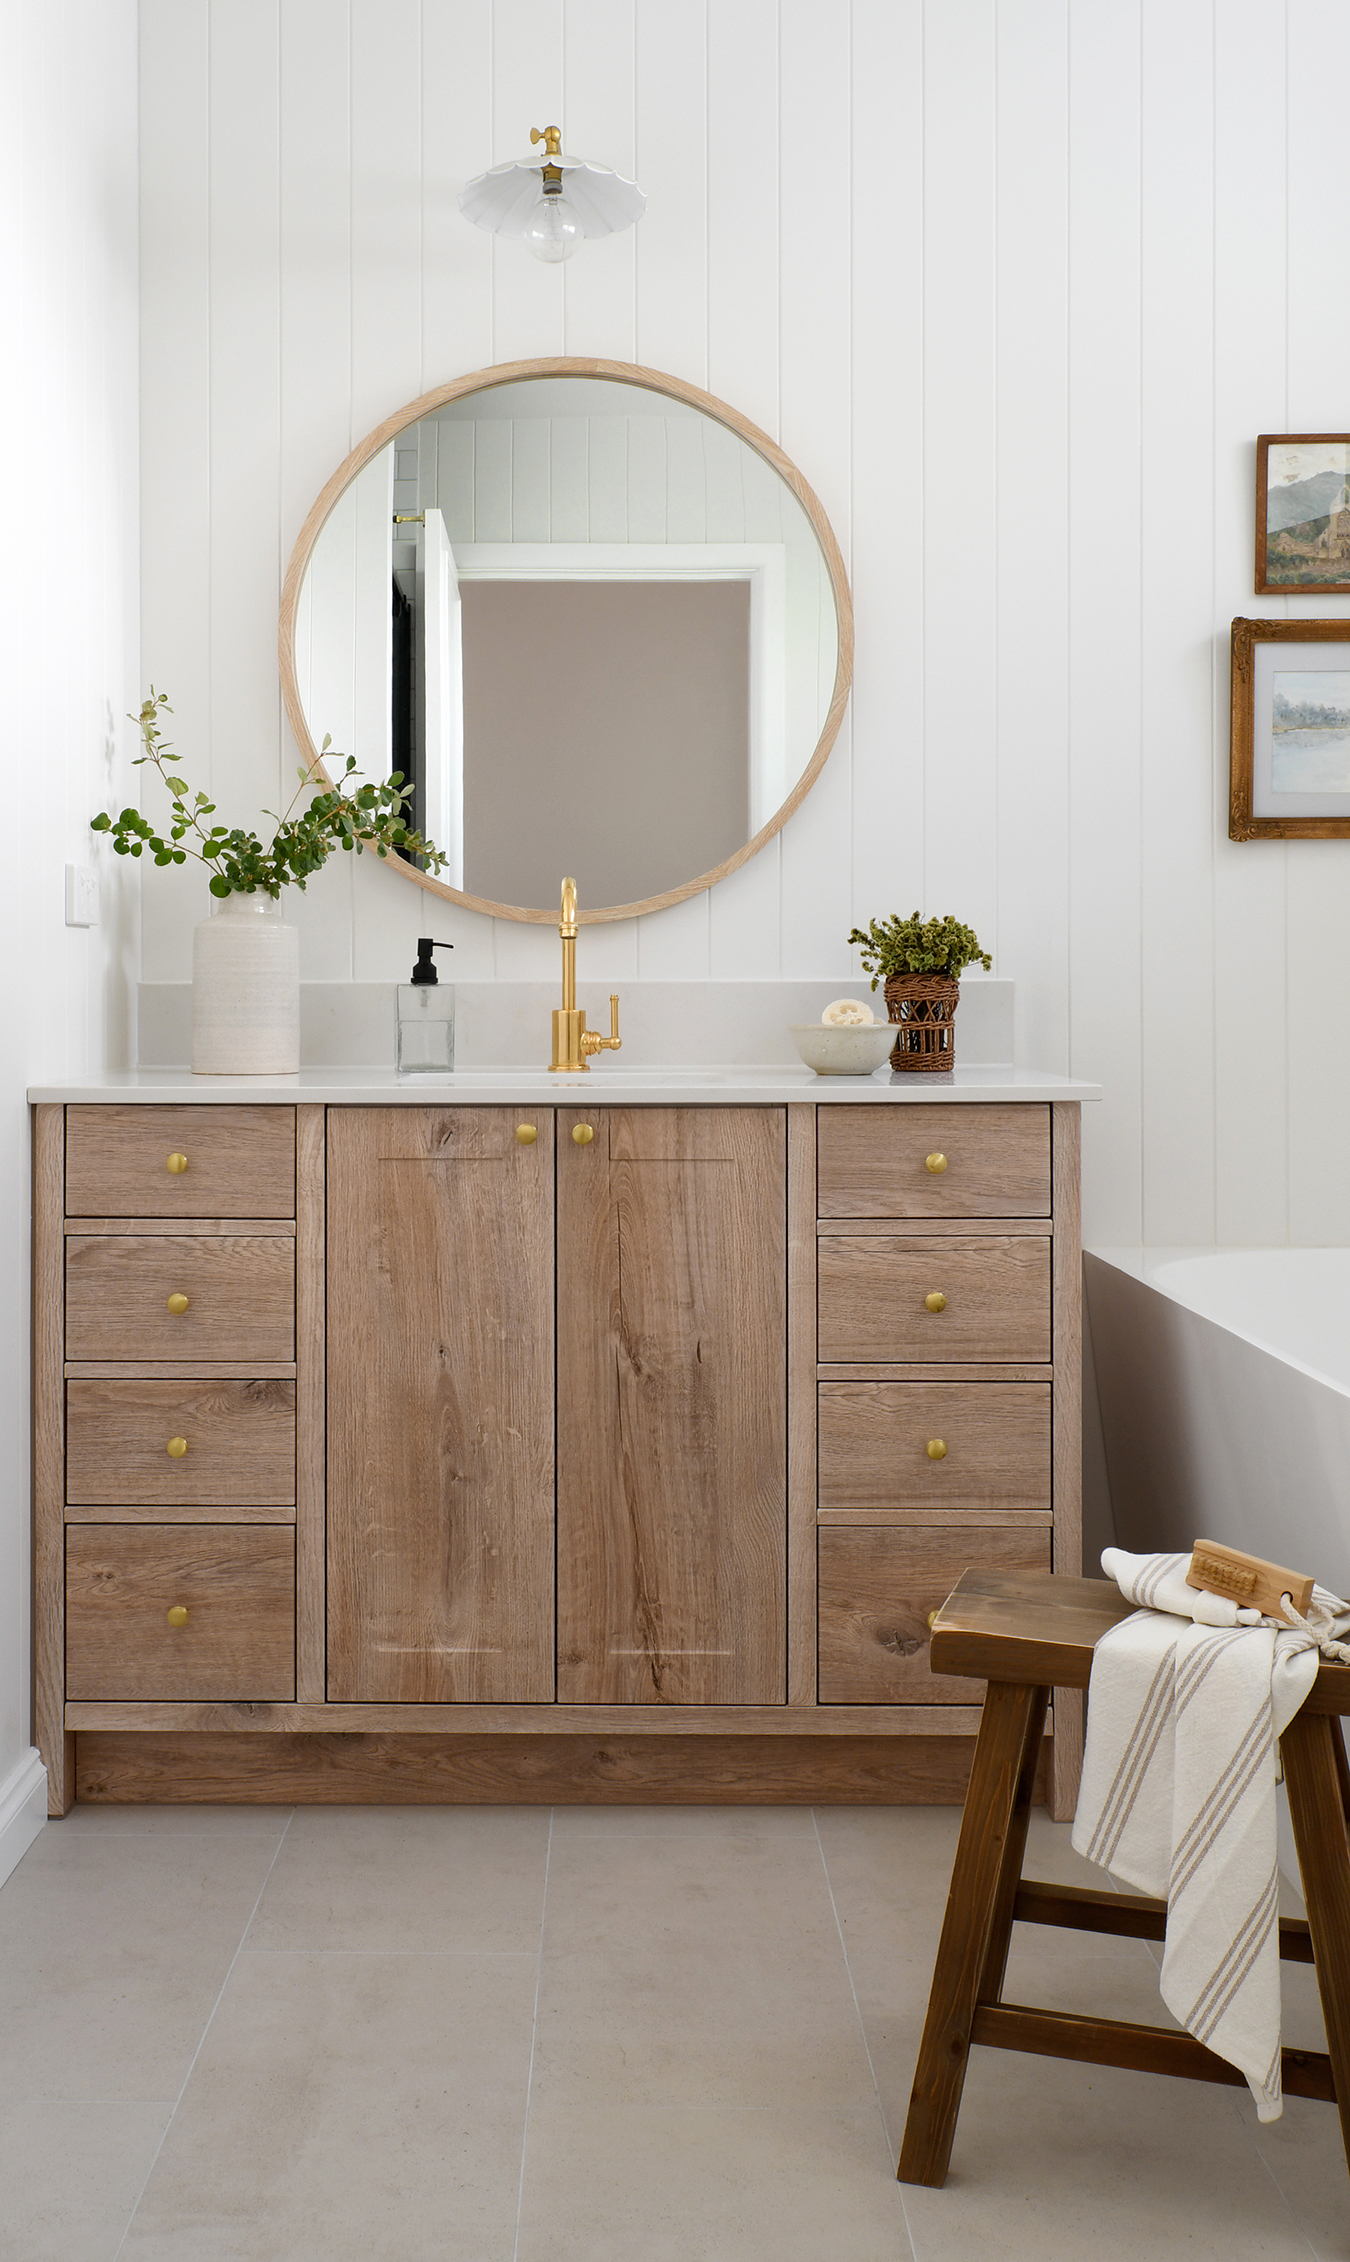
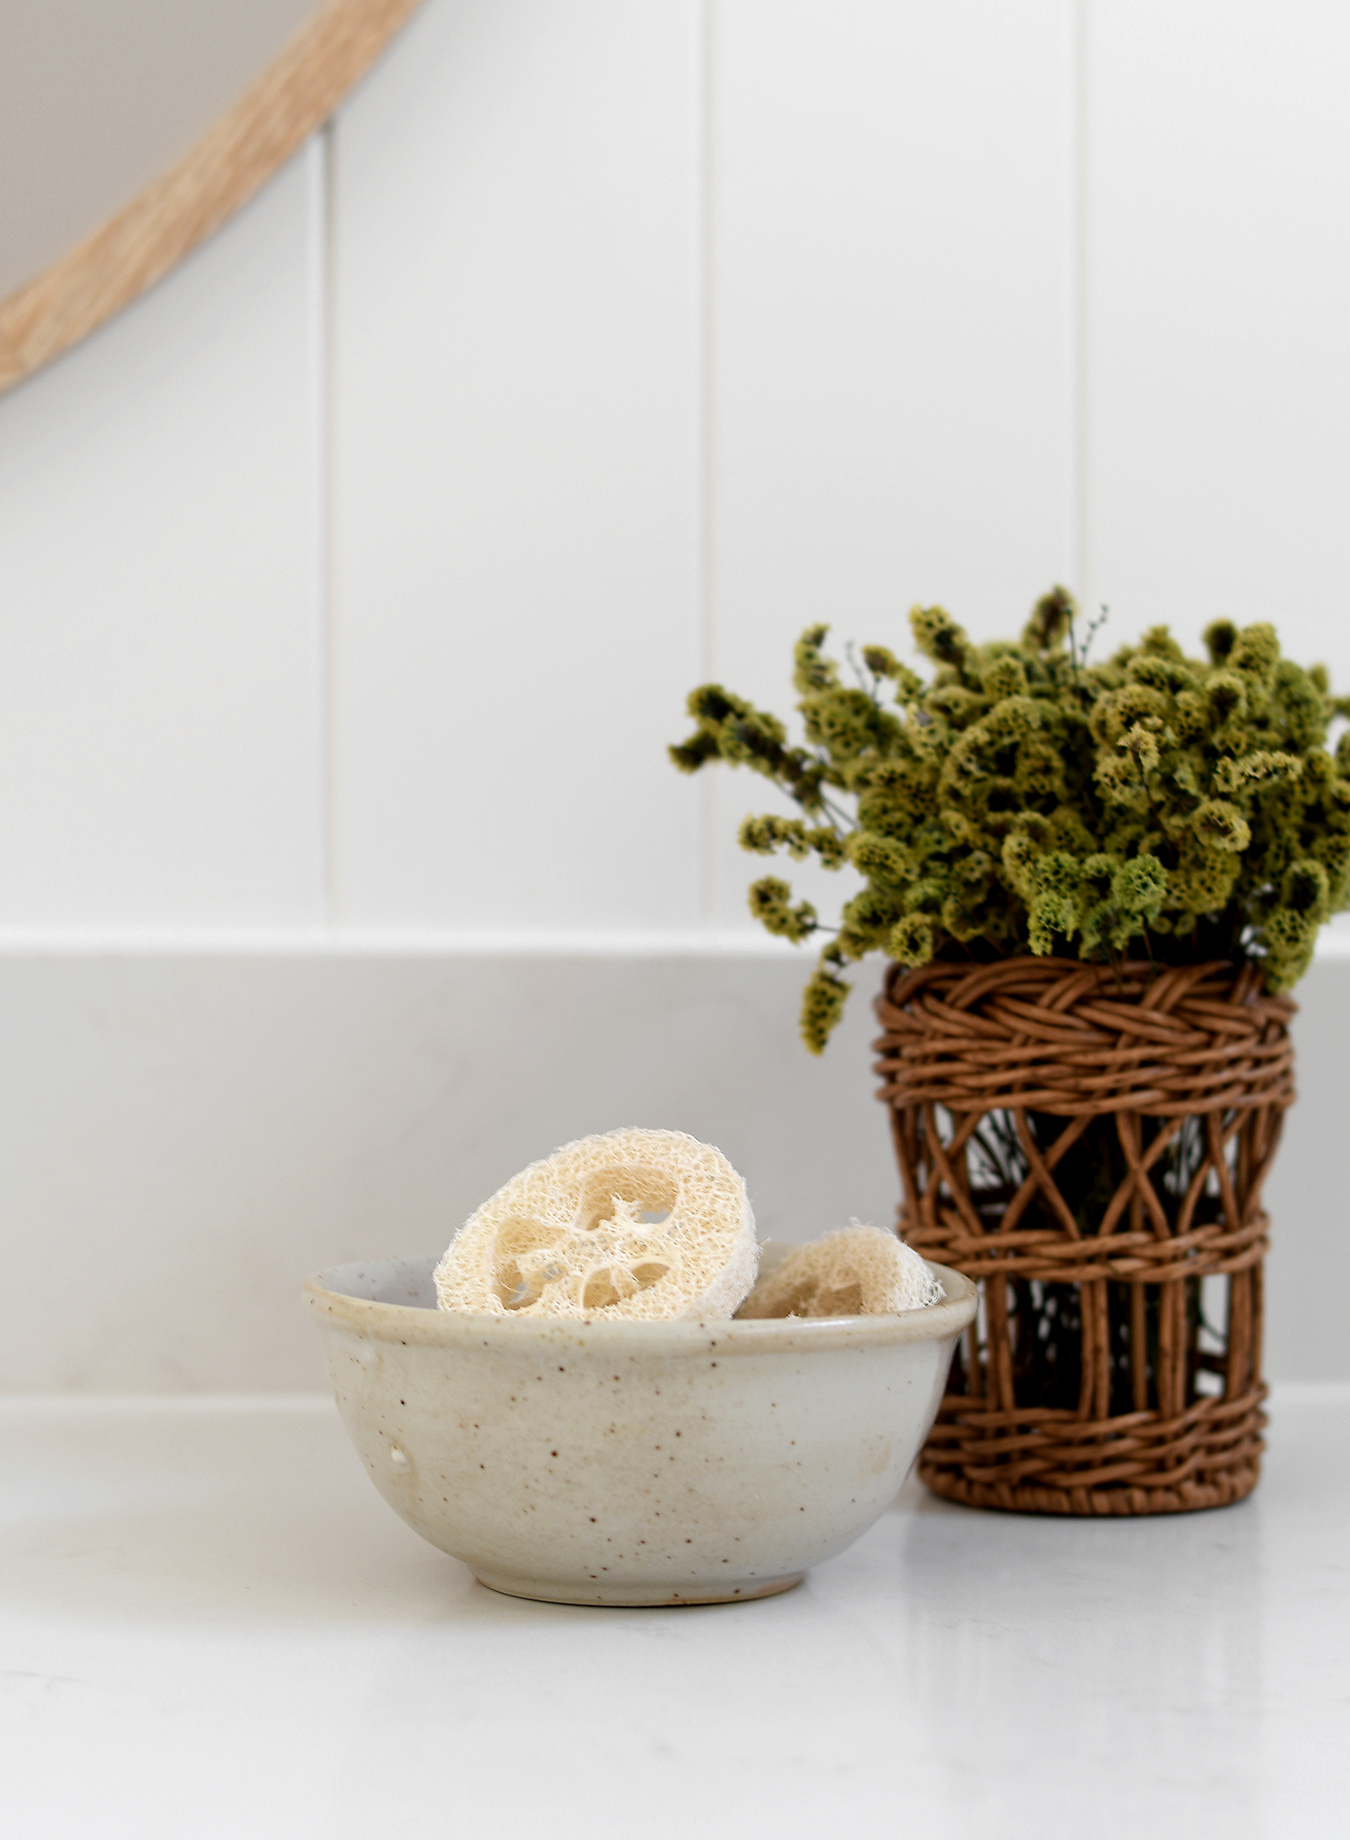
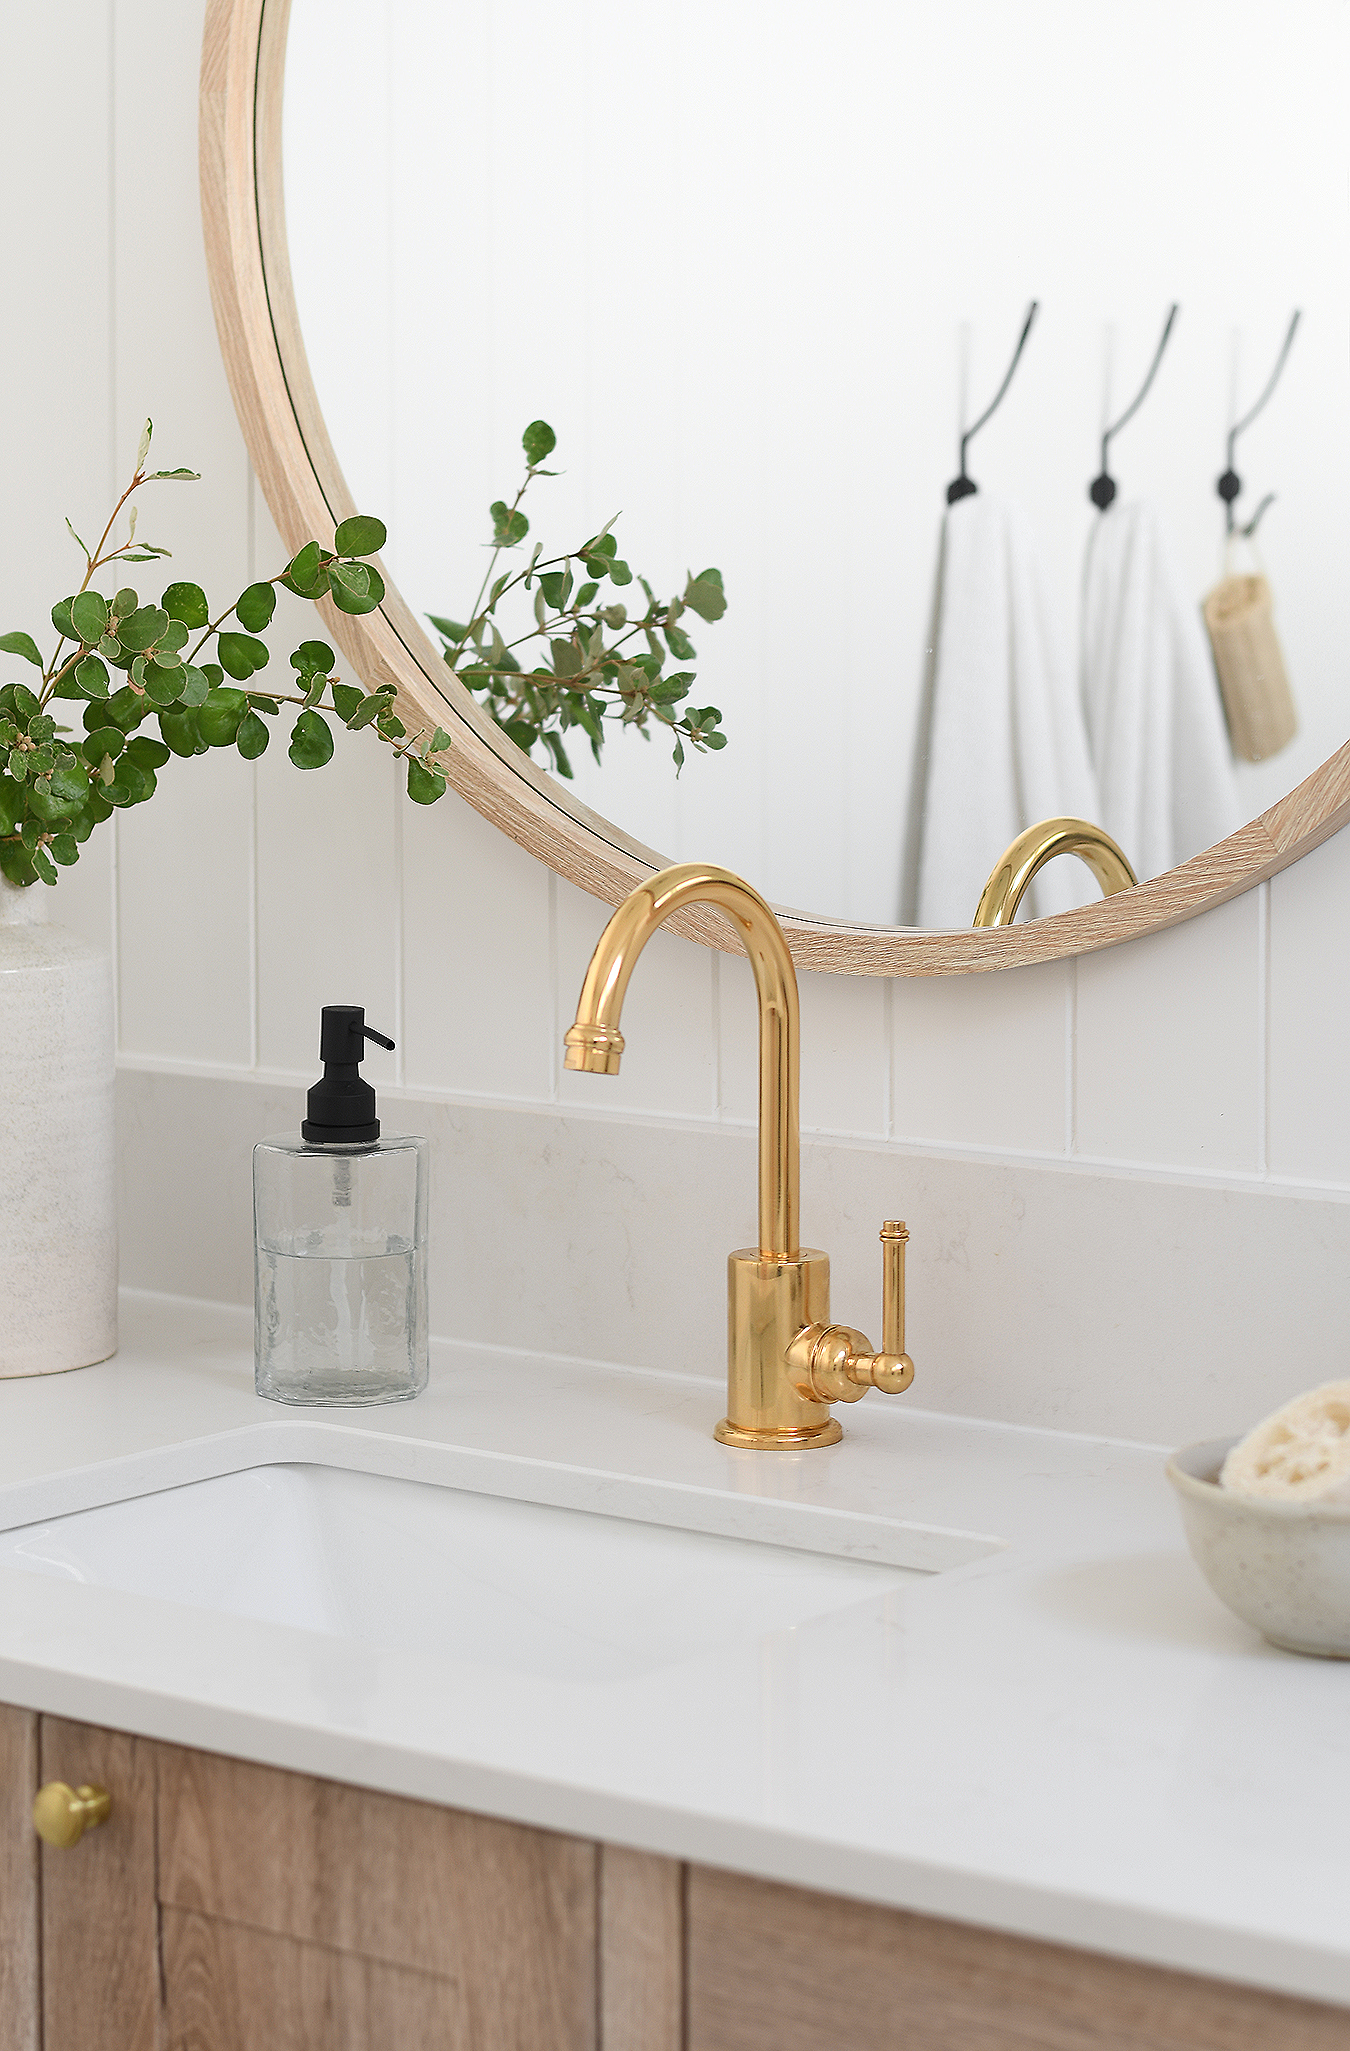
We undermounted the basin and extended the stone up the wall to create a little backsplash for a tailored finish.
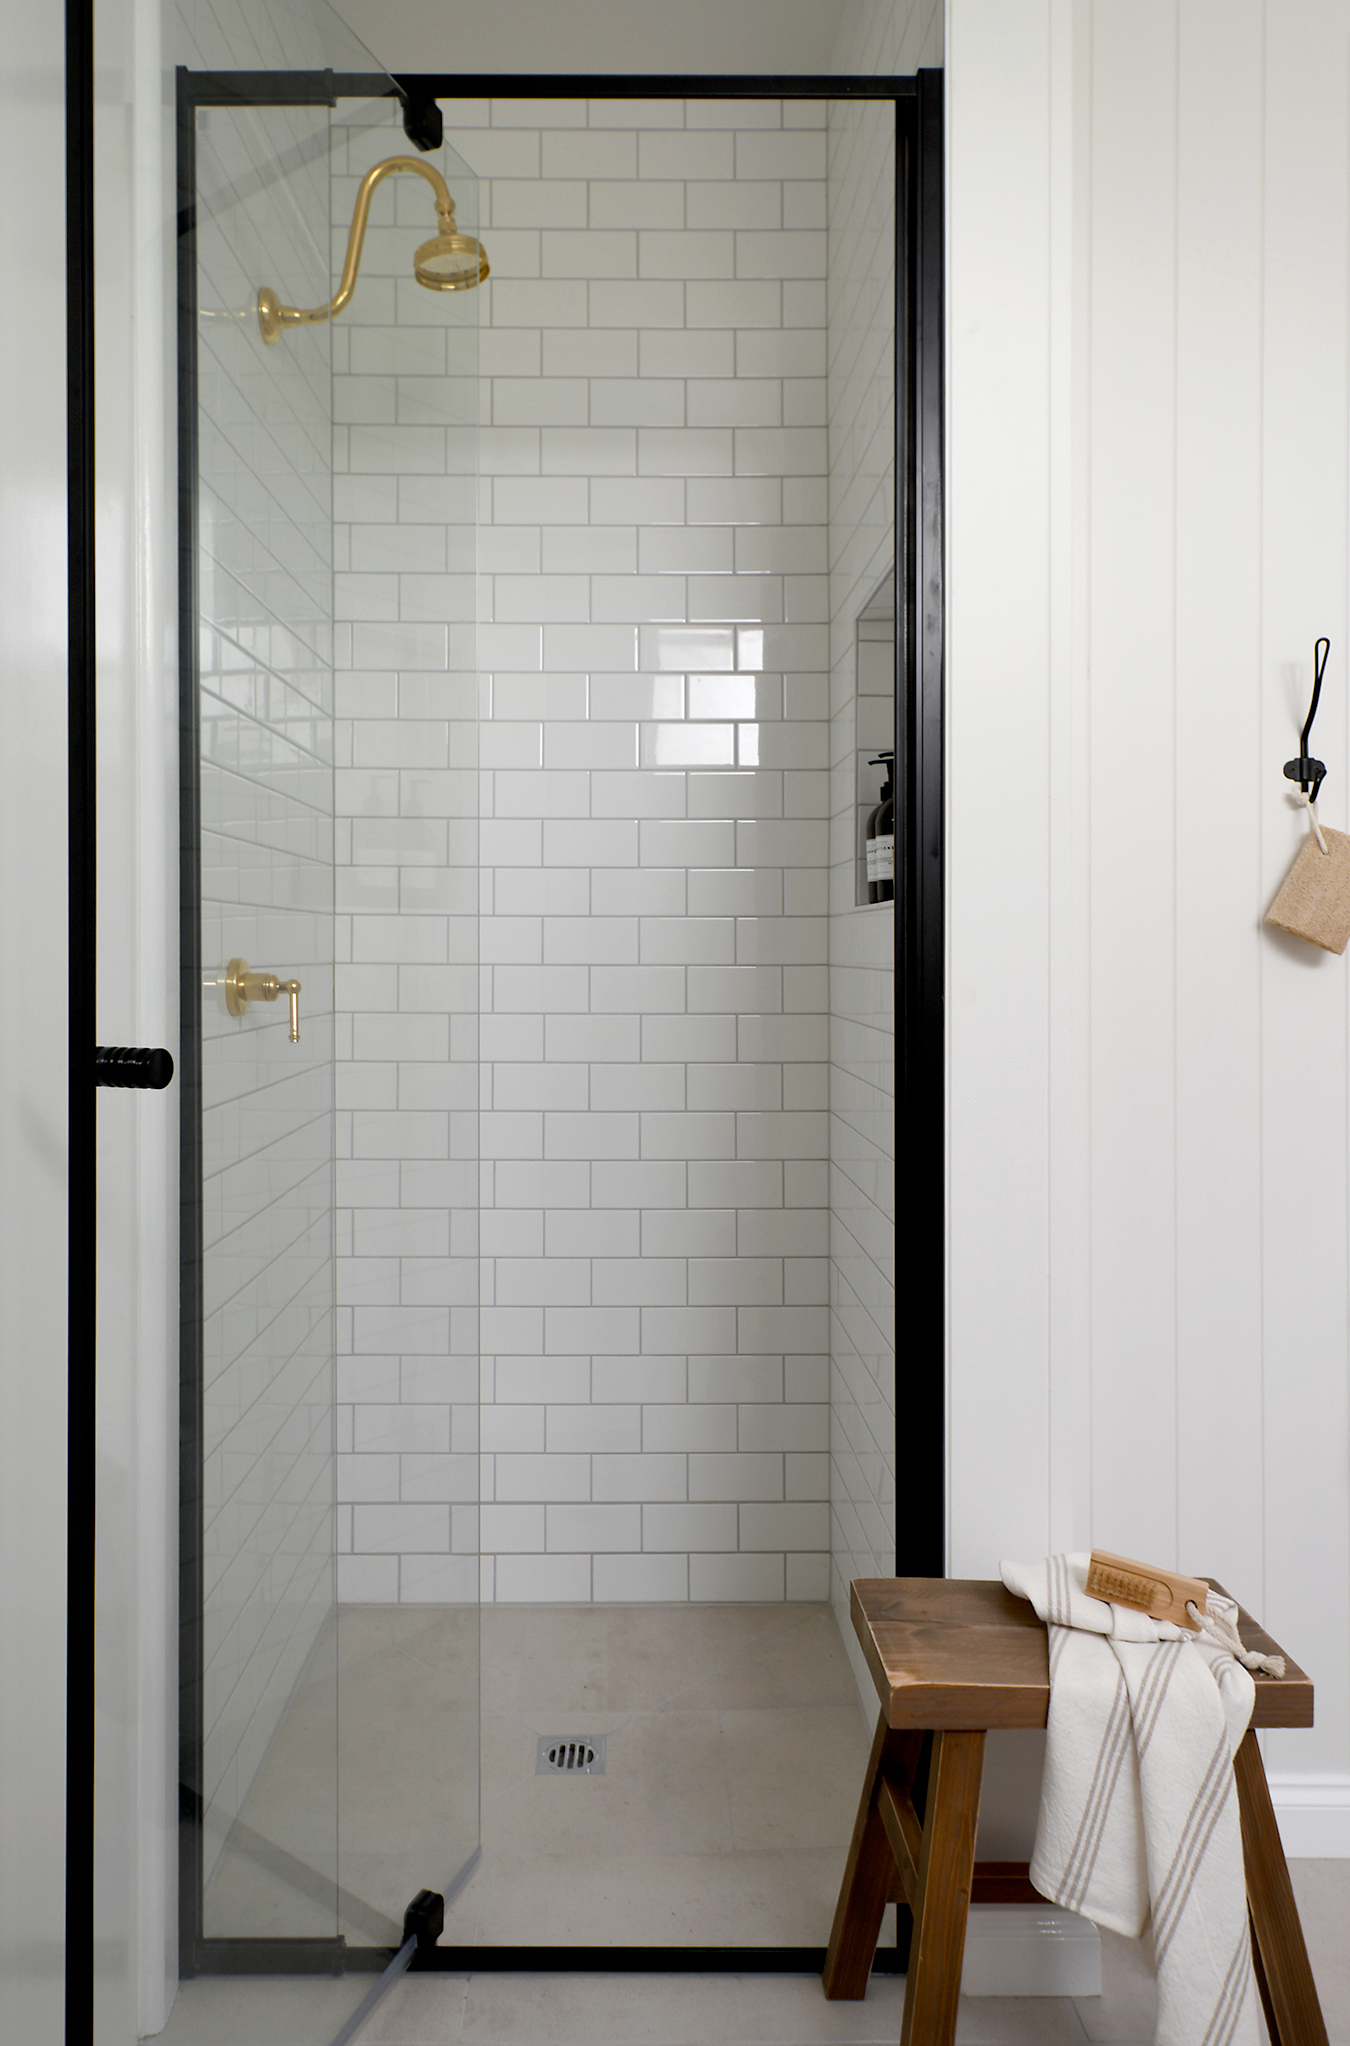
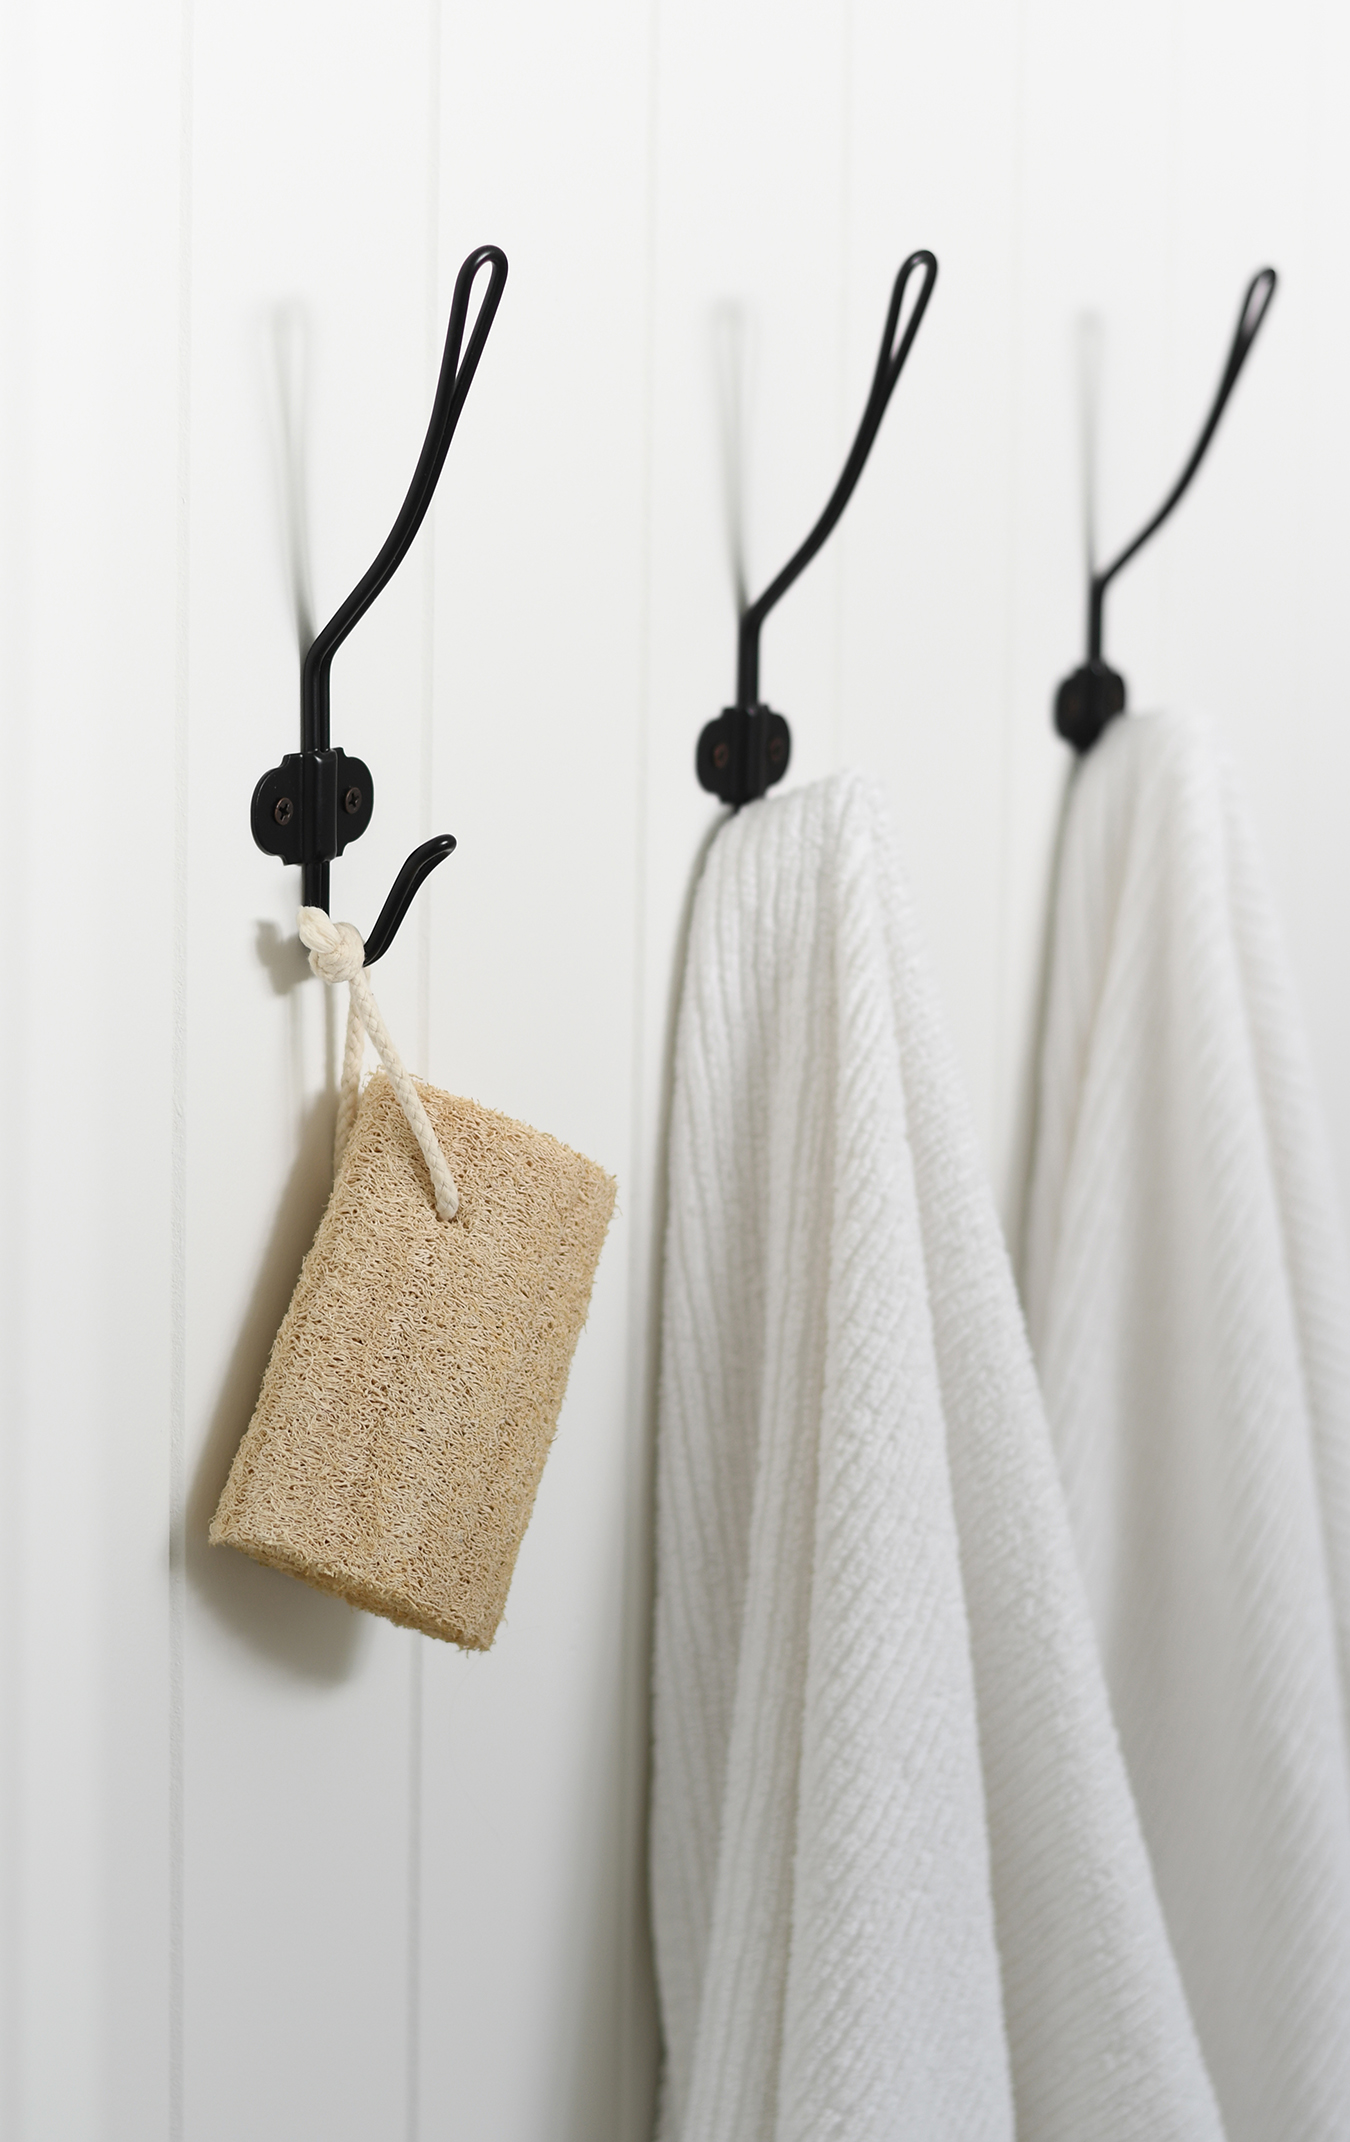
A frameless shower screen would have been nice, however it was priced at double that of a semi-frameless screen. The only frame options were chrome and black, so mum opted for black and we tied it in with the towel hooks and toilet roll holder, plus the soap pump.
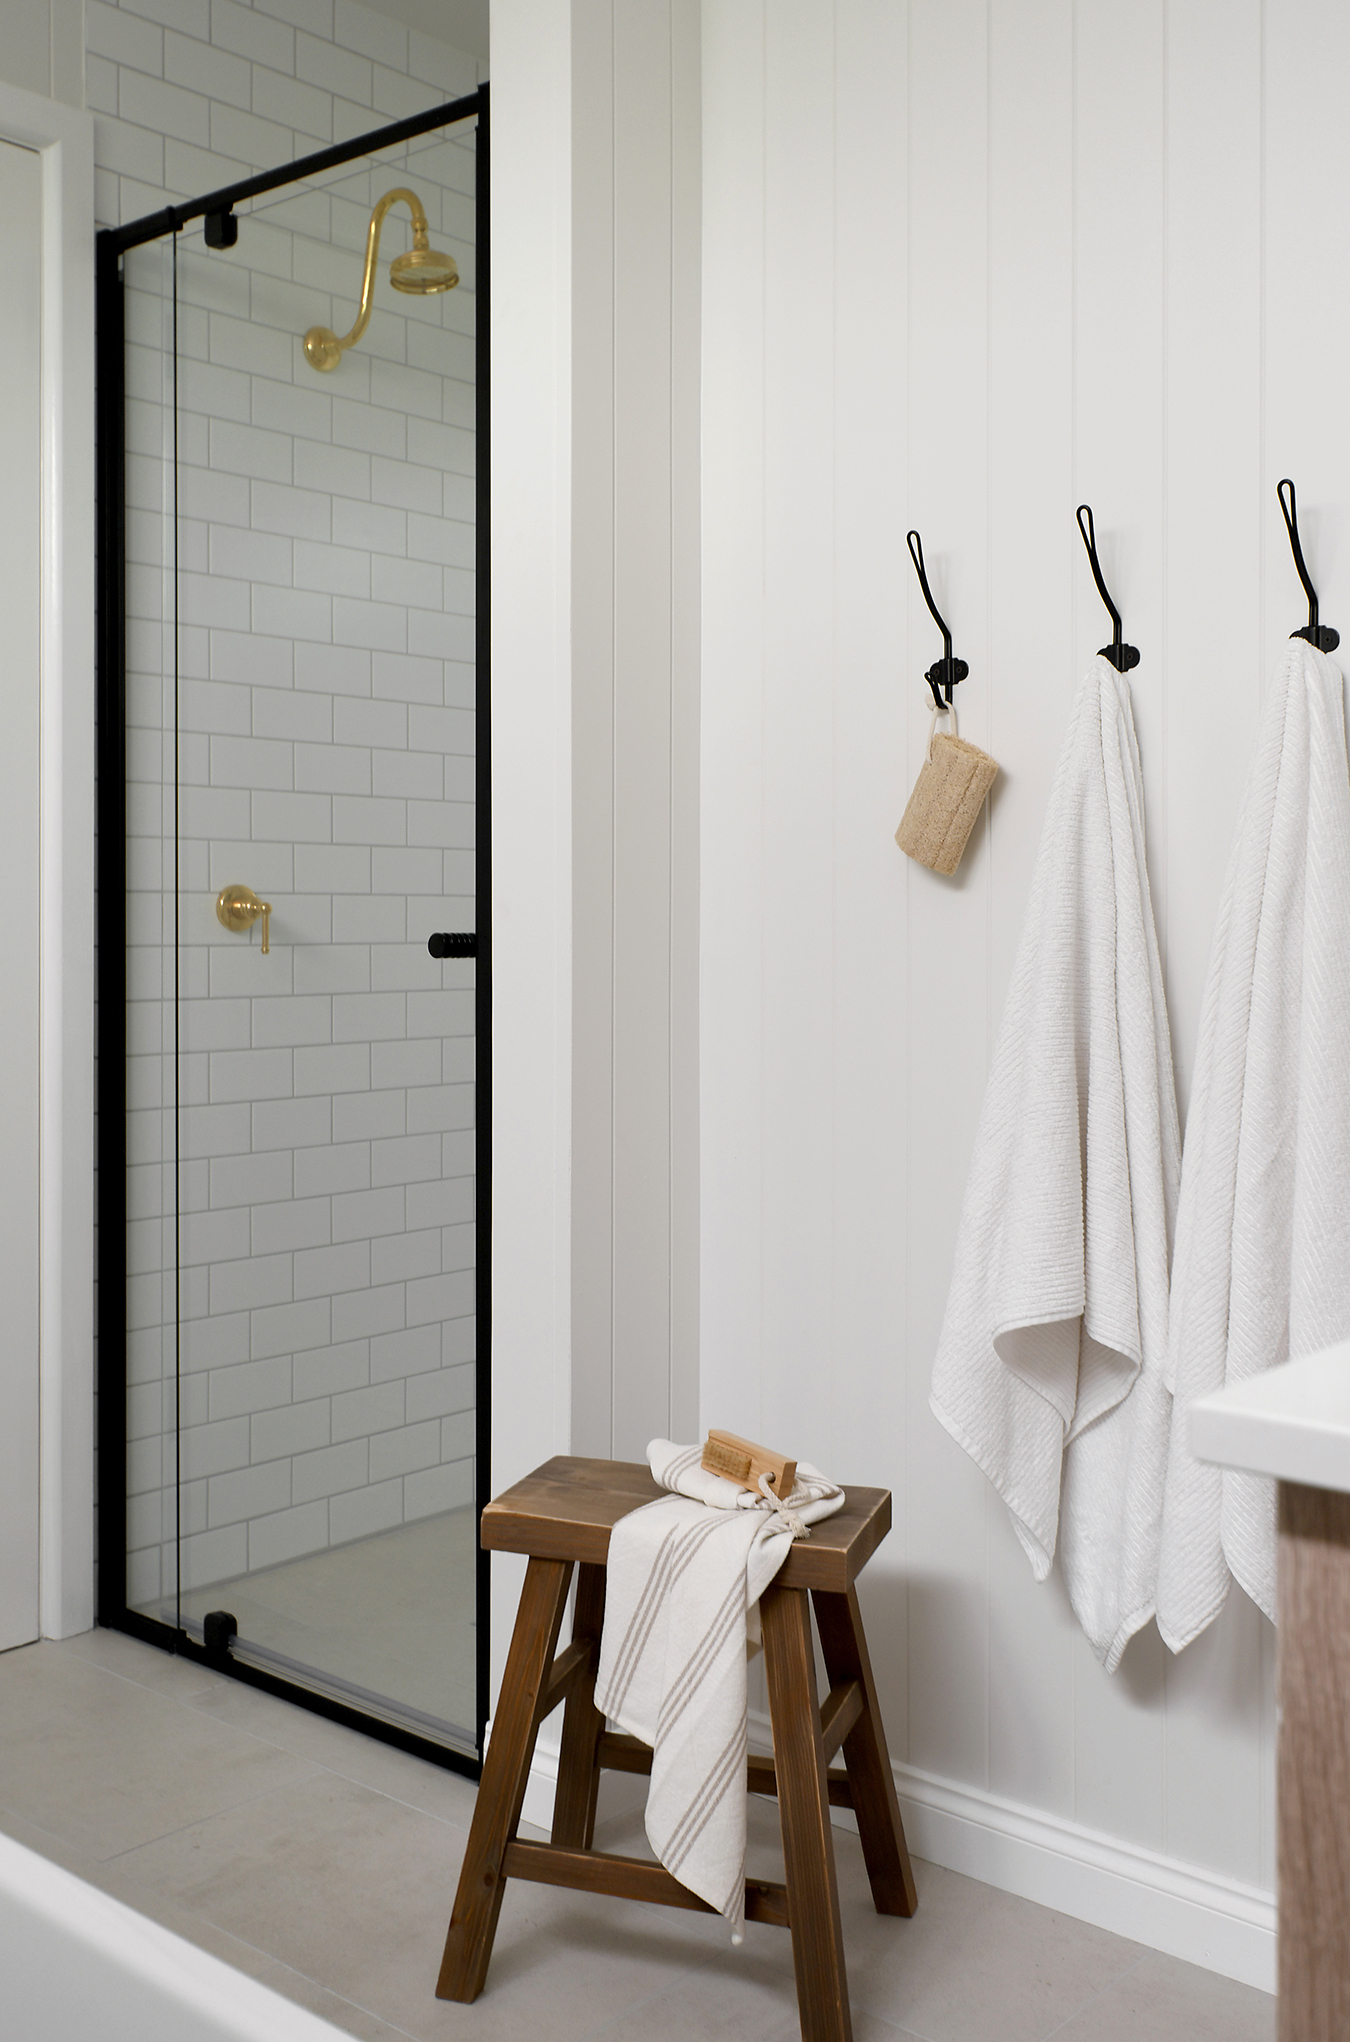
Although they are only subtle references they do work to make sense of it in the space.
My parents kept the shower tapware simple with a fixed head and mixer.
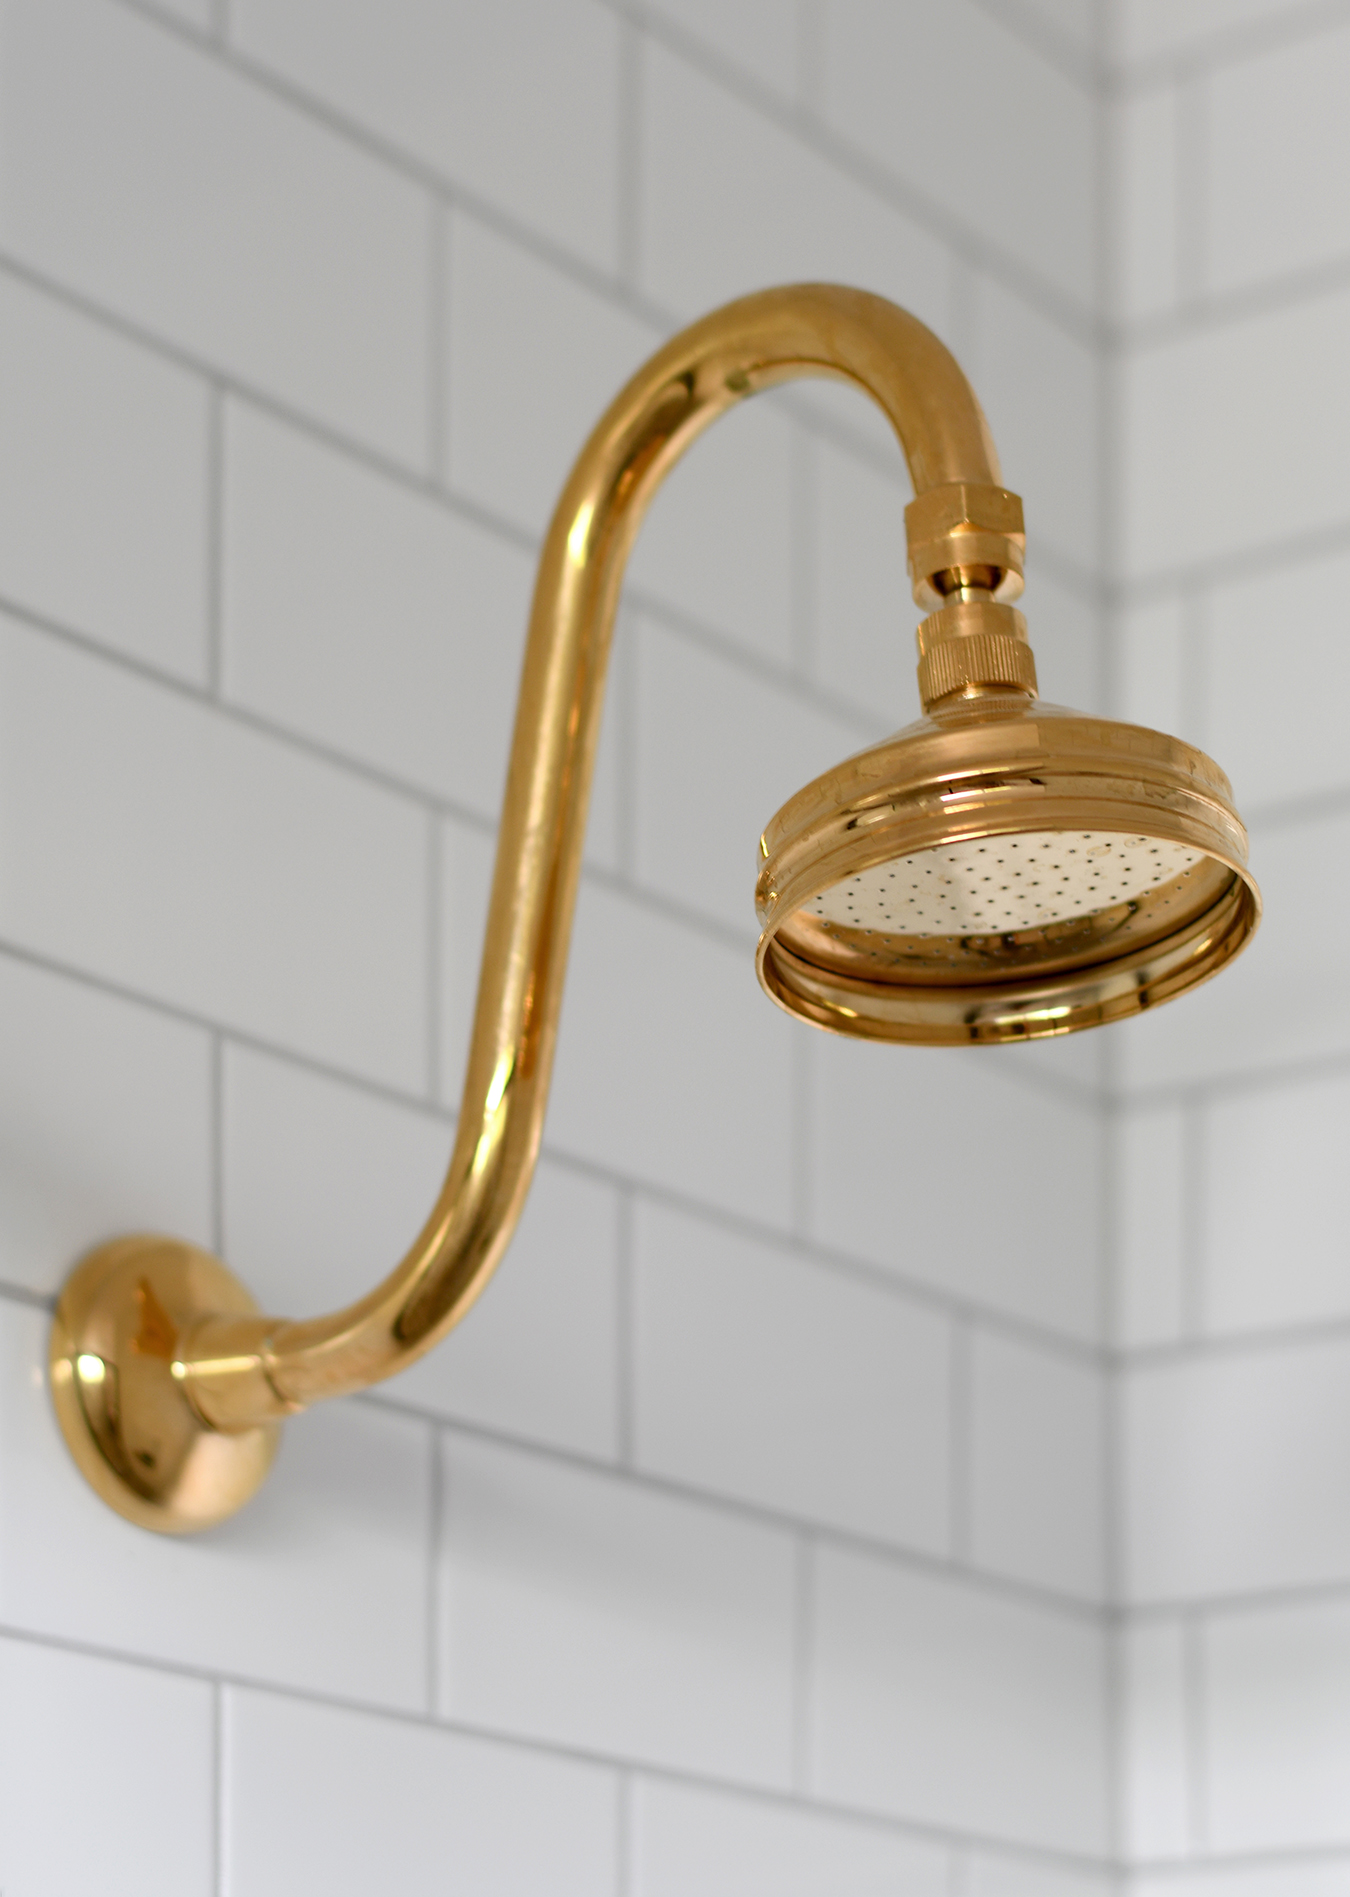
I know rail sets with hand-held pieces are practical, and popular at the moment too, though they don’t use this bathroom so they weren’t fussed.
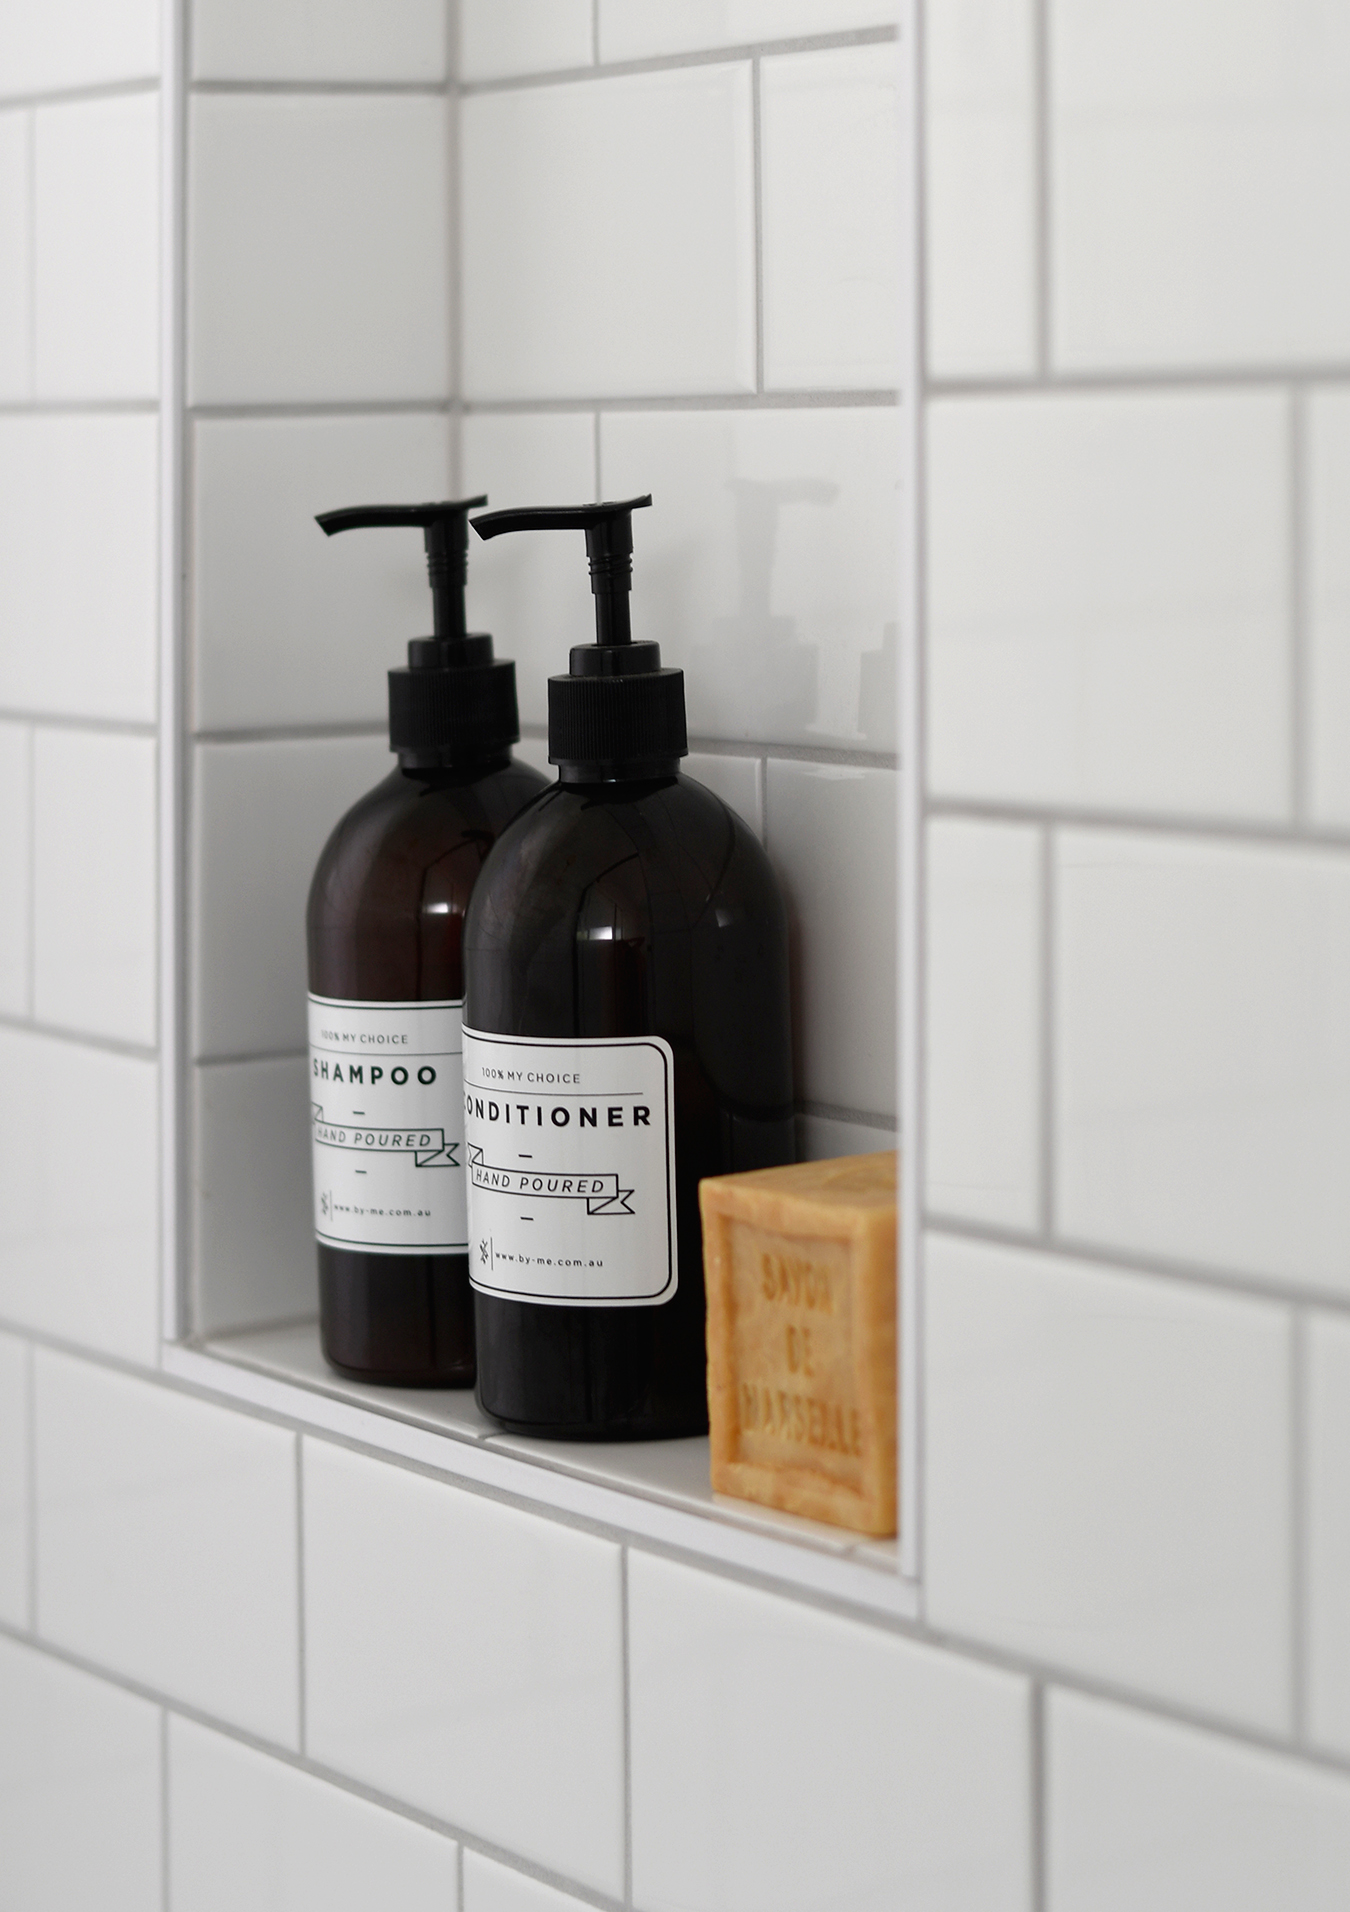
One thing they were fussed about though was adding a shower niche as previously there was nowhere to house, well, anything!
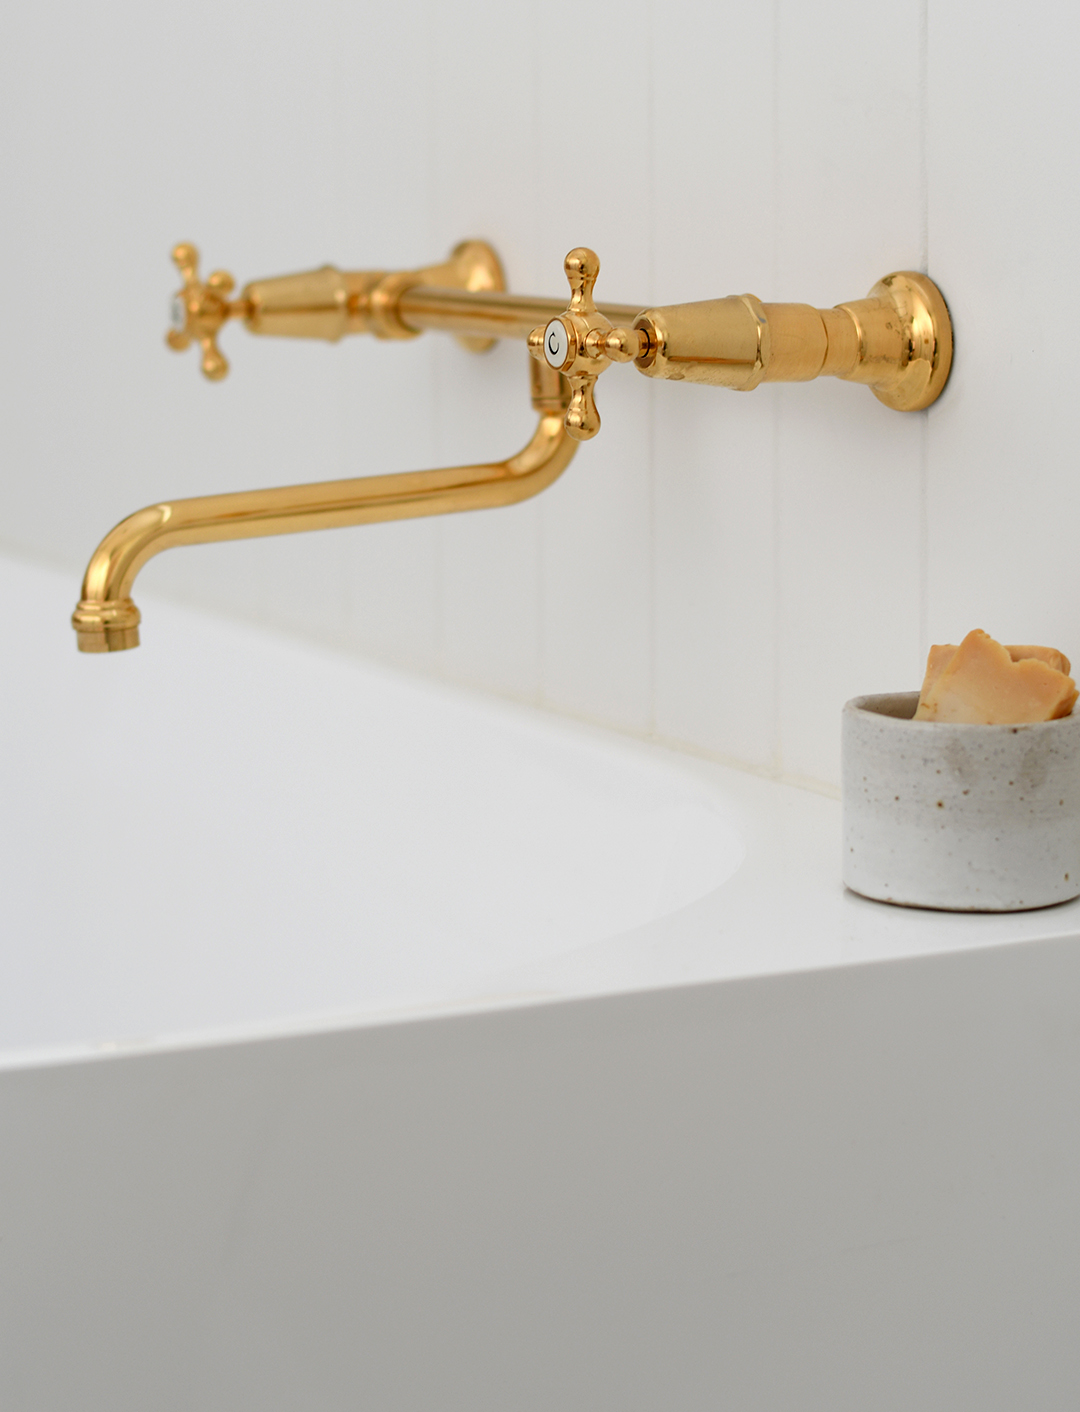
The wall mounted bath tap set is really stunning and provides instant impact upon entering the room. It’s certainly a star in the space!
Fittings like this can easily cost upwards of $1,000 though we managed to find this one for a few hundred. Still not cheap I know, though certainly not overly lavish. And how sweet is that little pottery “soap cup” (actually a candle holder) which was hand-made by my lovely sister-in-law.
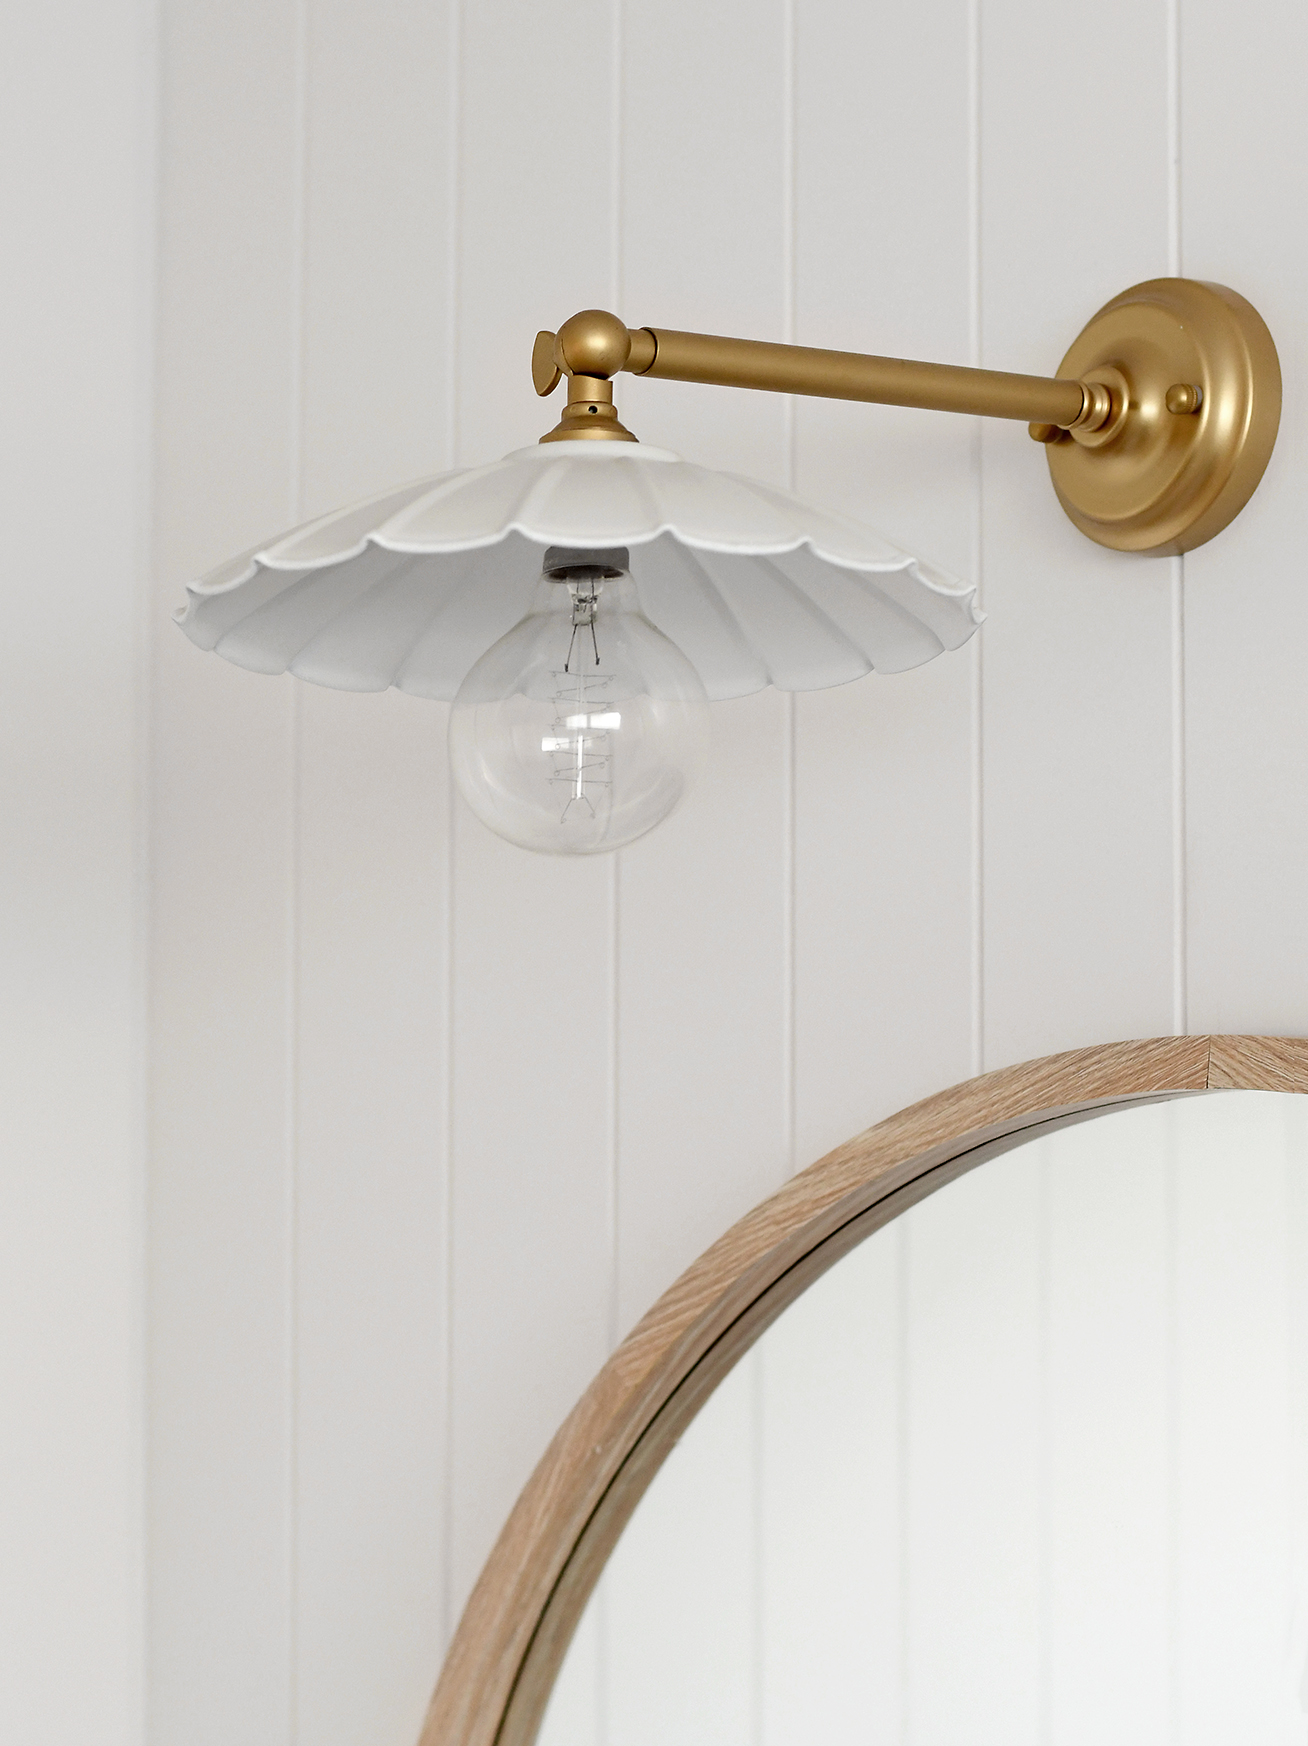
The wall light is super cute! It didn’t come with a white shade, so we simply spray painted this one.
One thing I tried, and failed, to convince my parents of was switching the hinged door to a slider (as per the layout concepts). You can see how the door opens over the shower in the reflection of the mirror below.
Although a cavity slider/pocket door couldn’t work (because of plumbing and electrical in the walls) a barn door was an option. For reasons I still don’t fully understand, my parents were adamant about retaining the door as is. Although it’s not ideal (in my opinion), one pro I vividly recall from my teenage years was being able to use the vanity when someone else was in the shower – the door acted as the perfect privacy screen! But, I’m still secretly hopeful I’ll get the barn door idea across the line one day soon.
All of the artworks are vintage pieces.

One is a thrifted find and two are originals which belonged to my gran and depict the region she lived in.
Even if it’s just to dress-up the blank space above a toilet, it never hurts to use items with meaning when decorating.
Whilst we retained the same footprint, the room now feels soooo spacious! This is mainly due to revealing more floor area. As touched on at the beginning of this post, whilst I’m well aware this newly imagined space doesn’t exude the same level of character or creativity as its former self, it was certainly the right adaptation moving forward. I hope you guys understand.
Please leave a comment and feel free to ask any questions. And don’t hesitate to reach out to me if you’d like my help bringing a space of yours to life!
ITEM SOURCES
- Floor Tile | Tivoli Urban Light Beige (300mm x 600mm)
- Shower Tile | White Gloss Subway (75mm x 150mm)
- Wall Panelling | James Hardie Groove Lining (Dulux Natural White)
- Bath | Ovia 1500mm Back to Wall Corner Bath
- Vanity | Custom (Tesrol Montana Oak Vinyl Wrap/Caesarstone Frosty Carrina)
- Vanity Tapware | Tribata Federation Basin Mixer (Brass Gold)
- Bath Tapware | Tribata Federation Wall Mounted Set (Brass Gold)
- Shower Tapware | Tribata Federation Gooseneck Head & Mixer (Brass Gold)
- Mirror | Kmart
- Wall Light | Fat Shack Vintage (shade spray painted white)
- Towel Hooks | IKEA
- Wall Art | Vintage
- Stool | Spotlight
- Lotion Bottles | Labels from ‘By Me’


Always a delight to receive one of your emails in my inbox Kristine and you work never fails to inspire me.
Love seeing your emails! And I love the bathroom. That vanity is stunning. I’m with your mom on the barn door however. My brother’s house has a barn door on their powder room. It doesn’t close off the doorway completely and so privacy and noise dampening is lost to esthetics. Looks cool but doesn’t function well. Great job for your parents! They are blessed to have your talent.
Thanks Lisa. Yes, that can be an issue. This bathroom is at the end of a long-ish dead-end hallway so privacy isn’t a huge concern as it’s quite secluded anyway. I can understand why people might choose a barn door mainly for aesthetic reasons though in this case it would be for functionality to save the hinged door cutting into the room and opening over the shower.
Thank you so much Julie :)
An e-mail from The Painted Hive always makes my day! Thank you for taking us through the process. I hope that you and your parents love the end result. It is simply WoW!
Amanda, thank you so much. We are all super happy with the outcome. Still in awe of how much bigger the room looks!
Wow, wow, wow!! Love it!
As always you’ve done splendid work. Your parents must be so pleased. So enjoy getting posts from you.
Thank you! Wish I could post more often. It’s always so nice to read comments like these :)
Lovely work, as always. Love the way you have hung the artwork half on the tiles.
It looks terrific- are you able to share an approximate budget without invading your parents privacy. Costs have gone up significantly so it would be great to get a feel for what budget should be allowed for a bathroom like this. Thank you
Thanks Gayle. There are lots of ways you can save money when renovating by shopping around, choosing low-mid rather than mid-high options, and rolling up your sleeves (where possible – obviously some work needs to be performed by licensed trades). Because all projects are so different it’s difficult to average-out a price. Material costs are pretty easy to stay on top of. Like I mentioned in the post, being incredibly budget-savvy wasn’t a huge priority for this remodel so we splurged on a few items but it’s not hard to create a look for less. The most expensive aspect is labour so you can save literal thousands by doing whatever you can yourself. Again, my parents weren’t too fussed about saving money by physically working on this remodel (even though they are big DIYers, they’re at a point in their lives where they’re looking to take things easier). They did a bit of the work, including the demo, painting and some carpentry, though left the majority to the trades. In summary, using this bathroom as the example, if you’re looking at a fully managed project (little to no DIY or “mates rates” labour) using mid range items, the cost would be around $25K – $30K. If you’re willing to do lots of work yourself and/or have trade-based family/friends who can help, and if you shop around and choose affordable items, you could bring it in for half the price, or even less. I hope that helps.
I can’t tell you how excited I am to see an email from you! This is lovely – as always. I loved the before, but also love the after.
Well done! It’s all lovely & great use of the space! Ok the toilet is a great sleek design too , what brand is it?
Thanks Thelma. Good question…I can’t recall the toilet brand or supplier! I will need to check with my mum. From memory it’s just a mid-range back-to-wall option.
Ok Thank you !
Truly spectacular. I love all the layout options and seeing your process. Love your blogs!
Thank you Leah!
so lovely!
I’m always excited to receive your emails and love following your work!
Love it! I especially love how you mix elements and the artwork! Thanks for sharing.
Kristine, You did an amazing job on the model of the bath room. It’s so serene and calming.
Great positioning of the commode too.
I loved the first bathroom redo was a great make lemonade from lemons budge makeover, but life happens and you have to take advantage of the opportunities that arise
I do have to admit I miss the blue”tile” floor.
Your parents are very lucky blessed.
.
Thanks Pat. Yes, the patterned floor! When I first started suggesting schemes for the new space I included a blue and white floor tile similar to what was there previously. Even though my mum adores blue and white, and the fact it’s a classic choice, she just couldn’t commit! Still, I am really pleased with how everything came together, even if it’s quite simplistic. Thank you so much for commenting as usual. I always look forward to your messages.
Fantastic job, as always! I love the mix of the natural woods with the white of the room, very much in for ’24! As I am a Senior, I would not want a tub of that depth myself, as it would be very difficult to get in and out of safely with my rickety bones! LOL However, I do love the looks of it. It’s amazing how you laid out the room to make it much more roomy looking, as it’s very much the layout I would like to have. Where you have the shower, I have a large linen closet which would easily adapt to a shower stall as my vanity is right beside it so even the plumbing is on the other side of the wall. And I would like to move my vanity where you put yours, so very much the same kind of a layout would work for me. It’s the cost of labor though, as you’ve said. It’s unreal anymore what they charge for labor, but there’s no way around it for most when it comes to the plumbing being moved. I’m very much a DIYer and can do most anything, but I don’t think I’d want to play with shower plumbing. I appreciate the phots of the room as it is just exactly what I would like with the mix of woods and the white. My preference though would be to have just a little design in the flooring, but perhaps a rug in the center would lend some pattern to the floor. But no matter what the designers say about anything, I think what is most important is that the owners are happy. And your parents are, so I wouldn’t suggest that you push them on the Barn door idea, although’ I very much see the purpose of it. For one thing, I’ve heard so many designers say that Barn doors are out for ’24! Have you heard the same? I like them myself and would like to know more as to why they are saying that. Thanks again for sharing the lovely work!
Thanks Pat. I’ve never been one to worry too much about what is “in” or “out”, however subtle trend influences are hard to ignore entirely. My take on the “barn door” situation is that it’s a term which became popular during the rustic farmhouse phase but it has since evolved to describe external (i.e. not cavity/pocket) sliding doors in general.
So, when I say “barn door”, I don’t necessarily mean a farmhouse style door, I just mean an external sliding door. Of course, these have been around for decades and come in a vast range of styles, from modern to heritage. They can be a feature, or they can be incredibly subtle.
Due to the fact the rustic farmhouse trend is now waning, and that “barn doors” are so heavily associated with it, you can understand why people might be saying they are “out” – when something trends it also inevitably dates. And whilst it’s probably true that having farmhouse style barn doors purely for aesthetic reasons is now considered dated (if you prescribe to that), you would never say they are out of place on an actual barn, or in a true farmhouse, or even in a thoughtfully designed home. Everything has its place. Likewise, sliding doors can be the best choice in lots of scenarios and if they offer the most functional solution that can’t ever be a bad thing.
For me it comes down to just doing what you love and not worrying too much about what other people might think or say :)
Yes, I agree with you, and when I think of a barn door in a house setting, I don’t necessarily think of the old barn wood type, but like you said, something external that might be a little more classic in style. I have no problem with it, as stated, just that people need to have what they like and are comfortable with. Not everything has to be on trend and who is to say a designer is right about everything? I have seen a lot of conflicting statements made on You tube for 2024! Anyway, I loved what you did to the bathroom and would love to have it myself! I’m past the age where I can do the work now all by myself as I used to, and I don’t have the means to hire professional help. So, I will do as much as I can and leave the rest to dream about! LOL
Thanks for sharing, and I look forward to seeing more of your posts!
Wow–that tub! 😍 Looks great!
Thanks Elayne :)
I love it! Simple but stylish. I actually thought your first photo of the finished bathroom was a rendering it looks so perfect, lol. I used the same bathtub when I remodelled a couple of years ago, and it replaced a tub similar to your parents old one – losing the dead space at the end that was a royal pain to clean and gaining a deeper bath was fantastic.
Thanks Julie. I wish my concept program could render that realistically! Yes, the new tub is great. That old ledge was always such a dust catcher!
I did love the previous bathroom but this looks lovely too. I hope the leak didn’t cause much damage.
Thanks Anna. We were lucky we caught it quickly but there was only one way to fix it unfortunately!
What an amazing job, Kristine! The before was beautiful, of course, and now the bathroom has been future proofed. I still need to do something about our elderly, falling down bathroom, but cannot decide on anything. What are the dimensions of this bathroom please? It is so interesting to see the different layouts and the final choice. I too think that a sliding barn door would be a good idea, but I love how respectful you are of your parents’ wishes🖤🖤
Thanks Jennie. This room is approx. 2600mm long x 2000mm wide, plus the shower bump out which is around 900mm x 900mm.
Thank you, Kristine. Your work is always exquisite! The spaces that you create seem very calm as well as beautiful🖤🖤
Aw, thank you :)
Hi Kristine, really love this space! Are you able to share any further info about the ceramic cup made by your sister in law? Does she sell them by any chance? Thank you!
Hi Jade. Thanks. She is a hobbyist who loves doing pottery. She’s been taking classes for a few years now and has amassed a decent collection of little “cups”. If you have a Google around you will probably find some ceramic artists in your area who make similar items. Maker’s markets are a good place to search :)
What a great post kristine! I love how the brass gold metal taps make a bold impact while still keeping the bathroom’s budget-friendly vibe—such a great balance of style and savings! :D
Thanks for sharing these ideas!
Hi Kristine, I absolutely love the vibe. I want to do a very similar look for my downstairs remodel. Do you think that the type of fixtures and finishes you mentioned will hold up long for a fairly heavily used bathroom? I’m re-doing it because I bought some amazon stuff when I moved itn, and it’s basically fallen apart.
Thanks!!
Hi Tilly. Yep, everything I used is built for longevity. Only thing you may want to investigate is the material of your vanity. Some people don’t like vinyl wrap (thermolaminate) though it comes in varying qualities and in general has improved heaps over the last 20 or so years. If your bathroom isn’t well ventilated some lesser quality vinyls can peel over time as a result of humidity. I have not personally ever experienced this issue.
This bathroom remodel is absolutely stunning! Love how you balanced modern updates with classic charm—so fresh and timeless. Thanks for sharing the process!
What a beautiful bathroom makeover! I love how you balanced classic and fresh details—the brass accents and custom touches really stand out. As someone who sells posters online, I’m always inspired by how art and personal style can transform a space. This is such a wonderful example of thoughtful, inviting design. Great job!
Definitely going to try this out. Thanks for the tips!
Absolutely stunning! I love how bright, calm, and timeless the bathroom feels; those classic details with the warm wood are just perfect. The new layout makes so much sense, too! It’s such a beautiful balance of function and style, truly a space that feels lived in and loved.
Wonderful remodel ideas and clear inspiration. The blend of timeless design with practical updates makes this bathroom feel both elegant and functional. I particularly appreciated the thoughtful choices in tile, fixtures, and storage great guidance for anyone planning a bathroom refresh.