
You know that old saying, “Too much of a good thing is never a good thing.”
Well, aside from the fact they forgot to exclude wine…and pistachios…and Friday nights, it’s pretty sound advice, and perfectly apt in the case of this cute little desk.

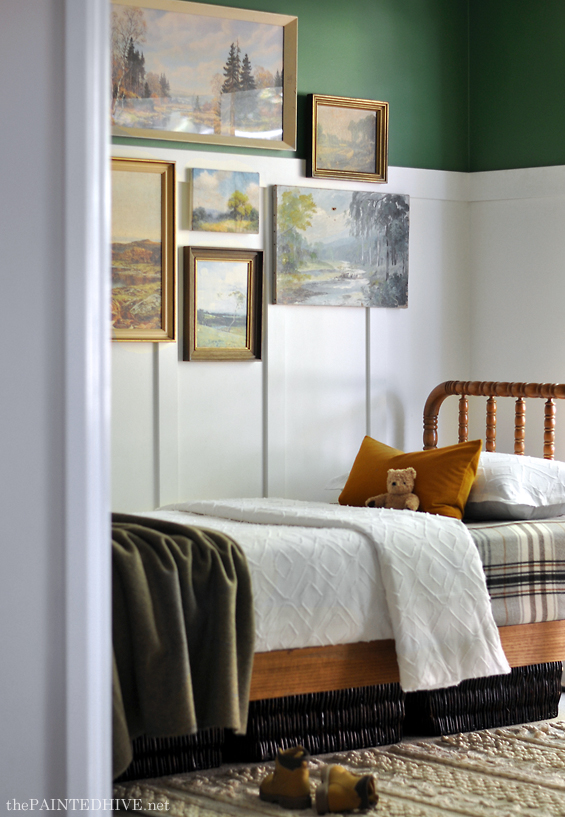
As good as its original pine finish was, when teamed with the warm walnut bed and the dark cedar dresser already in my son’s tiny room, it was just all too much.
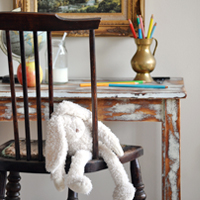
Here’s how the desk looked this time last year.
I loved the natural rustic timber (as evidenced by my aforementioned collection of unpainted items), however, aside from the fact the ocean of wood made Riley’s bedroom feel a bit dark and dull, the pieces were competing which meant nothing had a chance to shine. It was death by brown!
Something had to give. And the desk lost…or maybe that should be won?
I’ve seen enough heated debates over painting wooden furniture to know it’s a contentious topic. Personally, I believe both finishes can be beautiful and it usually comes down to context. I’m happy with the call I made here.
Anyhoo, this was the easiest makeover ever.
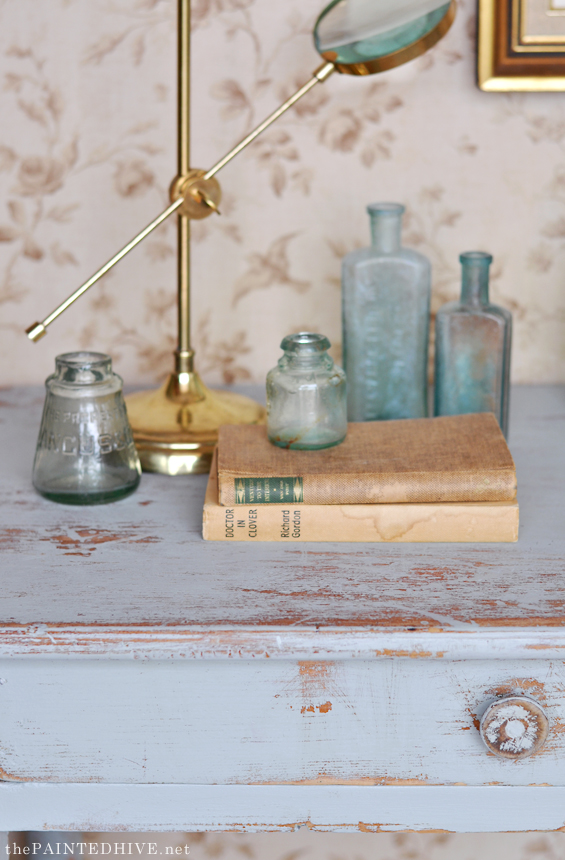
The trickiest part was deciding on a colour. I didn’t want anything which would fight against the green walls and eventually landed on a muddy blue-grey. Not only is this relatively neutral (and my son’s favourite hue) though it also references the colours in many of the landscape artworks.
I made the paint colour using some left-overs I already had.
Given the desk was in rough shape, I thought a heavily distressed finish would work best.
My son wanted to help me paint and, whilst I’m always willing to take-on little apprentices, for a project like this I wholly welcome them! In my experience the best distressed finishes come from being entirely haphazard and kids are the absolute best at that!
After masking off the brass castors with some tape we brushed on two coats of paint in the most random manner possible. There were drips and blobs and obvious brush strokes, though that was just how I wanted it (you can find some previous tutorials where I used a similar method HERE and HERE).
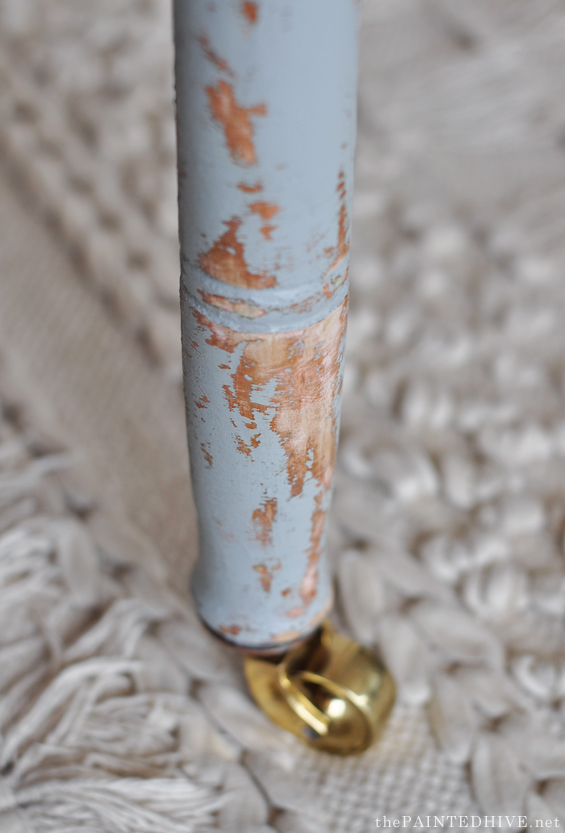
To distress, I did something I’ve never done before. Whilst some of the thicker areas of paint were still tacky, I began randomly sanding the desk by hand using medium grit paper. I don’t know if wet paint distressing is actually a ‘thing’, and, to be honest, I only did it because I was being super impatient, though I liked the effect!
The tacky paint balled-up and peeled off with ease resulting in a clean chippy look, whereas the dry paint distressed as per usual for that more scratchy rubbed effect.
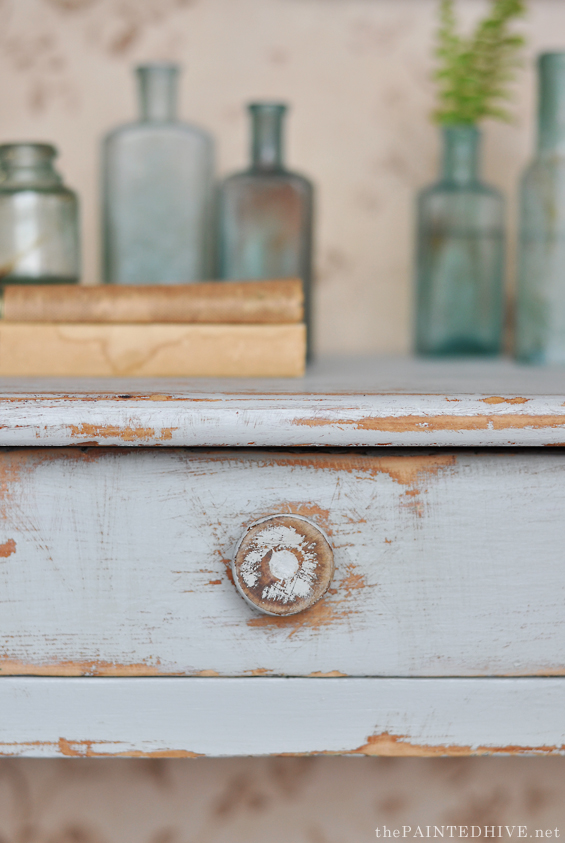
I like the super matte finish and am obviously not fussed about the desk becoming more disheveled with use so I didn’t bother applying any kind of protective topcoat. A clear wax or water-based poly can help if you’re after a more polished look.
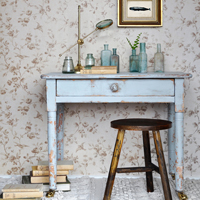
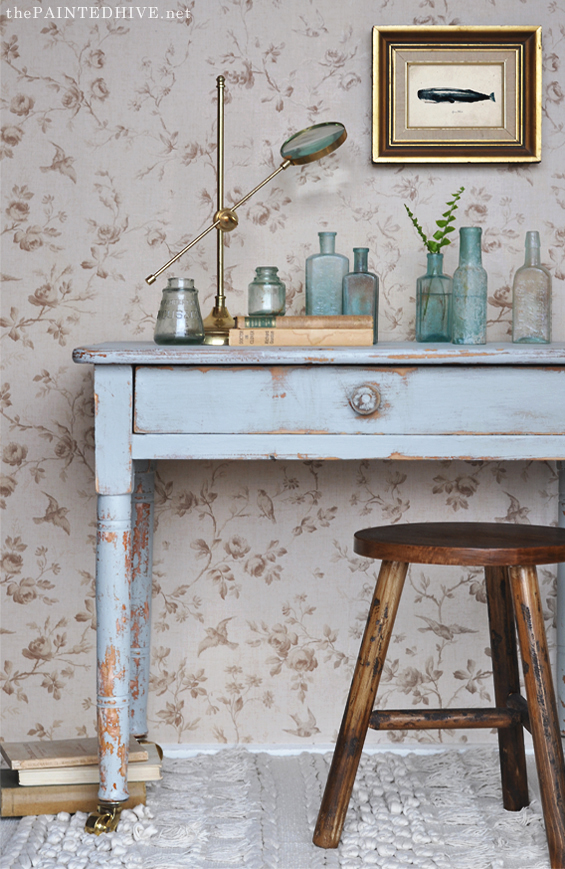
Due to Riley’s room being so small it’s a bit tricky to take decent photos of the desk in place so I had some fun dressing it up in my entryway.

Granted, the toile wallpaper makes things look a bit girly though the desk itself is gender neutral.
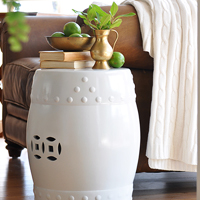
I used some of my collection of blue-green glassware, vintage books and the stool I hacked earlier this year.
Although I love both versions of this desk I know the painted finish will suit my son’s room best.
![]()


Love it! Love that you had your apprentice helping on it too! And it looks great with the blue glass collection ;-)
Thanks so much Sherylee. Was fun to style it this way :)
I liked it better before!
Weirdly so did I. I usually adore painted things. It seems cold somehow. Maybe its forma warm climate and cooling effect was needed for this location, but it missed something ?
As an individual piece, I liked the before too. Though, as mentioned in the post, this wasn’t about an individual piece, this was about making an overall room scheme work :)
Very nice – I had the same dilemma with my son’s room. Bed – wood, desk – wood, dresser -wood. A little paint can really break it up. I really like the results of the distressing!
Thanks Leslie. Yes, like I mentioned in the post, I love natural old wood (hence the dilemma I was in!) though when there’s too much of it in a space the lack of contrast can just make everything feel blah. There’s a big difference between looking at an item individually, and looking at an item in an overall scheme. Breaking things up with some paint can work wonders.
I love it!!! you did great!
Thanks Ellen :)
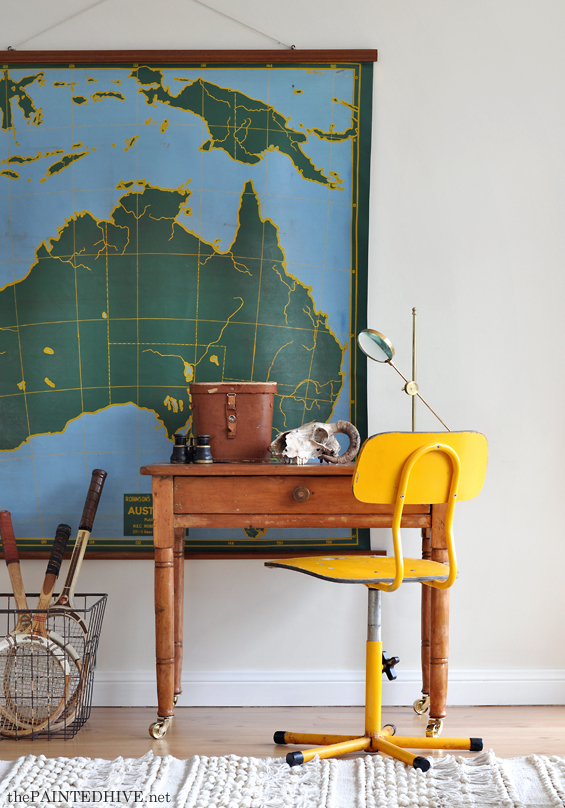
Since you’re showing it in your entryway, rather than your son’s bedroom, I’m assuming that the blue glass bottles are just for a photo display. ‘Would love to see it in front of the wall map and maybe even with the yellow swivel chair.
Yes, I just styled it this way purely for fun. The original photo of the desk with the wall chart wasn’t taken in my son’s room either! That was set up in my living room just for fun too. I no longer even have that map. I just need to finalise some curtains for his bedroom and then I will be able to share the proper reveal of his whole room :)
I adore that map! Looking forward to your sons room reveal x
I’m with you with the thinking that timber is best, but sometimes painted can be better, especially to break up the brown, brown, brown thing. I really like the color you concocted and know it looks fabulous in his room!
Thanks Deb. Glad you get where I was coming from :)
Charming little desk. I wonder if it would look lovely simply painted blue…maybe highlighting some of the details with a slightly darker version of the blue paint. (To my eye, the distressing does not enhance this little desk.)
It’s just personal preference I guess :) Yes, I could have done a hundred different finishes, and may change things in the future, though for now I like it as is and my son really enjoyed being able to help me.
You took an ordinary little desk and made it so sweet and Charming. It’s like you brought it to life and it actually looks happy. I bet the stool is jealous.
Thanks Ann :)
I love it! I think it looks better this way and I agree with why you chose to paint it—-too much wood can be a bit too much.
Absolutely love the colour and distressed finish! It suits the desk perfectly and I’m sure it will look wonderful in your boys room (though I’m also loving it against the toile wallpaper with your beautifully styled little scene there) You’ve inspired my to take the plunge and paint my huge pine sideboard – a daunting task but it really needs to be done! x
Thank you. So glad to have helped inspire :)