
You know how on home renovation shows they can completely transform an entire house in just five days?
Yeah, well, this in’t a home renovation show. Clearly.
We’ve been grinding away at just the facade for over a month now and the finishing line is finally coming into view!
I know it’s not the fast-paced, instantly-gratifying kinda makeover most consumers seem to crave, though I hope it offers some real-life perspective, and possibly even inspiration, to those of you who also can’t commit long uninterrupted days and a massive team of people to your own home renos.
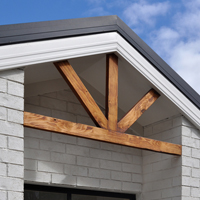
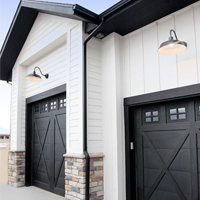
Last week my $14 DIY gable pediment went up.
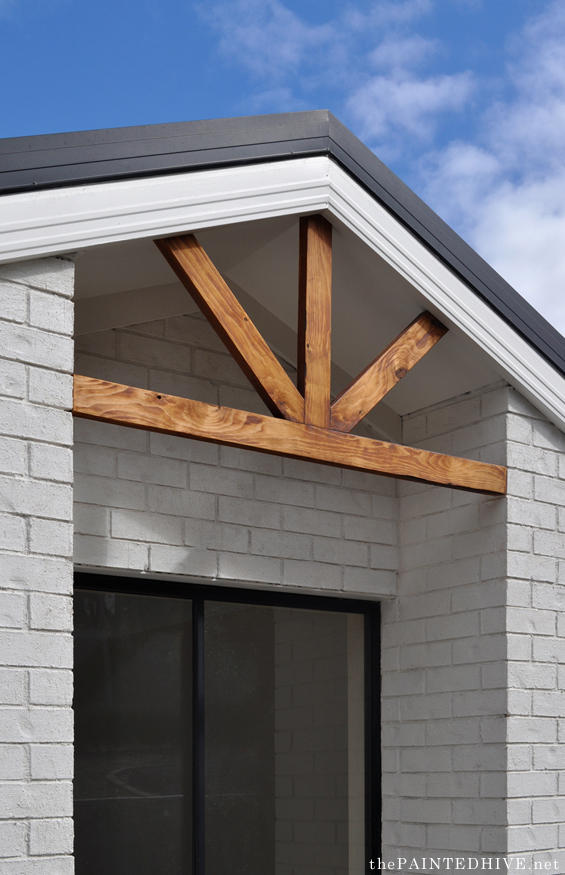
It’s simply attached directly to the brick with some right angle brackets and masonry anchors.

At the moment it’s lightly stained and oiled, and I love the rustic warmth it brings, though I’ve been contemplating painting it black. It’s currently the only natural timber element at the front of the house, and whilst I like the fact that makes it a real feature, I’m just a bit concerned that in the end it might look a little lonely. I’ll wait until everything else is in place before I decide whether or not to change it though at this stage I think it will probably stay as is.
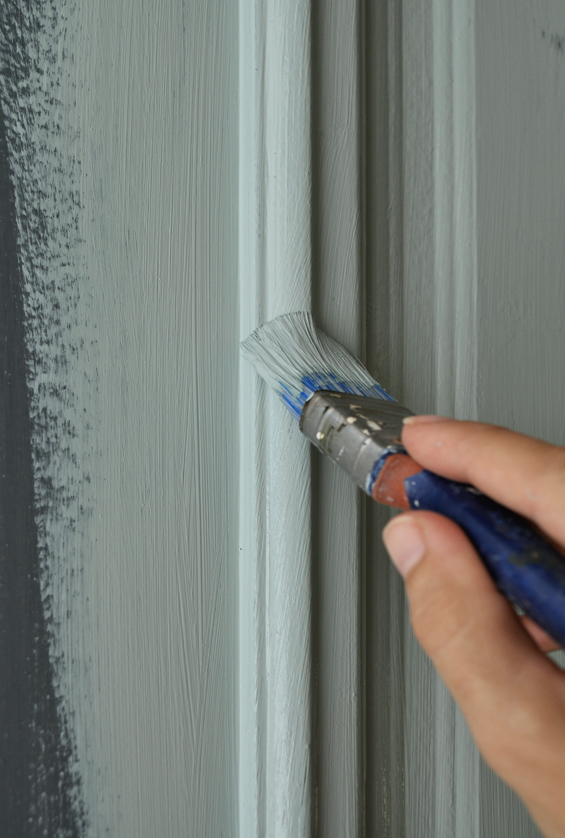
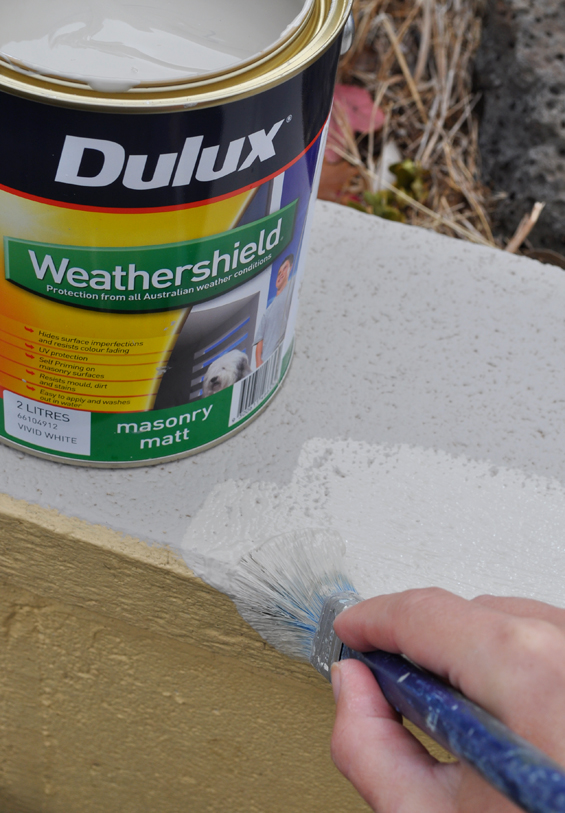
On a different note, the above pic shows the cool texture effect of the specialty Dulux paint we used really well.
I have also hung the shutters.
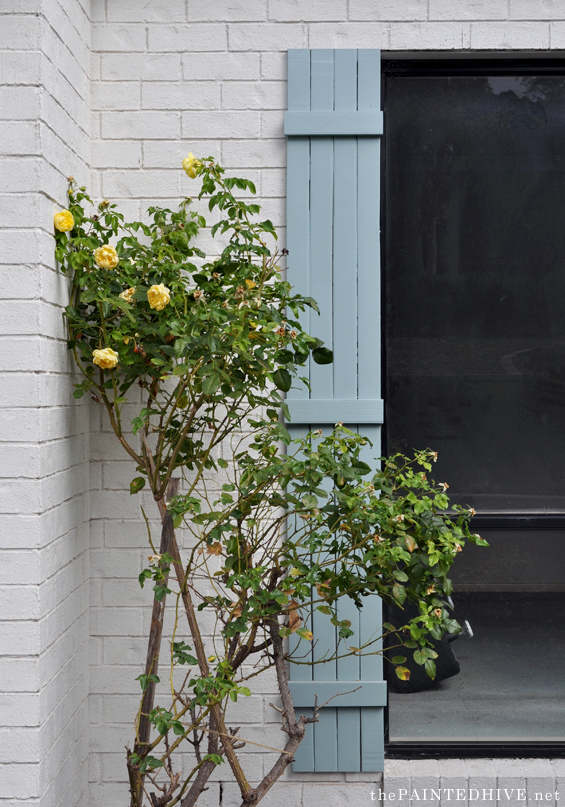
Now, I know some people loathe decorative shutters (especially those – like mine – which are clearly too small to give any impression that they may actually function), though I personally don’t mind them. To me they’re just like any other decorative element which is designed to do little more than look a certain way. I just wanted to add a bit of charm, interest and colour and they do that perfectly. If they bother you maybe pretend they’re the fancy kind which fold. Or just loathe them in secret.
You might recall that I planned on painting them a soft duck-egg colour so it kinda makes sense that I landed on Dulux Weathershield Semi-Gloss in ‘Duck Egg Blue’. Go figure.
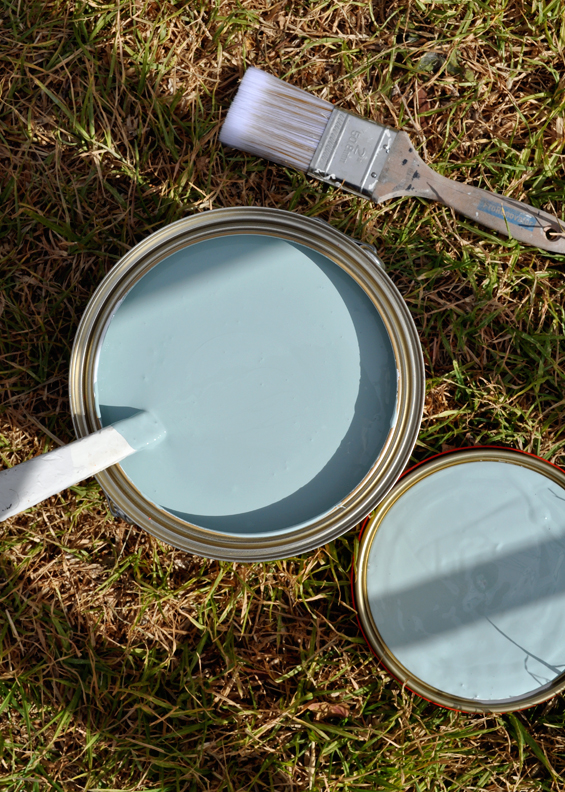
It’s a gorgeous soft blue-green which just may be my most favourite exterior accent colour ever.
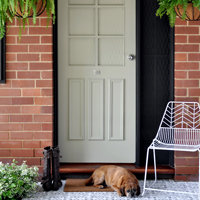
The dark indigo front door got the same splash of colour.
Although indigo can be lovely it was just a tad too dark and uninviting given the recessed entryway.
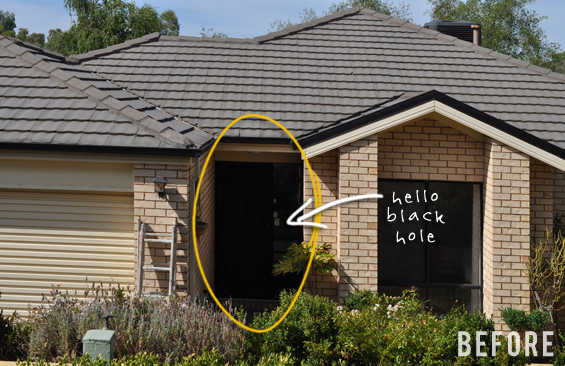
The duck-egg helps brighten everything up and now you can actually see the front door from the street – which is a nice novelty. LOL!
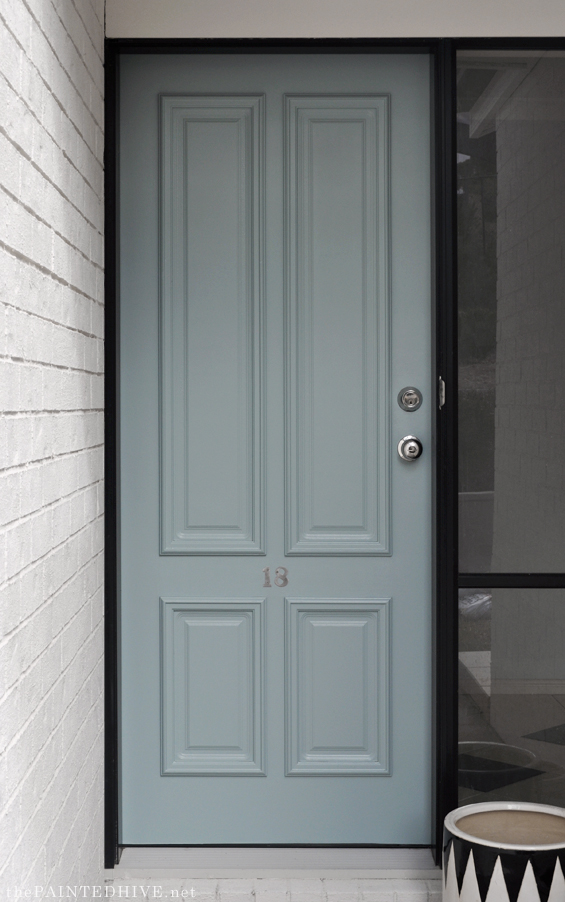
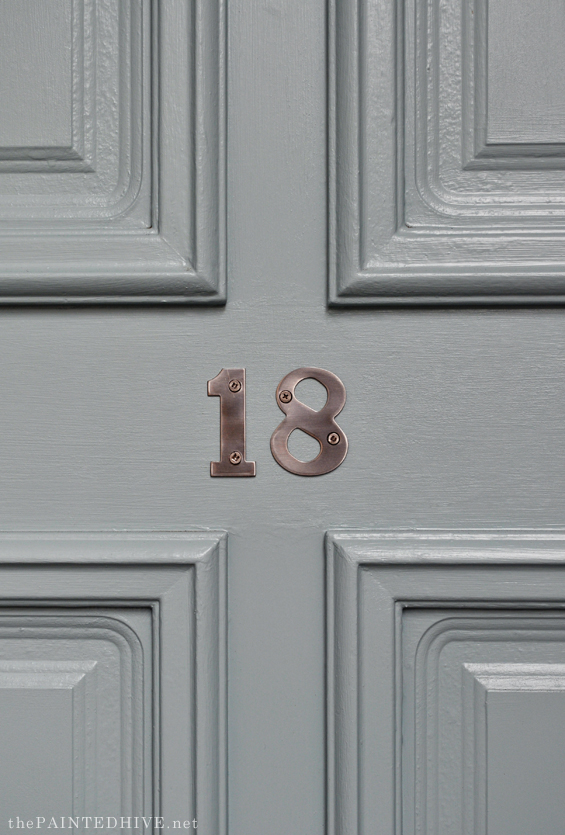
To add a touch of charm I dressed it up with these sweet nickel numbers.
In addition we’ve started painting the concrete block retaining walls.
In the below pic the yellow is the original colour, the stone-grey is the new colour.
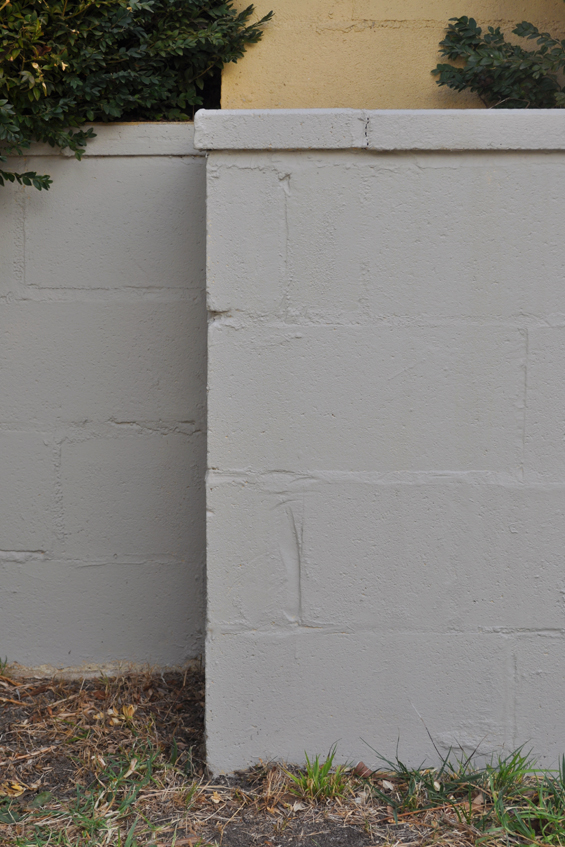
I was tossing up between black for drama, white for continuity and stone-grey for subtle contrast – obviously, stone-grey won out and I love how simple it is. The colour is Linseed by Dulux and I used Weathershield Masonry Matt which is fantastic to paint with!
Unfortunately I don’t have a great before shot which shows all of the walls though they are pretty extensive. For this reason we were originally going to leave them. They look like quite a neutral sandstone colour in the below pic though are definitely more of a mustard yellow in reality.
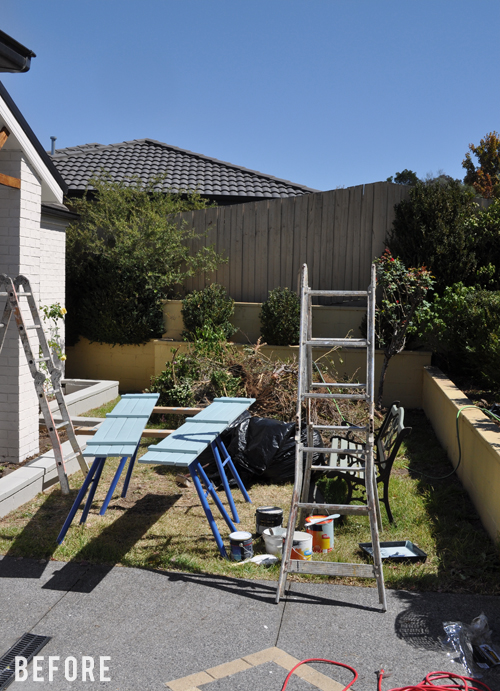
Although the colour could be worse, it had little relationship with the new scheme so I decided to try painting just the small wall around the front of the house (you can see it – after one coat of paint – on the left in the above pic).
Even though I only intended on painting that one wall, it was such a surprisingly quick and easy job that I figured I’d just keep going! After painting around half of all the retaining walls I finally ran out of paint so will finish things off next time.
There’s been some progress in the garden too. A few new plants have gone in including Viburnum, Westringia and Pittosporum.
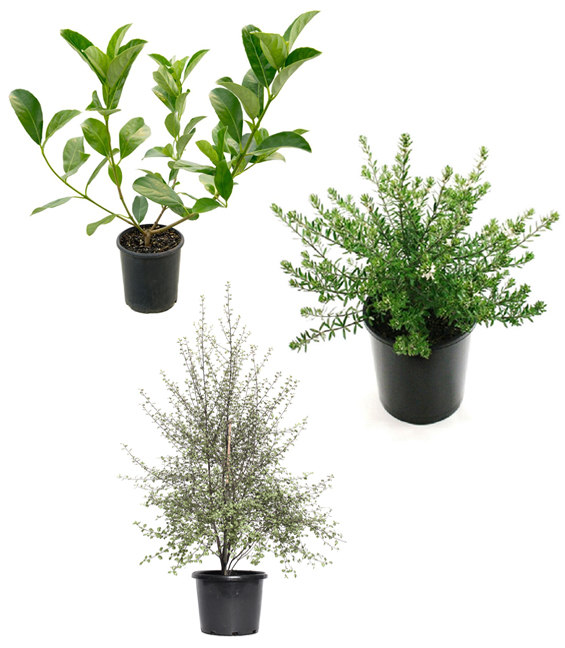
Given we’re just coming out of a long, hot, dry summer and don’t have the budget for lots of large established plants the garden is proving a bit of a challenge. Still, we’re up to the task and will do our best to make it look as nice, neat and fresh as possible.
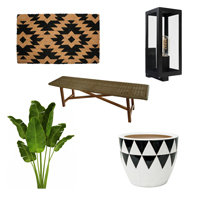
For me though, the most exciting aspect of our progression so far is the purchase of a few decor pieces!
From the start I envisioned one of these box lights in the entry and I couldn’t love it more (still need to add a pretty bulb).
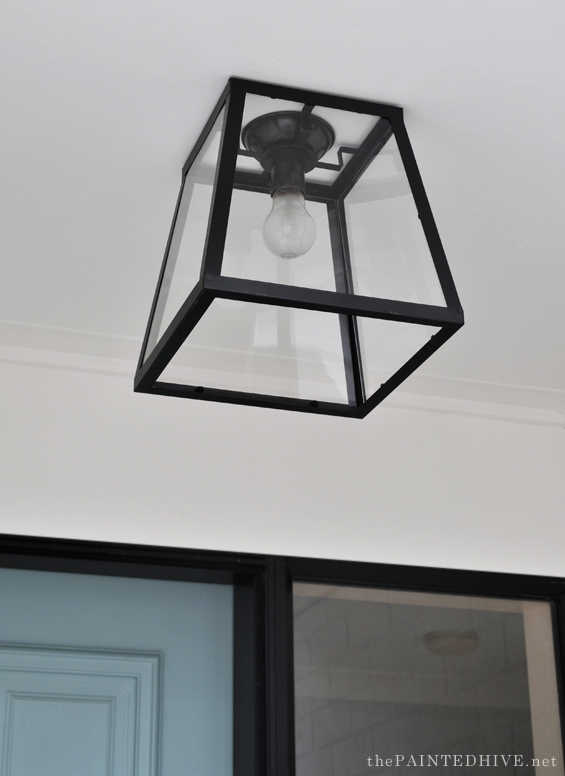
Makes such a nice change from the plastic “eyeball” light which was originally in place.
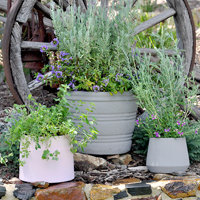
And I’ve also been playing around with some modern pots and a geometric door mat.
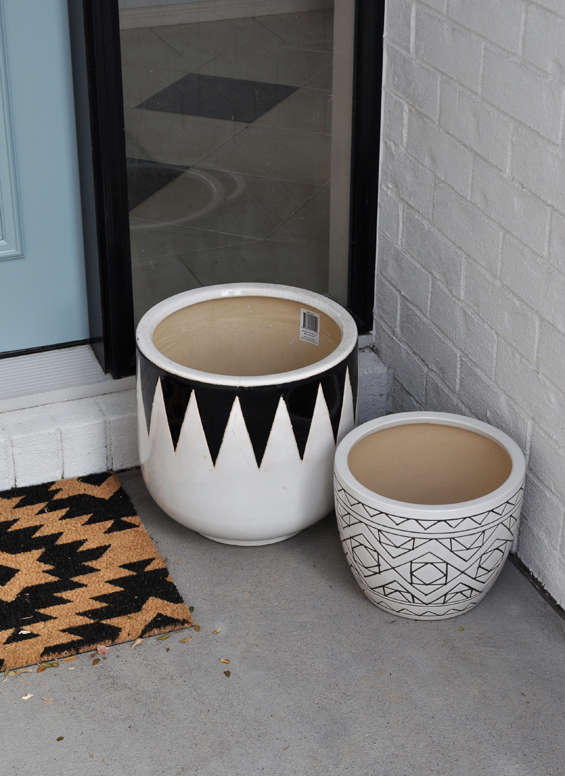
Deciding on plants for the pots has been tricky – in a good way!
My initial idea was for pretty cottage style shrubbery with white blooms, then I thought maybe something more rustic like a little olive tree and some rosemary would be nice, now I’m leaning toward lush statement greenery like a bird of paradise and blousy fern. Any preferences?
Anyhoo, that’s where things currently stand. It’s soooo close!
I’ll be back as soon as I can to share further details, hopefully including the barn style garage door!
Thanks so much for following along.
![]()
Catch up on all of my previous posts about the flip house HERE.


You are doing an amazing job! Duck egg blue is a fav colour of mine too, I have a very large barn door painted that colour in my home. The front door is so much more inviting and is a fantastic contrast with the black. I look forward to seeing your ongoing progress :-)
Thanks so much Jenny :)
I LOVE the duck egg color! Really brightens things up! So glad you decided to paint the retaining wall as well. Such a great color choice as well! I’ve enjoyed seeing the transformation thus far!
Thanks so much Nancy :)
Looking fabulous !!! Can’t wait to see the end product !!!
As for plants by the front door, my vote is for the olive tree and rosemary. Beautiful color for the front door and the shutters and the whole thing is coming together so well! Great job!
Thanks so much :)
There are decorative shutters that just look wrong, think thin plastic, and then there are decorative shutters that are truly decorative which yours are. and it doesn’t matter whether they’re operable or not, they are a design element that adds to the whole look. Love that color and I am not a blue person. Can’t wait for the whole reveal. It’s already looking amazing.
Thanks so much Deb. When I first saw your comment I misread it as “those shutters just look wrong”. LOL! I panicked for a second there!
Oh boy – I guess I could have worded that sentence better! Sorry for giving you a moment there !
Oh no. All good. It was just my brain making words up :)
Can I just say ‘ditto’ on Deb-NC’s comments? (though I’m becoming a blue person)… Love those shutters. Looking forward to seeing the big picture!
Beautiful! Love the blue, pots are lovely and interesting. I like the rosemary and olive tree as well!
As per usual, spot on.
Your progress photos are so gorgeous I don’t need afters.
Yet.
Love the colors you’ve picked–especially the duck egg. Good job!
Thanks :)
This is so exciting, can’t wait for the next instalment! Love your colour choices.
Looking wonderful so far. Much lighter and brighter. I would stick with the Mediterranean plants of olive and rosemary – it’s not really a cottage garden style of house – the grey/green foliage should really marry with the duck egg blue.
But, what do I know? All of your refurbs always look great at the finish!
Thanks Carol. Yes, my main concern was that a little olive might not have much presence from the street. Also, I have a narrow area to work with and finding a slim one could prove tricky. Will see how I go :)
ALRADY IT LOOKS AMAZIN
Already it looks amazing. I am in love with that soft blue door! The facelift has taken years off the old girl and she is heading towards young and pretty.
You are doing an amazing job on the house! I love your color choices! My humble opinion on the gable pediment is to leave it as you have it now. I like the rustic, stained wood. It just adds to what you have done everywhere else. Maybe you could do a matching wood planter box for the porch or near the porch? Can’t wait to see the progress on your next post !
Thanks Mary :)
I had to laugh when you said “Well this ain’t some home renovation show”, as I know exactly what you mean! I had painted my formal D.R. a couple of months ago, and wanted to put up some “picture frame” molding on the bottom third which I had painted white. Well, first I couldn’t find the exact molding I wanted in white, so I had to buy unfinished molding, which of course means more work. Then I just wasn’t in the mood to do it! Well, I finally got around to it yesterday, and because I’m almost 78, & don’t have an electric mitre saw, I had to do the mitering by hand…. very time consuming! Secondly, each section of wall was of differing measurements, and there was also a bay window which came down lower than the chair rail, making that area more difficult, too. All in all, I’ve just finished getting it up and have 15 hours of work in that, and I haven’t begun to paint it yet. I’ve always loved decorating and renovating and all, but now that I’m much older, I find that I may still have the head knowledge but am much slower in doing my projects. But that’s okay…. it gets done eventually, and I am blessed to even be able to still do everything myself as old as I am. Your flip looks lovely, and when you first showed us that gable pediment you made, I commented then that it was going to be my next project. Well, I may have lied a little bit about that as it’s still very cold here, so I’ve had to do inside projects instead, but as soon as the weather warms up enough, that will the next job for me! I love it, and love the whole exterior of the house you’re renovating…. I can hardly wait to see the total renovation done once you do the inside. Not only do you have wonderful ideas, but everything is done well, too! Thanks again for sharing with us! You’re a super talent! Just take your time…. LOL
You should be so pleased with your accomplishments! And don’t worry about me..I’ll be sure to take my time – he, he!
Looking good!
LOVE!!!
I love that you are making safe, affordable changes and updates that add a real impact. That takes a special talent, one that you have.
Thanks so much.
I loved it, I loved it. Very good taste.
I love the colors! I am a BLUE girl…I have blue in every room of my home—it just makes me happy. Cobalt is the accent in my gray/white kitchen. Teal is my accent in my hall bath. Seafoam blue/green is my Master bathroom wall color. Living in Atlanta, moving here from the Florida beach, this is the closest I can get to the beach when we’re not on vacation. I don’t have any of the Duck Egg Blue, but it is a close color to the comforter in my guest bedroom. I may have to use it on our new covered deck—I have a couple of outdoor end tables that need to be updated. Love what you’re doing and everything is looking good!
Thanks Tina! Yes, you need to get some duck-egg in your life :)
Love what you are doing. You are a real inspiration. Can’t wait to see the finished job.
Aw, thank you Di :)
It is looking awesome! Love the duck egg blue, and the shutters! They are for balance after all and don’t need to be functional. With the soft tones you having going on, my vote would be for an olive tree at the front door, and another pot of similiar soft tones, with a punch of vivid colour. Can’t wait to see what happens next!
Amazeballs!! That texture in the paint on the brick is gorgeous against the duck egg blue. I’m loving the way this reno is going and can’t wait for the big reveal!
Thanks Sam. It’s still hard to know how it’s all going to look in the end though it will hopefully be better than it was before at least :)
I think the “character” that the decorative elements makes a huge difference and the colour choices are beautiful. I would keep the timber and try to match it with adding something else at the front. – its hard to tell from the pictures but could you do a little deck type step to bring the timber to the front door. Looks like there is nearly enought height and room for it? You are very clever to make it feel quite timeless but with small touches of trend that will appeal in the accessories. Love it.
Thanks Rebecca. Yes, I thought about adding a little timber “boardwalk” leading up to the front door, or possibly even cladding the porch ceiling. Not sure it will happen though they’re options if I feel they are needed in the end.
What a huge difference already!!! I’m looking forward to seeing the completed project… great job!
I really enjoy your blog, and I appreciate the way you show how things really are and what they really cost. Everything looks beautiful. Thanks for sharing your progress.
Thanks so much Janet. Glad you’re enjoying it :)
The progress looks fantastic! I echo the comment that your gift is to make beautiful on a budget. I can tell that you spend a lot of time “finding” just the right things as well. It looks like I also get to echo the planter plant choices – an olive tree and rosemary would look great in the black and white geometric scheme you have going on. BTW, in Amurica we call the type of light that was the previous porch light a “boob light”. ;)
LOL! Yes, we call them boob lights here too though I thought maybe mine wouldn’t qualify because it didn’t have the “nipple” bit I often see on other ones. Ha, ha.
Seems I’ll have to think more seriously about the olive and rosemary option. I was leaning more toward a lusher feel, mainly because I wanted the plants to have some presence from the street.
I’m a newbie but have quickly grown to LOVE you style and your energy! I think this Reno looks amazing and the blue is a lovely surprise…how you manage to create these looks on a budget
is a real testament to your creativity. Your explanations are easy to follow and I have learned so much
following your blog(and I’m not a kid😉)… Keep up the good work and look forward to the finished product!
Thank you so, so much :)
The gable pendinent makes such a difference. I agree you’ll need to paint it black or black wash it.
Love the blue gary door. Good choice on painting the retaining walls gray. But wouldn’t it be nice if enough pallets of river rock facade fell from the sky so you could cover the walls with it. One can only dream.
It’s amazing what you can do on a budge.
Can’t wait to see the new garage door!
Thanks Pat. Oh, that garage door has been giving me headaches! Will share more this week :)
Beautiful!!! Love the blue – its a great choice. that new door colour and the newly painted brick really opens up the entrance way and makes it feel much lighter and airy-er (if that’s a word…haha) The addition of plants there will enhance that feeling too – no matter what you pick. The gable add so much visual interest to the front as well. Feeling inspired!
Thanks Leslie :)
My wife just loves the color combination of the rooms. Thanks for the insights, it has inspired a project we are doing
Love what you’re doing, as always Kristine! Those front windows are very long. How about building some window boxes stained in the same color as the gable and putting them along the the bottom of those windows to balance things out a bit. You could fill them with annuals for an instant pop of color!
Thanks Mary.
There is a garden bed in front of the windows which we will plant out. Once the plants grow any window boxes would be hidden. Also, it’s hard to see though there is a slanted brick sill at the base of the windows which would make attaching planters a bit tricky. It’s a great idea and would be very pretty for the right house. Just not suitable in this instance unfortunately.
I see the right angle brackets screwed into the brick, but how did you attach it to the peak? Do you have a post about the gable? I’m looking to make this exact thing and I would to show my hubby a how-to so he can wrap his brain around it!
It’s not attached at the top at all. It’s purely held in place with the brackets and merely rests under the eave inside the fascia. It’s quite a tight fit so is snug to the eave. You could use some exterior silicone to hold it in place if you felt that was needed.