
It’s finally done!
Sorry it has taken me soooooo long. I’d like to say it’s because I was super busy, though the truth is, it’s because I was totally procrastinating over writing this tutorial due to the fact I knew it was going to be a beast!
Not that making the table itself is a beast, quite the opposite actually, however clearly documenting and explaining the process sorta is.
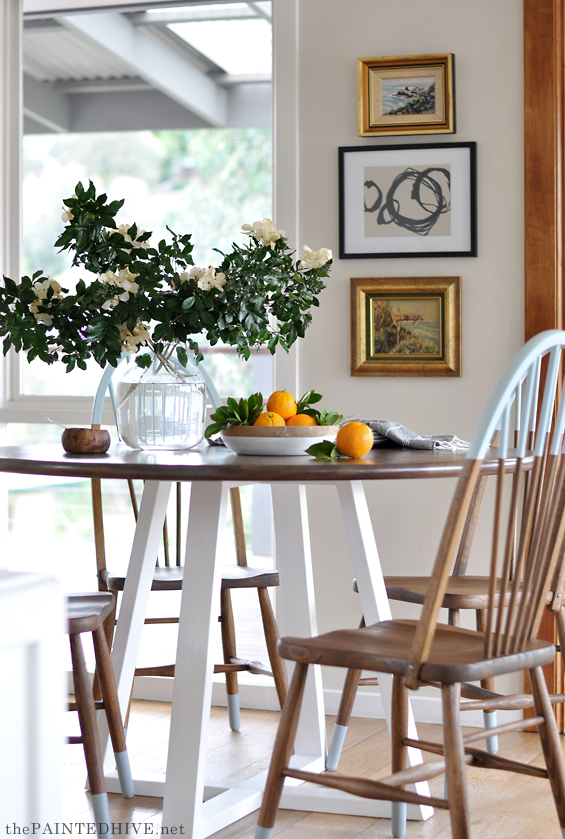
For anyone new here, I originally made this table base as part of my sister’s free dining room makeover.
It cost just $7 and took only a couple of hours.
A lot of you were keen to see a how to, so here it is…
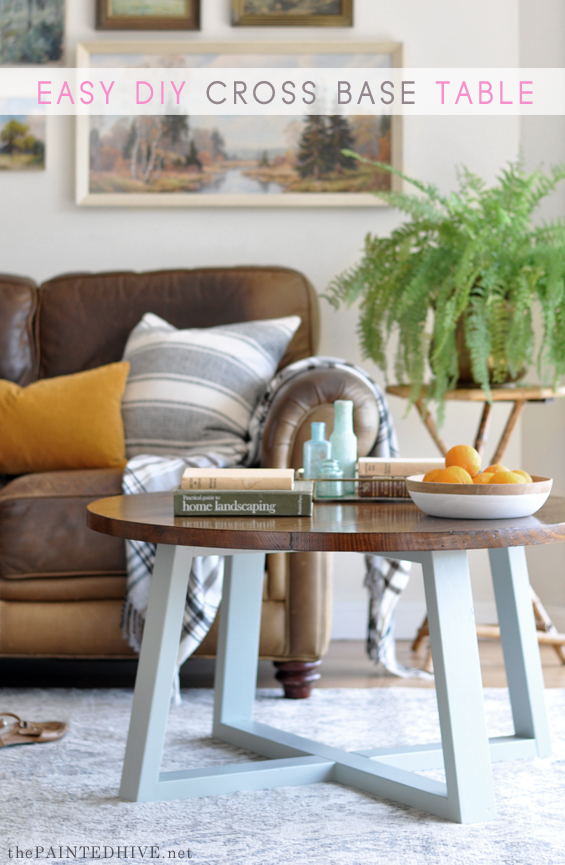
For the purpose of this tutorial I built a coffee table, rather than another dining table, however the basic principle is the same.
Although at first glance the tutorial seems lengthy and complex, building the table is actually really quick and easy. I just wanted to be as thorough as possible.
Some dimensions are rounded to the nearest whole number or decimal. Not all diagrams are to scale.
I have tired my absolute best to be completely accurate with all numbers though can’t guarantee there aren’t some slight miscalculations. Math is not my best friend.
YOU WILL NEED…
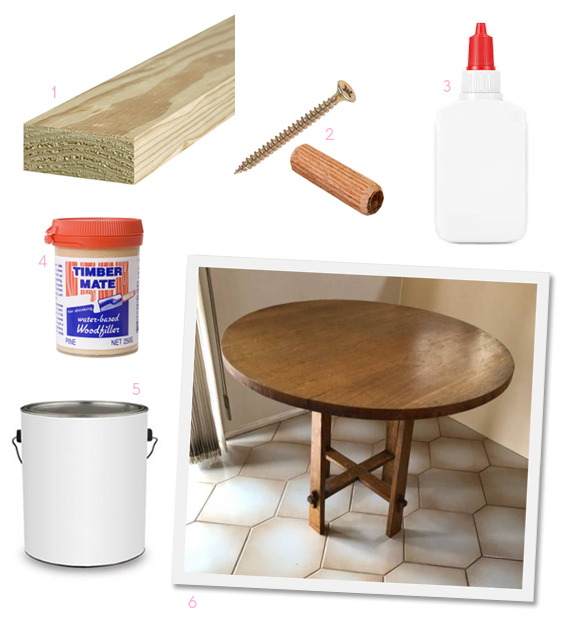
1 TIMBER
I used a $7 length of merch grade pine which was 7cm/2.7″ wide x 3cm/1″ deep x 5 meters/16′ long. You may find that not all hardware stores and timber yards stock it though it’s not hard to come by. I got mine from my local Mitre 10.
Merch is a structural rating, not cosmetic, so although the timber is likely to have a few physical faults some lengths are actually quite good looking. Be sure to search through the pile for something nice and straight without too many imperfections.
2 SCREWS & DOWELS
To assemble the table, timber screws with countersunk heads work best. I used 6cm/2″ long screws (double the depth of my timber).
To attach the base to the top you need screws which are slightly shorter in length than the overall depth of the base and top combined. My base and top together are 6cm/2″, so I used 4.5cm/1.7″ long screws which enabled me to countersink them around 1cm/.3″ and still allowed for a really good “bite” into the table top without the screw protruding.
I used 3cm/1″ long dowels.
3 GLUE
Any decent wood glue is fine. I used Selleys Aquadhere.
4 FILLER
Wood filler is preferable. I used Timber Mate because that’s what I had in the shed.
5 PAINT
Whatever you like. I used primer followed by an acrylic top coat in a duck egg shade (I just made it using some left-overs I already had). To seal I used a water-based poly.
For the table top I used Feast Watson Prooftint in Oak followed by Feast Watson Clear Varnish in Satin.
6 TABLE TOP
If you can find an affordable table top alone, then good for you. I find it’s much easier to come across a cheap second-hand table and then dismantle it. I found the one shown, which has a nice thick solid timber top, on Gumtree for just $20 (it’s 90cm/35″ in diameter by 3cm/1″ deep). If the base is any good you can keep it and use it for a different project. If the base is unsalvageable because it’s super ugly or damaged then the table was probably really cheap – yay! I got my sister’s dining table, which had a weird rail type base, for just $1! Also, keep in mind the material the table top is made from. You’ll likely want solid wood if you’re planning on refinishing it. Of course, you can always make your own table top too.
You can purchase your table top first then use it to somewhat dictate the scale of your base. Alternatively, you can decide on the size table top you’d like/need, construct your base to fit, and then find a table top to suit.
Important Note: If you are planning on making a dining table, keep in mind that the size of the top will dictate how the chairs “tuck in”. Essentially, based on the splay of your chair legs there will be a point at which they make contact with the base (this isn’t determined by the size of the base as the chairs will make contact at the same point regardless). If your table top is too small the chairs won’t be able to be “tucked in” sufficiently. For this reason, I find this style of table (used for dining) doesn’t lend itself well to a top diameter smaller than around 110cm/43″. As a guide, chairs with a typical leg splay of about 45cm/18″ suit a top of around 120cm/47″ (this is what my sister has).
STEP 1 | WORK OUT DIMENSIONS
There are two ways this can be done: first, there’s the intentional (read “right”) way, and then there’s the impromptu (read “sorta not right”) way.
I’m more your impromptu kind of builder.
Essentially, the intentional way involves creating a proper plan with all dimensions prior to beginning construction. The impromptu way involves deciding on a few determining factors, cutting some bits then winging it from there.
Either way the dimensions will be dictated by three main factors: the size of your top, your desired table height, and your chosen angle. For the purpose of this tutorial, I’ll refer to my coffee table specifications.
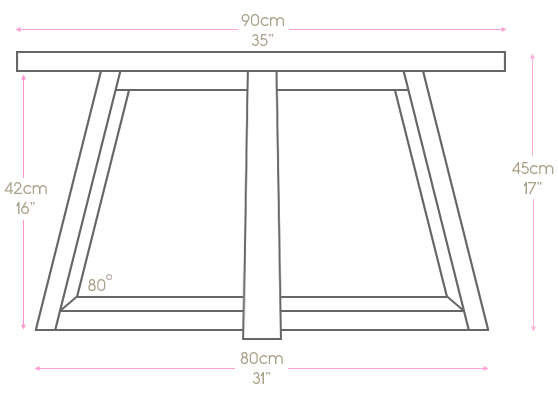
Obviously you want the base to be slightly narrower than the top – I find around 10cm/4″ – 20cm/8″ works well. My coffee table top was 90cm/35″ in diameter so I decided to make my base about 80cm/31″ wide (at its widest point).
For a standard coffee table the overall height is around 45cm/17″. Deducting the depth of my top (which is 3cm/1″) this leaves me with about 42cm/16″ for the base. Of course, this doesn’t need to be exact. For a standard dining table the overall height is around 75cm/29″.
I used a cut angle of 10 degrees. This gives the assembled table an angle of 80 degrees (this is because mitre saws begin at 0 degrees which is actually 90 degrees, so 10 degrees is essentially 80 degrees – yeah, I know, reading this hurts my brain too). I find this gives a nice tilt without being overly slanted.
With these factors determined, you can begin planning your build. As already mentioned, there are two ways you can go about this…
THE RIGHT WAY
If you want to do things the right way by creating a complete plan prior to beginning construction, it takes some math. Yes people…math. This is due to the angles involved which makes things slightly trickier than a regular straight up-and-down build.
To explain, I’ll use my coffee table as an example.
I know that my base at its widest point is 80cm/31″, that my height is 42cm/16″, and that the angle of my cuts are 10 degrees (which, remember, are essentially 80 degrees). What I don’t know is how wide that makes the base at the top and how long the legs need to be exactly.
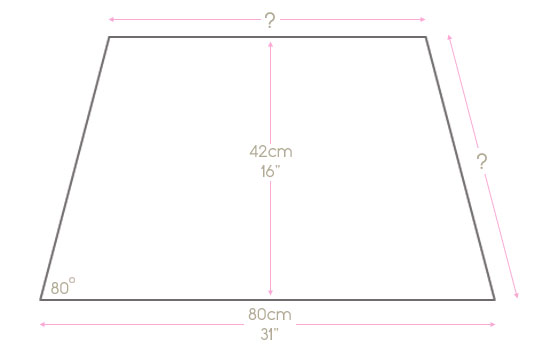
Well, this is how to work it out…
Create a triangle at one end.
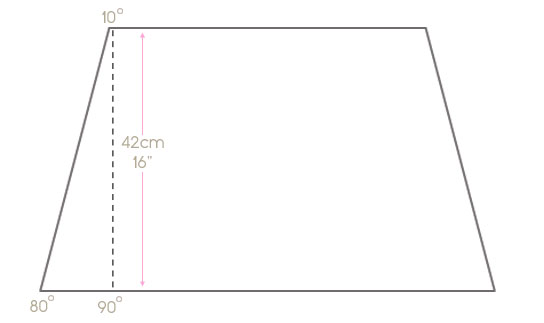
This retains the overall height at 42cm/16″ and the angle at 80 degrees (the base dimension of 80cm/31″ is not relevant). It also gives me a 90 degree angle at the bottom and a 10 degree angle at the top (I know this because the bottom is a right angle and all triangles must equal 180 degrees).
Input this known data into this online calculator.

For some reason the result is presented sideways.
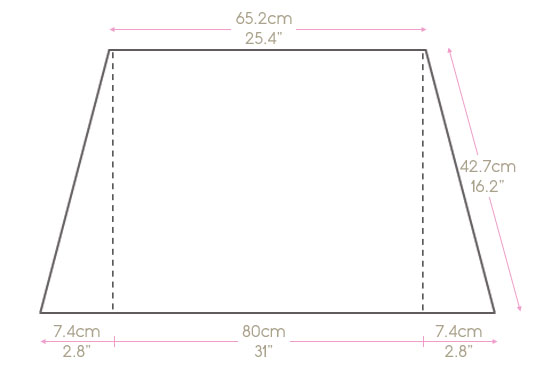
This reveals two factors: firstly, the leg length (42.7cm/16.2″ in my case), secondly, the length of the triangle at the bottom (7.4cm/2.8″ in my case).
Next, to determine the length of my base at the top, I simply need to double the length of the triangle at the bottom (7.4cm x 2 = 14.8cm/2.8″ x 2 = 5.6″) then deduct it from the overall length of the base (80cm – 14.8cm = 65.2cm/31″ – 5.6″ = 25.4″). This is the length of my base at the top.
Now that I know the overall size for my base, I can work out the dimensions for each of my pieces.
The legs remain unchanged, however the braces and joiners need some adjustment due to the fact they are flanked and intersected.

So here are all of my pieces.
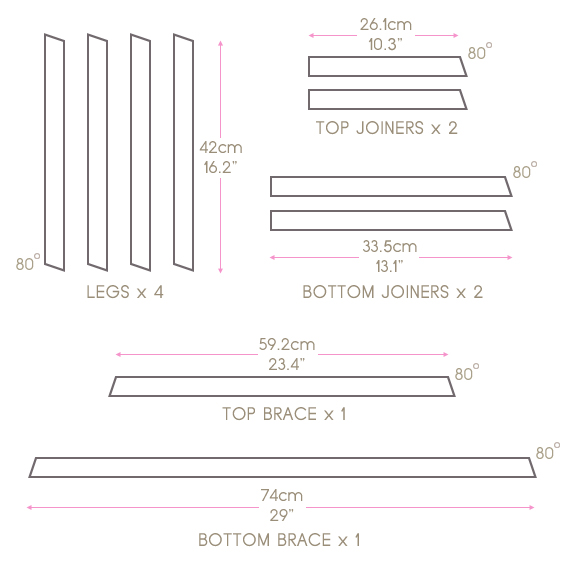
Important Note: Dimensions are taken from the outside edge of the base. So, the lower brace and joiners are measured from their bottoms (longest sides) whereas the upper brace and joiners are measured from their tops (shortest sides). All cuts are 80 degree (10 degree on a mitre saw) with the exception of one end of each joiner which is simply 90 degree.
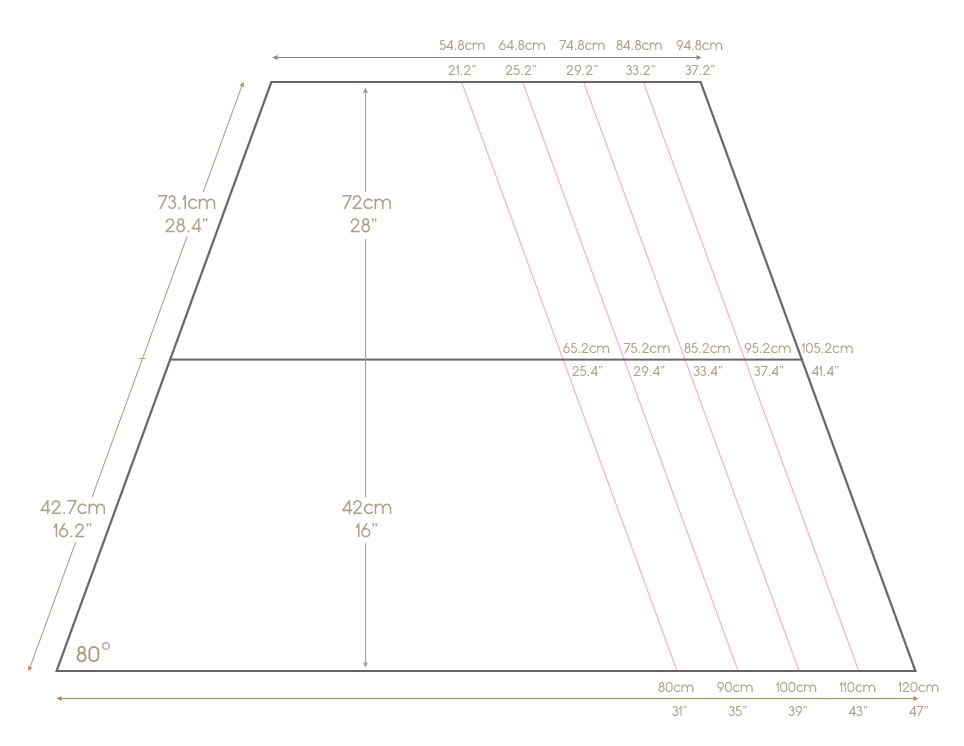
To save everyone some time and effort, I also created this handy ‘cheat sheet’ which you can reference if using any of the standard dimensions included.
DIMENSION CHEAT SHEET
(CLICK TO ENLARGE)
THE SORTA NOT RIGHT WAY
Jump straight to STEP 2 because planning is sooooo over-rated.
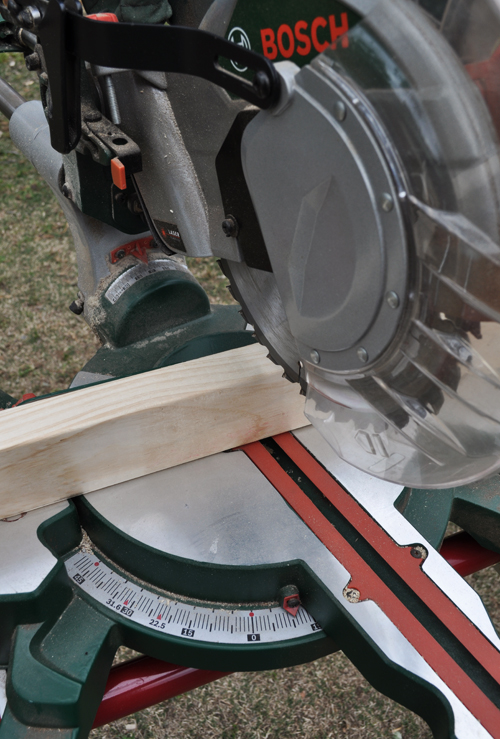
STEP 2 | CUT PIECES
The easiest way to trim the timber is using a mitre saw. If you don’t have a mitre saw you can use a hand saw and a mitre box (it will just take more time and physical exertion, plus there is a higher likelihood of some inaccuracy).
If you’ve done things the right way, use the dimensions from your plan to cut all of your pieces.
If you’ve done things the sorta not right way, start by cutting the legs.
Set the mitre saw based on your desired angle (10 degrees in my case) and trim the legs both top and bottom to your desired height (42cm/16.2″ in my case).
Remember that the slight angle will marginally effect the height however this is only very insignificant.
Next, cut the bottom brace to your desired length. Remember to deduct the depth of your legs as the brace will sit within them. My bottom brace length was 80cm/31″ and my legs are 3cm/1″ deep (of course, there are two legs so the total to deduct is 6cm/2″) so I cut my bottom brace to 74cm/29″ (at the longest point).
To determine the length of your top brace you can use the mathematical formula as mentioned above under “The Right Way” (remember to deduct the depth of your legs as the brace will sit within them). Alternatively, you can do what I did and carefully lay your pieces out on a flat, even surface then measure the gap.
Yes, I realise this is completely improper though, hey, it works.
In my case my top brace needed to be 59.2cm/23.4″ (at the shortest point).
Finally, cut the brace joiners.
These need to be the same length as the braces themselves minus the width of the intersecting wood, then halved. That sounds really confusing though is actually very straight forward.
In my case, my bottom brace is 74cm/29″ long. Minus the width of my wood (7cm/2.7″) I am left with 67cm/26.3″. Halve that, as the joiners are split in two, and I’m left with 33.5cm/13.1″. Don’t forget that one end of each joiner needs to be cut at 90 degrees.
Using this same method, each top joiner needs to be 26.1cm/10.3″.
You now have all of your pieces!
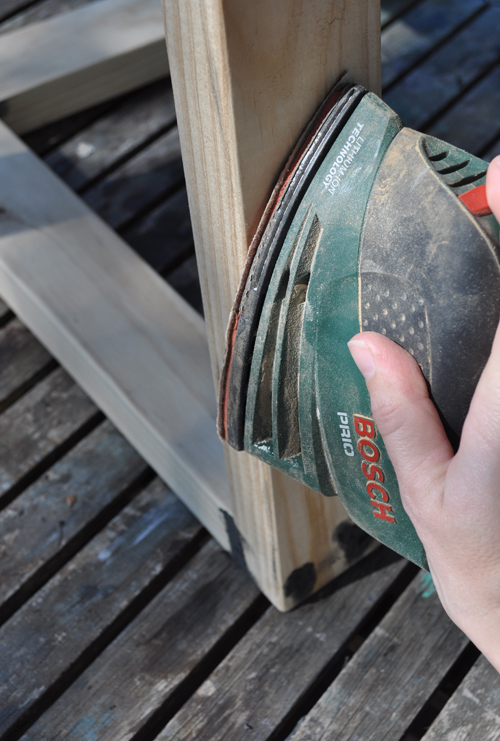
At this stage you can sand any overly rough cuts as they will be hard to get to once the table is assembled.
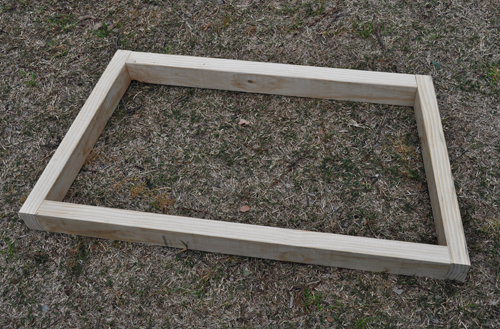
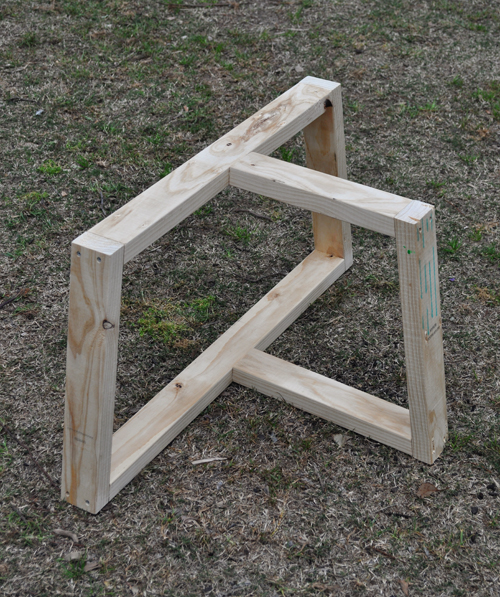
STEP 3 | MAKE BASE FRAME
Begin construction by connecting the braces with two of the legs to form a base frame.
I used wood glue and long timber screws to join my pieces.
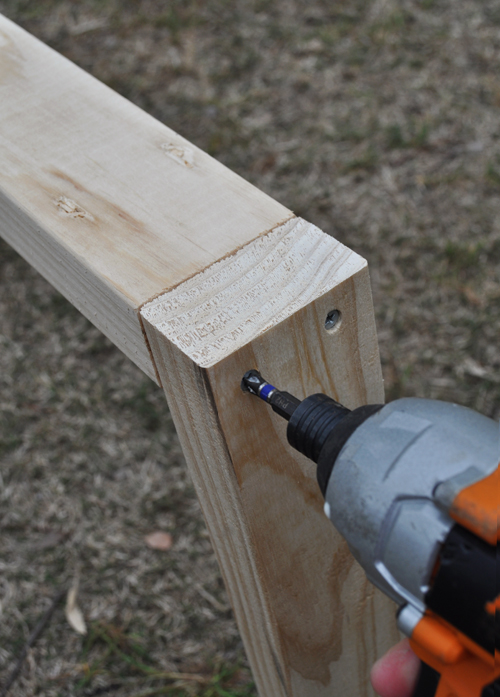
Because I was working with soft pine and a good hammer driver I didn’t pre-drill. I simply drove my screws in until the heads were counter sunk. If you have trouble don’t hesitate to pre-drill some pilot and counter sinking holes. It certainly can make things easier.
STEP 4 | ATTACH JOINERS & REMAINING LEGS
This step is a little trickier and requires good accuracy.
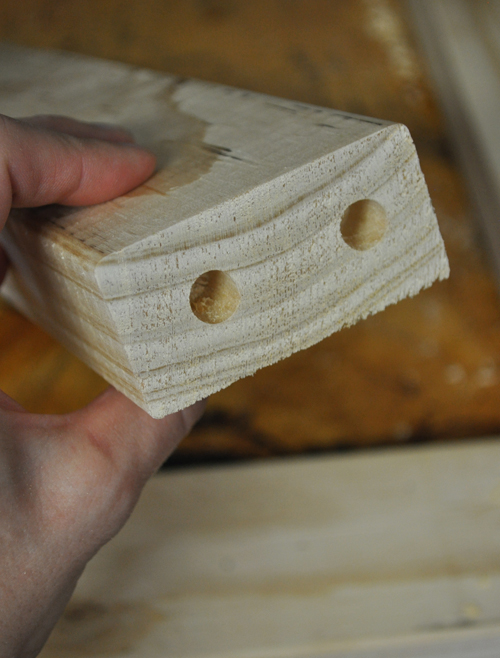
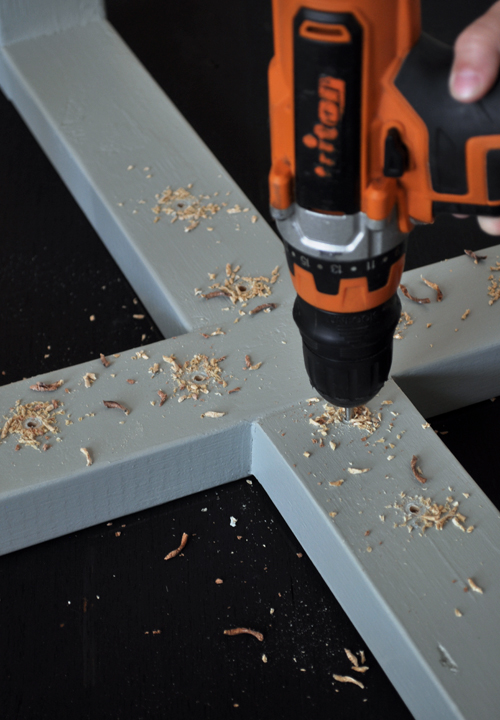
Measure the square end of all joiners and mark two points for dowels.

Using a small drill bit create pilot holes.
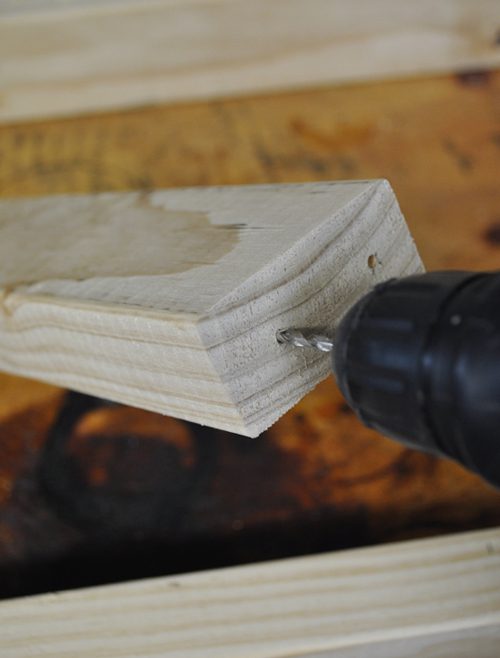
Using a larger drill bit (one or two sizes bigger than your dowel) create holes deep enough to comfortably accommodate half a dowel.
Repeat this process on the braces themselves, being careful to ensure that the holes will accurately align with those of the joiners.
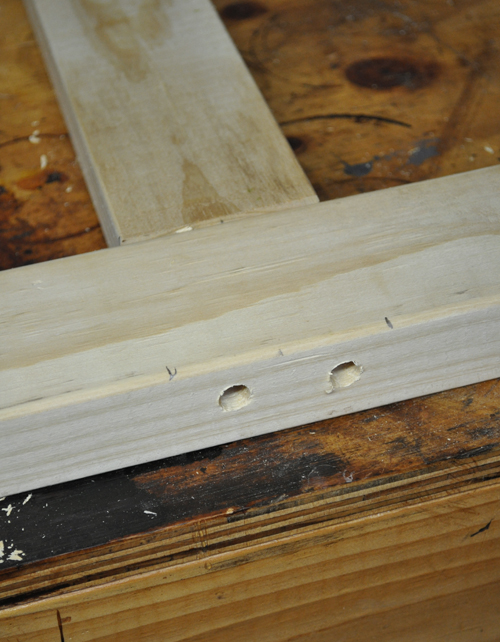
In the above pic I had already attached one joiner to the rear side of this brace.
Note: You can use a tool called a ‘dowel jig’ which helps to ensure holes are centrally positioned.
Starting with one half of the table base, fill all holes with a generous amount of wood glue, push the dowels in and then connect the pieces.
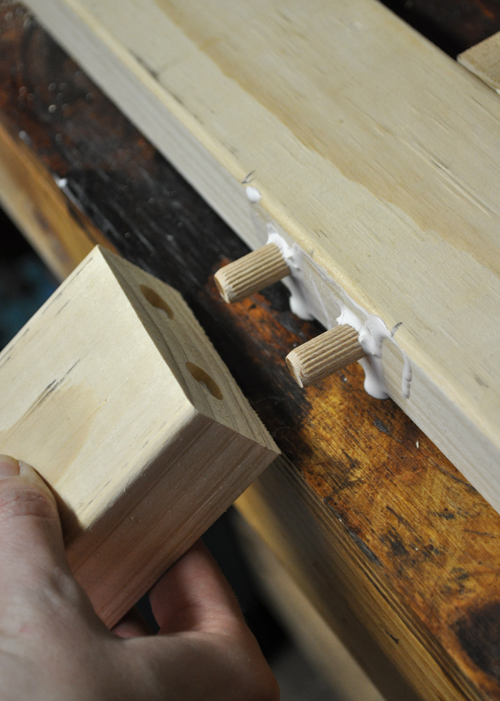
Ignore the messy glue. I’d normally be neater though it’s kinda hard to simultaneously construct furniture and document the process without making a bit of a mess – and getting glue all over your camera!

Use a mallet if needed and then wipe away any excess glue. You need a decent amount of glue as it works to dampen and swell the dowels (which is what provides a nice, strong join) and, of course, to bond everything together.
Whilst the glue is still wet, attach the remaining leg to the joiners using the same method as described in STEP 3.
At this stage, if you want a funky asymmetrical table you could stop here (just bear in mind this may be a little unbalanced and could potentially tip easily).
Repeat with the other side of the table then set on a flat, even surface to dry, ensuring everything is nicely butting and aligned.
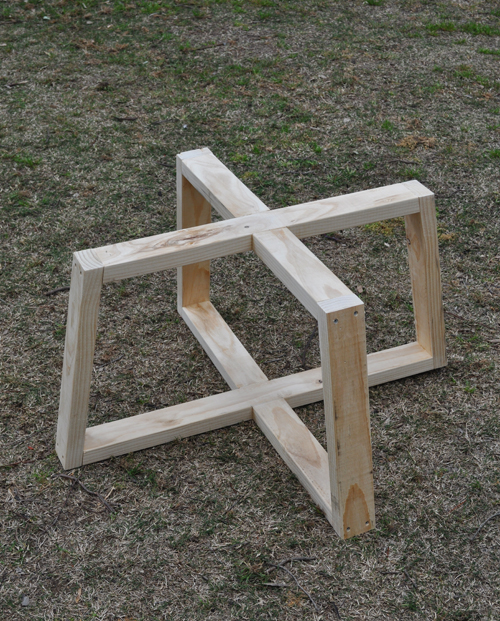
I found there was no need to clamp however if you notice any glaring gaps it wouldn’t hurt.
STEP 5 | FILL, SAND & PAINT
You can go as crazy as you like here. If you want a super refined finish then fill the screw holes along with the joins and any other notable imperfections in the timber itself. I decided to embrace the rustic nature of my base so only filled the screw holes and some of the more obvious joins.
Once the filler is dry, sand everything until nice and smooth. You may want to undertake a second round of filling and sanding if you’re going for a perfect finish.
To paint, I applied one coat of primer with a brush before spraying on three top coats in a soft duck egg colour (I just made it up using some left-over acrylic paints I already had).
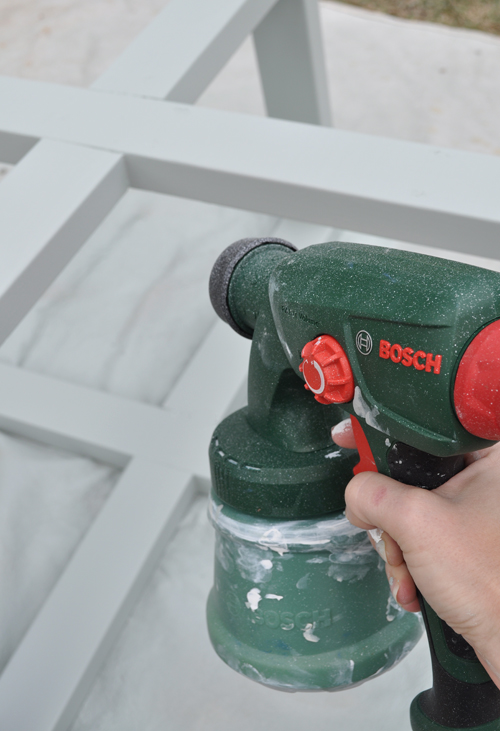
I have a paint spray gun tutorial HERE if you’d like to learn more.
To finish I sealed with one coat of clear water-based poly.
STEP 6 | ATTACH TABLE TOP
I’m not certain what type of timber my table top is made from though it’s really thick and lovely.
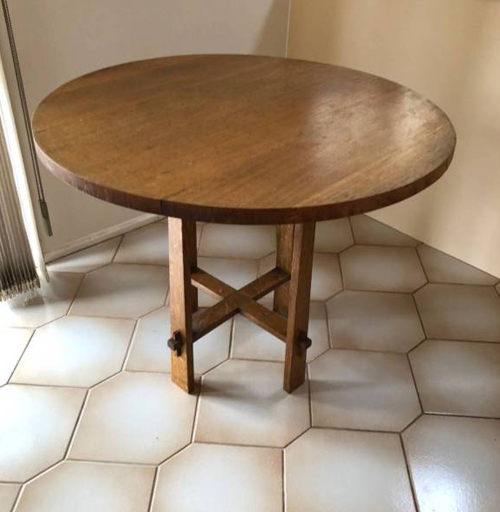
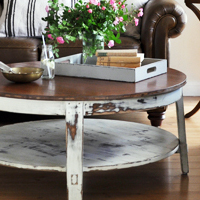
This is the photo from the Gumtree listing. The original base looks okay here though it had been previously damaged and ‘repaired’ with ugly timber supports which is why I didn’t feel too bad about removing the top – and also why I managed to get it so cheap.
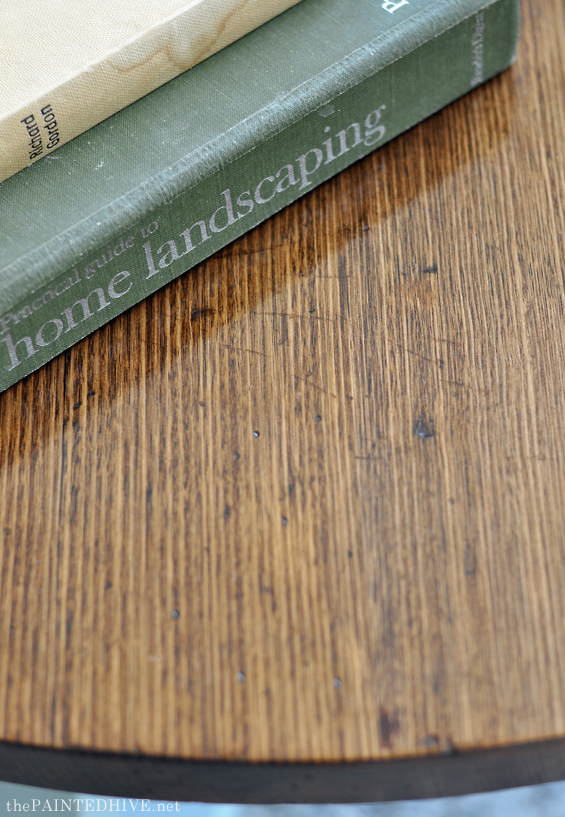
It had quite a few scratches and dings, which I personally love, though was also really patchy. I sanded the previous finish back to raw, being careful to retain some of the original character, before staining with two coats of Feast Watson Prooftint in Oak and sealing with three coats of Feast Watson Clear Varnish in Satin.
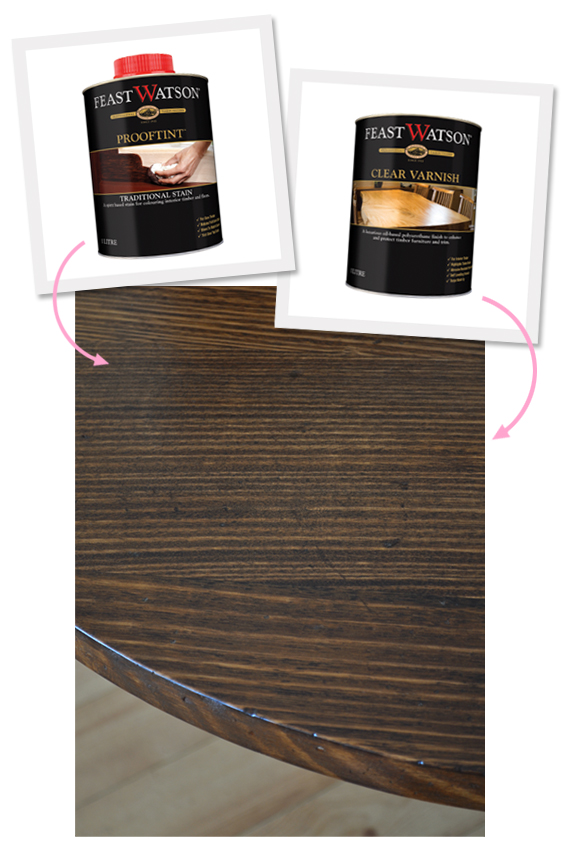
I absolutely love the way the grain and deliberate imperfections are beautifully highlighted.
To attach the top to the base, lay the top upside down on a smooth, even surface then place the base in position on top, measuring to ensure it is centralised. You can mark with a pencil in case of any movement.
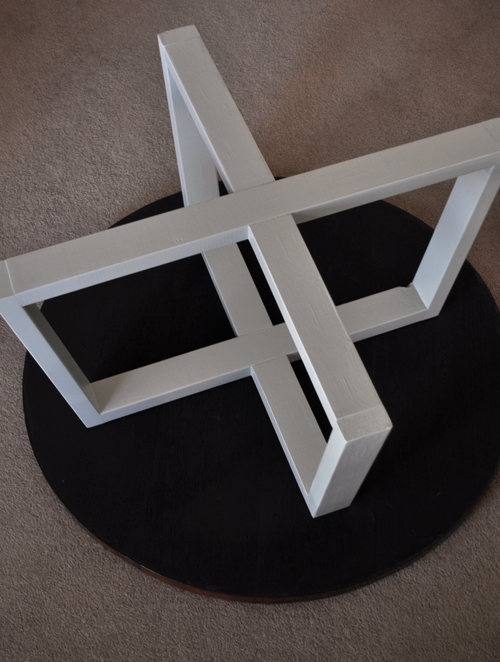
The underside of my table top was a little damaged and discoloured so I painted it black.
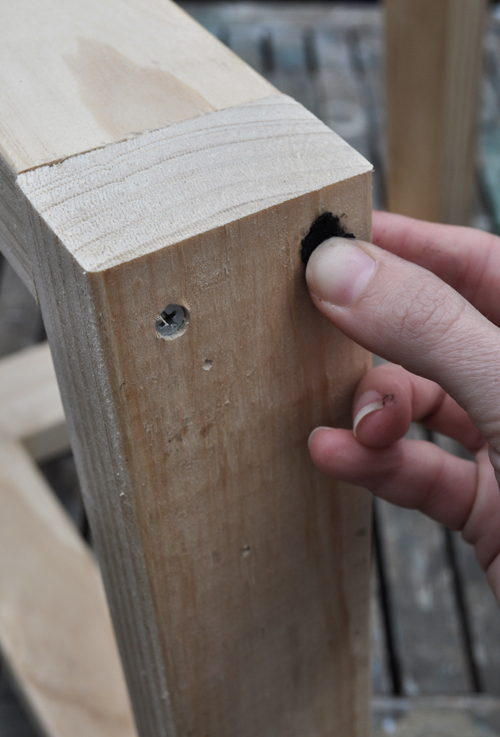
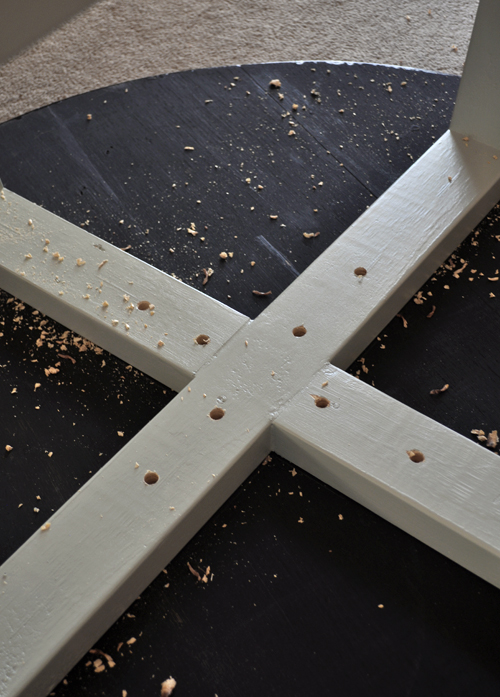
Next, measure and mark eight screw points – two along each leg (you could probably get away with just four in total though, hey, let’s over-engineer this sucker).
Using a drill bit one size smaller than your screws (refer to the “You Will Need” section for information about selecting the right size screws), create eight pilot holes, being careful not to drill right through your table top.
I’m not entirely sure why I clustered mine in the center. You could spread them more evenly along the length of the base.
Tip: Measure the drill bit and mark the depth with a piece of tape or marker to ensure you don’t go too far through.
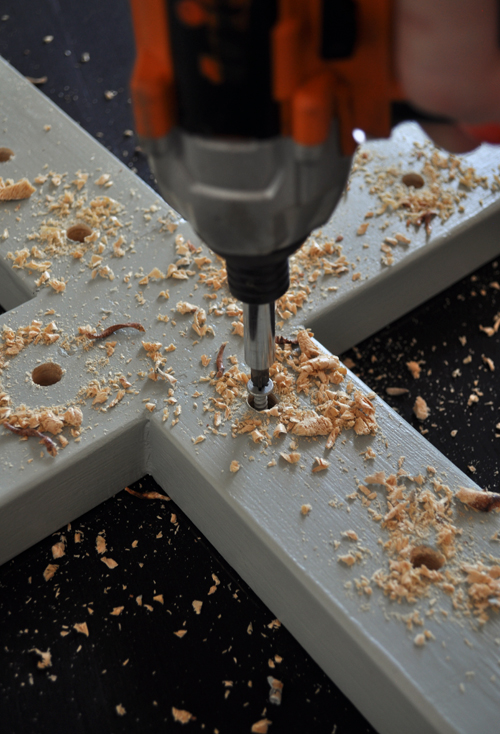
Next, using a drill bit slightly larger than your screw heads, create eight counter sinking holes. Ensure they are deep enough to neatly conceal the screws though not so deep that the screws will protrude through the table top when drilled in.
Drill all eight screws in until the top and base are securely connected.
STEP 7 | DONE!
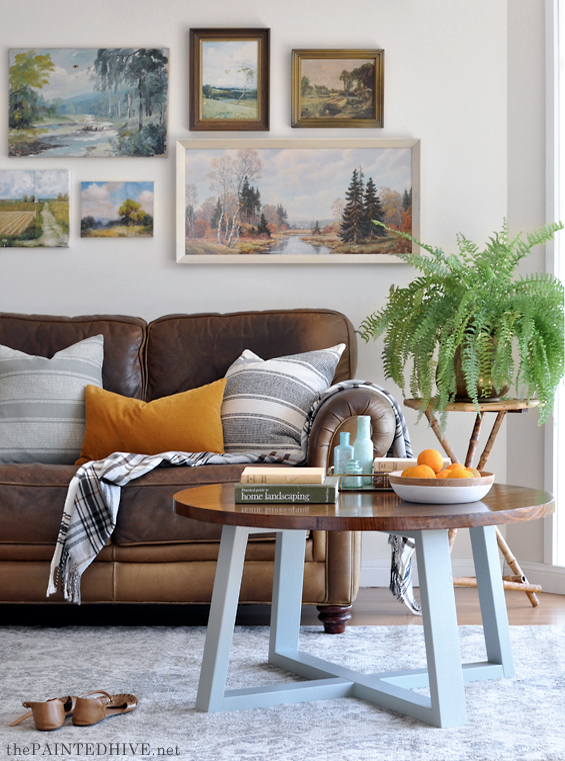
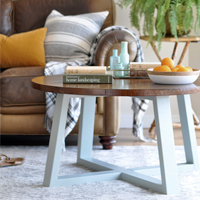
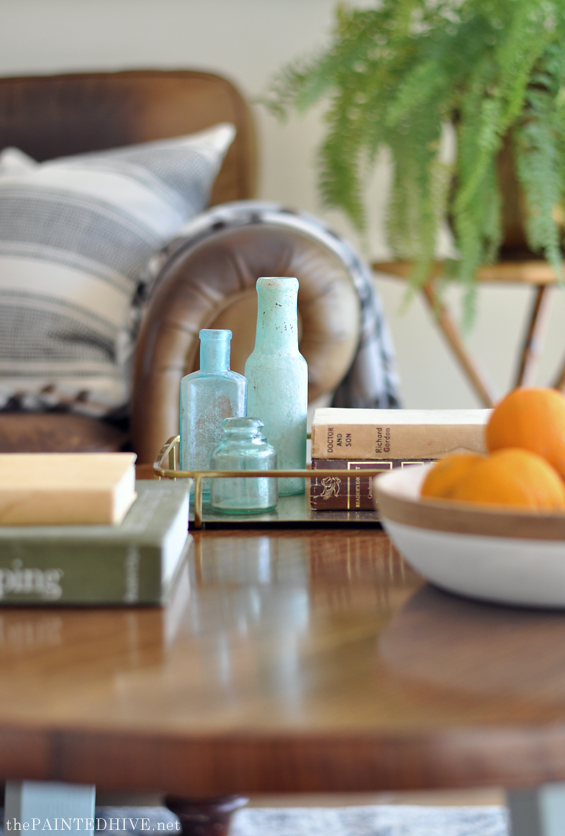
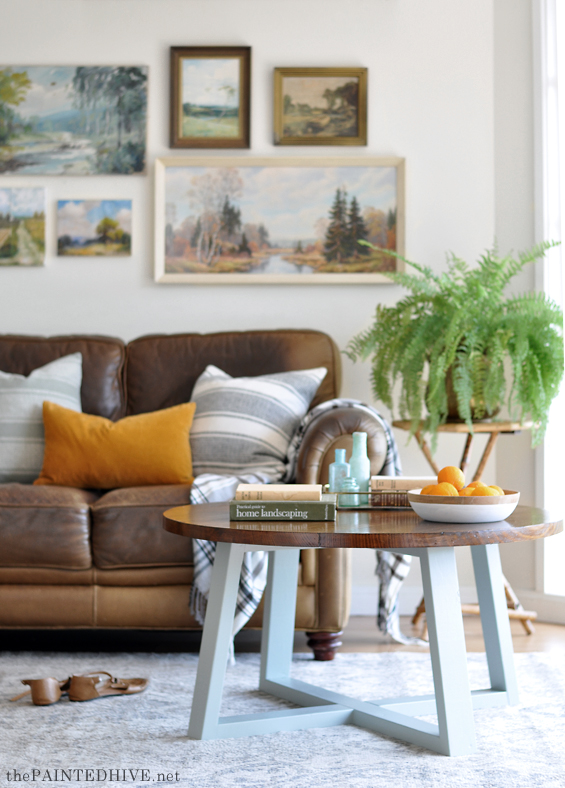
I had a bit of fun dressing-up my living room for the photo shoot. Sadly, most of this stuff won’t be staying as it’s basically all stolen from my son’s room and parent’s house! Ha, ha.
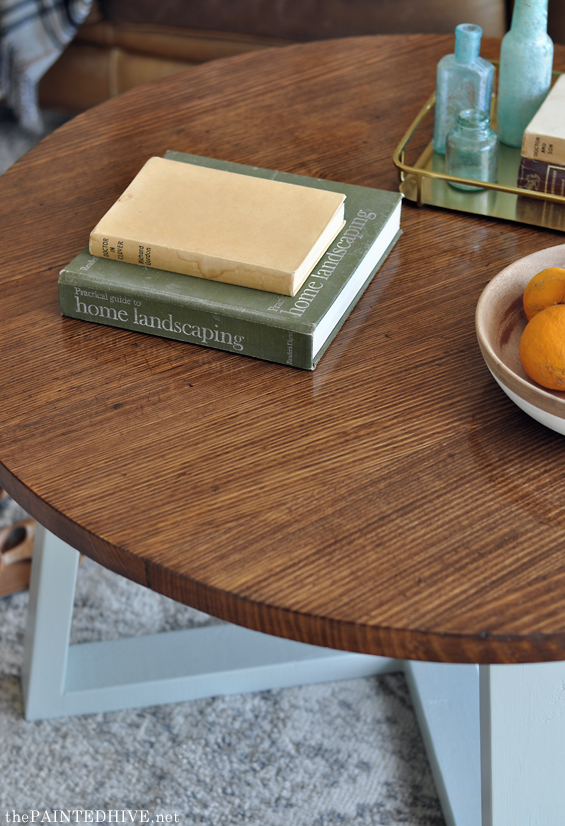
Here you can see some of the rustic character I retained in the table top.
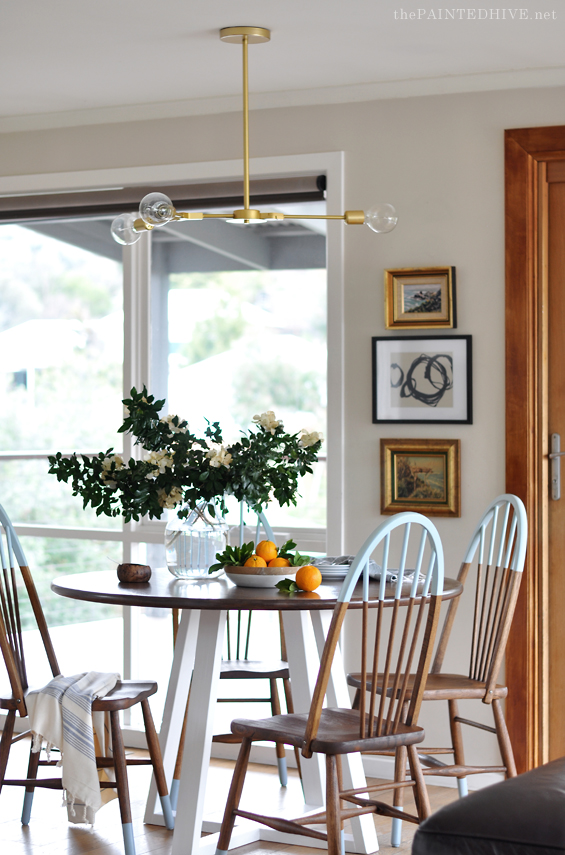
And, again, here’s my sister’s dining table which started the whole thing.
Now that this beast of a tutorial is finally published, I swear, someone better use it to make themselves an awesome table.
Have fun!
![]()


Love how it turned out! Great work!
Thanks :)
This looks great! Can’t wait to give it a try. Thank you for sharing.
Thanks Leslie :)
Perfect!! All your brain pain makes the directions so user friendly. Thanks for sharing both the rational and table(s).
Thanks Laura :)
you’re amazing!
You are fricking amazing with amount of detail you provide. I really, really, REALLY appreciate it.
Thanks Deb :)
You are an inspiration. Now where is my drop saw? 😀😀
Yes, go find it girl :)
Hi, wanting to make the base for a 120cm dining table too. Is it possible for you to advise how wide you made the base on your sisters table please.
From memory the base on my sister’s table is around 75cm. I originally made it for a smaller top though we later decided to up-size. I think it would look a bit more proportionate if the base was 90cm wide.
Would you recommend the Bosch drop saw? I’ve been looking to buy one that’s fairly nice to use with accurate adjustment.
I love my Bosch drop saw. Never had any problems with it :)
Love it; very thorough tutorial.
All I can say is WOW. Looks fantastic
Honestly, the designs are quite impressive! However, the last picture has handful number of paintings on the wall and the wooden table with matching colour combination is extremely appealing. Nice tutorial, keep it going.
The table looks great this is a super impressive job. The tutorial is extremely well done but it still looks a bit complicated for me! Haha, I’m absolutely nowhere near as savy as you and not even close! =)
Such sweet ideas for Christmas Decor!!!
Love your newsletters as always!!!
Kay and Will Lake
Thanks so much :)
Very elegant yet simple design! No clamping? Just glue, let it dry, then power tools?
Thanks. You could clamp the dowel joints (the other joints are screwed together) if you noticed they were gappy however as mentioned in the post I didn’t find it necessary as my base slotted together really well.
Thank you for the wonderful tutorial!! I made the legs and they turned out great. The only downside is that they ended up rocking back and forth for some reason. Any idea how I can fix this?
Hmmm, I assume there is a bow in the center, or perhaps just in one of the legs. Sometimes this is the fault of the timber and not an error on your part. You can try sanding or planing the base until it’s more flush. Or for an easy fix maybe some simple foam or rubber stoppers under any raised areas will help it sit level.
Hello, before I tell you that I like the project. One question, how do you calculate the measurements of the legs (bottom brace and top brace) for a table with 120 centimeters in diameter? instagram @daniel__arrieta
It’s really personal preference as to how wide you want the base to be in comparison to the top. As mentioned in the post, I made my base 10cm shorter than the top, so in your case that would be 110cm overall for the bottom span. Of course, you need to take the width of your legs into account when trimming the actual braces. So, if your timber legs were 5cm deep, then you would deduct this from either end of the bottom brace, making it 100cm. Is this what you were asking or have I missed the mark?
You can refer to this cheat sheet I made which might help.
https://thepaintedhive.net/wp-content/uploads/2018/10/Cheat-Sheet-for-Cross-Table-Base-Dimensions.jpg
Cheers.
Awesome instructions! Thank you! I cannot wait to have a go at making my table. I want to make a large dining table, about 140 – 150 cm. Surely the diameter of the legs needs to be considerably smaller for the dining table than the 10 cm you suggest for the coffee table? How did you work it out for the dining table to make sure there is enough space for the chairs and that the table is stable?
To be honest, I can’t recall exactly how I worked it out but from memory I think it was purely a guess. Yes, the base is smaller than 10cm in diameter compared to the top, but because my table was only a four seater I didn’t need to worry too much about the chair legs clashing with the table legs as each chair could fit within one of the table base gaps.