
I don’t do a lot of crafts, though every now and again I get a hankering for an easy little project.
If you follow me on Instagram, you may have seen that I’ve been growing plant babies as per the Woolworths Discovery Garden initiative.
Well, those babies got big fast! And after just a few short weeks were ready to be transferred into new larger homes.
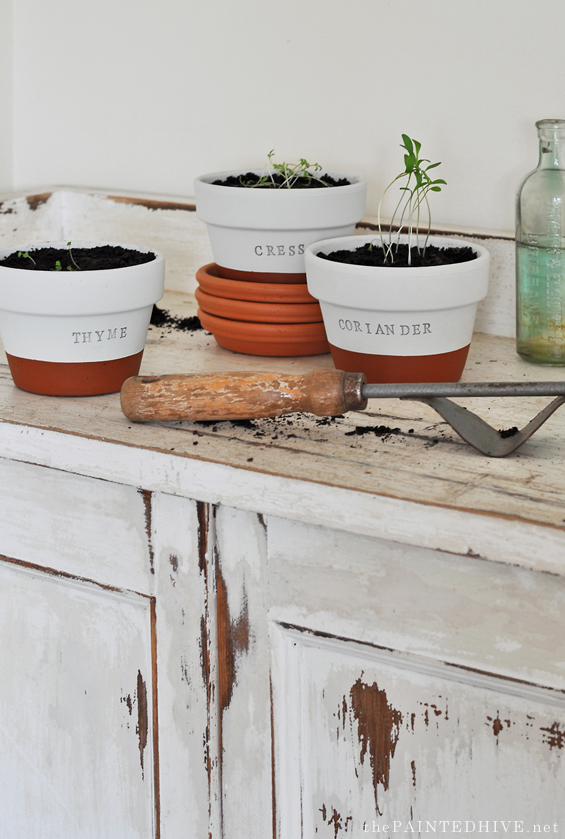
The veggies and flowers will make their way into our garden, though I wanted to keep some of the herbs near the kitchen.
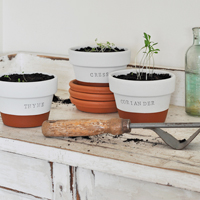
Initially I was just going to plonk them in plain terracotta pots (which would have been fine and dandy), though whilst I was brainstorming a way to label the herbs I decided a bit of upcycling was called for.
Of course, there are a million different ways to label potted plants and I was originally just going to use wooden pop sticks, but this was an easy and cute alternative.
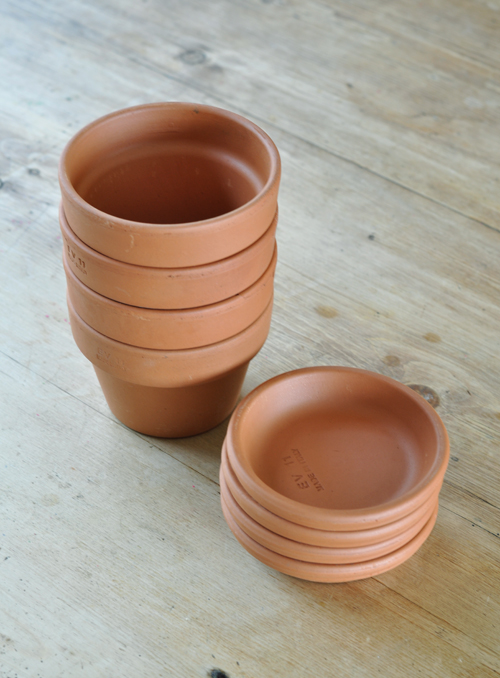
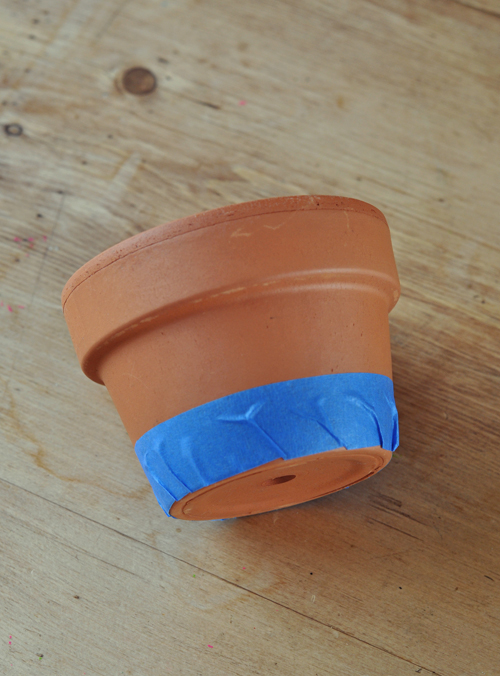
I started with some new terracotta pots and saucers (which cost just $3 each) and made sure they were clean and dry.
Next I masked off a section with painter’s tape, making sure the tape edge was really well sealed.
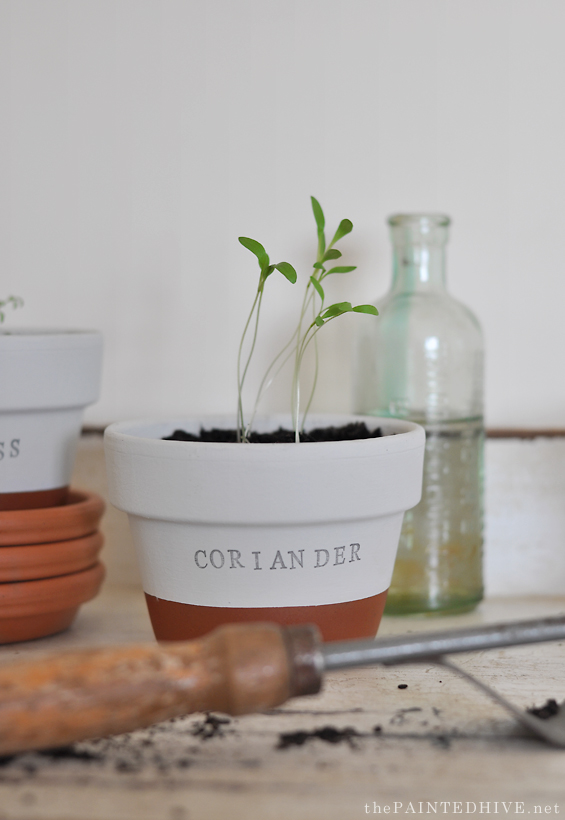
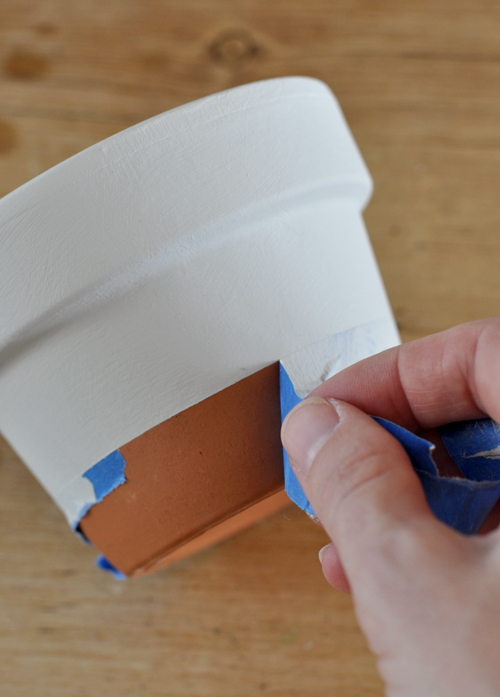
Then I painted the remaining portion of the pot with some water-based paint I already had (it was just a mix of left-overs and included some chalk paint and mineral paint too – it created a nice velvety matte finish). It took two coats.
NOTE: Sealing the interior of the pot is an optional additional step. As terracotta is porous, there is a chance that water seepage may effect the paint over time, resulting in peeling or cracking. As I’ve had great long-lasting results in the past without sealing the interior, I didn’t bother. Plus, I’m not opposed to a bit of an aged weathered effect if the paint does deteriorate a bit. Just bear in mind that sealing will also diminish the breathability of the terracotta which can result in excess water retention in the soil.

Before the paint was entirely dry, I peeled the tape off (removing the tape before the paint is totally dry just means the paint is still a bit “soft” which helps avoid little chips).
Once the paint was nice and dry, I used my daughter’s rubber stamp kit to add the herb names.
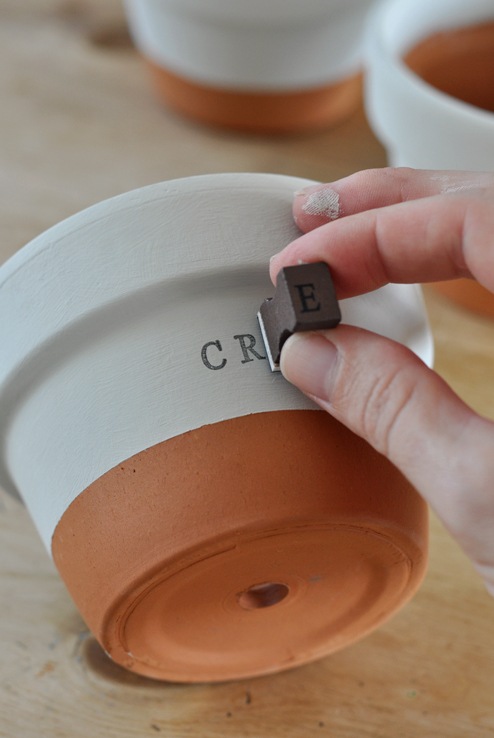
The kids helped and the words are deliberately a bit weird and wonky which I think adds charm. Ideally I would have liked lower-case letters, though I only had these and they’re fine.
I wasn’t sure how the ink would hold-up to the possibility of getting wet, so I tested it prior and it didn’t run at all. I guess you could seal the pots if you really wanted to protect the finish though I think they’ll be fine. Plus, I don’t mind a bit of grunge if the paint or ink does end up wearing a little.
So simple and cute.
![]()
PS Now that the flip house is entirely wrapped up (settlement was yesterday!) I’ll be back soon to share the new design project I’ll be working on…very excited!


Love this! Can I ask where you purchased the stamp kit from?
Ps really enjoyed following your “flip house” journey. Will miss the posts!
Thanks Kat. It was just from Kmart. I checked their site and they don’t appear to still have the same one. Have a look on eBay. There are lots to choose from.
This is a very cute idea. I like how much of the pot you painted and it’s nice your kids got to help.. I’ll save this, as here in the US we’re just starting into Fall. Have a great Summer there.
Thanks Vikki :)
Great ideas!
Thank you :)
I love the simplicity of this project!
Thanks Pat :)
The pots look gorgeous. What a great idea! Looking forward to your next project.
Thank you.
You always get my creative mind going!
Thanks Lisa :)
These are so cute – my daughter will enjoy doing this one with me. Looking forward to your new project!
Thanks Leslie :)
These are great and I really like how you cover everything, like mentioning sealing the pots, as it really adds to your tutorial
Thanks so much :)
Now decorate your wall using modern peaceful Lord Gautam Buddha painting. Contact us to do wide varieties of Indian Buddha canvas, wall decor art online shopping.
Wow, how adorable and what a lovely idea! I’m making these for my parents’ house! Would you care to let me know how big the planters are/ where you purchased them and what kind of paint did you use? Thank you, Kristine.
Hi Ginny. They are around 12cm high. I just got them from my local hardware/garden store – they are easy to find. I mixed up some paint using a few left-overs I already had. It’s a combo of chalk and mineral paint but you don’t need to use the same. Cheers.
Wow i love the letter idea! Whats the brand and where you purchase them? So beautiful!!
I got the rubber stamp kit from Kmart but if you Google “alphabet stamps” you will find lots to choose from.
Acho lindo o trabalho. Esse carimbo onde vc comprou?
Thanks. I bought the stamps from Kmart though if you look on eBay or Amazon for “alphabet stamps” you will find more.
I love the painted herb pots. Very earthy and natural looking. The labeling is nice too and adds to your farmhouse look.