
As promised, here is the reveal of my transformed home office space! It’s nothing spectacular, and there’ll probably be some future tweaking, though for now I’m calling it done!
Oh, and if you missed the awards ceremony, don’t worry, you can congratulate me later.
Huh, what’s that? You didn’t hear?
Well, I broke the world record for “Longest Running Room Makeover In History”. I got a pretty big trophy.
Yep, I managed to make this simple little room redo extend for well over 365 days! It has now officially been more than a year since the first of my ‘home office‘ posts. Phew!
Anyhoo, let’s get on with it. I’ll briefly outline some of the design decisions in this post though if you wanna better understand the thought-process behind the room you can catch-up on my previous home office posts here.
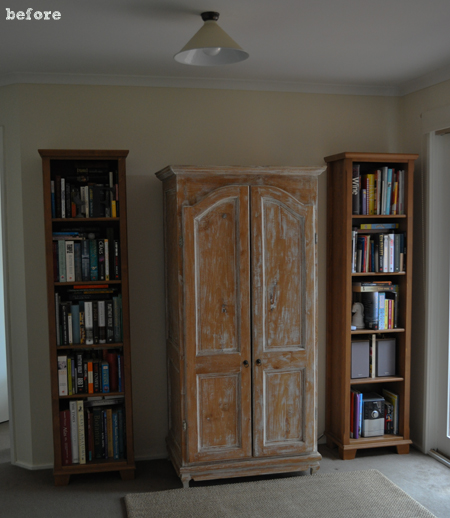
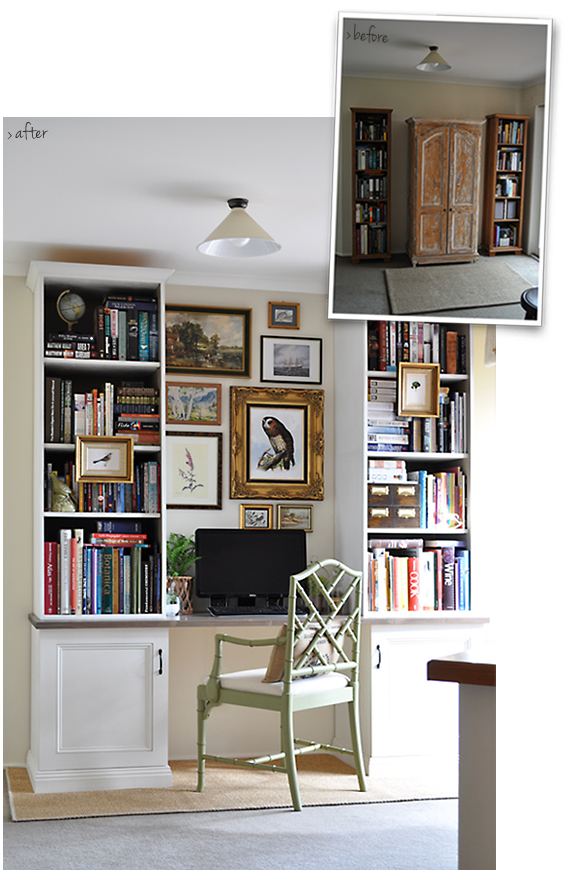
Above is the space in its prior ‘make-do’ state…argh, cringe! To make way for the new room redo I sold the bookcases and cupboard on eBay and relocated the jute rug to our entryway.
I conceded early on that our home office is really more of a glorified computer nook. It occupies the only remaining free area in our teeny home; the ‘little-weird-nothing-space’ off our kitchen. It’s a small area with multiple personalities, acting as a; side entryway, playroom, library, main thoroughfare, laundry sorting station, general gathering space and impromptu dance studio, amongst many other things…
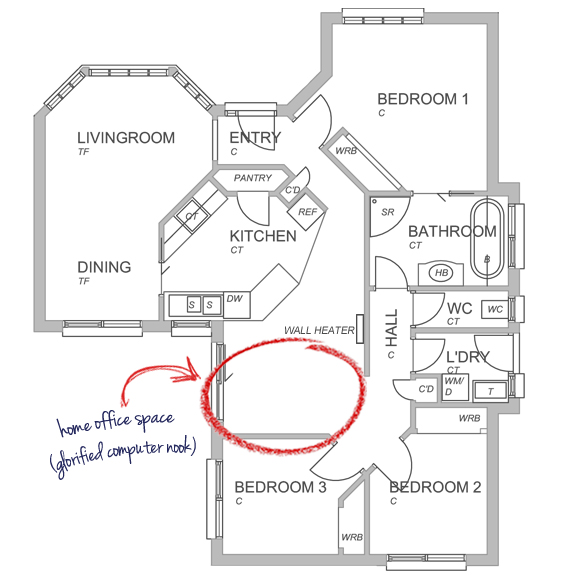
Given we don’t have a spare room to act as a proper home office (with space for filing trays, paper piles and other office-y stuff), I simply wanted to create a pretty yet practical computer station (yep, we have a big, bulky, stationary PC in favour of a neat, little, portable laptop) which didn’t interrupt the homey flow of our house. It also needed to hold all our books and hide the ugly technological thingamabobs.
Please excuse the corner of my kitchen bench – it’s a tricky space to capture.
I mentioned in some previous posts my dilemma with finding affordable, appropriately proportioned cabinets (I scoured eBay for months and IKEA’s selection just wasn’t quite right). In the end we were fortunate to have an awesome friend of ours custom build the cabinetry at mate’s rates (‘course you could DIY something similar though, or get innovative with second-hand or shop-bought cabinets if you don’t have finicky size and storage restrictions). It’s completely free-standing and modular, with the desk, two upper bookcases and two lower cabinets forming five separate pieces, so it is easy to relocate and even reconfigure if needed. You can read more about it in this original post.
To keep material costs down we had it built from humble pine ply. Here it is before (so sorry, super lame photo)…
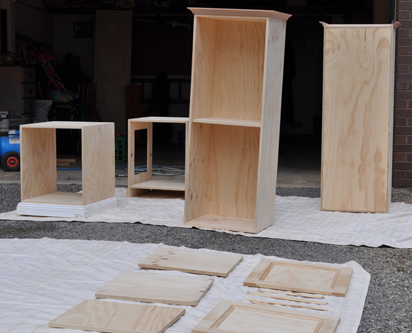
I finished it with an acrylic low sheen in ‘Antique White USA’ (by Dulux) which I sprayed on using a compressor and air gun. The desk, which is simply a pre-fabricated solid pine panel, I finished with an acrylic all-in-one stain and varnish in ‘Marita Grey’ (by Cabots). Though it’s hard to see in the photos, I also painted the inside of the bookcases in a warm grey (I mixed up the colour myself from left-overs I already had).
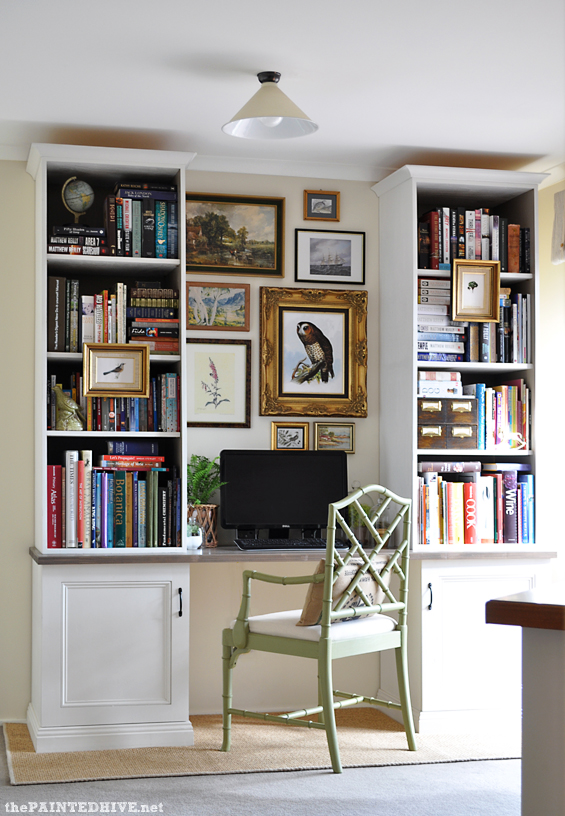
I thought a wall of floor to ceiling cabinets might feel imposing and cumbersome in our little room though the tall, slender cases and long spanning desk actually help create an illusion of height and space.
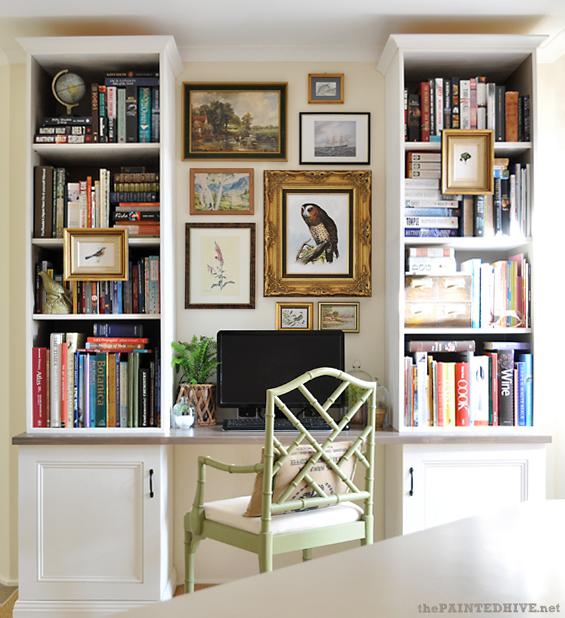
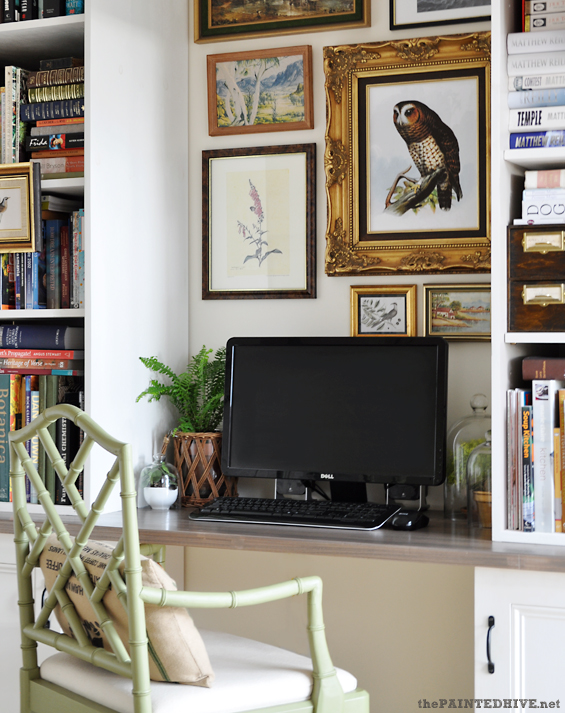
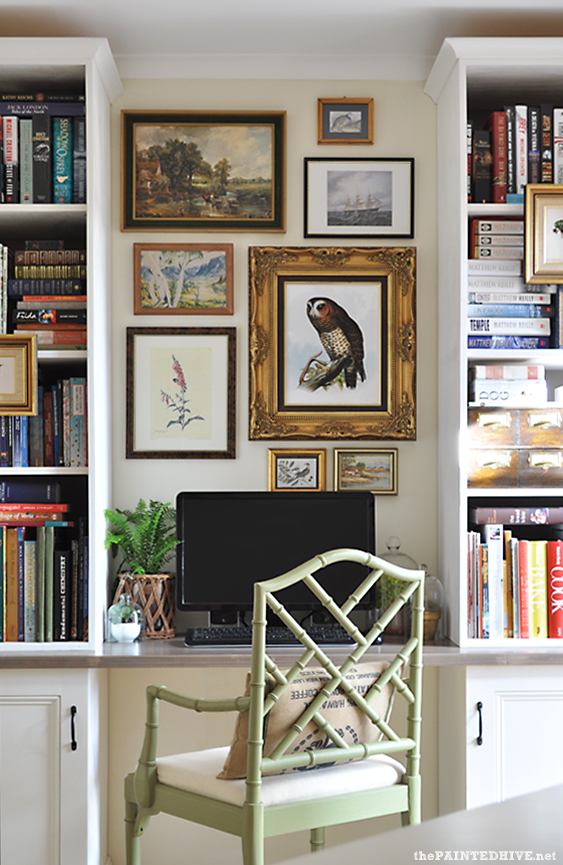
I know it’s trendy right now to display lots of ornamental knick-knacks on bookshelves though I thought I’d be a bit different and use my bookshelves to hold, well…books. The cases are double-depth to allow for extra storage (so, if need be, some of the books we’ve already read can be housed at the rear) and the shelves are repositionable. I know to some people a mish-mash of books can look messy and distracting though I think their jumbled layers are warm and personable, and lend a real collected sense of ‘home’ to a space.
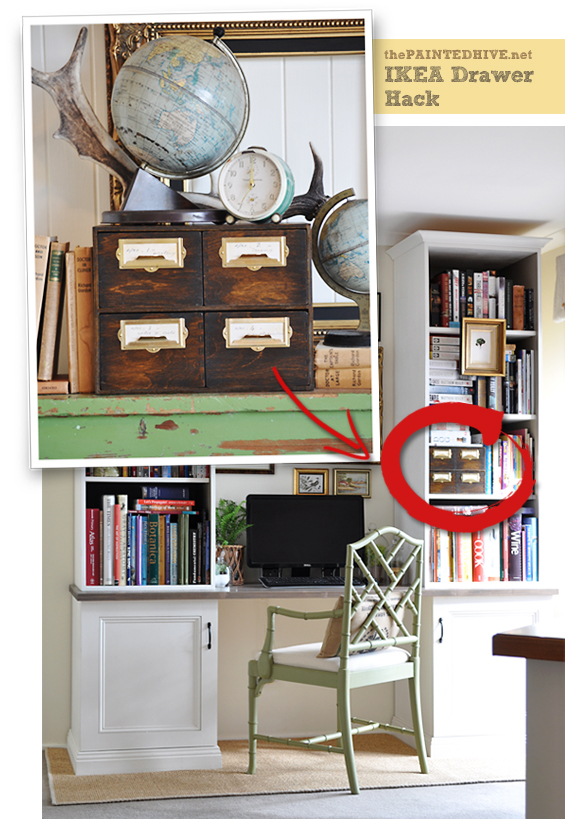
My hacked IKEA drawers (which I now have two of!) grace one shelf. They are prefect for keeping practical little stationery items within arms reach (and apparently they are also ideal for safely stowing away my husband’s prized hole-in-one golf ball!).
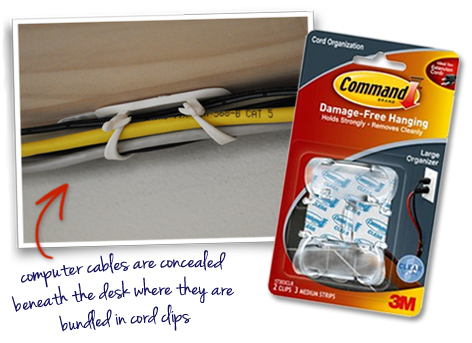
The power point is located behind the right lower cabinet which holds the computer tower and all associated components (like the modem, sound system and external hard drive). It has a mesh side to allow for extra air flow (this is something I probably wouldn’t have bothered with though hubby insisted on – it looks completely fine though is concealed beside the wall anyways). The lower left cabinet holds the printer along with some stationery bits and bobs and CD’s. All of the cables are discreetly concealed on the underside of the desk where they are neatly bundled in adhesive cord clips.
The rug is from Floorspace. It needed to be a pretty specific size and unfortunately I couldn’t find anything ‘off-the-shelf’. I considered DIY’ing something though really wanted a heavy jute to add some natural texture and warmth. To save on the usually extravagant cost of buying something bespoke I arranged to have it custom-made from an old off-cut. Although it was anchored by two heavy cabinets the rug still shifted and bunched-up like crazy on the carpet so I came up with a slightly weird solution which you can read about in this previous post.
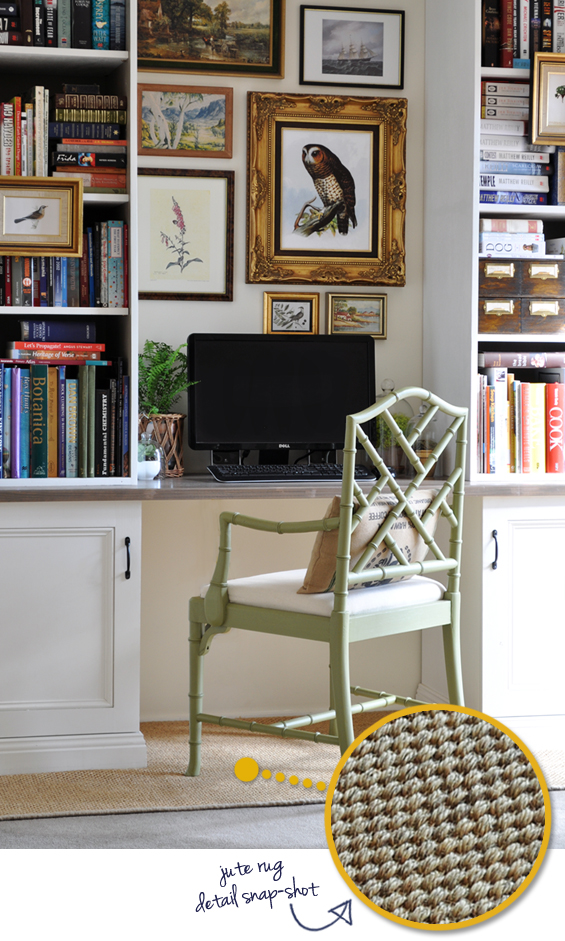
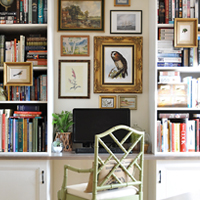
The wall gallery is deliberately eclectic. It is made up of inexpensive thrifted frames, some with their original art and others with free images I found online and had cheaply printed (you can read about the owl print here). I like the way the unstructured collection of frames mimics the busyness of the flanking bookshelves, giving a sense of continuity to the wall as a whole. To further enhance this sense of cohesion, I also hung two pictures on the bookshelves themselves. They are attached with simple picture strips so they are easy to remove and replace if needed. This is a look I love though I’m pretty sure it completely broke my husband’s brain (bamboozled doesn’t even begin to describe his level of incomprehension! I actually had to jump on Pinterest and show him some other examples just to prove my sanity. Though, in his defence, I do get why he thought I was crazy – hanging pictures in front of books is a slightly weird concept).
I also like that the collage of pictures helps camouflage the computer monitor.
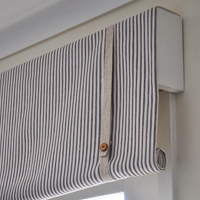
The big windowed sliding door (which is hard to see in the photos) is dressed with a DIY rolled valance which hides a practical black-out roller shade (which we need to block the frequent afternoon sun and occasional penetrating cold). You can read all about it in this previous post.

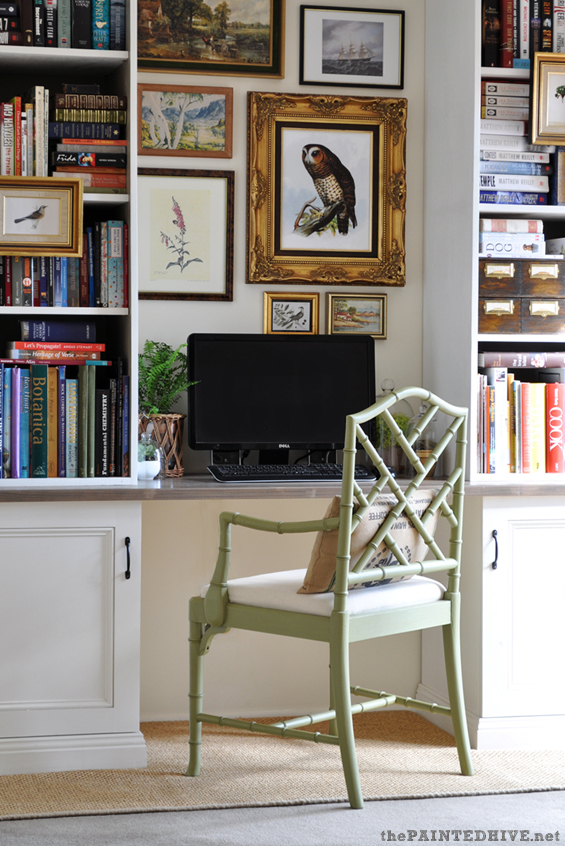
After having used an antique timber kitchen chair at our computer for years the Chippendale carver is like heaven! I’d love a fully upholstered tufted chair (or similar) one day though whilst the kids still have chronic grubby finger disease, I’m sticking with something that’s easy to re-cover if needed. The soft green looks more vivid in person, though is still subtle – I didn’t want a pop that punched you in the face though in the future I might amp it up a bit!
As blogged about previously, I bought the Chippendale chair as a raw, un-upholstered frame and finished it off myself. See my tutorial for upholstering the drop-in seat here. Read about the the chair makeover in general here.
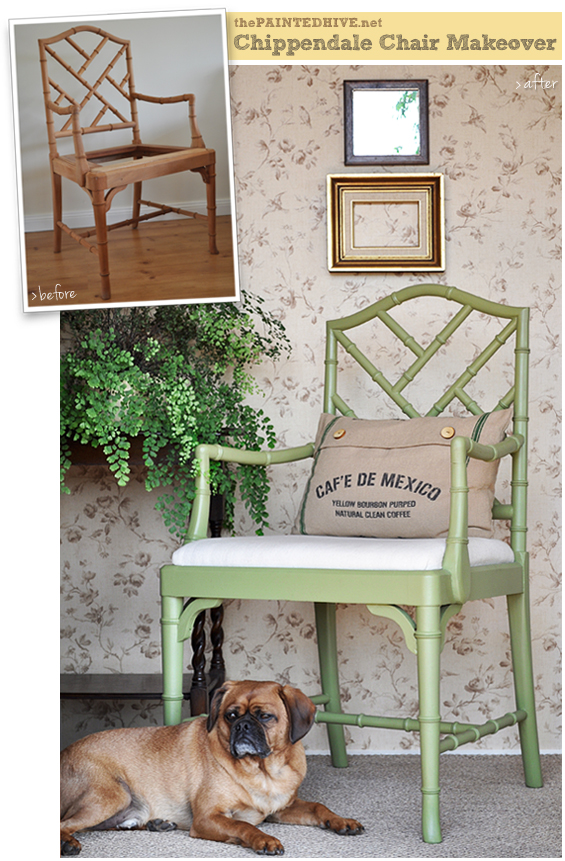
The typographic pillow is a repurposed tea towel. You can read my simple tutorial in this previous post.

Whilst the ceiling light is central to the room it is not in alignment with the cabinets. In person, when you view the room as a whole, this looks completely fine though in the photos where the focus is on the cabinets it does seem to throw off their symmetry. Regardless, we almost never use that light anyways as the adjoining kitchen down-lights provide ample brightness, so one day I might remove it completely in favour of some subtle integrated cabinet lamps. We have pretty low ceilings and the light is directly above a walk-through so sadly there is no vertical space for a lovely hanging feature pendant. For now I’m happy to stick with the simple enamel shade.
Anyhoo, just to finish-up, here are some before and after comparisons of the space…
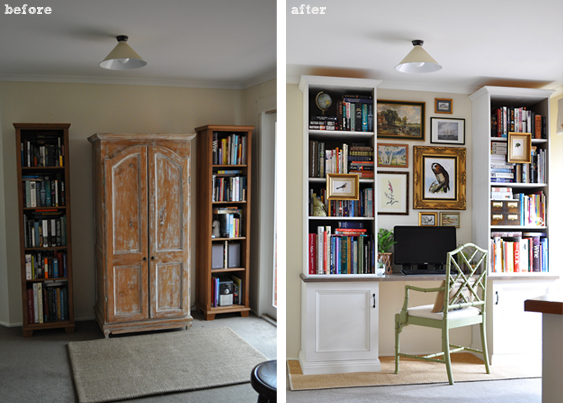
Like I said, nothing spectacular though pretty (enough) and practical. Have a fab week everyone.
UPDATE: This is mentioned in the body of the post though I also wanted to highlight it here due to the amount of interest it has generated….
One of the most loved elements in my home office space appears to be the owl print. I agree, it is pretty awesome! Good news is, it’s not a one-off original oil painting I salvaged from some dingy old antique store. It is a free printable! Soooo, if you’re truly crushin’ on it, visit my original post about it here for the download link, and get one up on your own wall – yay!
![]()
PS As mentioned in my last post, I now have one foot back on a pedal and this little bloggy bike is slowly gaining some momentum so hopefully posts will become more regular. Thank you to everyone for your patience and understanding :-)
SOURCES
Cabinets – Custom built by a friend ($800)
Chippendale Armchair – Mahogany by Hand ($230 raw/unfinished)
Picture Frames – Thrift Stores/Op Shops ($50 total)
Rug – Floorspace ($180 custom)
Enamel Light Shade – Recollections ($10)
PROJECTS
DIY Rolled Window Valance
How to Keep a Rug in Place on Carpet
Easy Lumbar Pillow from a Tea Towel
Bamboo Chippendale Chair Makeover
How to Upholster a Drop-In Seat from Scratch
How to Fill a Naked Picture Frame
IKEA Moppe Drawers Hack


When you said you were going to be back with a new post, boy, you really meant it! This is exactly the kind of set up I need in our den/rumpus. We have a great big computer too and I have been struggling for ideas how best to incorporate it. All of your little details are so perfect. I love that you didn’t build in the cabinets so you can move them if you want to. Lovely, lovely, lovely!
Treagan, you are always too, too sweet! Thanks so much.
Oh, I have been waiting (and waiting) to see your office space and I’m not disappointed. It’s full of gorgeousness.
I agree Rose.
Thanks ladies :-)
Love the gallery and all the books. So homey.
The look you have created here is like what I see in magazines and pine for though figure is too ‘designery’ for us regular people. Well, you have made it real and do-able – THANK YOU so much. I really appreciate your hints and explanations for how to achieve it on a budget and in a practical way.
Thanks Genie. I simply combined a few of the elements I love and luckily it turned out okay :-)
What a stunning space! A dream to work in!! All the little details make it perfect.
This is stunning. I love it. You have created such a fabulous area and it is decorated so beautifully too. Love, love, love the wall collage. I would love for you to link up to my Inspire Me Tuesday party that is ongoing. http://www.astrollthrulife.net/2013/07/173rd-inspire-me-tuesday.html Hugs, Marty
I just love the way you did the shelves and above the computer…very professional looking!
nothing spectacular? Are you kidding? Everything is spectacular! Love it! Makes me want to go rearrange things! :) Melaine
Thanks so much Melaine. Don’t think you need to rearrange anything though…love your home.
Looks fantastic. The art is crazy awesome and the staging perfection.
I LOVE it!!!! I love the gallery wall, the built-ins, the styling, especially the pictures in front of books! You do such an amazing job on your blog….I always feel like I’m reading one of my decor magazines…I love the inset pics of objects that I might have overlooked.
Christine
Thanks so much Christine. That is truly a flattering compliment :-)
It takes me a bit more time though I really enjoy putting my posts together in a ‘magazine-y’ way (well, as best I can manage, anyways).
Good gawd woman, you are good. What a beautiful little space.
it’s perfectly you- love it! and i want to steal your chair. you are lucky i am not on your continent, sista!
Well, at least I know who to blame if ever it does go missing :-)
(First-time commenter) Love the redo! The eye is drawn to the two beautiful cabinets, your lovely green chair, and the owl picture. Nicely done! Gives me the motivation to do something about the blah spaces of my home; not just ignore them because it’s easier.
Thanks Karen. Love how you mentioned you are a first time commenter :-)
I still have a few ‘make do’ rooms I’m yet to find the motivation for…it’ll happen…one day!
It looks beautiful and proves that some things are worth the wait. I, too have been working on re-doing my dining room and it’s been in process for at least 8 months! And it’s a small, small room! Anyway love the job you did on the gallery pictures above the desk and LOVE that chair! The space is wonderful.
Kristine, This was WELL worth the wait! I absolutely love it! So sad I can’t get those cute Ikea drawers in the US – will have to try Hobby Lobby for a good substitute! The whole space is just lovely- thank you for sharing all your ideas and your lovely home!
Hia Kristine,
Brilliant ! love the cemetry …perfect balance/design components, Sage painted chair is perfect, brings towers , all together. I especially love the ‘Fern’ and the plant cloche’s. and Puppy…oh so adorable. next take a photo of babies sitting on chair. You are really quite talented! Bye for now Judith, USA
Oh My Goodness, Kristine….this was suppose to read * Perfect Symmetry -not cemetry. . I should never let my computer edit my words, then not check them. so sorry.
Judith, Davidson, USA
He, he. Don’t worry Judith. I knew exactly what you meant and I assumed it was just one of those auto computer spell-check typos.
Thanks so much for your lovely comment, as always.
You are so gracious…
I love what you have done with the space! I love how you’ve mixed a traditional look with a modern twist. I abolsutely love your before & afters!
Gemma xXx
amazing little space that you have carved out for yourself!
What’s the old saying? Good things come to those that wait? Well….it did come and it is spectacular! I love how it turned out. You did a marvelous job- xo Diana
You are a great writer. Thank you for your detailed description of your project. It looks beautiful and will be easy for someone to take up a similar project from your ideas. Love your work and words!
Thank you so much Darla. I know lots of people skim blog articles or just look at the photos (I must admit, I am guilty of this when I’m pressed for time) so it’s really, really lovely to hear that you appreciate my writing :-)
Nothing spectacular? I beg to differ! It is so chic! I think it is amazing!
Love it! And so refreshing to see bookshelves with books on them! Gives me hope that I can make our abundance of books look pretty one day too. :)
Thanks Lizzie. I’m so glad to hear you find the books refreshing. I almost felt pressured to display décor accents instead (even though we have no-where else to house our books) though am super glad I stuck with the books…they are personable and homey.
As usual it looks beautiful-just what I have come to expect. Love seeing your home xx
Kristine, just beautiful. It is a pleasure to look at pieces of old and new given a place that makes them all sit together with equal importance, balance and care. That old saying you don’t have to have a lot of goods in your home, just have the things you love. Cleaning your home then is not just cleaning, but treasuring what you have. You almost revived me out of my winter blues. Four days in a row with no sun and just enough sleet to keep the kids indoors good old Canberra winters can really mess with my enthusiasm.
I have a friend in Canberra who loves to hate the weather there :-)
Over half way through Winter now so hopefully we start seeing some motivating sunshine!
Love the way you’ve styled this, keeping traditional pieces feel while giving the space a much more contemporary and eclectic feel. Great job!
Welcome back! Awesome office, love the owl especially. I’ve just finished my new office space too so great to compare with yours. Always get so many ideas from you Kristine:)
I love that owl too Andie. He has such a beautiful presence and really makes the space.
You can print one for yourself if you’re truly crushin’ on him! See the UPDATE at the end of the post for details :-)
This is beautiful! I love your style! That gallery wall is so fun. I popped over from HoH–thanks for sharing!
~Abby =)
Hi Kristine this looks fabulous. I love the books on display. I too have a stationary pc I prefer it my hubby has a laptop but it’s harder to use. Thanks for the explanation as to where every thing is you answered all my questions. look forward to your posts.
Kind Regards
Karen
I prefer a stationary PC too Karen. I love having a keyboard and a mouse and a great big monitor! So easy to work at, especially when editing photos and designing graphics.
This is just gorgeous! I love all the art above the computer and that chair is beautiful! Pinning! Jenna @ Rain on a Tin Roof
I think it is totally spectacular, and I’m thrilled to see you put books on the bookshelves. :) We have a stationary PC, too, and I love it’s huge screen. Thanks so much for sharing!
you are seriously so talented!
You are seriously too sweet!
Great job Kristine! I LOVE all the little elements that went into this project! Little things like the drawers, the cord clips, and the rolled valance.
Thank you for posting this! First of all you did a FABULOUS job, secondly it helps give me ideas for a similar space in our “new” home!
Beautiful, Kristine! Love everything about this makeover! Love the bookcases and the pictures you hung over the desk area. It looks so neat! It looks like you managed to achieve what you were going for here.
Kristine, what can I say…WOW…..sometimes having a small house you find more usable space (because you have to) and it makes it cozy and warm. I love what you have done to the space and all the frames hung up in the middle rather than a notice board or one big print. It looks so welcoming and in the meantime I wouldn’t worry about taking 365 days (or over) to finish your study nook after all you did produce a baby that took 9 months!! I have been in my house for two years and in the study (where my computer is) behind me there are a number of boxes items that well…lets say have been sitting there since I plonked them down when I moved in. Life is busy and as it’s not urgent it hasn’t been done. I love your space it looks warm and cozy and classy all at the same time. Thanks for sharing. Oh yeah I bought the Ikea boxes to do up the little filing tray like you did however it is sitting in the garage still probably for 6 months. I have two little kiddies that I feed, clothe, love and give attention to and that is my priority really but one day maybe I’ll get to do a little project or two. Great job. Regards Kathy A, Brisbane, Australia
Thanks so much Kathy :-)
I bought a second set of IKEA drawers and, like yours, mine are still sitting somewhere un-loved too – oh well, like you said, there are other priorities and projects can wait.
Hope you have a lovely week ahead. Thanks so much for stopping by.
I love EVERYTHING about this space! And indeed your entire home. What a talent and inspiration. Mother/wife/designer/decorator/blogger. AMAZING.
Wow, this is quite inspiring! Very lovely. Just perfect mix of clean modern lines with classic vintage and pops of color. Pinning this for inspiration. Thank you for sharing!
Beautiful! I absolutely love the eclectic style. This is definitely magazine worthy! Im popping over from nifty thrifty things;)
Wonderful makeover! I love the maximalist look you have going on your shelves. It can be tricky to pull off, but you have succeeded! Everything just flows together so nicely! Love that owl print too.
Your transformed home office space is looking fabulous and very stylish too! Tremendous work is done with this makeover. I really appreciate this, loved it!
Beautiful and homey and comfortable-looking and so well thought out. Thank you for going into such detail. So many inspiring ideas (really love the books and the owl)!
It looks amazing! i can’t take my eyes off that owl in the gold decorative frame!! gorgeous. :)
That owl has captivated so many people. He is pretty awesome. Did you notice in the post I mentioned he is a free printable? If you really love him you can print one for yourself! Check the post for the link :-)
Kristine
Congratulations Kristine! Btw, your new home office looks nicer… I like the thought that you always included the before photos so we can spot the big difference. Looking forward to another room transformation hehe. Clap! Clap!
This looks great and those shelves look AMAZING! I just posted our shared office reveal on my blog. I still need to find some great “knick knacks” to finish styling my shelves. I’m not sure my floating shelves can support the weight of too many books and considering that our desks are glass…Anyhow, I digress. LOL. Excellent job love the look!
I love this makeover! It’s so smart — what a great use of a wall and a great combination of hidden storage & open storage. Love the eclectic collection of art too. The rug is a great idea as well, further making that space as its own!
Hi Kristine
Congratulations! This is so fabulous and stylish, a real inspiration. I’m truly impressed and appreciate the detailed explanation of how you approached this project. Very pleased to have found your website.
Regards
Dina (Johannesburg, South Africa)
Hey, I am waiting that some one can change my home look like this. It is so fantastic..
I absolutely love your home office makeover! The tall white bookshelves and gallery wall in the center really makes this a special space. All the small little details are absolutely perfect as well. Great job on this project!
It’s September now, but still the same year so not too late to post a comment on your wonderful reveal. I don’t care that it took you 365 days, the end result is AWESOMENESS. I also love your blog writing style ~ sufficient detail, however, brief and witty. :)
I couldn’t agree more on trying to hide the “ugly technological thingamabobs”. If you do a search for home office, walk-in closet, gift-wrap station, butler’s pantry, laundry closet, mudroom, or anything of that nature, then images and ideas abound. Search hide electronic components, and good luck getting anything useful back. It’s as if Designers have forgotten that we have modems, cable TV boxes, and assorted other wired and necessary components that don’t necessarily look pretty next to the sleek Flat Screen TV and ultra-modern fireplace, or your tidy bill-paying station. H-E-L-L-O, someone needs to start paying attention to this decorating issue. It is not important on a grand world scale of cure disease, end hunger and stop wars, but it’s useful info that is currently missing from the ‘beautifully organized homes’ hype.
Thanks so much Ana. And it’s never too late to comment on a blog post – I love getting belated ‘surprise’ comments!
I know what you mean about the lack of designer articles which elude to incorporating technological components, appliances and cables. It is almost like most designers have forgotten about their inevitable inclusion in our homes. I find bloggers are more open, honest and realistic in relation to addressing this decorating dilemma, and every now and again I do stumble across a blog post which talks about this issue.
Perhaps it’s something I should consider writing about too.
Kristine
I was wondering what the actual table top is? Is it painted wood? It is hard to tell and I love it!
Hi Maurie
As briefly mentioned in the post, the top is simply a pre-fabricated solid pine panel (which just happened to be the perfect size!). I finished it with an all-in-one stain and varnish (Cabots in Marita Grey).
Kristine