As promised, here is the reveal of my transformed home office space! It’s nothing spectacular, and there’ll probably be some future tweaking, though for now I’m calling it done!
Oh, and if you missed the awards ceremony, don’t worry, you can congratulate me later.
Huh, what’s that? You didn’t hear?
Well, I broke the world record for “Longest Running Room Makeover In History”. I got a pretty big trophy.
Yep, I managed to make this simple little room redo extend for well over 365 days! It has now officially been more than a year since the first of my ‘home office‘ posts. Phew!
Anyhoo, let’s get on with it. I’ll briefly outline some of the design decisions in this post though if you wanna better understand the thought-process behind the room you can catch-up on my previous home office posts here.
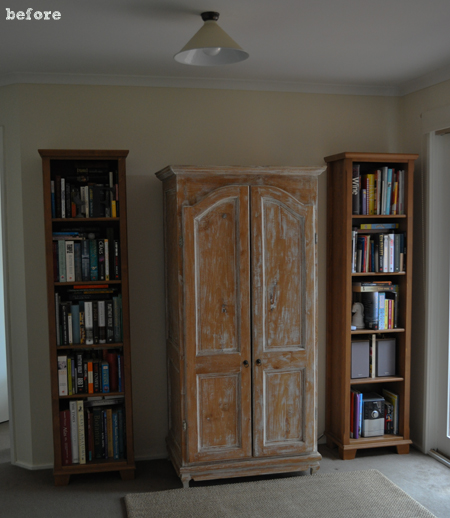
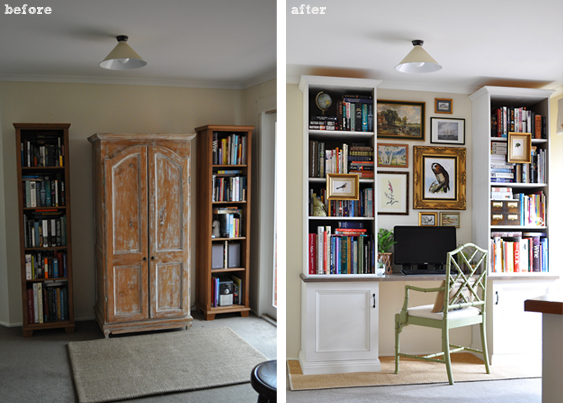
Above is the space in its prior ‘make-do’ state…argh, cringe! To make way for the new room redo I sold the bookcases and cupboard on eBay and relocated the jute rug to our entryway.
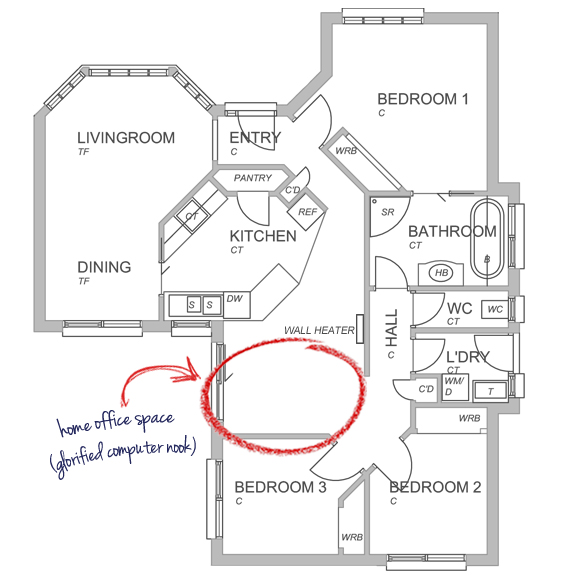
I conceded early on that our home office is really more of a glorified computer nook. It occupies the only remaining free area in our teeny home; the ‘little-weird-nothing-space’ off our kitchen. It’s a small area with multiple personalities, acting as a; side entryway, playroom, library, main thoroughfare, laundry sorting station, general gathering space and impromptu dance studio, amongst many other things…
Given we don’t have a spare room to act as a proper home office (with space for filing trays, paper piles and other office-y stuff), I simply wanted to create a pretty yet practical computer station (yep, we have a big, bulky, stationary PC in favour of a neat, little, portable laptop) which didn’t interrupt the homey flow of our house. It also needed to hold all our books and hide the ugly technological thingamabobs.
Please excuse the corner of my kitchen bench – it’s a tricky space to capture.
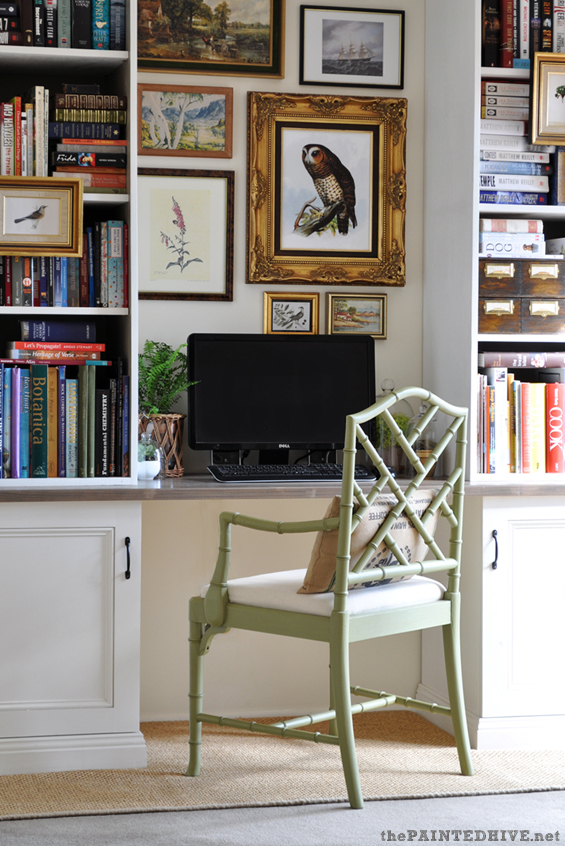
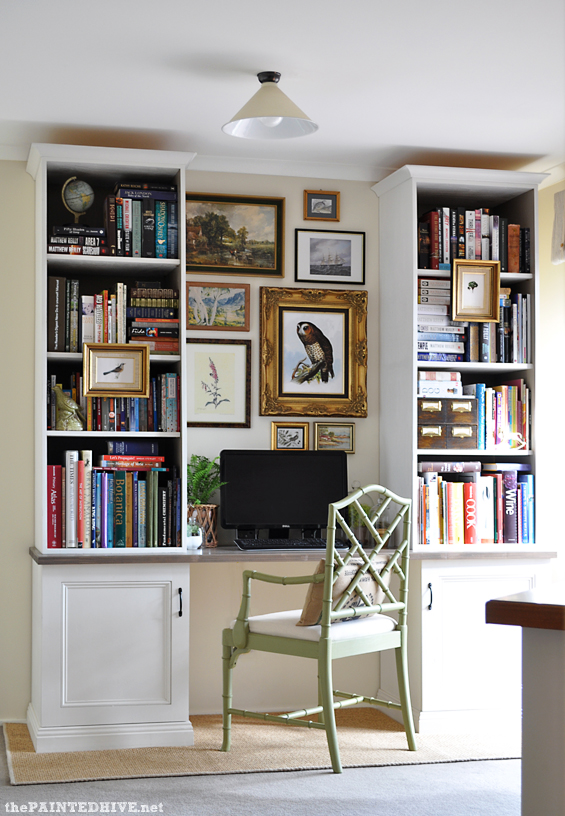
I mentioned in some previous posts my dilemma with finding affordable, appropriately proportioned cabinets (I scoured eBay for months and IKEA’s selection just wasn’t quite right). In the end we were fortunate to have an awesome friend of ours custom build the cabinetry at mate’s rates (‘course you could DIY something similar though, or get innovative with second-hand or shop-bought cabinets if you don’t have finicky size and storage restrictions). It’s completely free-standing and modular, with the desk, two upper bookcases and two lower cabinets forming five separate pieces, so it is easy to relocate and even reconfigure if needed. You can read more about it in this original post.
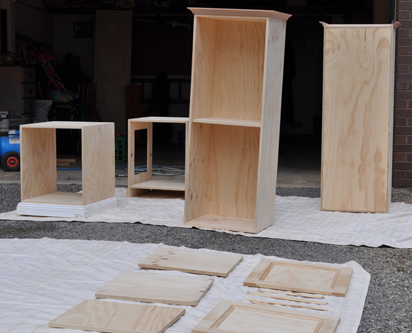
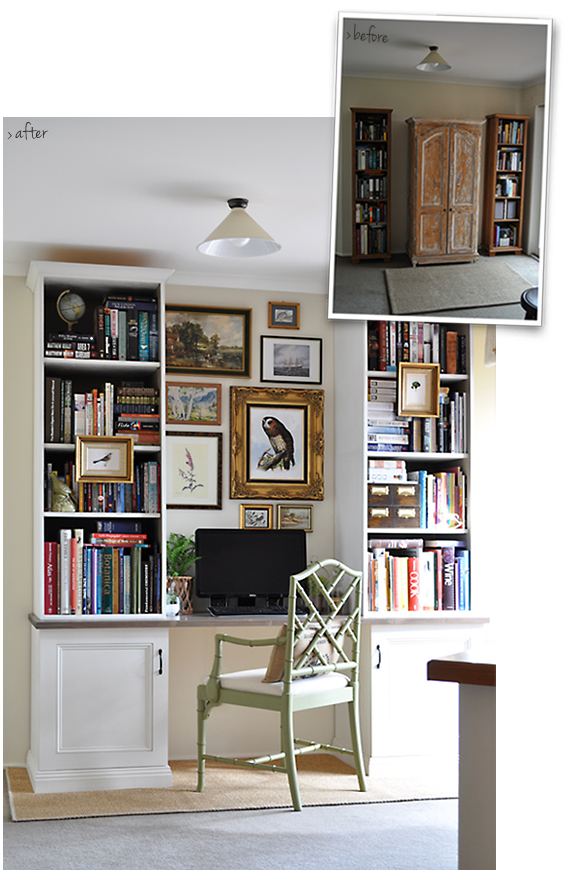
To keep material costs down we had it built from humble pine ply. Here it is before (so sorry, super lame photo)…
I finished it with an acrylic low sheen in ‘Antique White USA’ (by Dulux) which I sprayed on using a compressor and air gun. The desk, which is simply a pre-fabricated solid pine panel, I finished with an acrylic all-in-one stain and varnish in ‘Marita Grey’ (by Cabots). Though it’s hard to see in the photos, I also painted the inside of the bookcases in a warm grey (I mixed up the colour myself from left-overs I already had).
I thought a wall of floor to ceiling cabinets might feel imposing and cumbersome in our little room though the tall, slender cases and long spanning desk actually help create an illusion of height and space.
I know it’s trendy right now to display lots of ornamental knick-knacks on bookshelves though I thought I’d be a bit different and use my bookshelves to hold, well…books. The cases are double-depth to allow for extra storage (so, if need be, some of the books we’ve already read can be housed at the rear) and the shelves are repositionable. I know to some people a mish-mash of books can look messy and distracting though I think their jumbled layers are warm and personable, and lend a real collected sense of ‘home’ to a space.
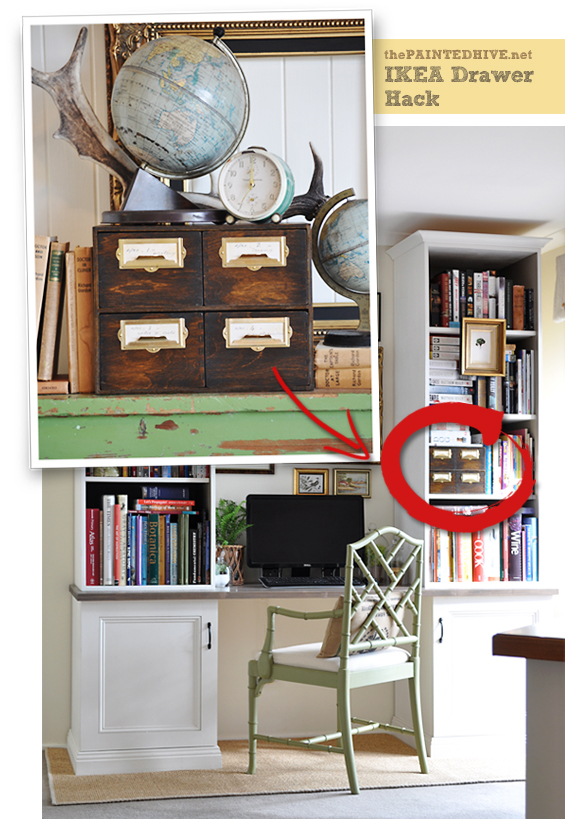
My hacked IKEA drawers (which I now have two of!) grace one shelf. They are prefect for keeping practical little stationery items within arms reach (and apparently they are also ideal for safely stowing away my husband’s prized hole-in-one golf ball!).
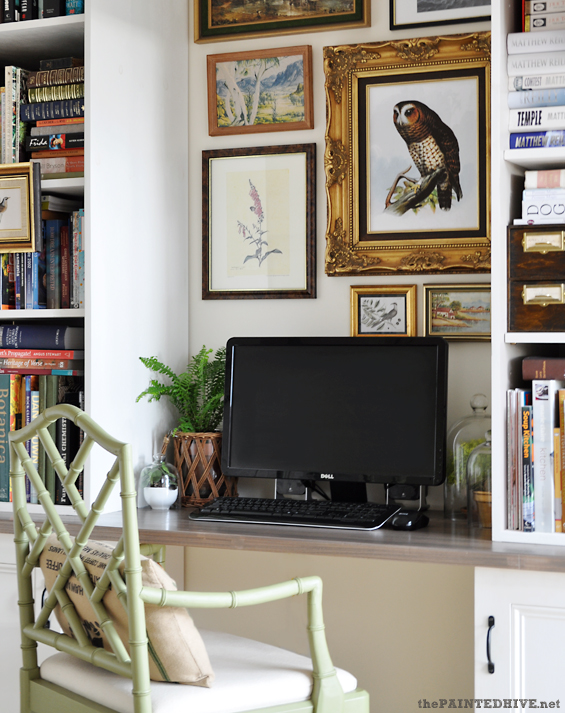
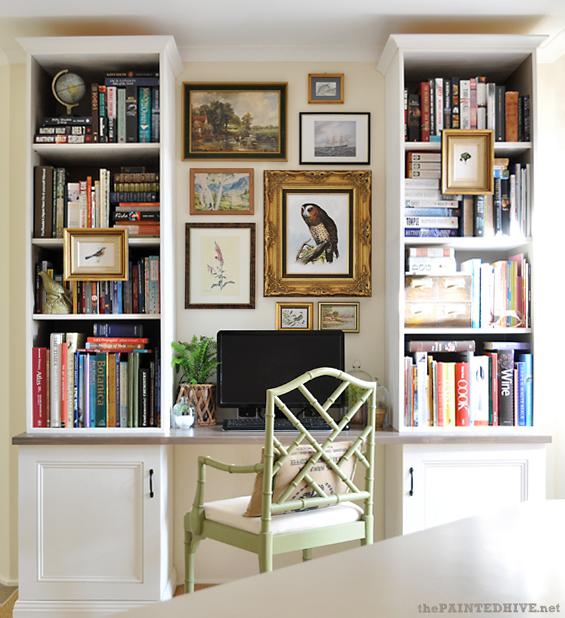
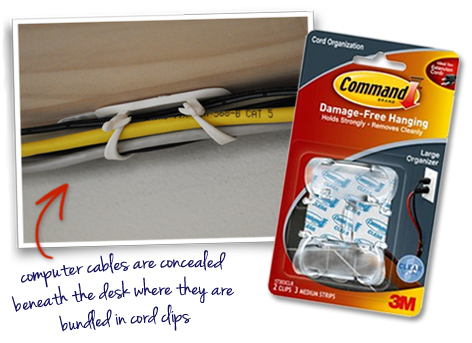
The power point is located behind the right lower cabinet which holds the computer tower and all associated components (like the modem, sound system and external hard drive). It has a mesh side to allow for extra air flow (this is something I probably wouldn’t have bothered with though hubby insisted on – it looks completely fine though is concealed beside the wall anyways). The lower left cabinet holds the printer along with some stationery bits and bobs and CD’s. All of the cables are discreetly concealed on the underside of the desk where they are neatly bundled in adhesive cord clips.
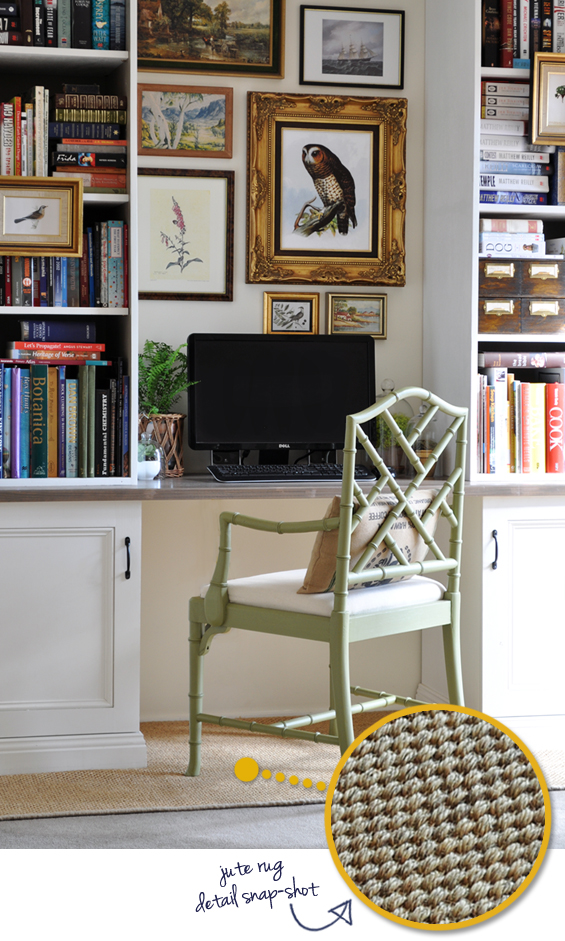
The rug is from Floorspace. It needed to be a pretty specific size and unfortunately I couldn’t find anything ‘off-the-shelf’. I considered DIY’ing something though really wanted a heavy jute to add some natural texture and warmth. To save on the usually extravagant cost of buying something bespoke I arranged to have it custom-made from an old off-cut. Although it was anchored by two heavy cabinets the rug still shifted and bunched-up like crazy on the carpet so I came up with a slightly weird solution which you can read about in this previous post.
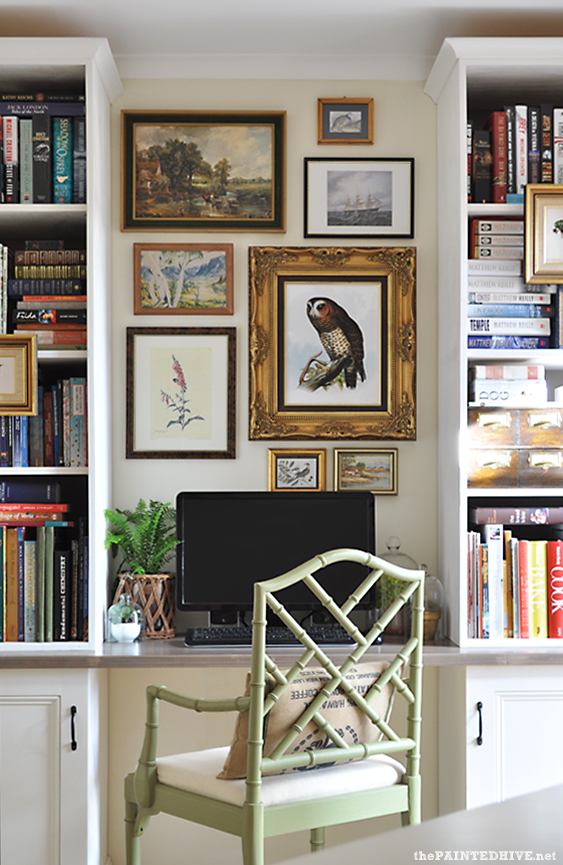
The wall gallery is deliberately eclectic. It is made up of inexpensive thrifted frames, some with their original art and others with free images I found online and had cheaply printed (you can read about the owl print here). I like the way the unstructured collection of frames mimics the busyness of the flanking bookshelves, giving a sense of continuity to the wall as a whole. To further enhance this sense of cohesion, I also hung two pictures on the bookshelves themselves. They are attached with simple picture strips so they are easy to remove and replace if needed. This is a look I love though I’m pretty sure it completely broke my husband’s brain (bamboozled doesn’t even begin to describe his level of incomprehension! I actually had to jump on Pinterest and show him some other examples just to prove my sanity. Though, in his defence, I do get why he thought I was crazy – hanging pictures in front of books is a slightly weird concept).
I also like that the collage of pictures helps camouflage the computer monitor.
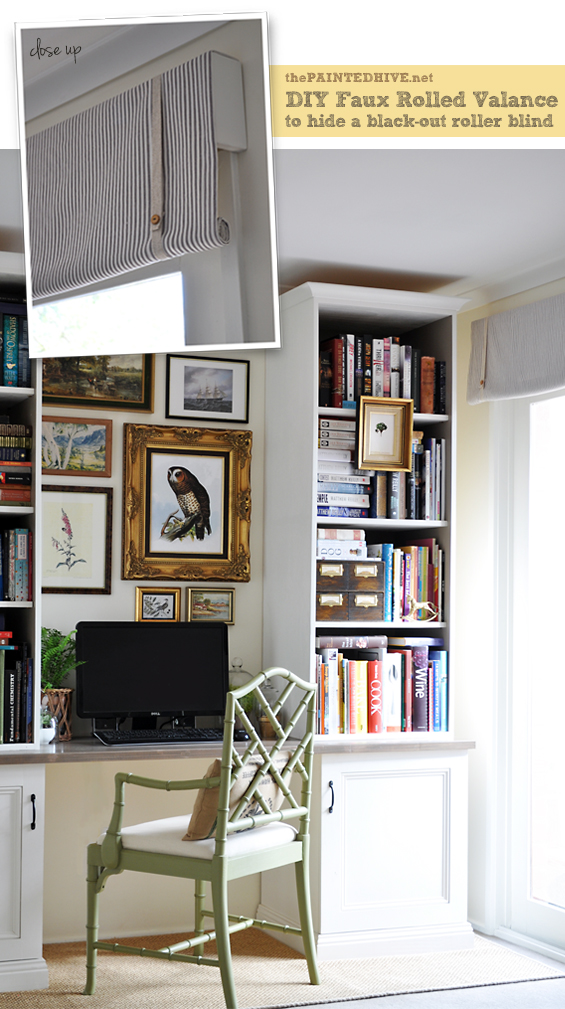
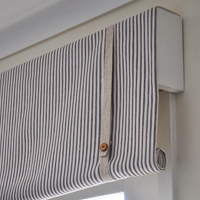
The big windowed sliding door (which is hard to see in the photos) is dressed with a DIY rolled valance which hides a practical black-out roller shade (which we need to block the frequent afternoon sun and occasional penetrating cold). You can read all about it in this previous post.
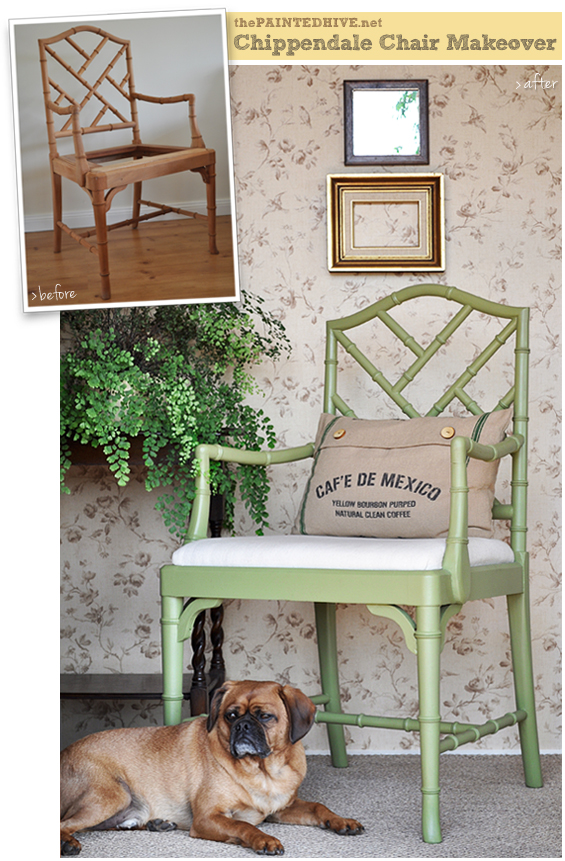
After having used an antique timber kitchen chair at our computer for years the Chippendale carver is like heaven! I’d love a fully upholstered tufted chair (or similar) one day though whilst the kids still have chronic grubby finger disease, I’m sticking with something that’s easy to re-cover if needed. The soft green looks more vivid in person, though is still subtle – I didn’t want a pop that punched you in the face though in the future I might amp it up a bit!
As blogged about previously, I bought the Chippendale chair as a raw, un-upholstered frame and finished it off myself. See my tutorial for upholstering the drop-in seat here. Read about the the chair makeover in general here.
The typographic pillow is a repurposed tea towel. You can read my simple tutorial in this previous post.
Whilst the ceiling light is central to the room it is not in alignment with the cabinets. In person, when you view the room as a whole, this looks completely fine though in the photos where the focus is on the cabinets it does seem to throw off their symmetry. Regardless, we almost never use that light anyways as the adjoining kitchen down-lights provide ample brightness, so one day I might remove it completely in favour of some subtle integrated cabinet lamps. We have pretty low ceilings and the light is directly above a walk-through so sadly there is no vertical space for a lovely hanging feature pendant. For now I’m happy to stick with the simple enamel shade.
Anyhoo, just to finish-up, here are some before and after comparisons of the space…
Like I said, nothing spectacular though pretty (enough) and practical. Have a fab week everyone.
UPDATE: This is mentioned in the body of the post though I also wanted to highlight it here due to the amount of interest it has generated….
One of the most loved elements in my home office space appears to be the owl print. I agree, it is pretty awesome! Good news is, it’s not a one-off original oil painting I salvaged from some dingy old antique store. It is a free printable! Soooo, if you’re truly crushin’ on it, visit my original post about it here for the download link, and get one up on your own wall – yay!
PS As mentioned in my last post, I now have one foot back on a pedal and this little bloggy bike is slowly gaining some momentum so hopefully posts will become more regular. Thank you to everyone for your patience and understanding :-)
SOURCES
Cabinets – Custom built by a friend ($800)
Chippendale Armchair – Mahogany by Hand ($230 raw/unfinished)
Picture Frames – Thrift Stores/Op Shops ($50 total)
Rug – Floorspace ($180 custom)
Enamel Light Shade – Recollections ($10)
PROJECTS
DIY Rolled Window Valance
How to Keep a Rug in Place on Carpet
Easy Lumbar Pillow from a Tea Towel
Bamboo Chippendale Chair Makeover
How to Upholster a Drop-In Seat from Scratch
How to Fill a Naked Picture Frame
IKEA Moppe Drawers Hack




I’d like to dispute that. It’s definitely spectacular! The old one looks too outdated. The office makeover is a stunner with its modernistic approach. And it looks far more organised and functional. Nice!
This was worth the wait! For being a small space you did an excellent job. I everything about this space.
What a cool home office space. The framed print collage is what makes it for me. The landscapes are beautiful and the owl is just rad. I like how the rug sort of separates the space too. Being as it is technically part of a larger room, it is nice to add some breakage for a work space. It is really cool how this projects is the culmination of several smaller projects you have done before.
-Kyle
PlushRugs
I just ran across your blog through Pinterest. Your home office is beautiful! I love the pictures over the desk. This is something we can all find the space for, and be able to keep everything neat and organized.
I found the link to your page on Pinterest. I just wanted to tell you what a beautiful use of space you have there. I’m enjoying browsing your blog a lot.
Thanks Pippa :-)
. I love this! It’s beautiful.
Hi there! I absolutely LOVE your makeover! Everything about it is absolutely fantastic. I’ve featured this post in my Home Office Makeovers Round-Up – check it out here: http://www.dwellbeautiful.com/home-office-makeovers-round/ Thank you! :)
Thanks Erica. Great round-up!
Well-done. Your compact work space looks very gallery-like and elegant. I love your roman-esque shade as well as your fabric choice too. I might have to steal that idea one day.
Thanks Bridget. It was a really rewarding DIY space to put together.
Beautiful! I have a similar setup, but I went with ikea cabinets. I see now that I need to “get real” about my cord management! Thank you for sharing something so beautiful!
Thanks Leigh. The IKEA cabinets are a great option.
You may think this is nothing spectacular but it really is! The progress is immense and you made it to be a very functional, not to mention, pretty space. The wall gallery was a great addition.
Beautiful! But where did you put the printer?
Hi
Thanks! As briefly mentioned, the computer tower and components (like the modem) are in the right-hand cupboard and the printer is in the left-hand side. All of the cables run beneath the desk where they are concealed with cord clips.
Cheers
Terrific web site you possess here.|
Love everything about it! Thanks for all the links and tips.
Thanks :)