
If you’re anything like me, then you probably consume quite a bit of design and decoration content online, either through social media, blogs or other websites. And, like me, in your time you may have come across the odd article or two about exterior shutters and their supposed “right and wrongs” (perhaps with a heated ensuing comment thread!).
Yes, apparently some people have strong opinions about some wood attached to the side of a house!
The bulk of the negativity is aimed at decorative shutters, especially those which don’t “fit” the window size so can’t even pretend to have some sort of function.
The secondary annoyance centers around their general appearance. The belief that they diminish, rather than enhance, the look of most houses nowadays because they tend to come across as fussy, old-fashioned, forced and erroneous.
I get it, and totally understand the arguments, but I’ve never been one for rules or trends.
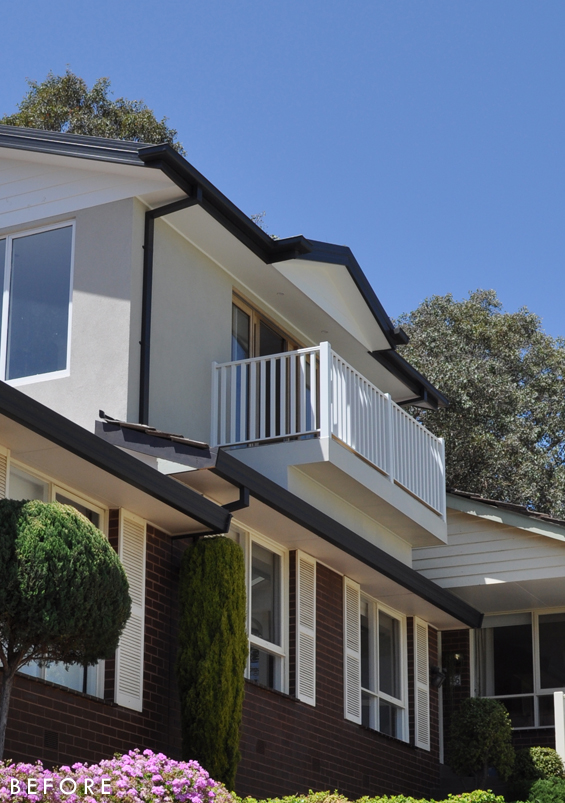
When my parents painted their exterior brick a few months back, they needed to remove all of their original white louvered shutters – yes, the ones below which don’t “fit” the window size.
At that stage we discussed the possibility of leaving them off entirely, though they were both adamant that they wanted them back. And, I must say, I liked the idea too.
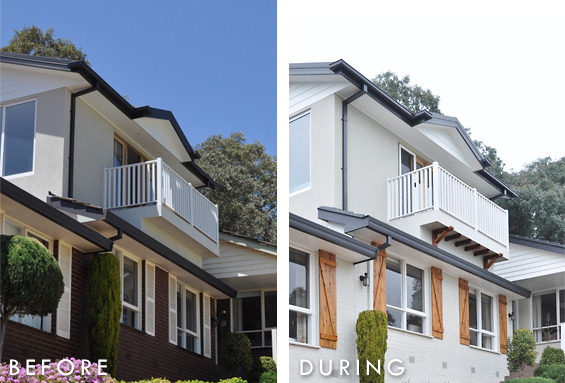
As you can see, a large portion of their house is visible from the street, and although the new white brick was fresh and crisp, there was a LOT of it! Plus, my parents have always loved the charm of country style homes, so the somewhat sleek and modern look of having no shutters, whilst appealing to many people, simply wasn’t for them.
We toyed with the idea of re-using the original louvered shutters (which are currently popular again!) but decided something with a bit more substance and character would work better. Plus no-one was interested in stripping the paint off all the louvers – LOL! It would have been a massive job. Of course we still have the original shutters and will repurpose them for future projects.
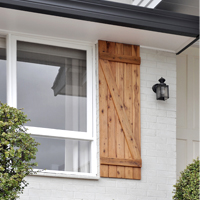
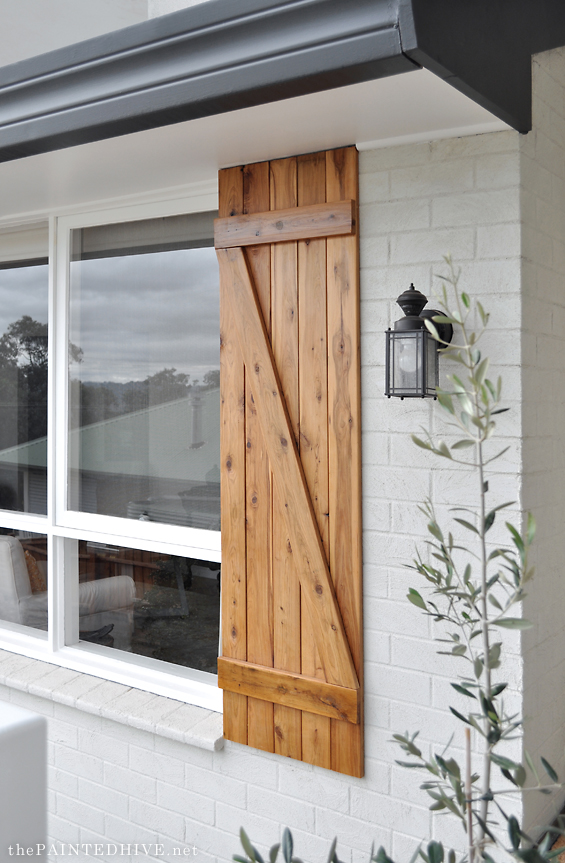
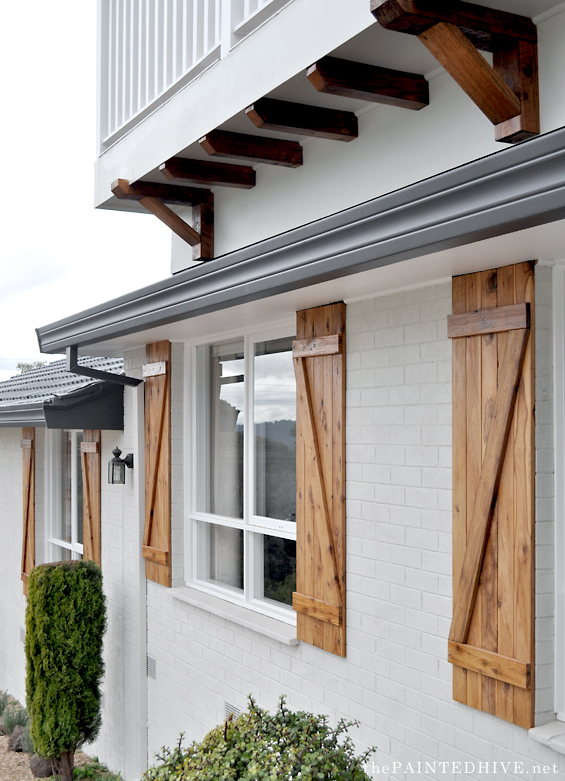
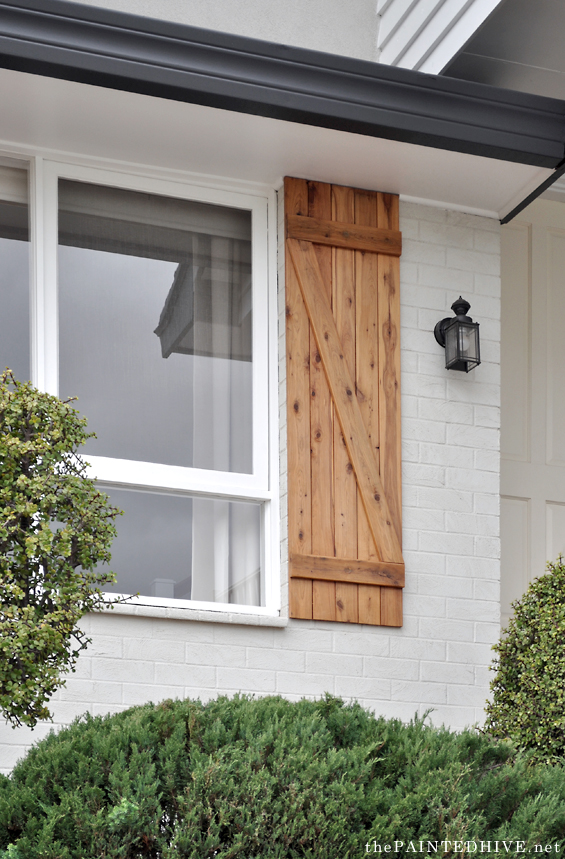
After settling on a simple ‘Z’ design, my Dad built all of the shutters from cypress pickets. It’s a pretty straight-forward DIY (just cut, glue and screw – similar to the batten style shutters I built last year for the flip house). Each shutter cost $60 and there are ten in total.
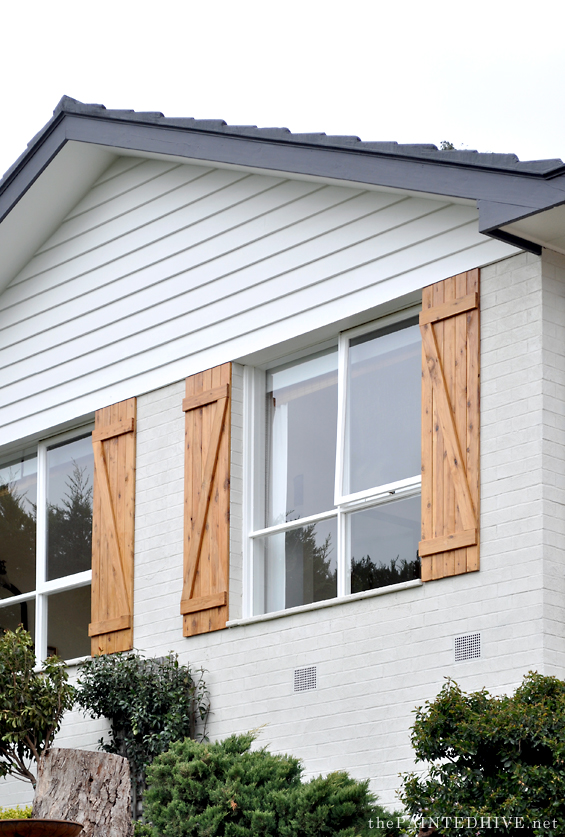
They are merely bolted directly to the brick. To retain and enhance the natural warmth of the timber we simply finished them with clear exterior oil.
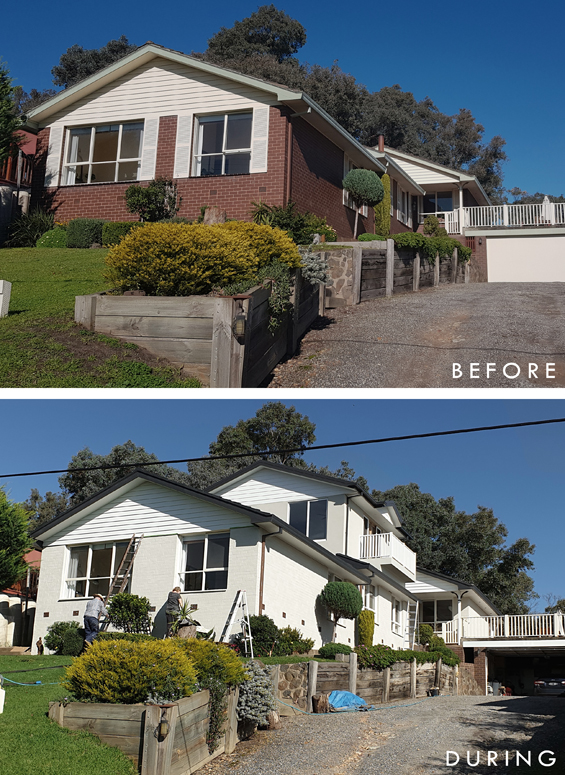
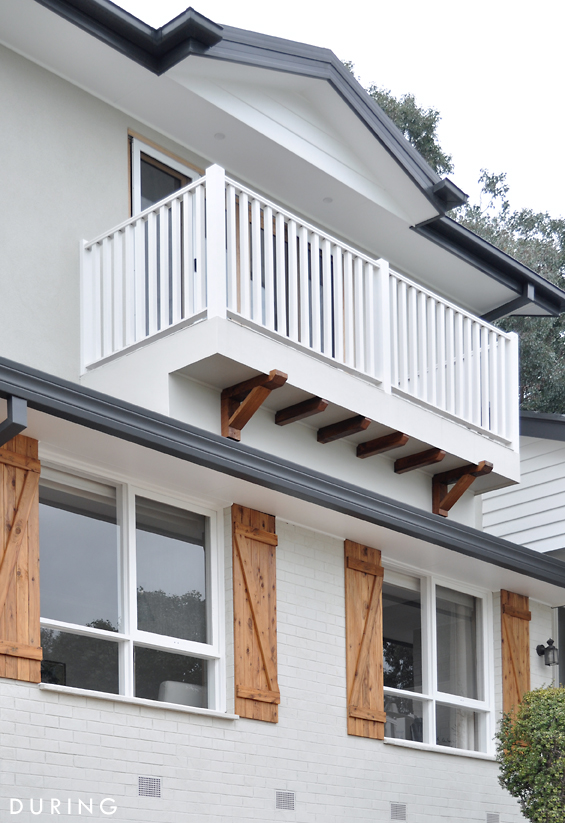
Here’s a before and during (“during” because the house is still a work in progress) with and without shutters…
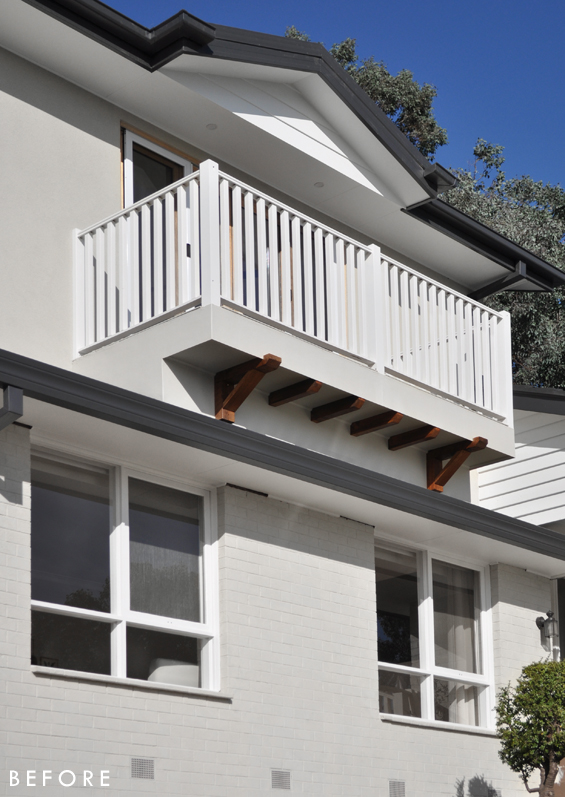
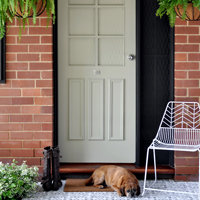
And here’s before the brick was painted with the original shutters still in place…
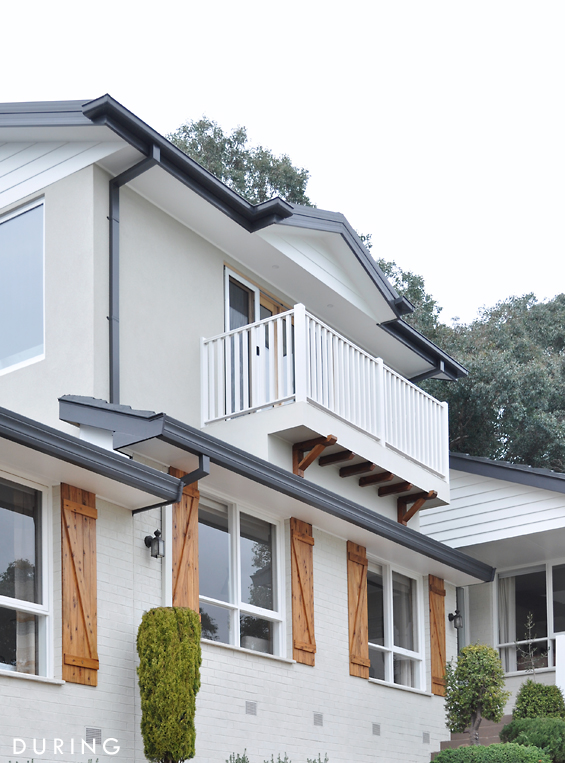
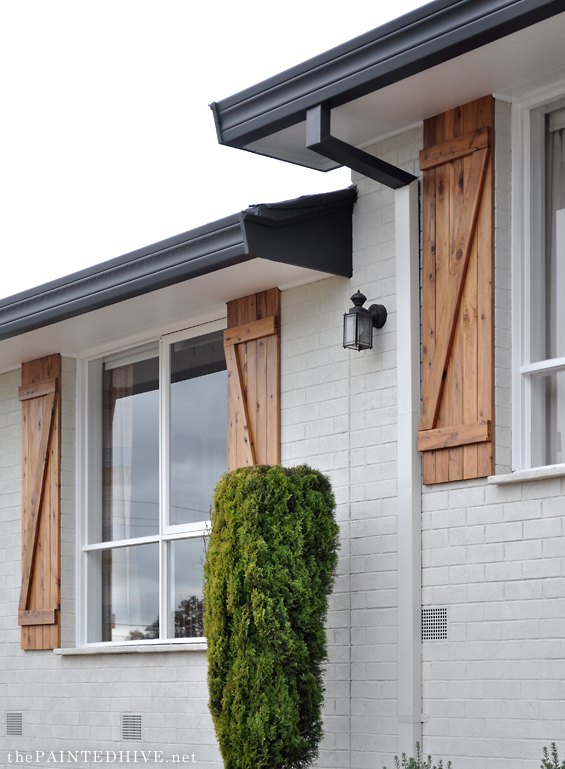
For a while we were tossing up the idea of charcoal or duck-egg shutters, though I’m so glad we went with natural timber!
Like I said at the start of this post, they may not be for everyone though I absolutely love them!
![]()
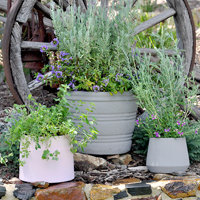
If you noticed that my photos are all relatively tight-framed, this is why…
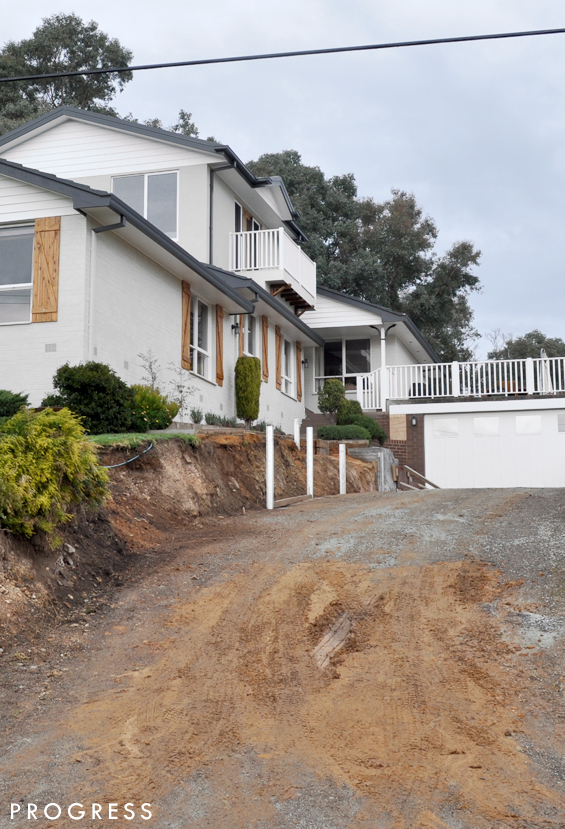
My Dad pulled down the old retaining wall a few weeks ago so this whole area is a big mess. Aside from building a new wall and having the driveway made, we still also need to finish the garage area and stairs which will all be clad in stone, and there will be a timber pergola going up on the balcony. It’s slowly getting there.
![]()
Catch up on all of the other suite extension posts HERE.


To me it’s looking a bit European and quite lovely. I’m with your Dad, the wall had to go. Kudos to you all.
Thanks :)
This is beautiful! What is the color of the brick you painted? It almost looks a little bit gray which I love!
Sorry for the delayed reply. The bricks are painted in a colour called White Duck (Dulux). It’s a lovely warm light greige.
What stain did you use if any?
They are finished with clear oil which enhanced the natural colour of the cypress.
Goodness me if people are so anti “purely decorative shutters” one would have to ask whether they have a similar attitude towards all other decorative elements inside and outside a house…….paintings, sculptures, wallpaper, light fittings, potted plants etc. I think the shutters look great, the whole house looks amazing, but the most important thing is that your mum and dad love them.
Thank you. Yes, I often think the same thing about other decorative items which don’t seem to cop the same amount of flak. But it’s all good. I love the shutters and so do my parents :)
I LOVE this look so much! We are having our house painted white right now and I plan on making shutters similar to these. I love this color stain, too. Can you tell me what it is? I don’t believe you mentioned what it was.
Thanks. They aren’t stained. They were built from cypress which has a naturally warm honey tone so we simply oiled them.
I never knew there would be such a debate about shutters! I love these – they look beautfiul and I think that the natural timber looks just perfect with the white brick and the beams under the balcony.
Thanks so much Leslie :)
Yes, indeed in Europe we have shutters on the windows which are used to close them during the night or to protect ourselves from the heat in summer. I find ridiculous the size of the false shutters whose size does not correspond at all to the size of the windows.
I never knew there was a debate over decorative vs functional shutters. As long as they suit the style and are in scale to the windows/house what is the issue? After your parents spent considerable time painting the brick, it is understandable they wouldn’t want spend hours prepping/painting the old shutters.The timber shutters look great. They brake up the white painted brick and tie in the millwork on the balcony. Great job!
Thanks so much. Like anything I guess there always people who want to express their personal views. It’s fine really. I’m getting better at taking the good with the bad :)
I think the shutters look great. I took down decorative louvered shutters on my house, which overall greatly improved the look of the exterior. But I still sometimes look at the house and think it’s missing something. Once you see shutters on a house, it can sometimes look bare once they’re taken down. I think it’s all about proportion; ours were much too wide and seemed to overwhelm our small house. Perhaps if they were more narrow I wouldn’t mind them so much.
Just curious if you’re planning to put shutters up on the windows of the extension?
Yes, my parents had lived with the original shutters for almost 40 years and it’s easy to simply get used to something. I knew they would want them back though in this case do think it was the right call for the look and feel they wanted.
At this stage we are leaving the extension shutter-free. There isn’t much space either side of the windows up there so adding shutters could make things look a bit crowded.
People will always have an opinion. It is your (your parents’ house) and you can do what pleases you. I think they are quite lovely! Charcoal might have been too stark and the duck egg too foo-foo. I really like the natural wood. Maybe an accent of duck egg somewhere outside?
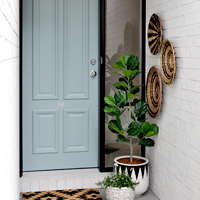
Thanks Cherie. Yes, we are thinking of adding duck egg, or perhaps a more grey-green, on the garage door trim or front door perhaps.
WELL DONE!!
Going with the wood was the perfect choice! It looks fabulous! I can’t wait to see the retaining wall, driveway and garage finished…it’s going to look like a million bucks!
Thanks so much :)
Well, I’m in your camp and I think it looks stunning! Your Dad did a super job and it really warms up the white exterior. The house looks more beautiful each post and I’m looking forward to the coming pictures.
Your exterior colours are impeccable! The pure white, “cream” and charcoal are divine! Normally don’t like shutters, but yours are perfect (well done to your talented Dad :)
Thank you. This is a lovely comment. Exterior palettes are always a bit tricky and I’m so happy with how this has come together.
I think it’s looks beautiful. I love the trim and the shutters. I think it really warms up the house.
The timber is perfect.
Thanks. Yes, I think so too :)
Perfection
Aw, thanks :)
It looks gorgeous. Well done.
I never imagined shutters would create such strong emotions!
But your home looks stunning – it sounded like a little bit odd combination first (yes, I admit not being a huge fan of wooden shutters) but you make it look so good!
Hallo Kristine, herzliche Grüße aus good old Germany. Die Fensterläden machen das Haus erst richtig schön. Sie bilden einen schönen Kontrast, ohne sie wäre das Haus langweilig. Gut gemacht und was die anderen sagen, soll uns immer weniger interessieren. Ich warte schon auf den nächsten post ;) Gruß Theresa
Thanks so much Theresa. Lovely to hear from you :)
Wow what a fantastic blog post!! Well done
Those timber designs are awesome! Your dad has a great decision on building all of the shutters from cypress pickets.
your design looks great hope you add some more in future also. thank you for sharing
Thanks for the useful information hope to see new posts
Looks beautiful. What color stain did you use on the shutters?
Thanks. They aren’t stained. They were built from cypress which has a naturally warm honey tone so we simply oiled them.
I love the look of the shutters! I think they are so cute! Great job.