As promised, I’m back to share the bedroom from the Airbnb bungalow I worked on for a lovely client.
When I first saw this space I knew it was going to be challenging, but I love those kinds of makeovers!
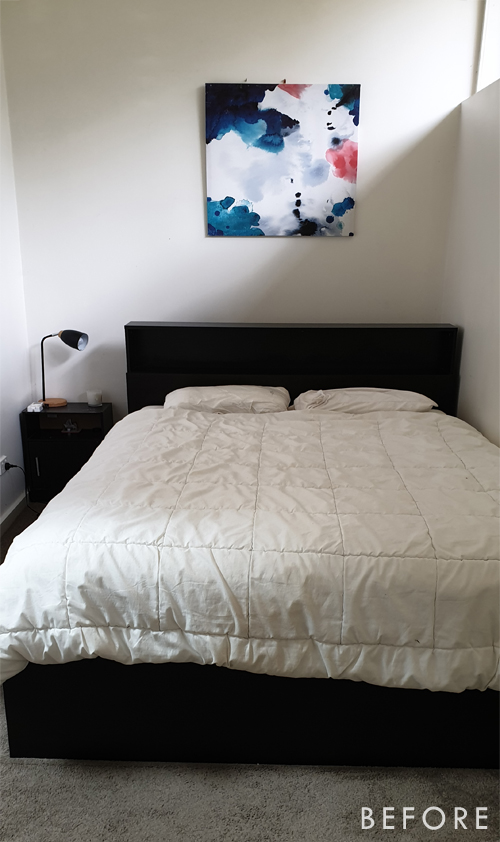
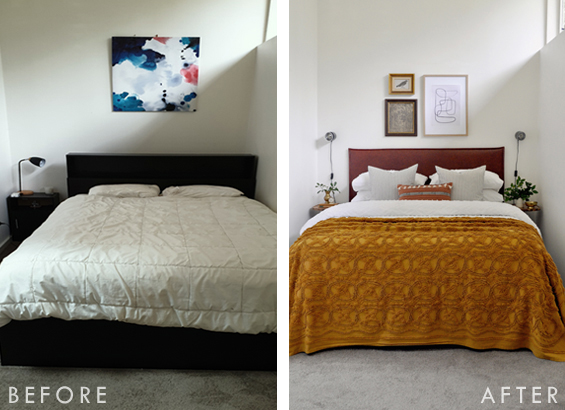
Here’s the room before…
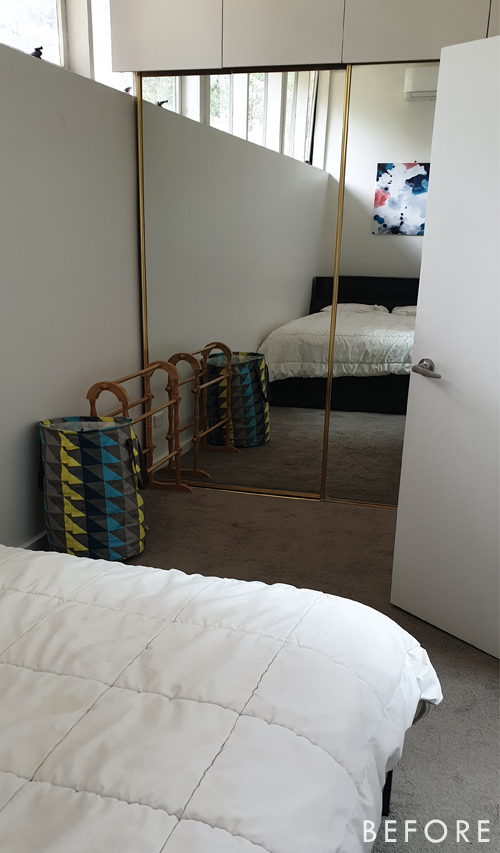
My client wanted to leave the wardrobe end of the room bare, so I didn’t do anything but clear that area out. Still, I have included the before photo for overall context.
As you can see, it’s super narrow, with a spanning clearstory window, and mirrored built-in wardrobe at one end. The only place for a bed is on the blank wall as shown (the room isn’t deep enough for it to be positioned vertically), and the entry door is right by the foot.
My main priority was to centre the bed, allowing two people to use it comfortably. Let’s face it, no-one wants to have to climb over their partner in the middle of the night to grab a glass of water, then also ask said partner to place said glass of water on their bedside table because, well, there is only one!
Yes, access was always going to be a little tight, but it still provides a much more desirable layout.
I also wanted to give things a fresher, lighter, more sophisticated, feel. And all on a tight budget of course.
Here’s how the room came together…
Where possible, I always like to try and work with any existing pieces, but the original bulky furniture (which was merely cheap black laminated chipboard my client had purchased out of necessity) simply wasn’t suited to capitalising on this tricky space.
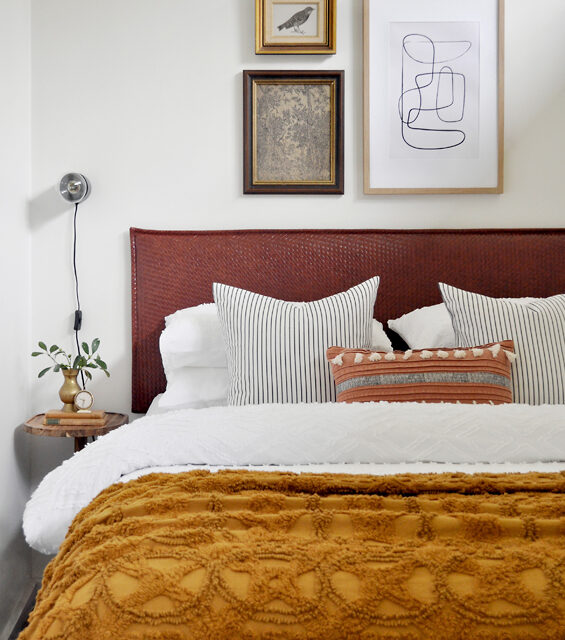
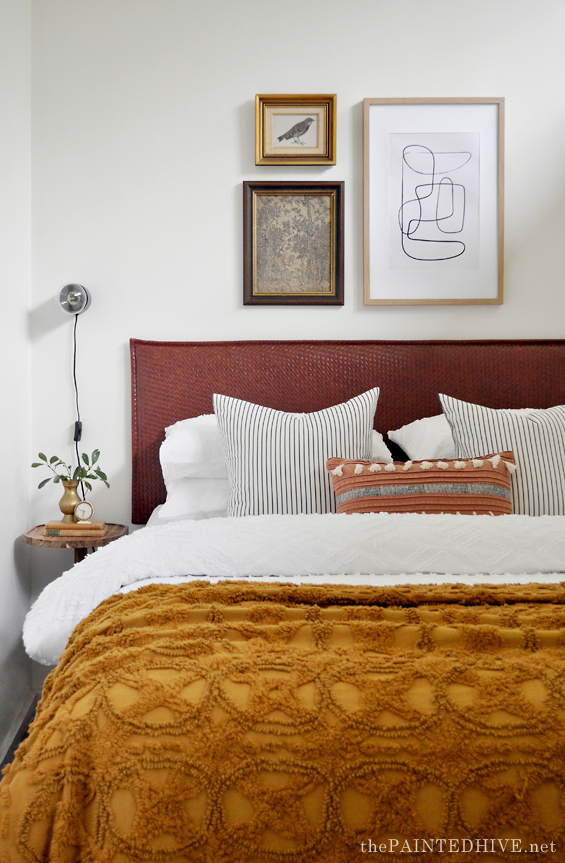
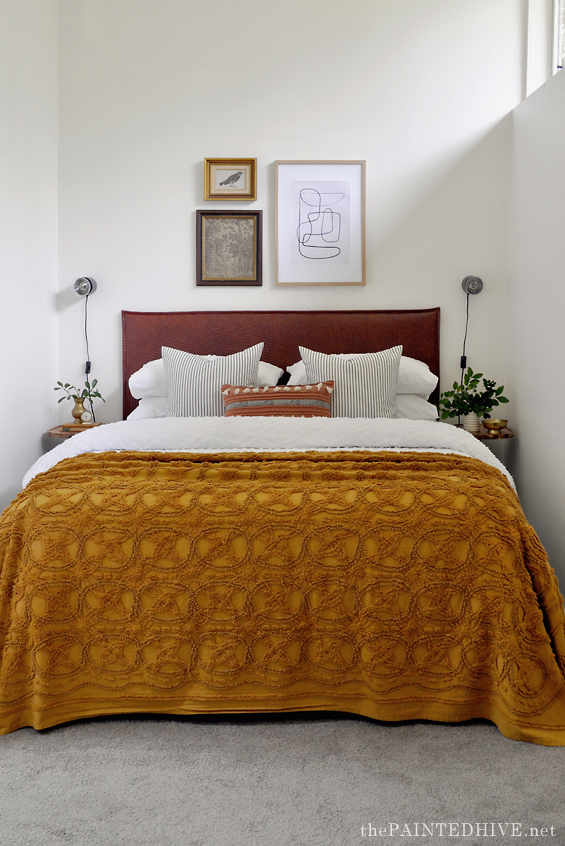
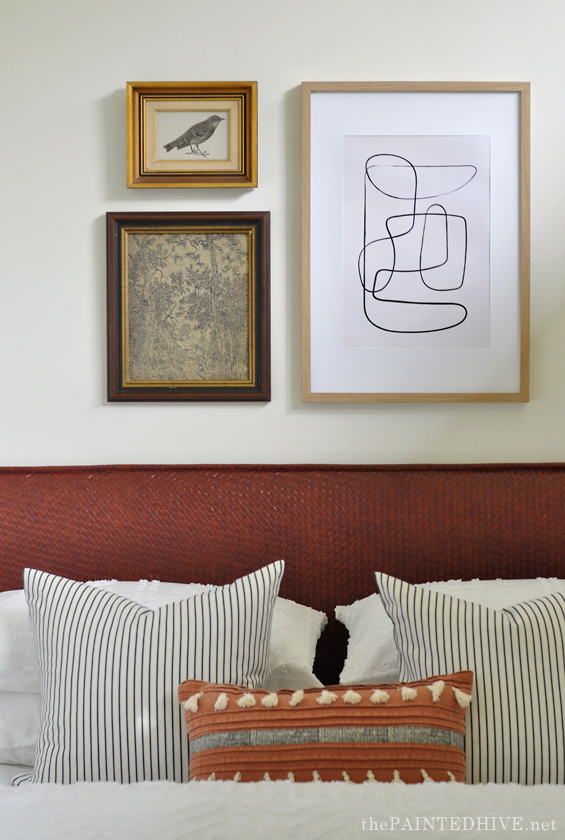
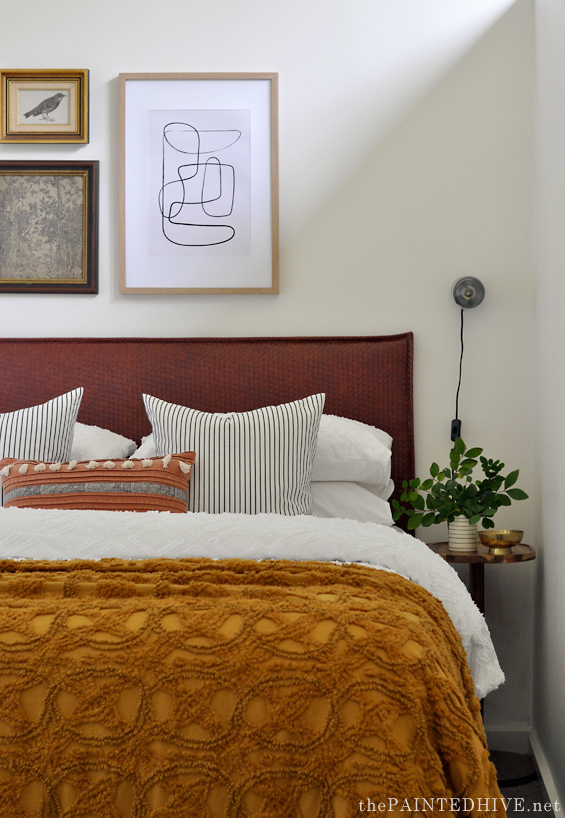
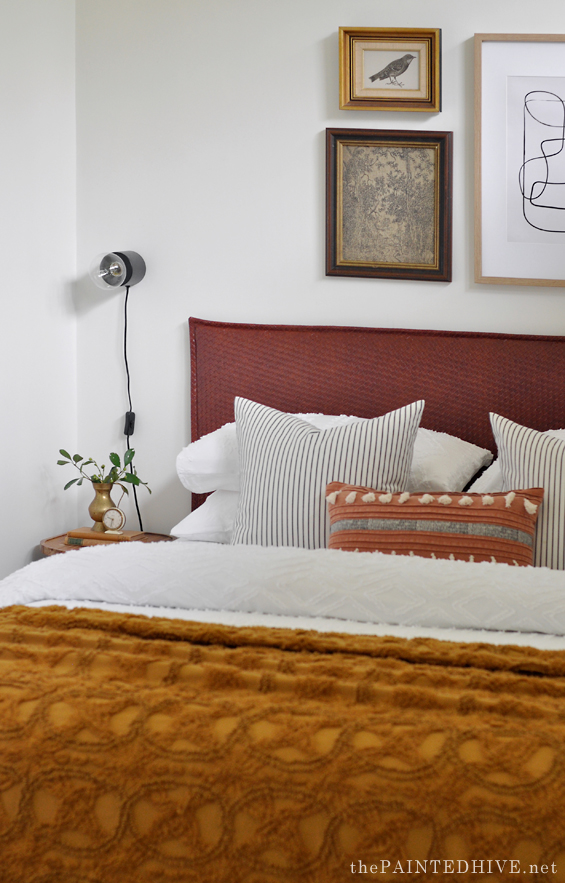
Instead I opted for no bed frame and brought in a simple ensemble base (you can’t see it in the pics but it’s actually the same skirted base I used in my mother-in-law’s guest bedroom), along with a lovely custom DIY headboard.
Having no foot on the bed helps open-up the entry to the room given the bed is so close to the door. Likewise, using a slim headboard which allows the bed to be pushed back as far as possible against the wall also aids in providing more space at the entry.
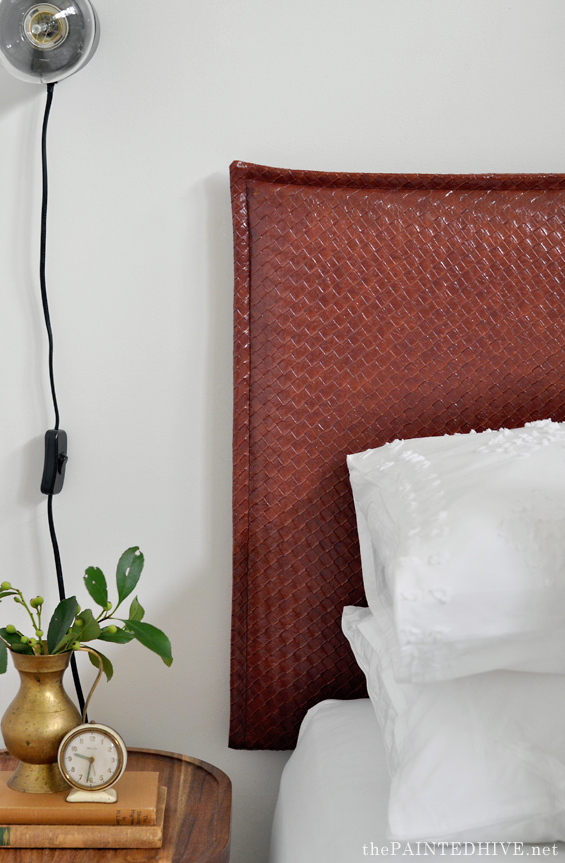
I’ve been wanting to use a leather headboard in a room for ages, and this makeover provided the perfect opportunity!
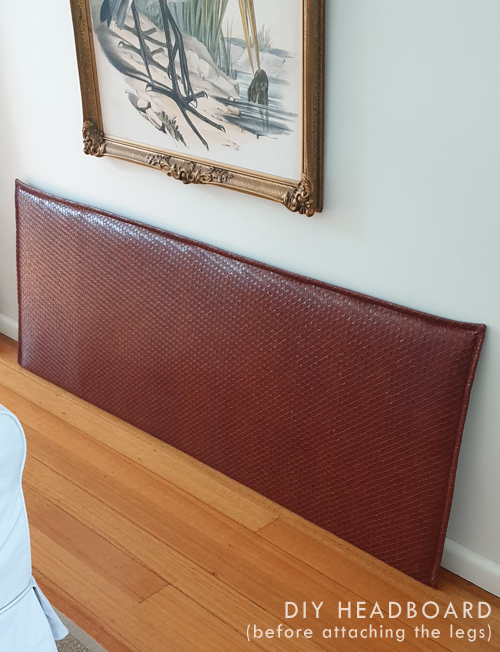
My budget couldn’t extend to real leather, so I visited a fabric store (Spotlight) to see what nice faux options were available. At first I found a vintage-style tan faux suede which I was almost set on, but then I happened to come across this rich hatched faux leather which I just couldn’t stop thinking about!
It almost has a snake-scale or crocodile-skin vibe. I know it’s probably not everyone’s cup of tea, and it is a more risky choice, but I love that it’s a bit different! And, although it looks quite expensive, it was only $17 per meter.
I’d like to take full credit for making this headboard, but at the time I was super stretched, so my wonderful mum stepped in and undertook the majority of work.
Still, it’s a relatively basic project.
Just a sheet of MDF cut to size, some wadding/batting to cover (we didn’t use any foam), then a sewed cover which is stapled in position. It’s very similar to the process we used to make this slipcovered headboard for the flip house. But this time around we only used the “show” fabric for the front so it’s not a typical slipcover.
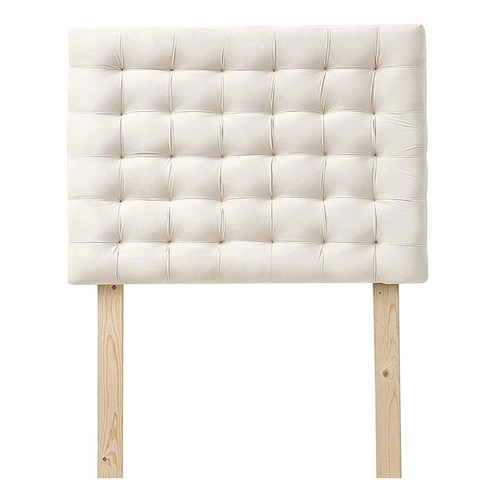
To finish I attached two basic legs so it’s able to stand on its own at the right height behind the mattress and base. Just like this…
Sorry, I never took a photo of my actual headboard so this is clearly just an example image.
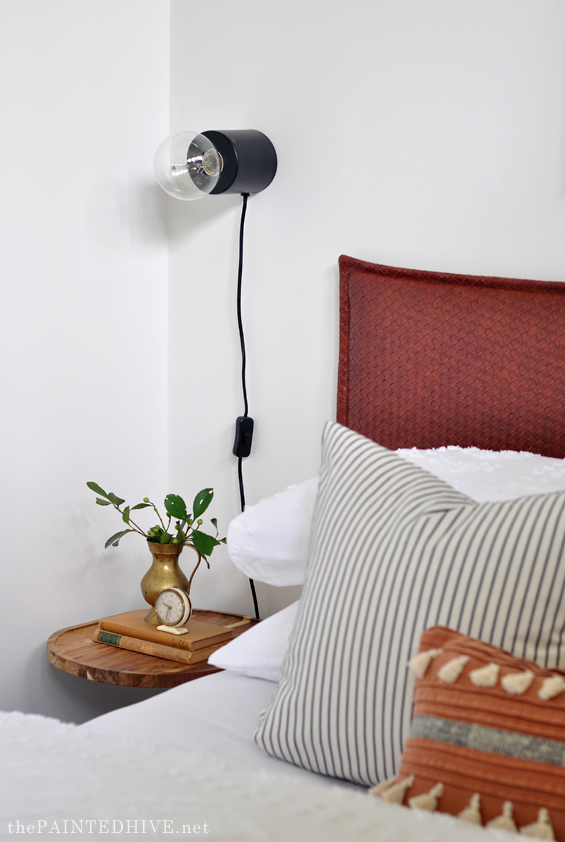
Of course, given the narrowness of the room, one of the trickiest elements was going to be the bedside tables. I looked high and low for a long time for something which was the right height, width and price. My initial ideas were to custom build something, use bar stools, or hack some plant stands by placing bread boards (or similar) on top, which I would have resorted to if needed, but then one day Aldi released a catalogue with these perfect tables!
Aldi is pretty notorious for quickly selling-out of their ‘Special Buys’ and in the end I needed to visit three different stores, with my kids in tow, before securing two tables in the correct colourway.
But it was totally worth it, despite my grumbling kids, because they are absolutely perfect and were only $45 each.
Given the limited surface space on the side tables, I knew regulars lamps were never going to work well in here. But I had no budget for installing hard-wired sconces, so my only real option was plug-in wall lights (I did consider using battery operated bulbs in regular sconces, but they just don’t hold enough charge to be practical in an accommodation setting).
Although plug-in wall lights are more widely available here in Australia than they used to be, options are still quite limited, and I couldn’t find anything ideal for the right price. So, I started looking at table lamps I could attach to the wall instead – remember when I first did that years ago in my daughter’s bedroom?
It didn’t take me long to decide on these Marlo Table Lamps from Bunnings at just $10 each! Bargain!
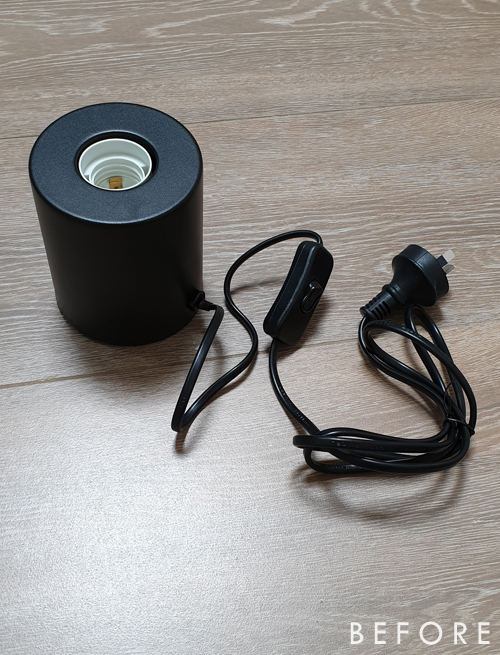
Aside from having a minimal and modern feel, which is exactly what I wanted, they also lent themselves to being adapted for use as wall-lights perfectly…they were super light-weight, the hollow base had a little lip so they could easily be mounted from a nail or screw, plus there was an in-line switch which would sit at just the right height.
Here’s one light right out of the box, shown in its intended orientation…
Obviously it’s a pretty basic project which I didn’t think warranted a full tutorial, but if you’d like more info, I’m happy to put together a separate post with all the details. Just let me know :)
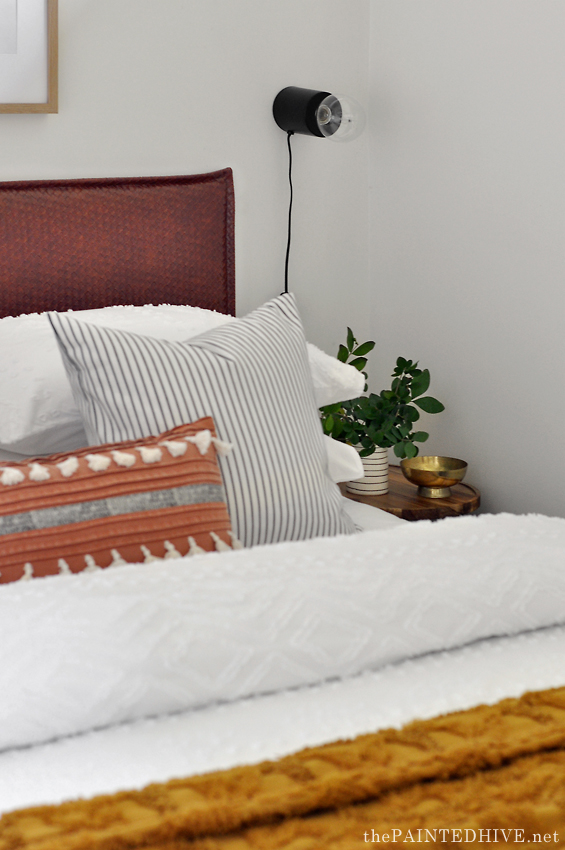
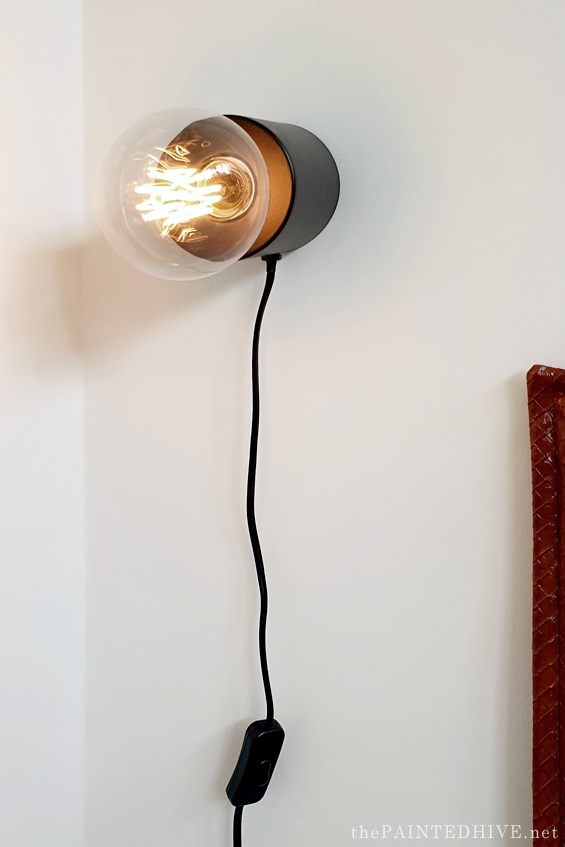
To complete the look I added large decorative Edison style bulbs. Frosted bulbs could also work well.
I rarely take photos with lights on so this is just a quick phone snap, but I wanted to show how warm and inviting they are, without being glary at all given the absence of any shades.
I used to have a thing about visible cords trailing down walls, but now I think they can actually work to add a slightly funky edge to the right space. If you saw the living room reveal from this bungalow then you may have noticed that I also used a plug-in wall light there too. I think it helps provide a nice synergy between the spaces.
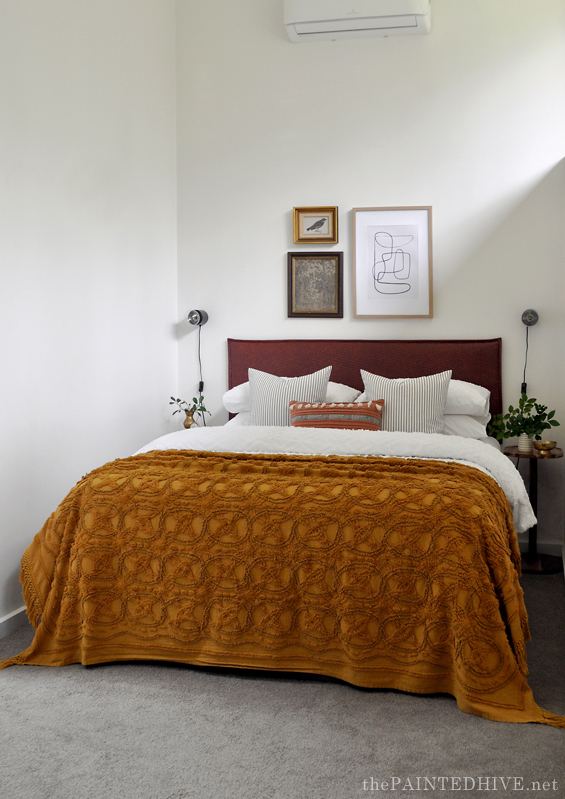
In terms of the bedding, the white tufted quilt cover is from Target, as is the little lumbar cushion. The mustard throw is from Manchester Warehouse and the striped cushions are IKEA.
If you recognise any of them it’s probably because they are some of my current favourite products!
For the little gallery wall I went with a vintage and modern mix to add extra interest and also to connect with the dining room art.
All of the artworks are digital downloads which I had printed through Officeworks. The bird illustration and landscape etching were free from Rijks Studio, and the abstract was purchased from Etsy.
The large frame is from Kmart and the smaller frames are simply old thrifted finds I’ve had for years.
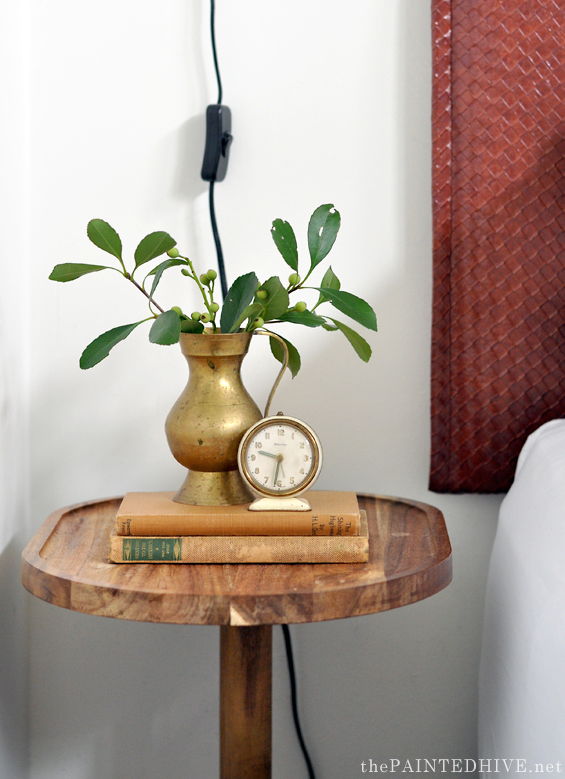
Most of the decor items have been included purely for styling purposes as my client wants to keep the side tables quite clear. Which makes total sense because guests need somewhere to rest their book and phone.
So, here are the comparison pics…
This was such a fun project to work on. Yes, a bit tricky given the awkward space and tight budget, but so rewarding! And made all the more enjoyable thanks to my lovely and trusting client.
It was also really liberating to step a little bit sideways in terms of my signature decorating style and try something a tad more modern and minimal – even if I can’t help but include a smidge of vintage here and there!



Love this!!
Kristine – You’ve done it again!
A minimal space made very welcoming.
It has changed from cold and utilitarian, to warm and homey.
Looking at the photos was an interesting diversion!
Love it! Very clever styling and use of space
Thanks Diana :)
Lovely work. You have great color sense. Your mom did a lovely job on the headboard and I would love a tutorial for this one day.
Yes! a tutorial for this headboard would be great. I was thinking that you wouldn’t even need the legs but rather attach it to the wall with a Hangman bracket which has a built-in level. I love the choice of “leather” too!
Argh, I didn’t take any photos of the process so would need to make another one in order to get a tutorial together. I’m considering helping my brother makeover his bedroom soon and might include one in there so will keep you posted.
Yes, I did consider wall mounting the headboard but I wanted to keep it free-standing for my client. Plus it’s an exterior wall on a mudbrick cottage which can be tricky in terms of affixing things to.
I’m not a fan of mustard unless it is in a ham and cheese sandwich or my sister’s honey mustard chicken however in your hands it’s a colour I can appreciate. :) Amazing work as usual.
Ha, ha. Now I want a ham and cheese sandwich!
What a sexy headboard! I love it! Oh who am I kidding, I love all of it!
Amazing work with such a small space – such a big difference. LOVE that headboard!
Bravo you’ve worked wonders with this small space. You’ve inspired me to have a go at styling my parents place in country Victoria before it goes up for sale.
Good luck with it! Feel free to ask if you have any questions along the way :)
As a user of AirBnB’s, thank you for including two side tables and lights. We stayed in a place where the bed was against the wall. It was a pain! This is beautiful!
Just so amazing to see the difference you make with color, and perspective. WOW
I love all your rooms. They are simple and warm, yet look elegant. I love that burnt orange bed cover, you really have a talent.
Thanks Sheryl :)
Install a table lamp on a wall? Who knew? Brilliant ! (Charlotte’s wall lamp is fan.tas.tic !)
Wow the light was impressive. I have never seen that done before.Brava to everything! Love the headboard.
Forget to say i love the mustard!
Thanks :)
So clever, I love it. Colours are fabulous.
you’re so darn good at this! every space you touch sings.
You’re so inspiring! Truly, I wish to be more like you. x Jeannie
The dark bed frame really over takes the room. It looks so open and light with the new headboard and bedding. And the headboard…what can I say but kinda sexy. Lover the rich color and texture. All the little changes you update made such a big difference in the way the room feels. Great job.
What they said….I especially like that it is affordable and within the reach of many people.
As per usual, so inspiring Christine. Could you please let me know if the faux leather material you used was the brown or burgundy colour?
Pretty sure it’s the Brown. Even though Burgundy sounds like a more suited name I think that one was maybe more red and muted.
Well done! Very inviting, pretty but not overly fussy. I really love that gold chenille throw.
Thanks Jody :)
Your name is now Wonder Woman. impeccable and innovative as always Kristine, thanks for sharing. i love your work. also, affixing a light bulb to the wall tutorial will be useful for us not as intuitive as you. such a wonderful article to read. you should send to airbnb and they may send other owners to you!
Je vis près de Paris (France) et je vous lis depuis avant la naissance de votre fille. Je fais avec la traduction Google car je ne parle pas anglais. Mon neveu a adopté votre nationalité il vit depuis longtemps dans votre pays. Vos idées et réalisations décoration sont superbes. Bravo.
Hi Linette.
Well, I just read your comment via Google translate and it was lovely to hear your words. Thank you for being such a loyal long-time reader. My daughter turns ten in two days! Double digits!
France is my number one place to visit in the world! One day I will get there. Especially keen to see the South and Bordeaux region.
x
Love what you did with that room. Where did you get the bedspread? Fantastic!
Thanks. It’s from Manchester Warehouse (the brand is Linen House). I think I linked it in the post but that colour is currently unavailable.
Beautiful! I love the headboard, And the rich warm colors you’ve used in the room. It is all so much more inviting and comfortable than the “before”.
We just finished a budget friendly makeover and it was so much fun! This guide was super helpful and made the project so much easier. I would definitely recommend it to anyone looking to renovate their home on a budget!
Love this! Great job on the makeover!
I was super impressed with how you repurposed table lamps into plug-in wall lights. It’s a clever twist that not only solves a space issue but also adds a modern, minimal edge to the room.
Thanks for the lovely insights kristine!