
It’s finally time to begin sharing some of the tutorials for the DIY projects at the flip house!
I’m starting with the headboard in the master bedroom which lots of you have asked about. This is a really easy and inexpensive project that anyone can have a go at.
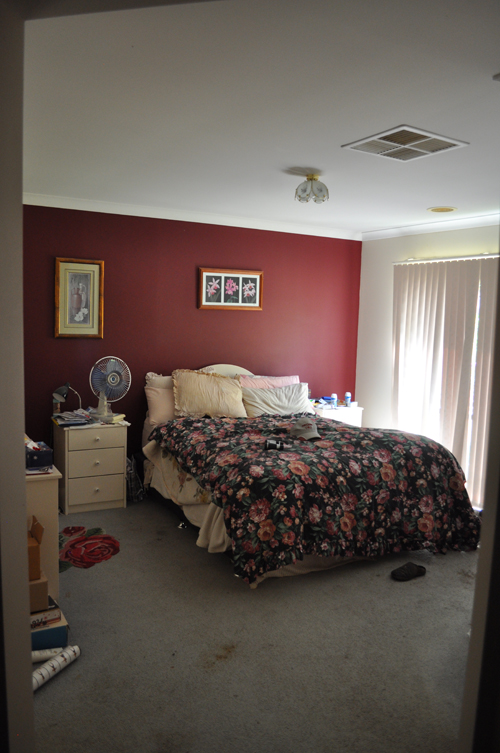
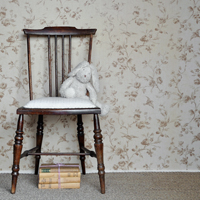
BEFORE
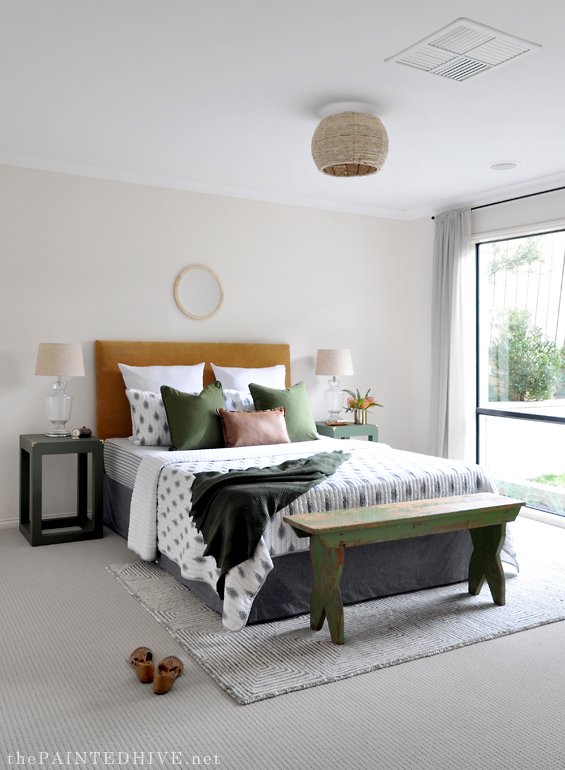
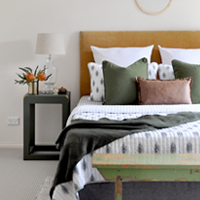
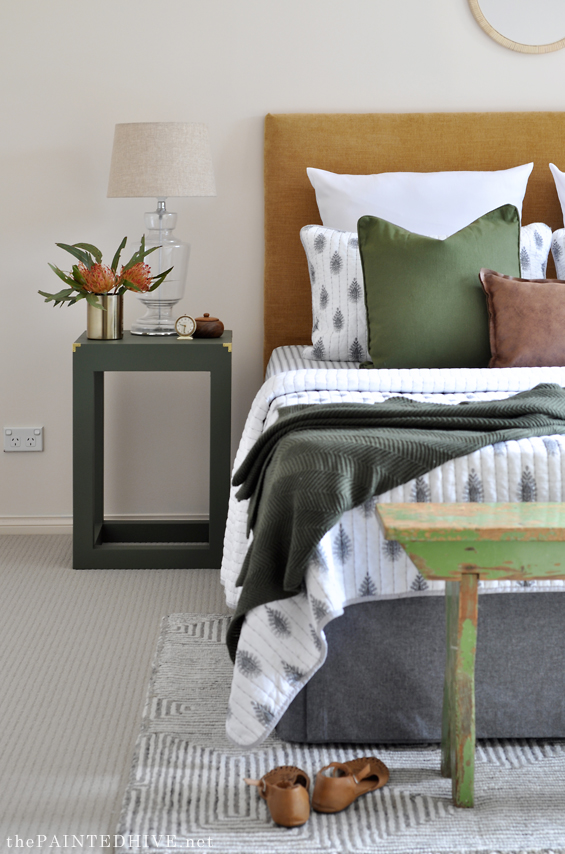
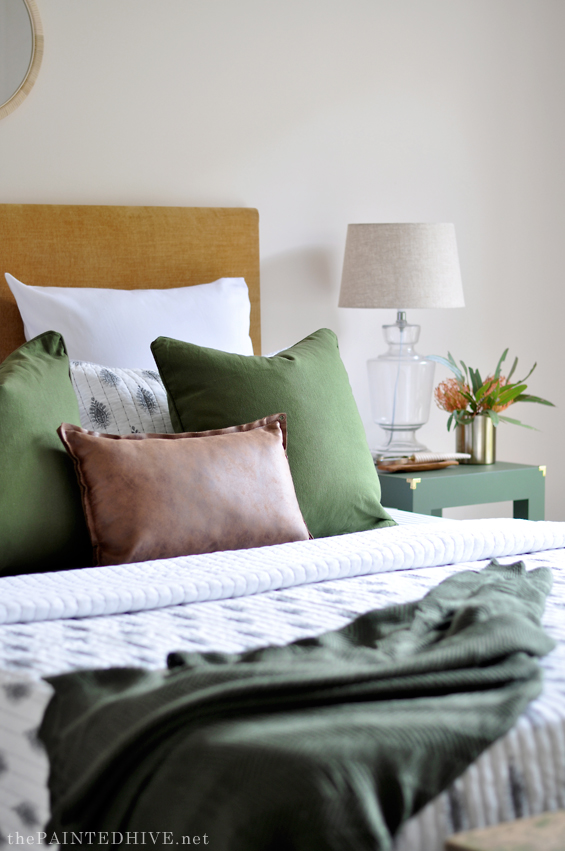
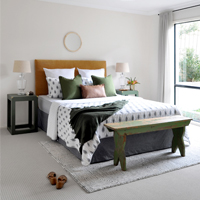
AFTER
![]()
When I create tutorials, I like to cover each step in plenty of detail. I’m sure you guys can appreciate that documenting the process adds a fair bit of time onto the actual project, plus often I don’t have anyone with me to help with things – like being a hand model, or taking photos on my behalf when I’m up to my elbows in fabric and staples! Because we were so time-poor trying to get the flip house finished, I wasn’t always able to stop for the sake of setting-up the camera. So, for the purpose of this tutorial I’ve created a mini replica to demonstrate the technique (let’s just pretend it’s an upholstered headboard for a doll’s bed).
![]()
YOU WILL NEED…
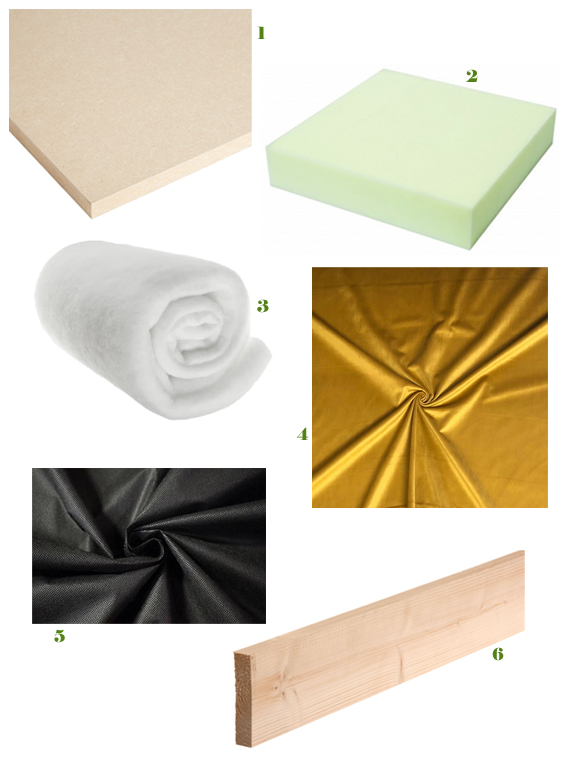
1 BACKING BOARD
I used a sheet of MDF I already had from a previous project. You could use plywood, chipboard, masonite, or even something like a second-hand door.
My MDF was 18mm/.7″ deep and I cut it to 155cm/61″ long x 120cm/47″ high. If you don’t have the tools or confidence to trim your own board, ask at the hardware store and they should do it for you at no charge.
2 FOAM (optional)
I wasn’t going to use foam, mainly because it can be pricey, though then I noticed an old mattress topper my parents had sitting in their garage. I figured if I positioned it ridge-side-down it would work fine. Foam isn’t essential though it does help provide a thicker, plusher, fuller look and feel, especially if your backing board is relatively shallow, like mine. If you’re using something quite deep as your backing board, like a door, then you could get away with just using wadding and still have a nice thick headboard. Alternatively, if you want a simple thin headboard then wadding alone over a shallow backing board can work fine (we didn’t use any foam when we made the headboard for the master bedroom at my gran’s house).
I cut my foam to the same size as my backing board using an electric knife.
3 WADDING/BATTING
This not only helps soften everything, though also works to create a smooth finish which conceals imperfections.
I trimmed my wadding so it could comfortably be wrapped around the foam and backing board.
4 FABRIC
I used this gorgeous mustard upholstery fabric from Spotlight. Of course, you can use anything you like. Just bear in mind that thicker fabrics tend to be more forgiving and linear patterns, like stripes, can be super critical. For the tutorial I’ve used some linen from Spotlight I had left-over from a previous project.
I cut my fabric so it was slightly more generous than the wadding. If your fabric wrinkles easily, be sure to iron it first too.
5 BACKING FABRIC (optional)
This is just to neaten-up the rear of the headboard for a professional finish. You can use anything you like though for obvious reasons I’d avoid anything expensive (unless your headboard will be visible (such as in front of a window). Cambric is typically used, though calico or hessian/burlap would also be fine. If you don’t care what the back of your headboard looks like, then you don’t need to worry about this.
6 LENGTH OF TIMBER (for creating legs or mounting brackets – optional)
My initial idea was to add legs to this headboard and make it quite tall and grand, though when I put it in place (just resting on the floor behind the bed) I figured it would do as is. If you’d prefer to have your headboard off the floor, you can attach simple legs (remember, they are hidden so no need to do anything fancy here). Another alternative is to mount the headboard to the wall using a basic french cleat system.
THE PROCESS…
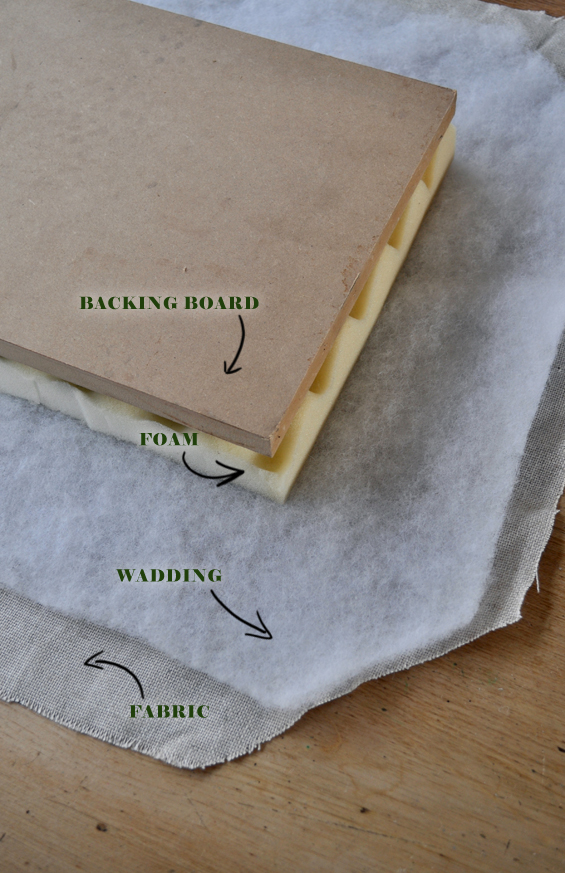
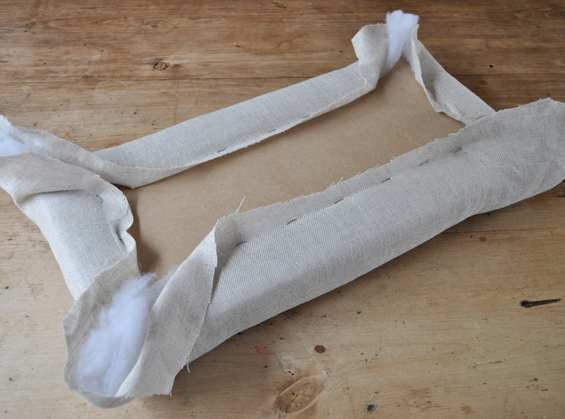
STEP 1 | Lay everything down, in reverse order, on a large, clear, even surface.
Start with the fabric (right side down), followed by the wadding, followed by the foam (in my case, flat side down – because I was totally cheating by using a mattress topper), then the backing board.
If you like, you can trim the corners of the wadding and fabric on a 45 degree angle so there isn’t too much excess padding or material when you begin the upholstery process.
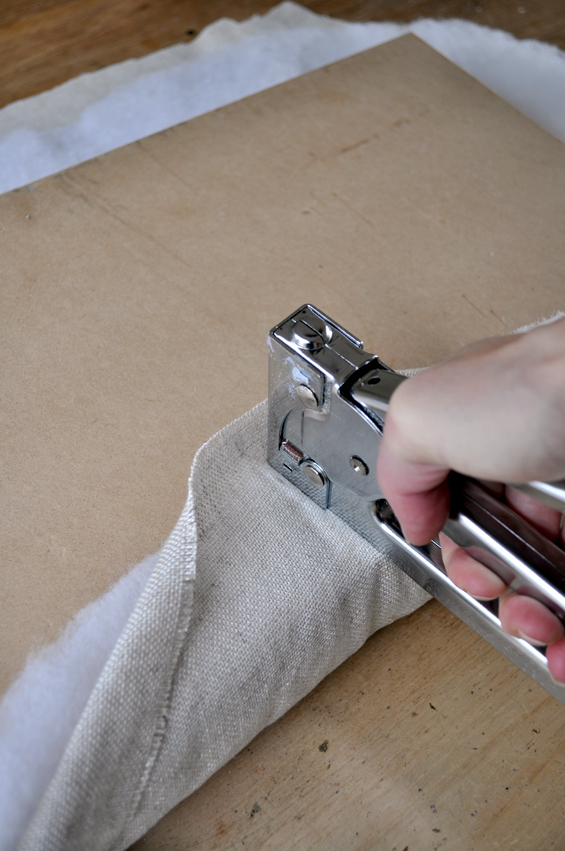
STEP 2 | Wrap the fabric around and secure with one staple in the center of each side.
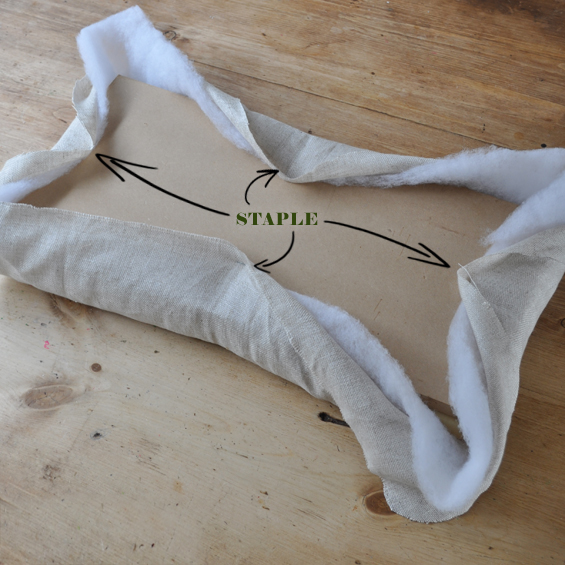
These are just temporary staples to keep everything in position as you upholster. Don’t make them too tight.
NOTE: Yep, I’m using an old school manual staple gun, but I don’t really recommend them. You can get great affordable power ones nowadays which will help make sure you don’t hate upholstery by the end of your project!
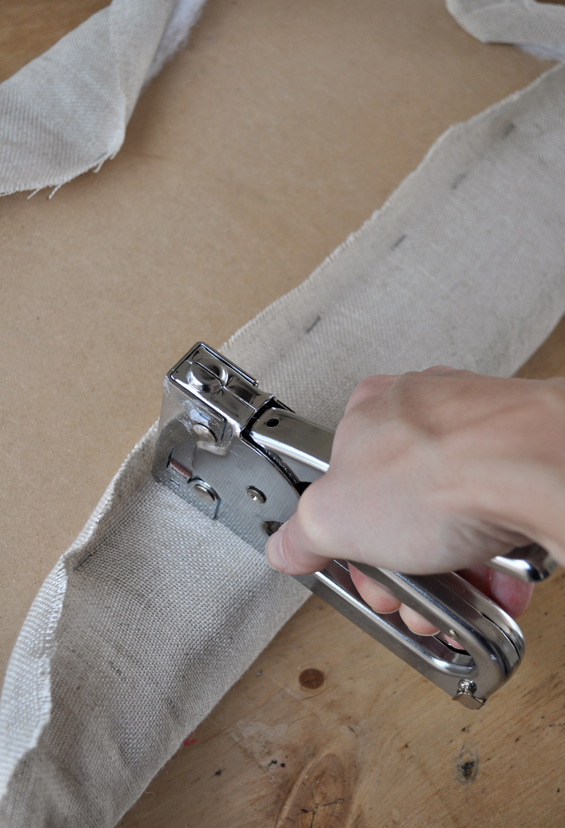
STEP 3 | Staple along each side.
Working from the centre of each side, begin stapling the fabric in place. Stretch some fabric evenly down and towards its nearest corner (I find it works best to pull a large amount of fabric at once by gripping it between your palm and fingers) then staple it in place. Stop stapling around 6cm (2″) from each corner.
You may find you need to remove and reattach staples from time to time (if needed you can remove the temporary ones at this stage too) if your fabric appears too tight, loose or rippled. Occasionally look at the front side of your headboard to ensure everything is neat, straight and firm. You may also need to thin some areas of wadding as you go if it seems too thick.
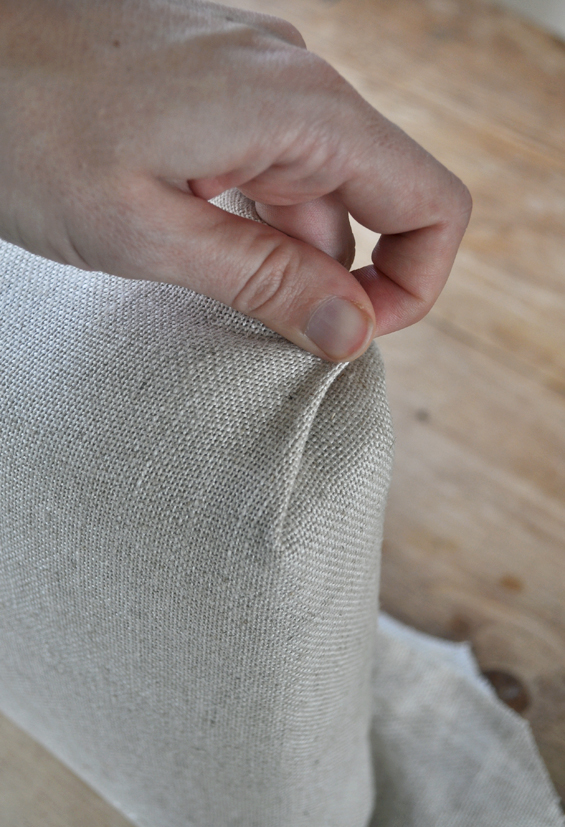
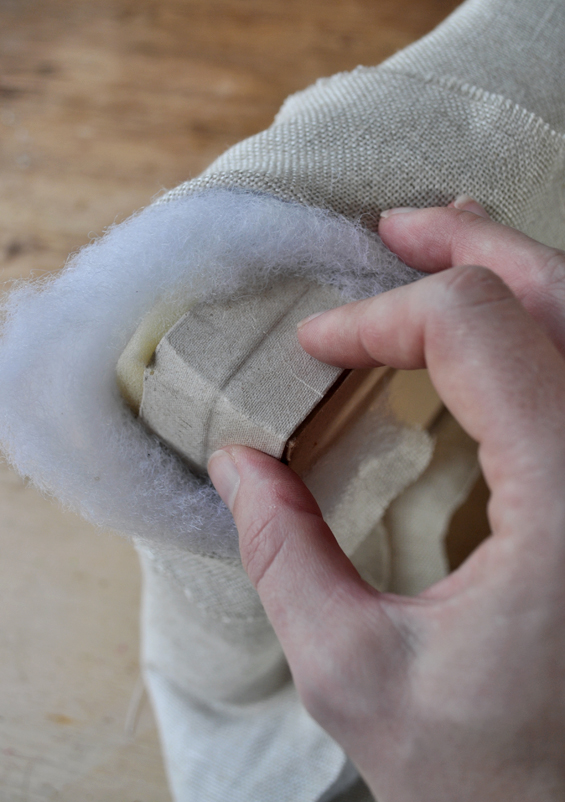
STEP 4 | Fold and staple the corners.
Argh, the corners! I’m not gonna lie, getting these perfect is never easy. I used basic tailored pleats which give a nice clean finish.
First, trim off any excess wadding and fabric (being careful not to remove too much, of course). I find it easiest to fold corners when I can see how they’re looking, so stand your headboard upright and position yourself in front of it. Pull the fabric from the vertical side tautly up then secure it with a staple. Next, begin folding and crimping the fabric from the vertical side under, at the same time creating a pleat in the top side (it’s kinda like wrapping a present – kinda). Obviously, I generally use two hands for this though I had to hold the camera. If needed use a tool (such as a butter knife or a bone folder) to push any excess fabric inside the pleat or to smooth out any creases. Keep manipulating the fold until it’s neat then wrap the top edge over and secure it with a staple.
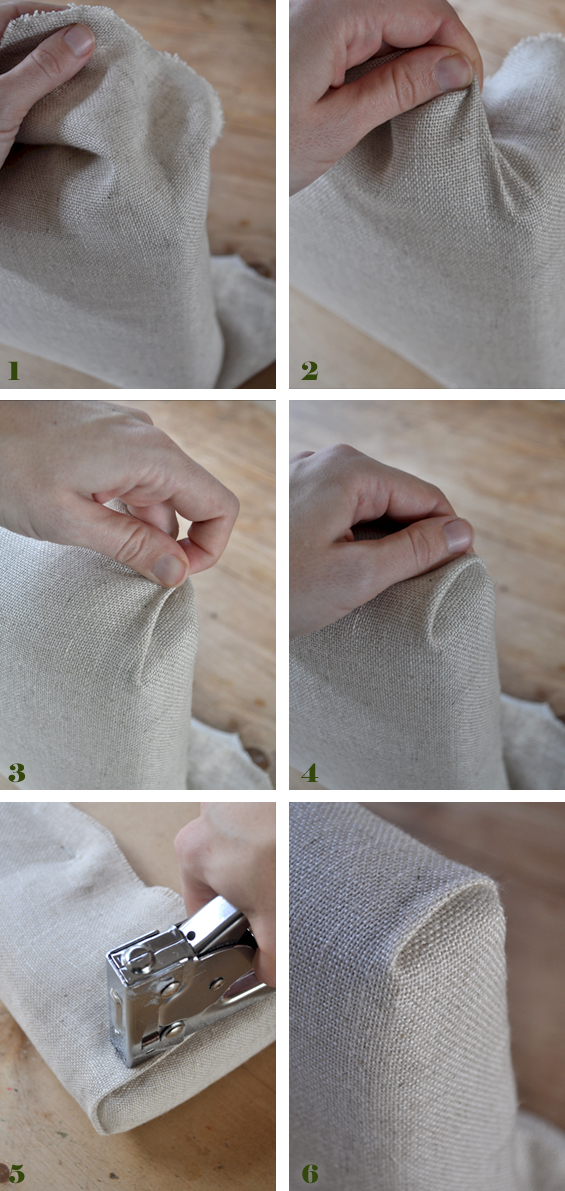
Don’t pull too tightly or you’ll over compress your foam and make the corners too shallow. You want to try and maintain the same level of depth overall.
TIP: If you’re struggling to maintain the shape and height of your corner, trim a strip of card (roughly 10cm/3″ long and about the same depth as your foam) then position it around the corner – under the wadding – to help provide some structure.
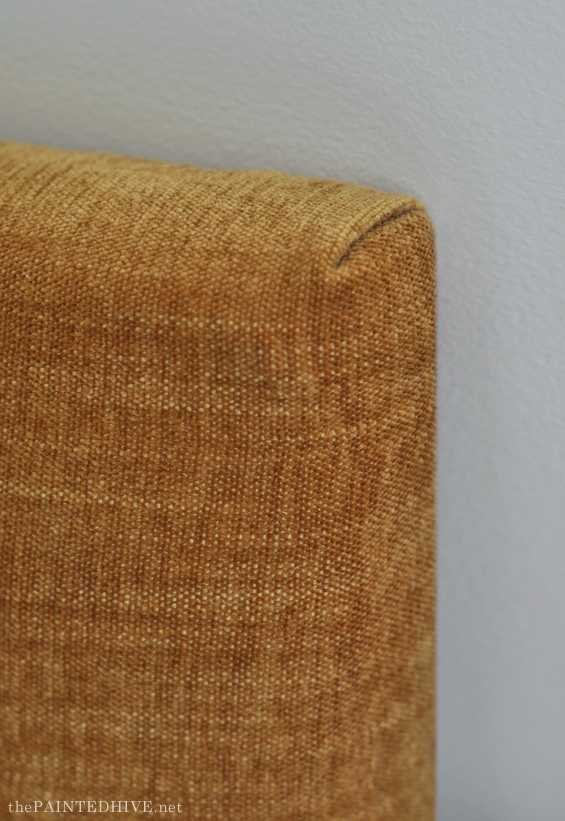
Check the appearance of the corner from the front. If needed, smooth and staple any nearby loose or rippled areas of fabric until everything is neat and even. Repeat until all corners are complete.
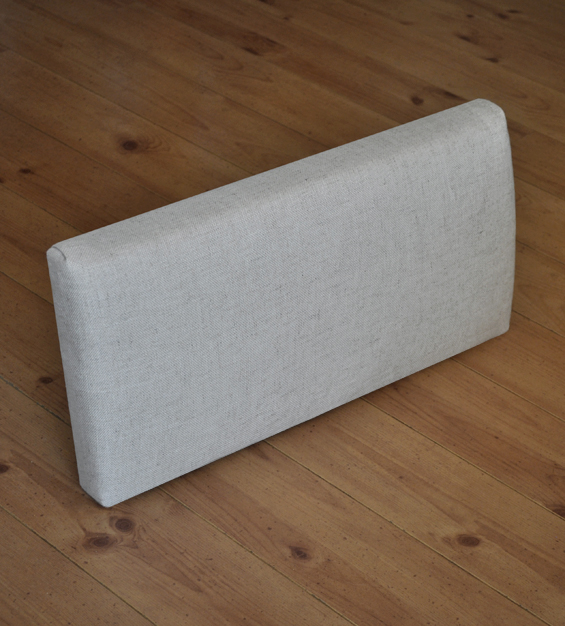
So, here’s my finished doll’s bed headboard. Or maybe it could be the top of a bench seat? Either way, really happy with how it turned out.
STEP 5 | Attach backing fabric (optional).
For the purpose of staging the house I didn’t bother attaching any backing fabric though I will if I plan to sell the headboard. It’s a simple matter of trimming some material to size then neatly attaching it (with staples or tacks) to conceal any less than attractive components.
STEP 6 | Add legs or mounting battens (optional).
As already mentioned, I didn’t feel the need to attach legs or mounting battens however this is a super easy addition. Just cut some narrow timber to size and screw it to the backing board.
Done!
It can be fiddly, and getting perfect results takes time and practice, though there’s nothing difficult about this project.
Hope this encourages you to give it a go!
![]()
See the entire master bedroom makeover reveal HERE.


Clear, easy to understand tutorial. I love this room despite being a girl who firmly believes that mustard belongs in ham and cheese sandwiches and my sister’s honey mustard chicken. Every now and then I notice a decor item you have used and I realise that I have something similar tucked away; looking at the sweet little wooden bowl in this room. I’ve had my version for over 40 years. :)
Thanks Julie. Do you mean the little wooden pot with the lid? Or the longer wooden plate I have the magnifying glass on? Both are vintage. The wooden pot is mine, the wooden plate was in the house :)
Now, that’s what called Perfection. Keep up!!
Thanks for that great tutorial Kristine. I love this bed!!
Thanks Mary :)
Kristine, thank you for this tutorial. Great results in such a easy way. I’m impressed.
How does it attach to the wall?
This is mentioned in the post. Have a look at Step 6 and also number 6 in the ‘You Will Need’ section. Of course, for the purpose of staging this house I never intended on mounting it to the wall. I was going to add basic legs (kinda like this though not as tall: https://www.dormco.com/Headboard_Legs_For_Twin_XL_College_Sized_Bed_p/dc-diy-hb-legs.htm) though decided it was fine resting on the floor. It is anchored by the bed base and mattress and felt tall enough.
In terms of mounting, there are a few different systems you can use. I’ve spoken about a french cleat system in the post and have made a diagram to help explain (again, refer to the information under number 6 in the supplies section).
I also wondered how you attached it to the wall.
This is mentioned in the post. Have a look at Step 6 and also number 6 in the ‘You Will Need’ section. Of course, for the purpose of staging this house I never intended on mounting it to the wall. I was going to add basic legs (kinda like this though not as tall: https://www.dormco.com/Headboard_Legs_For_Twin_XL_College_Sized_Bed_p/dc-diy-hb-legs.htm) though decided it was fine resting on the floor. It is anchored by the bed base and mattress and felt tall enough.
In terms of mounting, there are a few different systems you can use. I’ve spoken about a french cleat system in the post and have made a diagram to help explain (again, refer to the information under number 6 in the supplies section).
AWESOME, thanks for sharing! :)
Thanks :)
Thank you for the tutorial Kristine. You make it look so simple! I’ll use it for sure sometime soon(..ish).
It’s easy Magda. Does take a bit of patience and persistence to get everything neat, though it’s not difficult :)
What is the gorgeous fabric you used for your life-sized headboard??
Hi Nancy. The mustard fabric was this one from Spotlight:
https://www.spotlightstores.com/sewing-fabrics/furnishing-fabrics/upholstery-fabrics/marlo-upholstery-fabric/BP80458313
It looks a bit linen-y in the product pics though has more of a brushed velvet-like finish in person.
Hello, did you buy or make your side tables?
Hi Bianca. I found them on eBay.
Love this seems fairly easy. How many yards of wadding & fabric for a queen size headboard about 3’ tall?
You just need enough to wrap around all sides, but it depends how confident you feel as it’s easier to work with more excess, rather than less. 2.5 x 1.5 yards would be ample but you could always go smaller.