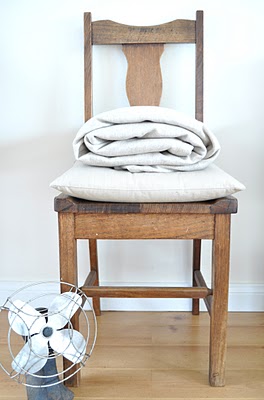
I gave up my search for a beautiful natural linen throw blanket a while back now. It wasn’t because I couldn’t find one for a reasonable price mind you, it was cause I couldn’t find one at ALL (though if I had I’m sure it would have cost a pretty penny anyways).
From the get-go I wanted to include a linen throw in my bedroom make-over. Though, what does one do when said desired item seems only to live in one’s own mind?
Well, one makes said item themselves (and no doubt saves some cashola in the process).
Step one; find some gorgeous linen you can’t resist rubbing on your cheek with a price tag that doesn’t make you sigh in resignation.
I searched high and low until one day, whilst not even looking, I stumbled upon some in Spotlight.
Even though no-one else in the store seemed too interested in my linen, I must admit that when I first spied the bolt I looked around kinda nervously, made sure the coast was clear then casually moseyed on over, so as not to attract attention, before greedily snatching it up before anyone else could.
A little crazy, huh?
Step two; buy some snug backing so your throw will feel and look all nice and cozy. I was lucky enough to pick up some beautiful cashmere on clearance for $8 a meter.

Step three; cut your linen and backing to the size you want then sew them, right sides together, like a giant cushion cover leaving a small pocket so you can turn it in the right way.
Step four; Carefully hand-stitch the pocket up (or, if you’re lazy and impatient like me, just cheat and use iron-bond hemming tape) then run a stitch line around the whole blanket one or two inches in from the edge to give a nice professional-like finish.
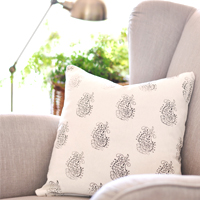
There was enough remaining linen to make a cushion for my bed too. I decided to paint some subtle grainsack inspired stripes on it.
I applied some charcoal craft paint with an almost dry brush to create a slightly faded effect.
Now I can’t wait to actually get this linen goodness on the bed (as opposed to the guest room floor where it’s currently patiently waiting alongside all my other bedroom stuff!).





I love it! I just made made some linen pillow covers…they may be getting the grain sack treatment.
Love this tutorial. I have a piece of cotton that a friend brought back from the Netherlands and I was unable to cut into it. Also lurking about: A blanket of wool and cashmere; tan and just a tad too light to be warm enough. Hello !~! married the two of them together just as you described and i am in love with the result. The whole cloth is stunningly beautiful; the tan wool as soft and warm as anyone could want. Beauty in a utilitarian object–my favorite. I must do a blog post on mine; thanks for the inspiration to write it up.
Hi Lynda
Thanks so much for letting me know my project helped inspire your idea. You should definitely write a blog post about it. Send me the link when you do…I’d love to see your beautiful creation :-)
Hi Kristine, I love your blog! I saw this post ages ago and it got me thinking about painting/stenciling on fabric. I have one of the Ikea bookcases with the DRONA storage cubes in plain white cotton (they didn’t have any colours that would work for me at the time) and I’ve been toying with the idea of stenciling a pattern on them but haven’t worked up the courage yet. I know that you used craft paint on the ticking pillow and I’ve seen chalk paint used on fabric before, but I was wondering if you’d tried using milk paint on fabric at all? Or if you had any tips/tricks for painting/stenciling on fabric in general? Thanks for any help you can give!
Hi Kaaren
Thanks for your comment.
Firstly, let me say that you should totally just go for it. If you stuff up or hate it, you can always paint them again.
In my experience, acrylic craft paint is fine – perhaps even the best option when you consider all of the pros and cons. It’s super high quality (if you buy the good stuff), readily available, comes in lots of colours, dries super fast and is reasonably affordable (stenciling/stamping generally only takes a sparing amount of paint). All that said, I have not tried chalk or milk paint on fabric, though given the great results I have achieved with basic craft paint I really haven’t felt the need to.
Since publishing this post over six years ago, I have played around with decorating fabric in a few different ways. You can find my posts here…
https://thepaintedhive.net/2015/10/diy-block-printing-on-fabric/ (hand stamping)
https://thepaintedhive.net/2013/01/diy-fabric-bunting-flags-tutorial/ (iron-on transfers)
https://thepaintedhive.net/2016/05/ikea-curtain-hack/ (stenciling)
https://thepaintedhive.net/2016/11/easy-diy-mudcloth-pillow-ikea-hack/ (fabric marker)
You could use any of these techniques for great results!
If you don’t plan to launder your storage cubes, you won’t need to add any fabric medium to the paint. In fact, I never added fabric medium when I first started and the paint has stayed stuck anyway, regardless of washing!
Let me know what you decide to do and I’ll happily walk through it with you. Just quietly, I love the idea of block-printing them!
Kristine
x