
It’s done. Finally!
If I hadn’t initially proclaimed it would likely take me forever to finish this room re-do, I might be feeling even more sheepish than I currently do sharing the reveal over a WHOLE YEAR from when it commenced. Yikes!
Am I really that sluggish? Wait, don’t answer that.
Anyhoo, I got there in the end and am totally loving this ‘new’ space!
It’s not only the look and feel and function that I adore, though also the fact this transformation has been completed on a super realistic budget incorporating lots of thrifted finds and DIY goodness.
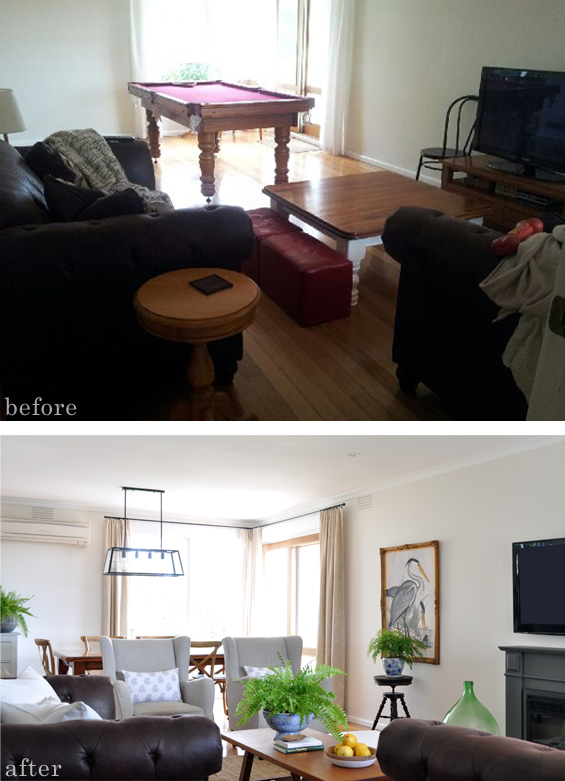
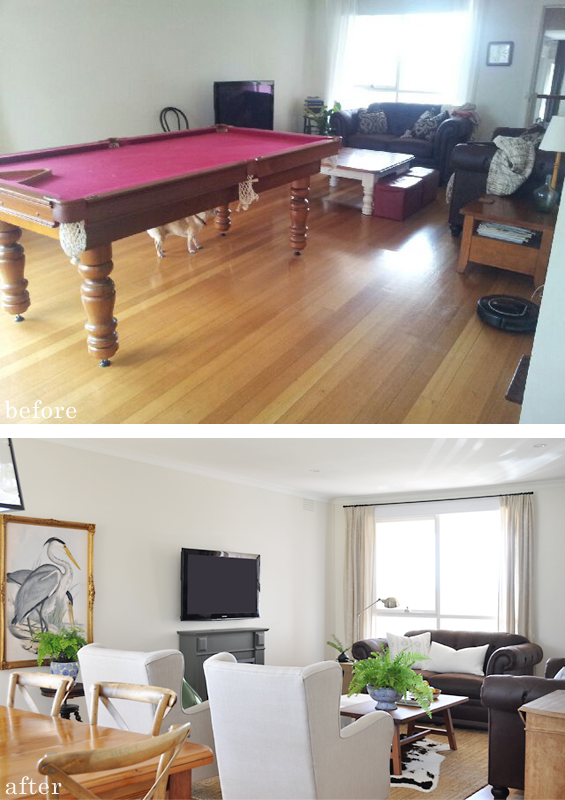
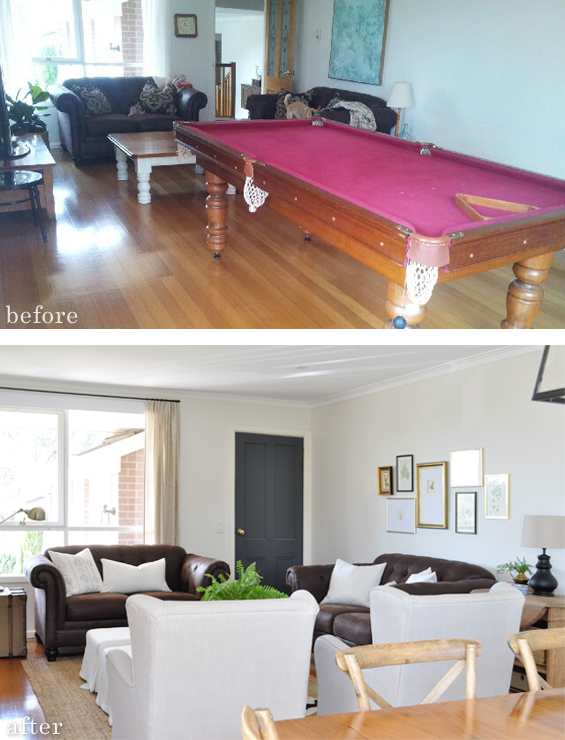
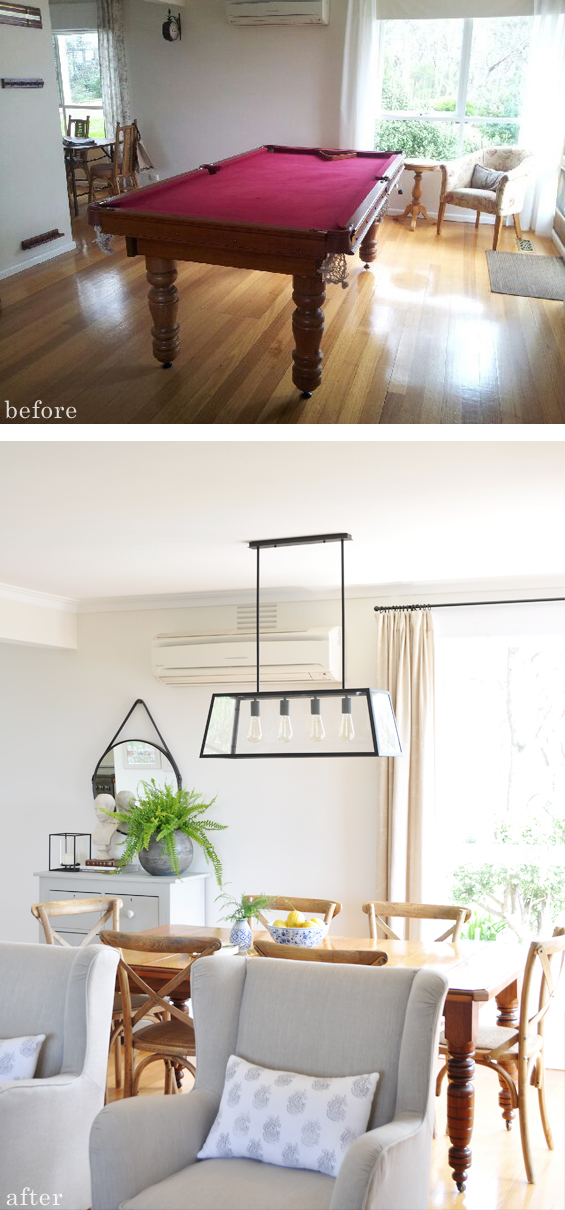
Just to recap, and for anyone new here, this is my parent’s open plan living-dining room which we decided to revamp after the burgundy billiard table (see below) was finally sold after having sat in place for more than 20 years! This gave us the opportunity to reclaim the dining zone for its intended purpose and tweak the lounge area.
For the purpose of this reveal post I’ll spare you all the whys and hows though if you’d like to learn more, or refresh your memory, you can find all my previous posts about the space here. I’ve also included a little gallery at the end of this post to make finding a specific project easy.
So, here’s what we started with…
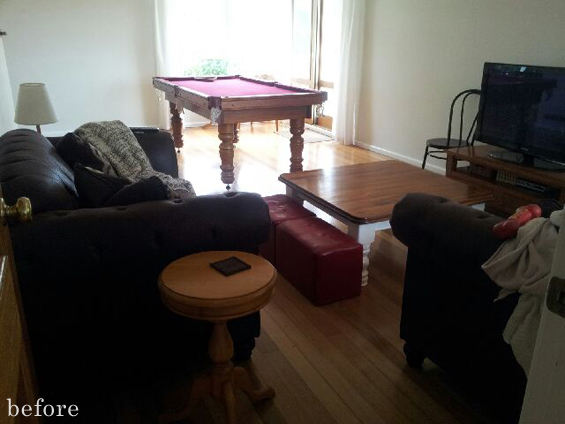
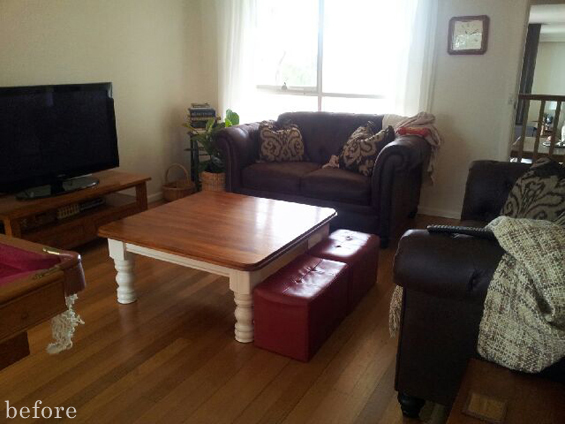
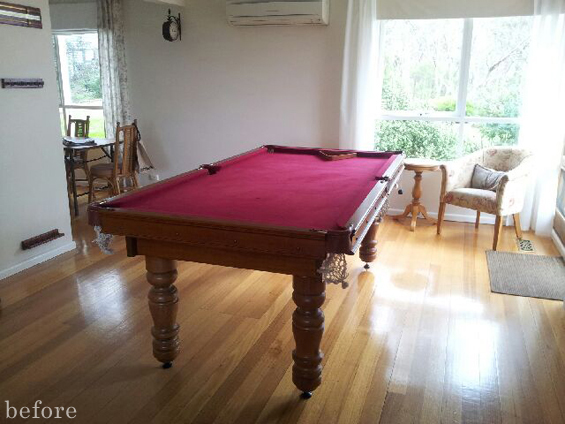
It was dark and heavy and just lacked a fresh and inviting feel.
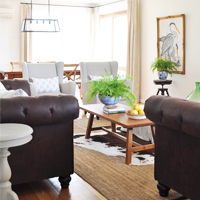
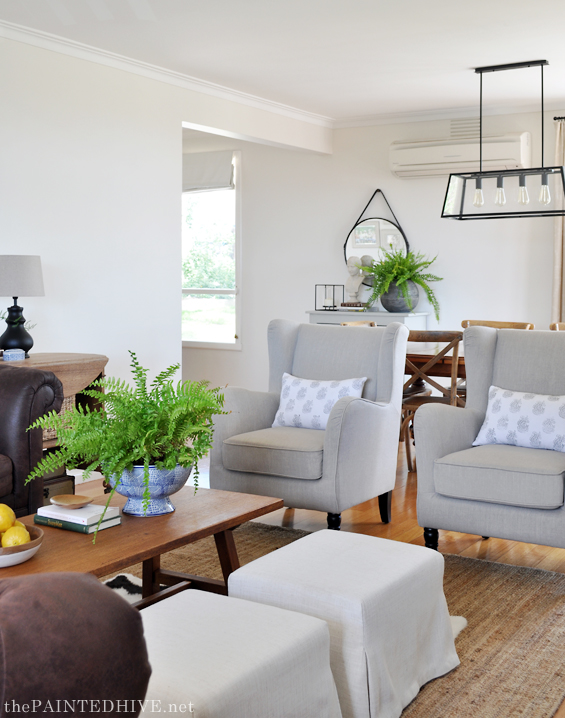
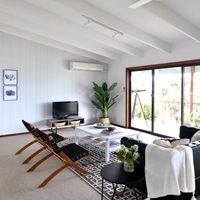
And here is the room now…
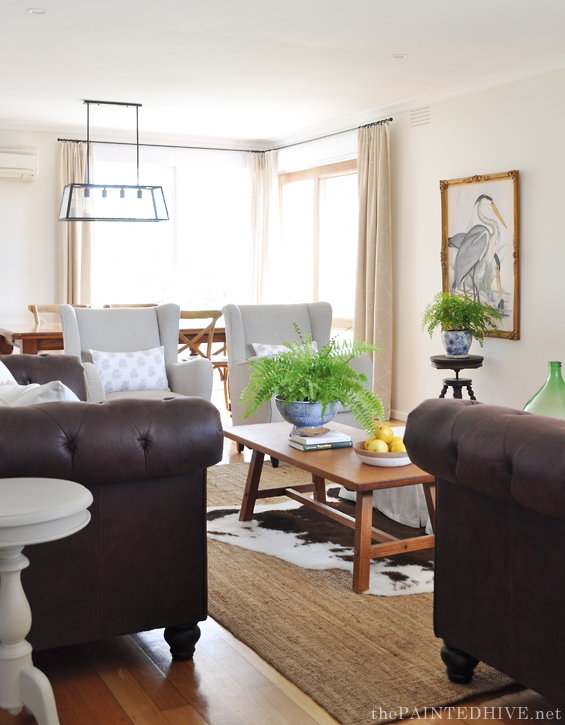
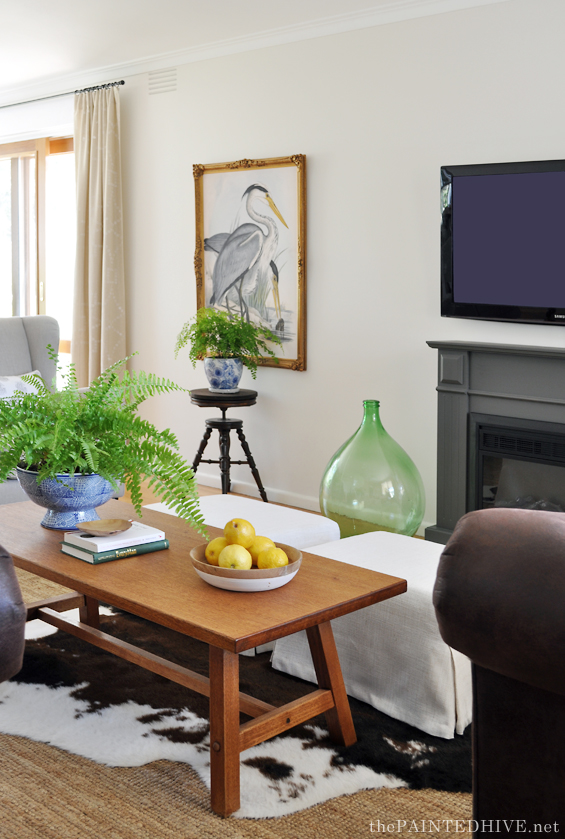
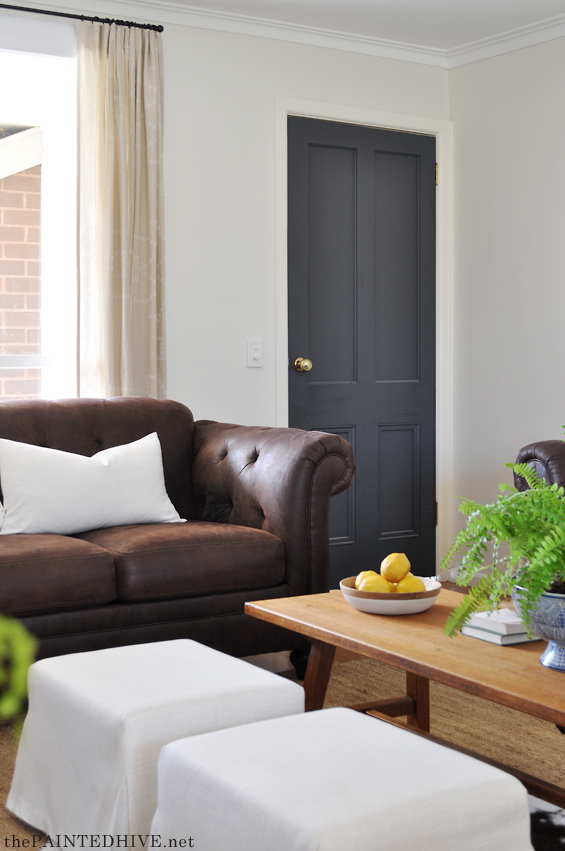
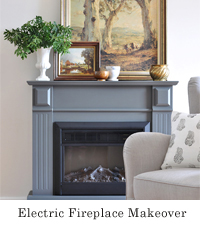
We painted the existing reproduction lead-light door (glass and all!) in this lovely moody grey-blue to tie-in with the fireplace and provide some anchorage.
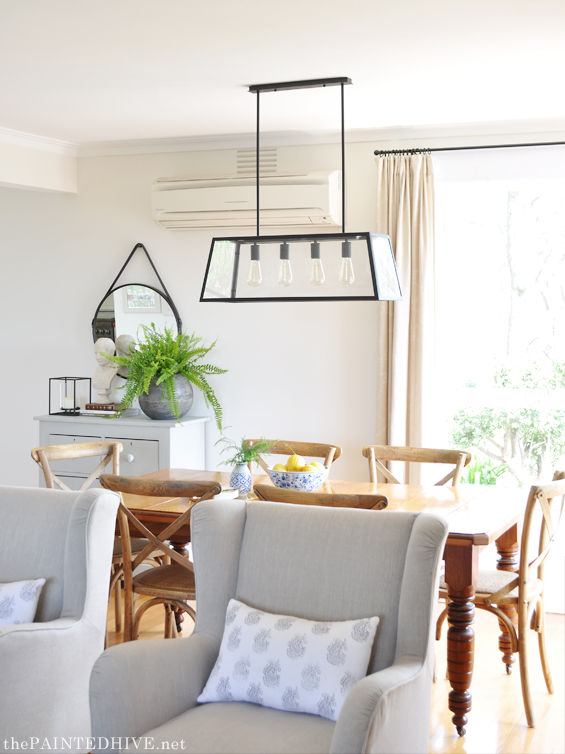
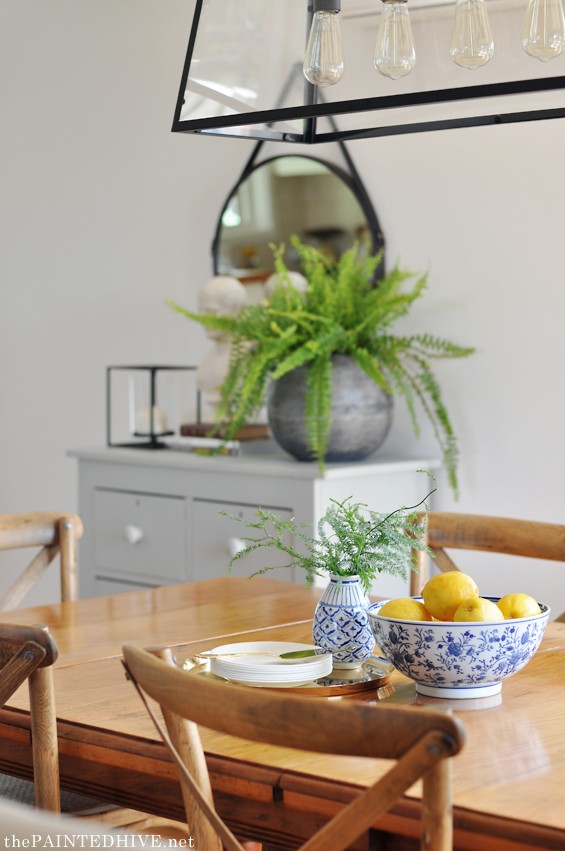
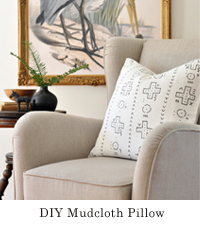
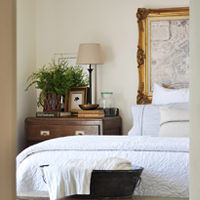
I’ve zig-zagged the grey from the linen armchairs through the room, from the little occasional table beside the sofa to the dresser on the far wall. Linking colours in this way helps provide a sense of continuity without being too “matchy-matchy”. Little touches of blue and white (mum’s favorite!) are also scattered here and there to further bolster the feeling of harmony, as are potted plants and clipped greenery, which also breathe life and vibrancy into the space.
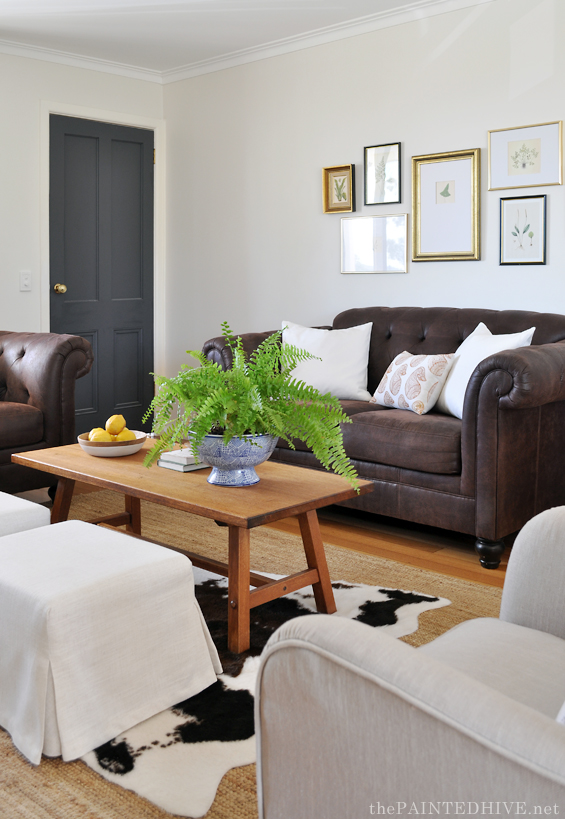
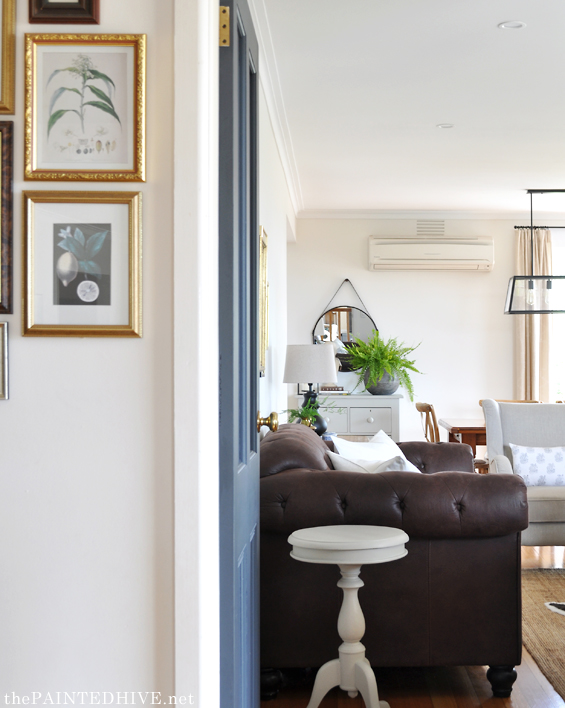
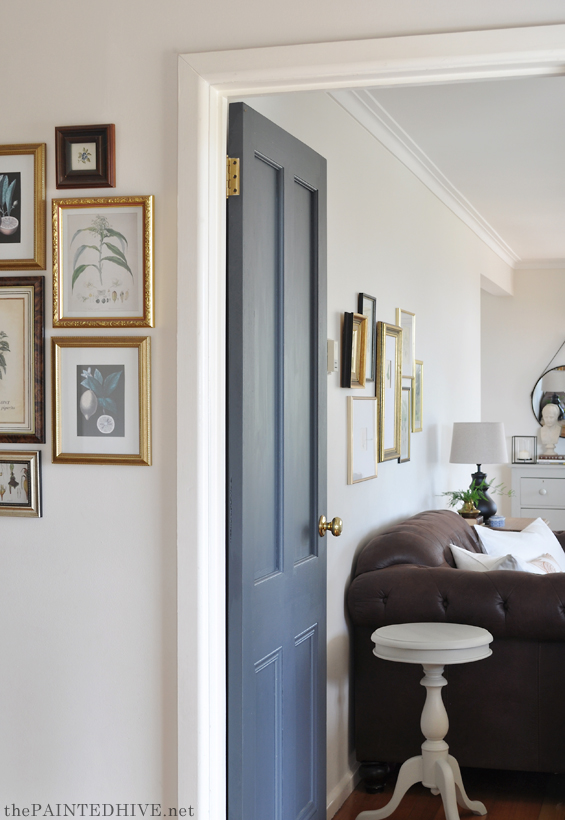
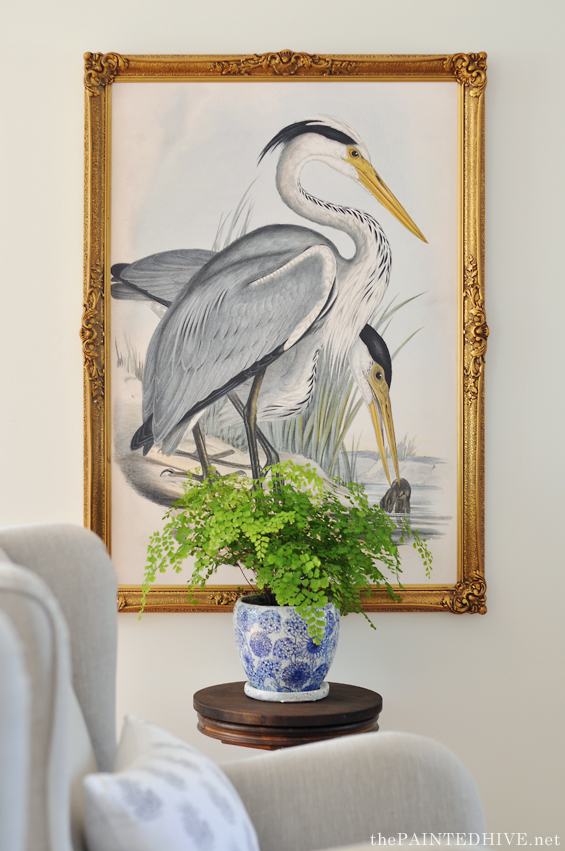
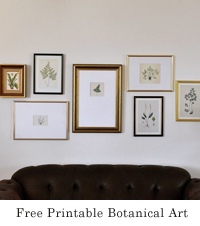
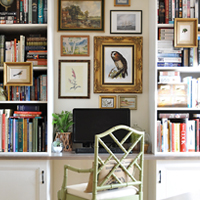
Mum already had the eclectic gallery in her entryway. It creates a lovely link with the gilt frames and botanical subject matter in the new grouping above the sofa.
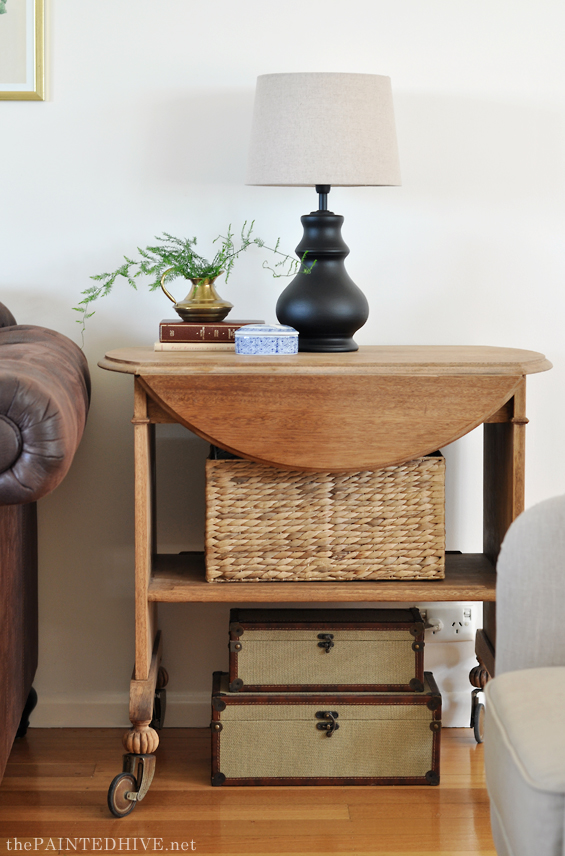
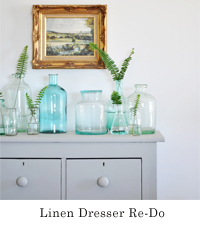
This antique drop-leaf trolley was stripped and left raw. The basket and canvas cases provide storage for DVD’s, remote controls and seasonal blankets.
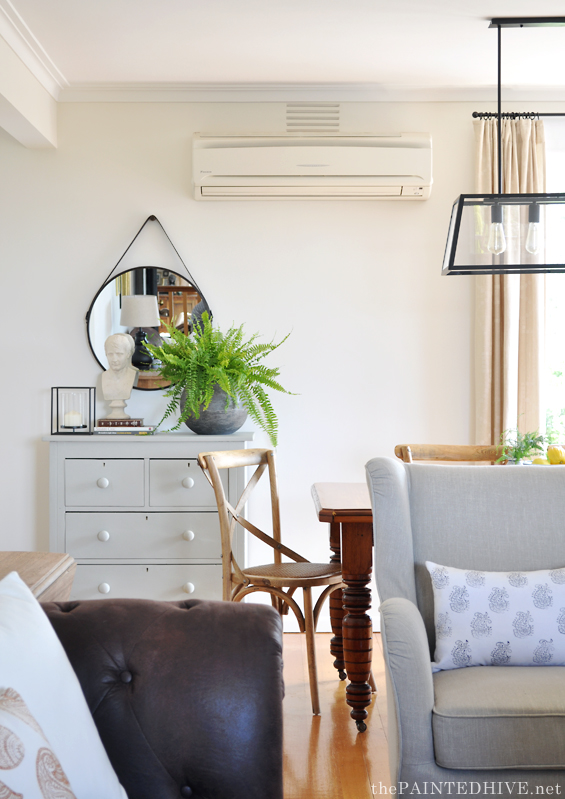
This is one of my favourite pics. Just ignore that hulking air conditioner (a bit of a necessity during summers around here) and focus on the lovely decor. M’kay?
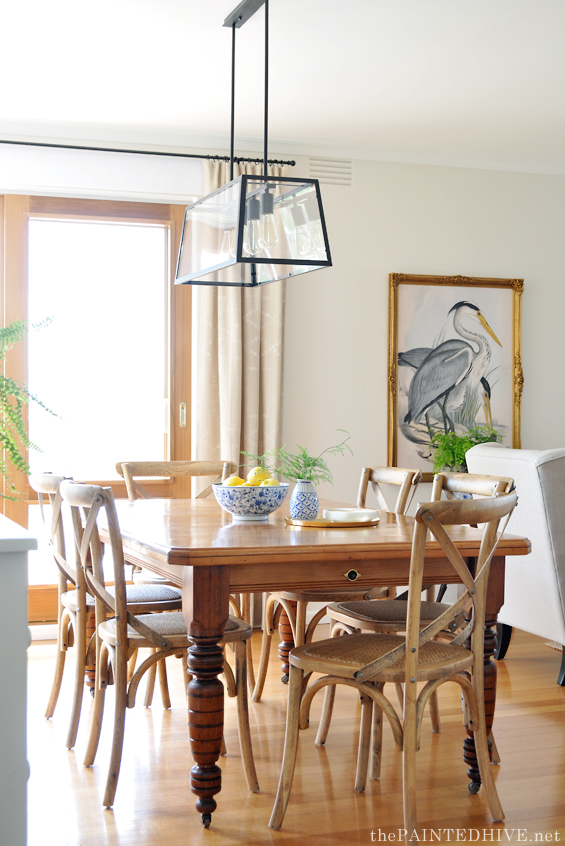
It would have been aesthetically nice to position a rug beneath the dining table to create some distinction between the furniture and timber flooring, though in all seriousness, how practical is a rug beneath a dining table anyways? If you can get away with one, you’re doing heaps better than us! :)

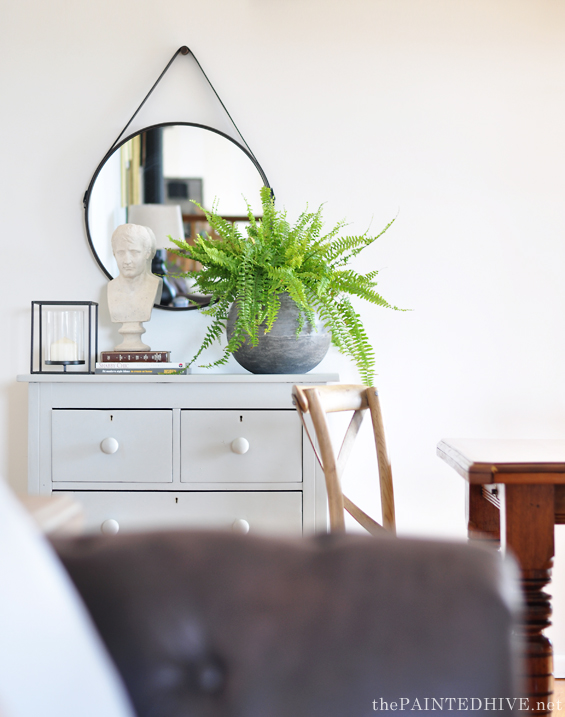
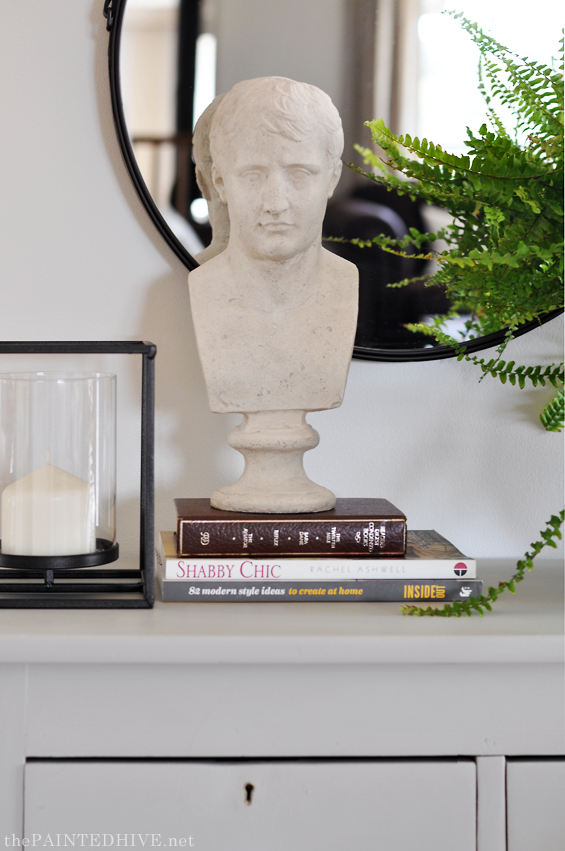
This lovely bust is my new best friend. I’ve wanted one for ages and absolutely love him!
If you’ve been following along with this room re-do, you might now realise that we haven’t actually done much to the “bones” of the room. Aside from the new lighting configuration and a fresh lick of paint, it’s really just all furniture and decor. Which is totally fine. That’s all it needed – plus it’s my favourite way to redecorate! You?
I’ve spoken about most of the elements and projects in my previous posts about the space though there are a few new additions I haven’t yet mentioned. To save turning this into an overwhelming monster of a post, I’ll be back in a few days to share all the extra details and recap on everything. In the meantime, feel free to ask any questions if you’re keen to know about something in-particular :)
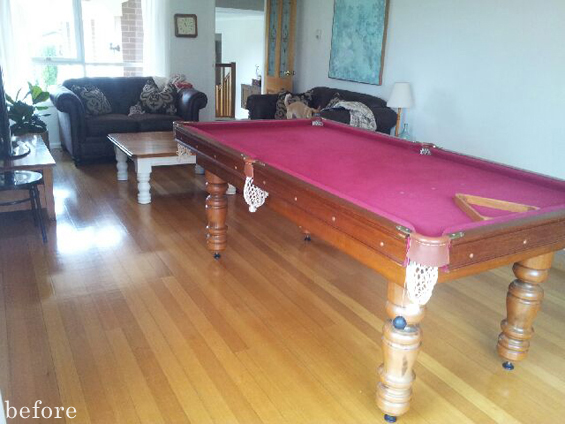
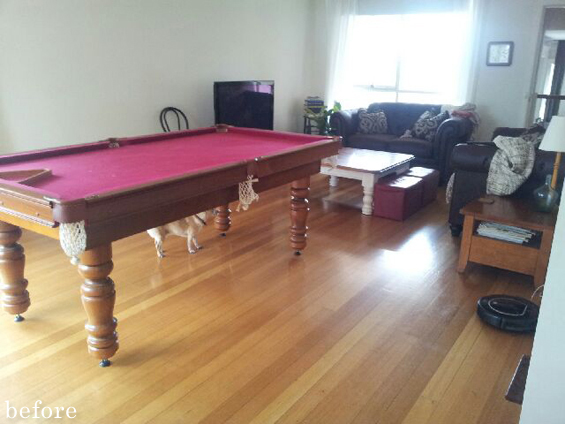
Now, just for comparison’s sake, here are a few side-by-side before and afters…
![]()
![]()
![]()
![]()
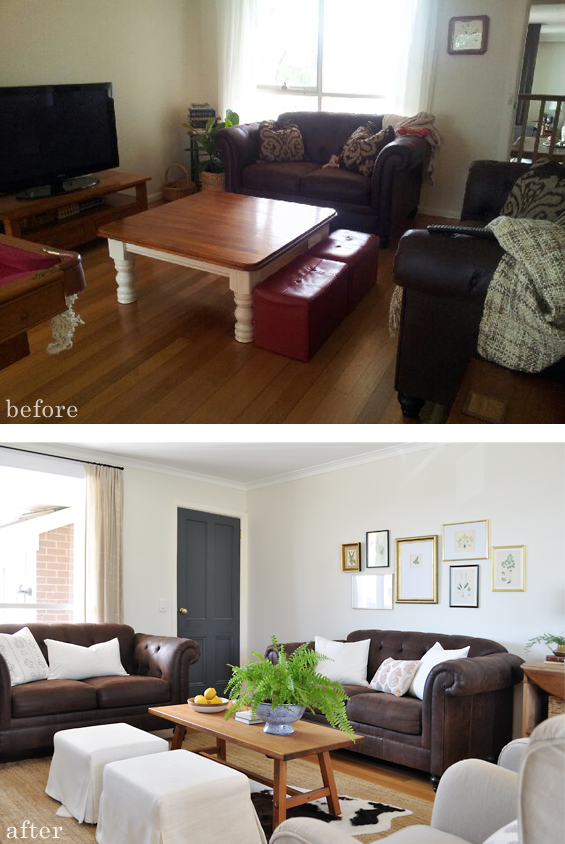
The above pics are taken from different angles, though you get the idea.
So, there you go. I know it’s not amazingly awesome though I hope it was somewhat worth the wait. I don’t really have a decent explanation as to why it took me so long (I mean, there was nothing particularly difficult or spectacular about it), I guess I just felt like lumbering over the line. Thanks so much for hanging in there with me!
![]()
As mentioned earlier in the post, I’ll be back in a few days with an extensive source list. In the meantime, find a little gallery of some of the past projects below.


I’m totaly speechless! It’s not only your ability to make the most and the beauty you can concoct from nothing though also the way you conduct yourself in such a humble and lovely manner. You are my design hero.
Oh Lorraine. You are way too lovely. Thanks so much :)
You are the queen of using what you have! I had to look back to realize it was the same furniture but looked oh so different with such beautiful accessories! Your Mum must be absolutely thrilled!!!
Thanks so much Sherry. Mum loves it.
Actually, it is “amazingly awesome” and I second what Lorraine and Sherry said in their comments. You are a superstar.
Too nice. Thanks Julie :)
Yowzer!!!!
Holy moley – what a transformation! You have much to be proud of, no matter how long it took you, because this new space is truly lovely!! The whole mood of the room is bright, comfortable yet polished and unique. Congratulations.
Thanks so much Anne :)
Such a beautiful makeover. Love the new chairs and that table is stunning. Doesn’t look like the same room.
Thanks so much Marty :)
Unbelievable!!!! Hard to believe the “room” is still the same. It looks incredible. Hooray!!!!
Thanks Robbin.
Looks great. Very open and inviting and serene. The natural wood floor and furniture blend well with the other pieces. Thanks for sharing.
Thank you Gail.
Wow! Its stunning! Your parents must be so pleased.
Thanks Tricia. Yep, they’re loving it!
I’d love to know what colors you used to paint your rooms. I love the look and would like to do it myself!
Thanks Julia. The walls are all Antique White USA by Dulux. Any slightly warm white should produce similar results. I’m not one of those super fussy paint people. As long as my whites don’t appear overly blue/yellow/pink/green, I’m happy enough.
Fantabulous! The room has a great flow, is light and airy but grounded, and the colors are perfect. You are able to give each of your makeovers their own personality, while still putting your stamp on all. Love it. Have ya got anything else in the pipeline? I’m looking forward to it. :)
Thank you so much Deb.
Am actually working on a bathroom and sitting room at my parents at the moment. Don’t worry though. They will not take me 14 months!
I am gobsmacked (I love that word ), it still looks like you knocked out walls and made the whole space larger just by using color, and the décor is stunning, you should be puffing out your chest on this xx
Aw, thank you so much Chris. Amazing what a fresh colour scheme can do for a room!
What is this “not amazingly awesome”???? It is lovely!!! The whole room looks so cohesive and perfect!
One request, could you do a post on plants that work well indoors? I never know what to buy! Thanks :)
Thanks so much Nicole.
Hmmm, plants. I do love them though I’m not certain I’m qualified to recommend them!
There are quite a few really hardy indoor plants which are lovely though I’ve always been drawn to fickle ferns. The Maidenhair and Boston varieties (which I used in this room) are my favourite. In all honestly, they usually end up beginning to look sad after six or so months of being indoors though I have gotten better at caring from them over the past few years. At the moment I have a thriving Maidenhair beside my bed and I think part of the success is the plant itself. It has larger leaves than some of the other Maidenhair plants I’ve had in the past and seems to be more hardy. I’ve also managed to keep one of my current Bostons happy for longer than usual.
I think a lot comes down to where they are positioned (in terms of light and temperature) and how much they like their pot (in terms of soil and drainage).
This was so worth the wait! Everything is just gorgeous! And I am so encouraged that a beautiful room can be a achieved without buying all new everything.
Thanks so much Hannah. Yep, if you’re patient and resourceful (and willing to roll up your sleeves) you can decorate a room quite beautifully with second-hand finds and existing furnishings. I always find well-considered decor to be one of the best tools too.
Looks amazing!! Slow design is the way to go! Because after all finding the right pieces on a budget takes time. Just wondering what the dimensions of the room are? And what does your Mum think of it? Can’t believe how just changing the colour of the door makes such a difference to the look of the room. Well done!
Thanks Jane.
The room is about 7 x 4 meters (22 x 13 feet). Mum loves the way it turned out!
I so love that dark door now. The original lead-light really dated the space.
I am still struggling with less is more in my house as I like too much stuff but you nailed it.
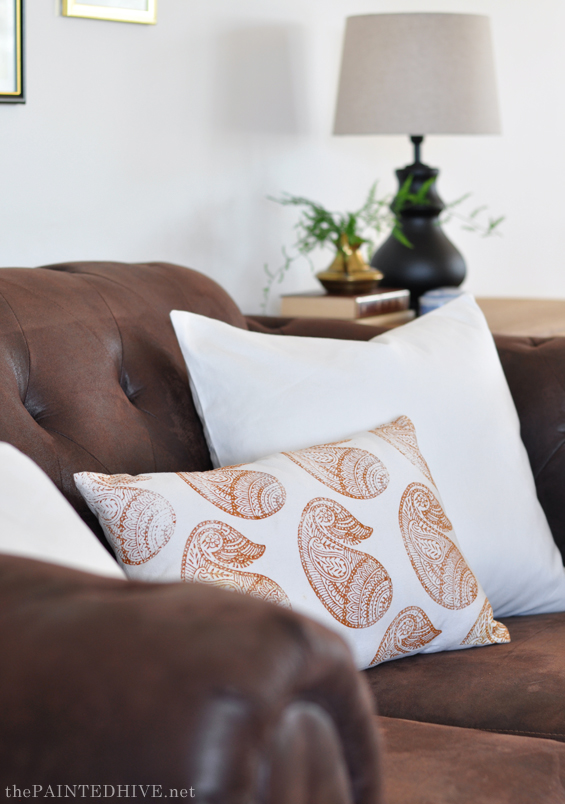
It is a truly beautiful room Kristine! The colours and accessories are just gorgeous. I will love to hear about your new best friend, the bust. And are those ottomans a new addition? Something re-vamped? I love their linen covers. Ooh, and there is a pretty gold/mustard paisley pillow that must have a story.
Thanks so much Sherylee :)
I’ll be sure to share everything in detail in my next blog post though just to let you know…
– I found the bust on eBay (it was from a store – not second-hand – so I think there are more available).
– Dad made the ottoman frames and mum sewed the slip-covers.
– Mum made the paisley cushion from some plain fabric I hand-stamped.
x
Wow its looks so lovely….amazing job…you rock!
Thanks so much Kaye :)
LOVE it, so fresh and bright. I can’t believe you just painted the whole door – I have friends with an old 80’s house full of these doors which dates it terribly and none of us have ever thought to just paint over the glass! I am forwarding your pics immediately, lol.
*I meant your website link of course, not just your photos!
I know, right? Who woulda thunk it? I wasn’t sure if it was going to work though that was one of the first projects we completed (about a year back) and there have been no issues at all. It was super easy and looks just like a regular, wooden door now. It’s one of my favourite things about the space.
You’re a master! I just LOVE your design ideas! :)
Thanks so much Cynthia :)
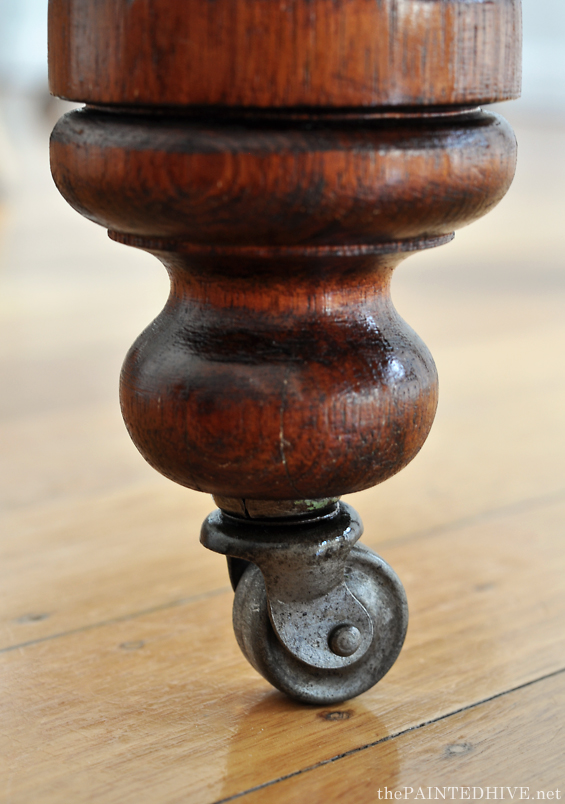
It’s so beautiful! I love it all, the legs on that table make my heart sing! You are so talented!
Thanks so much Laura. That table was a great find. Love it!
This was worth the wait! Your styling is a breath of fresh air- there are so many details, and projects to take in. Lovely!!
Thanks so much Ash. Glad you mentioned the styling – that was the bit I was most unsure about. I just knew I wanted lots of ferns :)
What a difference! I appreciate that you have a ‘use what you have’ mentality. And you have the ability/vision to make it work in a fresh new way. Hard to believe this is the same space. I love (covet?) that drop leaf side table. Your Mom must be thrilled!
Thanks so much Brenda. I think at the very least Mum is pretty stoked that it’s actually finally finished – LOL!
:)
Totally worth waiting for – it’s gorgeous! It doesn’t look new, which I mean in the best way – it looks perfectly collected, and although it’s traditional, it’s very fresh too. And your styling is perfect. Love it all!
Aw, thank you so, so much Lizzie :)
Hi Kristine,
One of my blog readers just sent this lovely post to me. Great job on the decor/furnishings and I adore that you painted the fugly doors! (One of my massive pet peeves are those gross, ersatz, fake, phony, “leaded” glass doors!). I linked back to a specific post where I talk about them. I think you’ll get a bang out of it.
Ha, ha. Great post Laurel! Loved it! So much awesome information.
Thanks for sending me over there and introducing me to your blog…and thanks for taking the time to comment on my room makeover too :)
Endorse all comments😊
Just a tip with your plants …have two of the same favourites and spell them alternately….. outdoors in a protected area or bush house.
I am looking foward to seeing your next redo.
Merry Christmas to you and your kin.
Great idea Kaye! Thanks, and Merry Christmas to you too :)
WOW…..absolutely FANTASTIC makeover!!!!!
Thank you so much Bernadette :)
Wow, you did a great job! Love the mix of some vintage items like the cane chairs and the framed heron art. Visiting from Happiness Is Homemade party.
Thanks so much Victoria :)
Love the new lighter look and vintage details. Your redo of the furniture is beautiful and I’m mad for the heron print.
Kristine, you breathed new life into that tired room! I love the floor and was glad to see it not painted, stenciled or covered up by anything. Your touches of grey and blue carried the brown upholstered pieces right into 2017. Wow! I plan to be a regular here at The Painted Hive.
Thanks you so much Jean. What a lovely comment :)
I love how it all came together! Can you come help me decorate my house!?
LOL! Thanks so much Lauren :)
This is an amazing transformation! The room looks brighter, but also a lot cosier! The dining table is a beautiful piece. Well done!
Thanks so much Magali :)
I totally love how you have changed the room around. My favorite part is how you have kept all the elements in the room in neutral shades, but you have used the plants and fruits and natural light to add that pop. It is absolutely marvellous!!!
Thanks so much :)
Wow! You did an amazing job. We also have brown sofas from years ago when I had no clue what I was doing and screwed up by buying an entire matching set . So its nice to see them working in a space. We are in the process of redoing our home one room at a time and I am glad to see some inspiration that doesn’t require me spending tons of money again buying new sofas. lol
Thanks Ashley. Brown sofas can totally work if you accessorise them the right way. Although this is my parent’s house I have brown leather sofas too and can’t imagine having light-coloured ones with my kids and dog (and hubby!). I’d be constantly cleaning them and they’d be constantly driving me nuts! Happy to have helped inspire you :)
What an amazing make-over. The room now says “come on in and visit” instead of “come on in and stagger through to a more comfortable room.” You’ve done the trick of putting a touch of gold and a touch of black somewhere in each room. I absolutely love the dining table with those beautiful legs.