
Every time I feature one of my DIY large-scale wall art prints I get requests for the framing tutorial. In the past I’ve never managed to capture the process because in the throes of a project most steps require both of my hands…not to mention most of my brain power – which leaves little capacity left for documentation purposes! Have I mentioned before that math isn’t my strong suit? Additionally, it’s generally a bit of a deterrent having to clear a huge chunk of floor space in my tiny house and scale a step ladder amidst a project in order to take the wide-angle photos needed!
But, it’s always been my intention to share a tutorial so last weekend, with the help of one very keen little assistant, I was determined to get it done! Albeit on a slightly smaller scale.
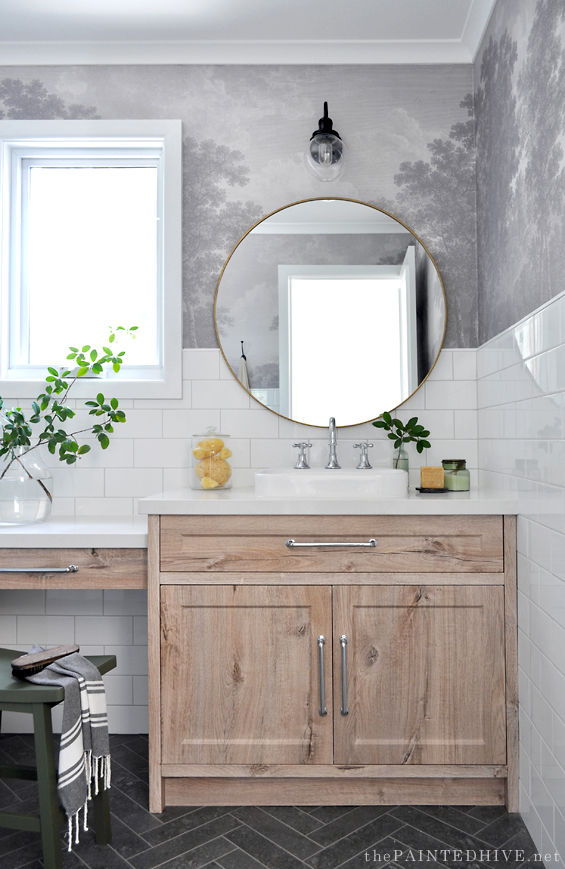
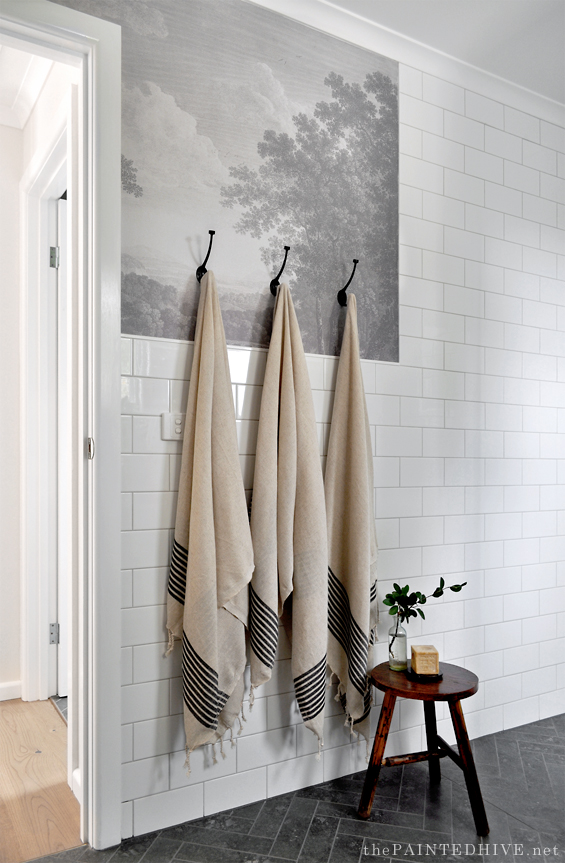
When I was trying to devise a way to create the tutorial (without needing to buy new materials), I recalled we had some peel-and-stick wallpaper left-over from my parent’s suite extension bathroom…
One of the larger remnants was an off-cut from the doorway – which you can just see here on the left…
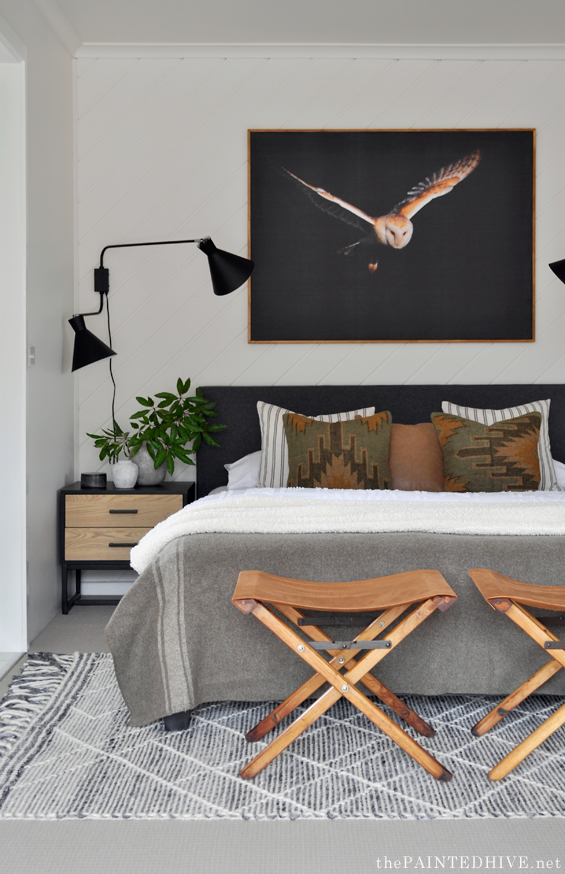
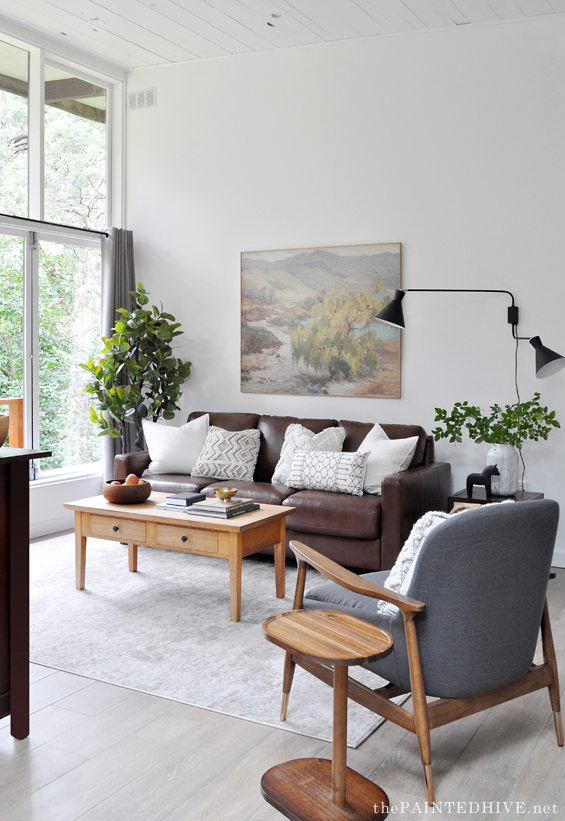
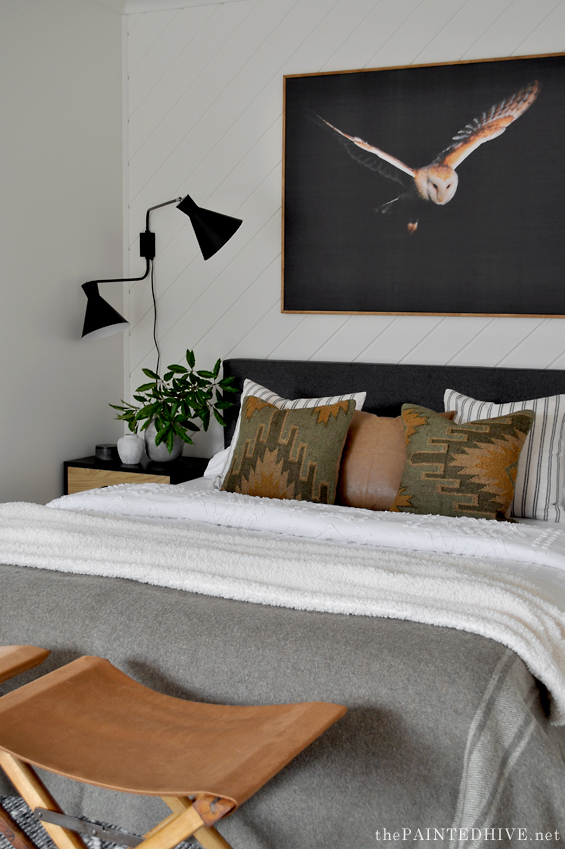
Although the composition of the image wasn’t exactly ideal for a piece of stand-alone art, given it was merely an unintentional off-cut, it was the exact same product I used to make the owl art for my brother’s bedroom and the landscape art for my client’s Airbnb bungalow, so it seemed like the perfect candidate for the tutorial.
And whilst it’s not quite as large as some of my previous pieces, at around 75cm x 85cm (29″ x 33″) it’s still a decent size – and does make things easier from a tutorial perspective.
So, let’s get into it!
YOU WILL NEED…
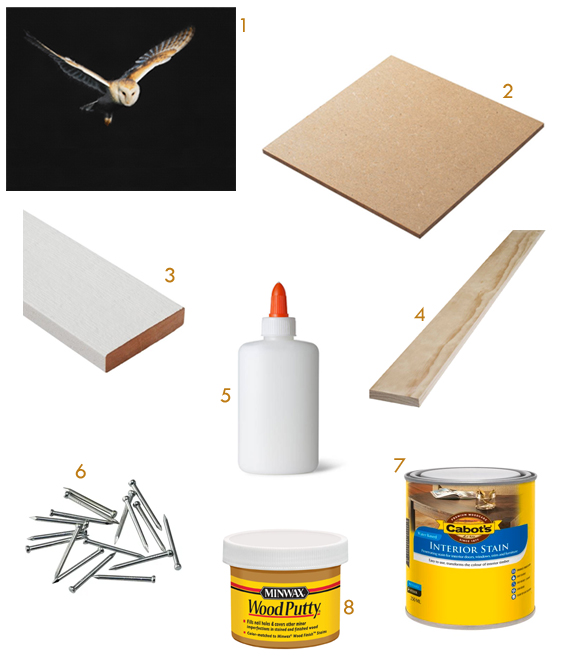
1 | ART PRINT
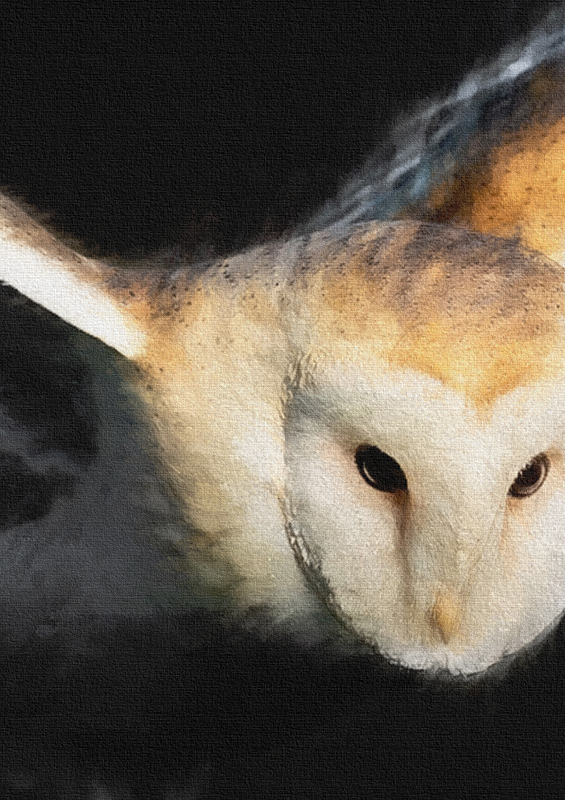
Of course this can be whatever you like. This tutorial centers around framing large-scale art so anything bigger than about 50cm x 50cm (20″ x 20″) is ideal (I have linked to some of my past tutorials for framing smaller art at the end of this post). As already touched on I’m using a peel-and-stick wallpaper remnant. Self-adhesive prints are great to work with because they are thick, durable, repositionable and easy to apply. You can certainly use paper prints too, and I’ve done this several times in the past. You just need to be a bit more careful as paper isn’t as resilient and the gluing process can cause it to bubble and wave. Something to be mindful of is having a decent “bleed” area around the print as a portion of the perimeter is wrapped around the frame. If you would like to use my owl image it’s available below as a free download. I had it printed by AJ Wallpaper who have warehouses in several countries and ship internationally.
2 | BACKING BOARD – CUT TO SIZE
Because we are dealing with large-scale art which needs to be affixed to a solid backing (unlike fabric which can be stretched around a mere frame) it’s important for the backing board to be light-weight, otherwise the art will end up being overly heavy. This means it can’t be anything too thick. I generally like to use 3mm or 6mm (.01″ or .02″) MDF sheet as it’s easy to obtain, nice and smooth, and affordable. You can even have it cut to size by the hardware store! There are many alternatives such as plywood, masonite and chipboard, or even materials such as corflute and rigid card stock. When considering the size of your backing board ensure it’s around 5cm (2″) smaller than your art print to enable the print to be wrapped around.
3 | REAR BRACING TRIM
As the backing board is quite thin it needs to be stabilised by adding bracing trim around the perimeter. This trim also provides an avenue for affixing the framing moulding to. I generally use lengths of MDF (because it’s the cheapest option and nobody ever sees it) but for this tutorial I have used some pine trim I had left-over in the shed. Depending on the size of your artwork you may also like to add a horizontal or vertical central brace if needed.
4 | FACE FRAMING MOULDING
This is the visible frame you actually see. There are loads of different mouldings you can use. I like the simplicity and affordability of plain rectangular pine in 12mm x 30mm (.04″ x 1.1″). This should be readily available from most hardware and timber stores.
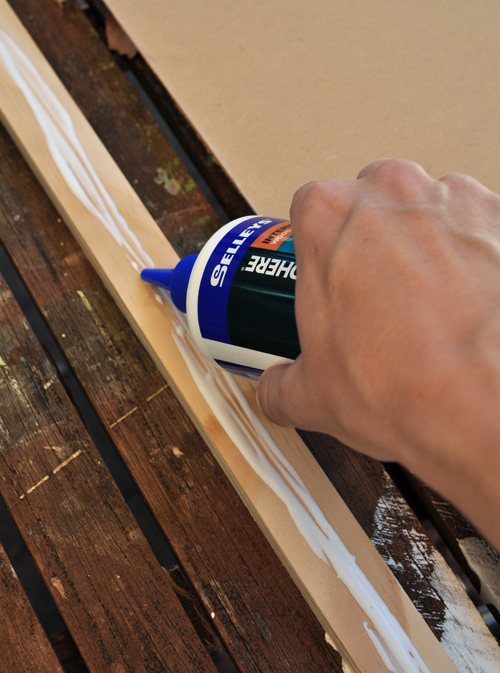
5 | WOOD GLUE
To attach the trim and moulding. I just used some PVA.
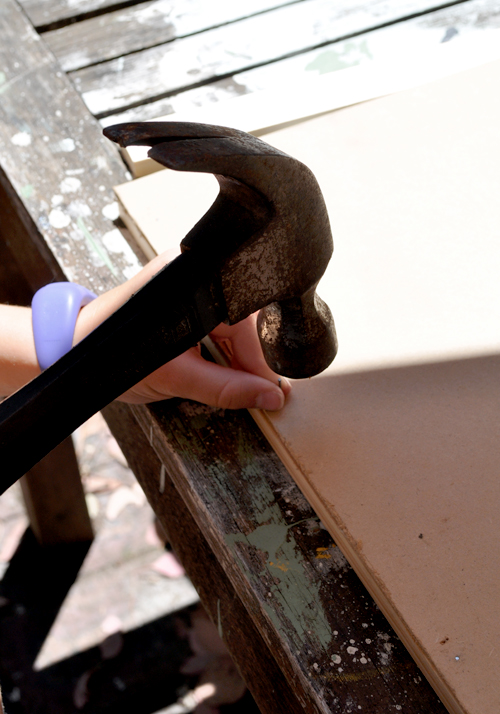
6 | FINISHING NAILS
These are fine nails with bullet shaped heads which can be easily hammered in so they are barely visible. You may need two different sizes: one to attach the rear bracing trim (something short enough that it won’t protrude through the trim), and one to attach the face framing moulding (something long enough that it can grab the bracing trim sufficiently). I realise this probably sounds complicated but it’s very straight-forward once you’re actually undertaking the project.
7 | WOOD STAIN/PAINT
If you’d like to stain or paint your frame. I used a water-based interior stain I already had in the shed. It had been custom mixed from a variety of left-overs so I can’t share the colour sorry.
8 | WOOD FILLER/PUTTY
To conceal nail heads and patch any corner joins if needed.
ALONG WITH…
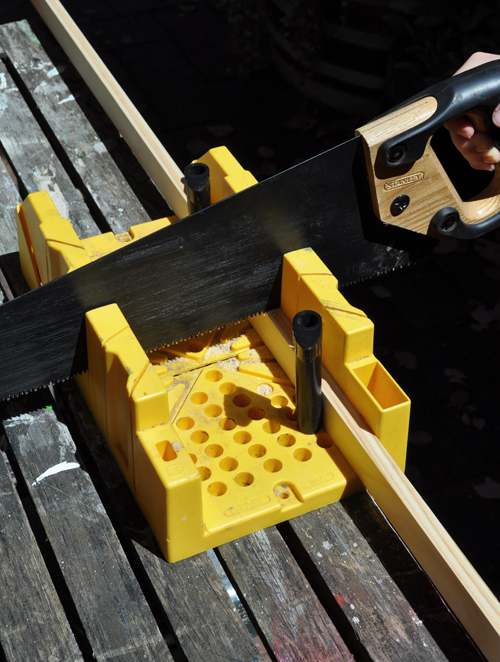
SAW & MITRE BOX (OR POWER MITRE SAW)
HAMMER
SANDPAPER
CLOTH OR BRUSH (FOR APPLYING STAIN OR PAINT)
NAIL PUNCH (OR PERMANENT MARKER)
METHOD…
STEP 1 | ATTACH BRACING TRIM TO BACKING BOARD
Firstly you need to cut your trim to fit around the perimeter of the backing board.
Note: As touched on in the materials section, you may also like to add a central (horizontal or vertical) brace depending on the size and rigidity of your board.
It doesn’t need to be millimeter perfect or look amazing – it’s always going to be hidden – but you still want it to be somewhat accurate and tidy. I simply cut mine to form basic butt joints at each corner.
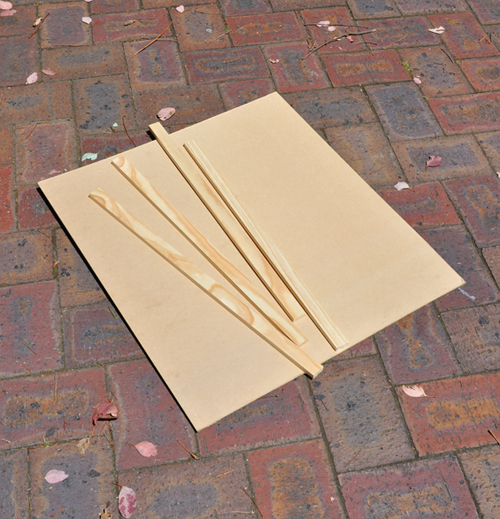
Here it is just resting in position…
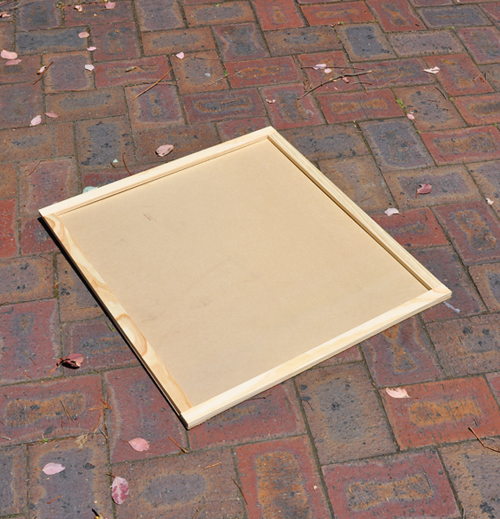
Each piece of trim is then glued to the rear of the board before being nailed on from the front. Nailing from the front ensures the nails grip sufficiently into the baking board (any nail heads will be concealed once you attach the print over the top). If you were to nail from the back of the trim you wouldn’t get sufficient bite through the board as it’s quite thin.
To prevent the backing board from sagging in the middle during this process place some spacers beneath it so it sits flush (I generally use some books which are similar in depth to the bracing trim).
Here’s the result…
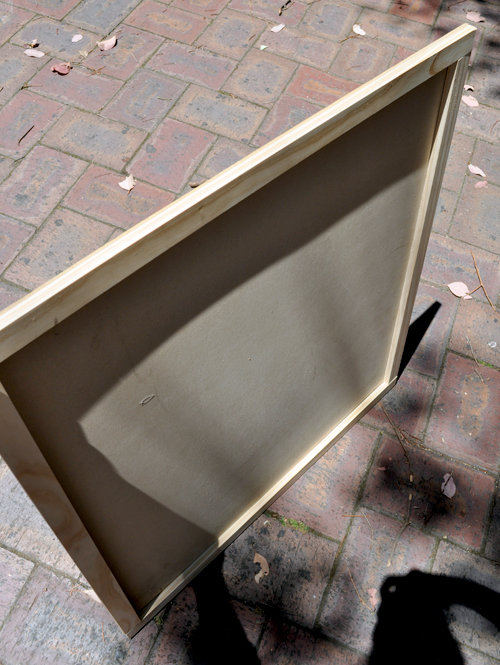
Sorry, it’s tricky to photograph.
STEP 2 | APPLY ART PRINT
With the bracing trim in place, it’s time to attach the art print.
Position it as needed on the backing board, ensuring it’s relatively straight and overhanging each edge, then peel away a portion of the film. Press and smooth the revealed adhesive portion of the print firmly into place. Continue peeling away the film, whilst pressing and smoothing, until the print is completely attached.

Peel-and-stick wallpaper is very forgiving. Because it’s quite thick it rarely bubbles and the removable nature of it allows it to be repositioned if needed.
Fold the edges over and make the corners neat by wrapping them in a similar manner to a gift.
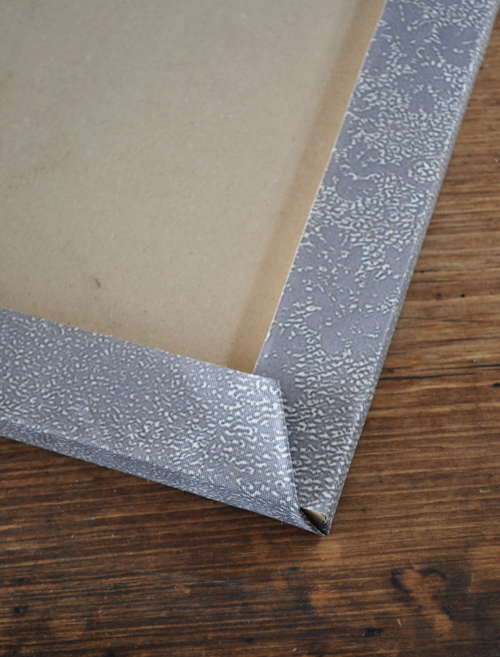
Note: In general peel-and-stick wallpaper adhesive isn’t crazy sticky so you may find the edges and corners lift after you’ve wrapped them around (this can be exacerbated by the fibrous nature of the timber substrate). Don’t worry. These will be flattened by the framing moulding in the next step.
STEP 3 | TRIM FRAMING MOULDING TO SIZE
It’s entirely up to you if you want to use mitre or butt joints for your frame.
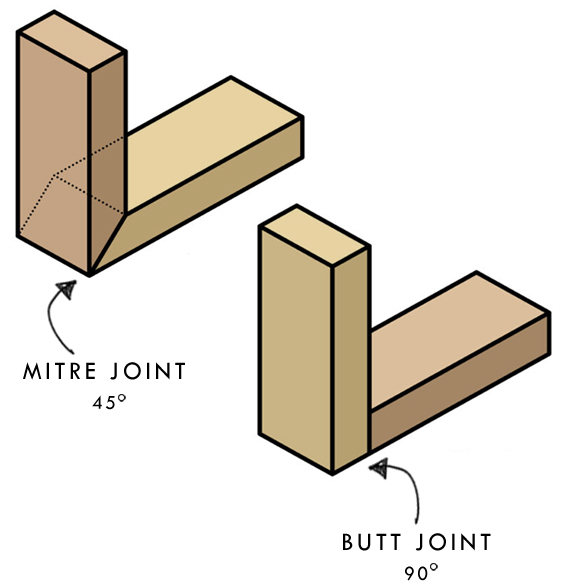
Mitre joints look a little more refined but they can also be trickier to get right!
Based on the size of your backing board, measure and mark your framing moulding then cut as needed.
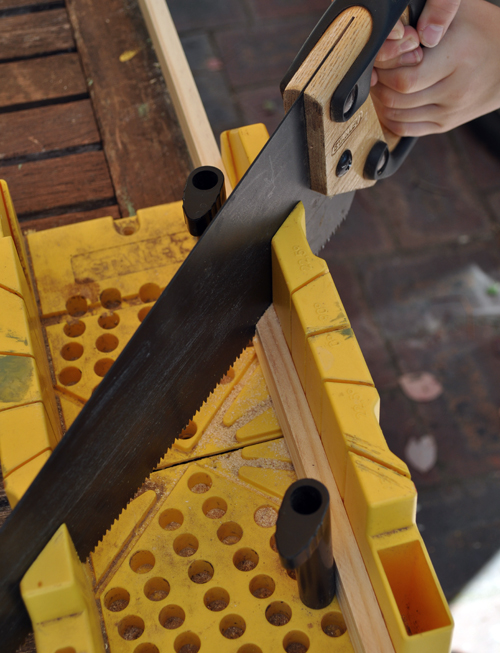
I always like to double check each piece against the print as I go to ensure the accuracy of the lengths and the neatness of the joints. Sometimes I find I’m a little bit off (have I mentioned before that math isn’t my strong suit?) so in general it pays to trim a tad larger if you’re feeling unsure – because you can always take more length off, but you can’t add it!
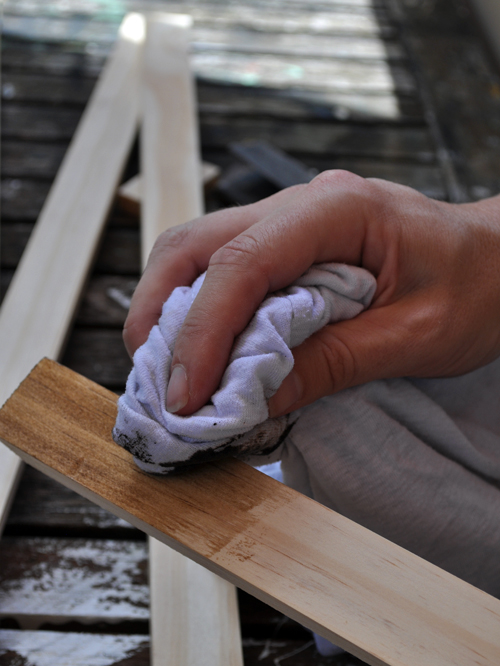
Once you’re happy with each piece you can sand lightly as needed then stain or paint as desired.
STEP 4 | ATTACH FRAMING MOULDING
With your print in a vertical position, apply a bead of glue along the length of your first piece of framing moulding then hold it in place before hammering in around five-seven nails.
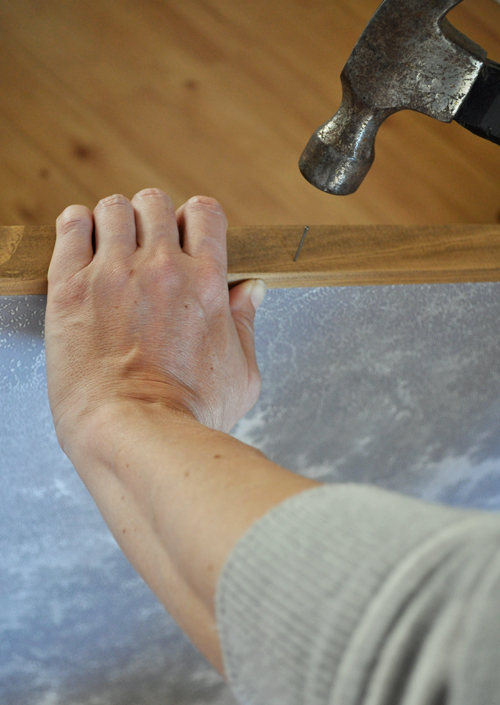
Ensure each nail bites into the rear bracing trim to provide a strong hold. I generally start with the centre nail – this gives wiggle room to adjust the alignment – followed by the two end nails, then I fill in any gaps as needed.
Continue until you have framed the entire print.
At this stage you can countersink any nail heads if needed by knocking them in with a punch before filling the holes with timber putty. Alternatively, you can simply colour the nail heads with a marker which matches your stain/paint. Or you may find that the nail heads are so subtle they blend-in regardless.
Depending on the neatness of your corners you may also like to touch-up the joints with some putty too. I’ve done this a few times in the past though this time around my joints were all accurate enough not to need any filler.
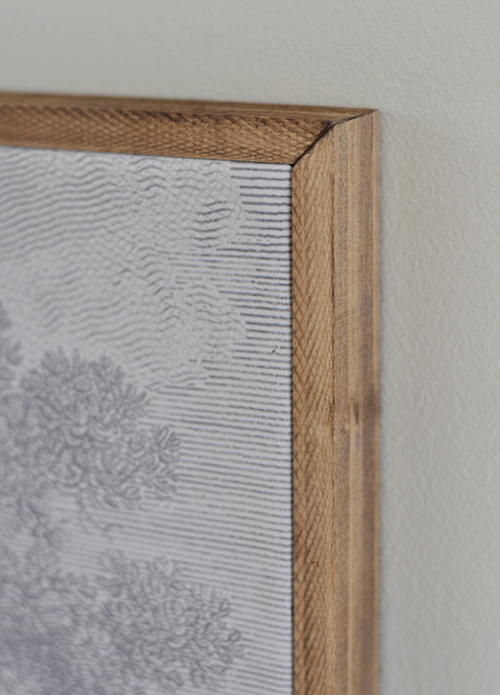
I like to align my frame with the front of the print but you can always recess the print if preferred for a more traditional look.
Because my framing moulding is deeper than the bracing trim it provides a little ledge to easily hang the art from.
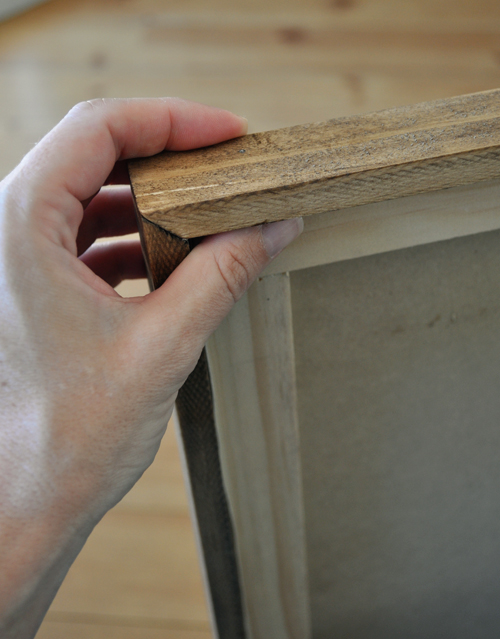
I generally just do this by hammering a couple of sturdy nails into the wall (at even heights of course) then plonking the frame over them, but you can always attach some picture string, or other hanging hardware, to the frame instead.
STEP 5 | FINISHED
Yep, that’s it!
I realise at the beginning of the post I made this project sound a little bit arduous, though it’s actually really straight-forward as I hope you’ve seen. It can just be a difficult process to ‘stop-start’ with.
All up the large-scale owl artwork for my brother’s bedroom came in at around $100 – about $40 in framing materials and $60 for the print. Given large-scale wall art prints can easily reach into the high hundreds (even thousands!) it’s certainly a really worthwhile and rewarding DIY to get comfortable with.
If you would like to use my owl image, you can download it for free below.


125cm x 100cm/50″ x 30″ at 300 DPI.
Can be enlarged or reduced by around 30% with good quality retention.
For personal, non-commercial use only.
Republication, reproduction or redistribution in any form is strictly forbidden.
As touched on in the post about my brother’s bedroom makeover, the owl was a free downloadable photo I originally found on Unsplash.
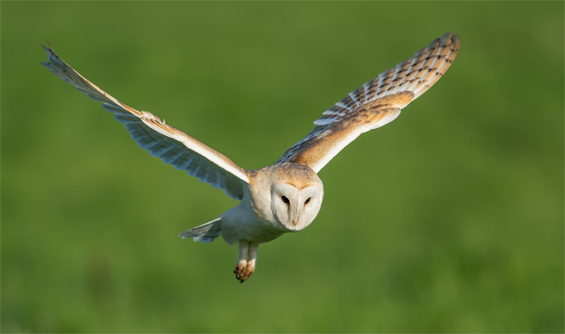
I made some colour adjustments and size edits in Photoshop, then applied a custom painterly effect using a program called Topaz Impression.
It’s hard to see the details from a distance, so here’s a close-up which better shows the difference…
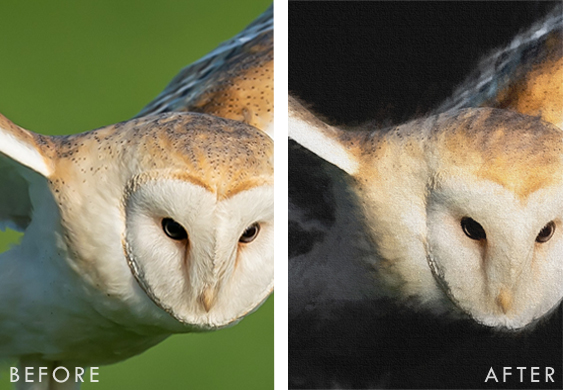
Of course, there was absolutely nothing wrong with the photograph to begin with. It was sharp and well composed and quite lovely, it just didn’t have the mood I was after.
If you don’t have fancy programs like Photoshop or Topaz Impression, there is a huge range of free and affordable software with similar capabilities.
Note: Just be mindful that some online editors and downloadable apps don’t have provisions for saving large-scale and/or high resolution images.
Over the years I’ve actually published a couple of blog posts with tutorials and general information about turning photographs into digital paintings. These even include program lists. You can find them here…
![]()
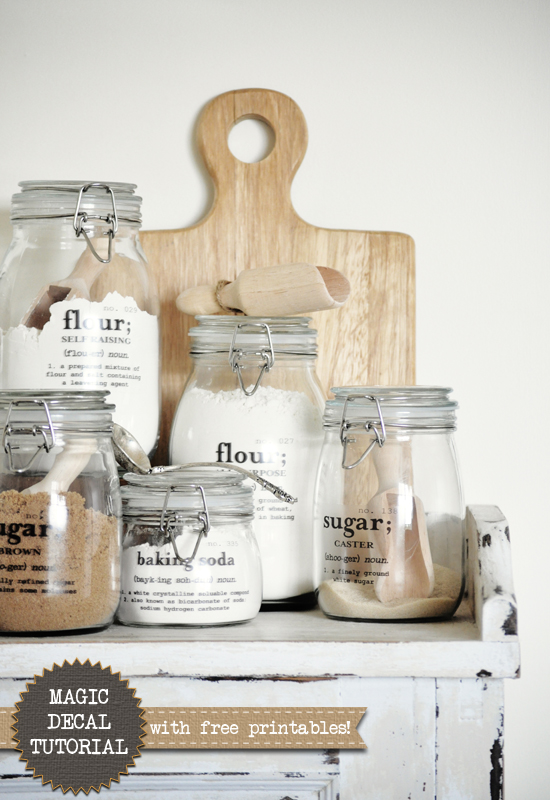
If you’re working with smaller scale art you can get away with using a thicker backing board – because it doesn’t end up being overly heavy – which eliminates the need for the rear bracing trim. If your art is smaller than around 50cm x 50cm (20″ x 20″) then I have some past framing tutorials you can check out (click the below images to go to the relevant posts).
![]()
Free printable is for personal, non-commercial use only.
Republication, reproduction or redistribution in any form is strictly forbidden.


I have a huge painting of my grandmother as a young girl, painted by her cousin, which I love. It’s just stretched canvas and I was thinking last night that I should figure out how to make this type of frame for it… I woke up to an email tutorial and I can’t thank you more! As always, it makes my day to wake up to an email from you. xoxo
Thanks so much Sara :)
Hello and thank you for sharing this with us. I will be sure to keep this saved.
What a great tutorial and I love that you found a way to use leftover wallpaper. I can’t wait to try it. You are always inspiring great ideas. Thanks!
Thank you :)
This is a great tutorial – Thank you very much for sharing!
Great tutorial thank you !! You’re mind is very keen with great ideas.
Thanks so much for the tutorial! I appreciate how you talk (write) out each step and then write it again as short hand with pictures. Makes total sense to me!
Thanks Deb. I take way too long putting my tutorials together so that’s really appreciated :)
Yeah! A new post. Thank you for the tutorial. Have a great day Kristine!
Another great tutorial Kristine. Thank you so much. I’ve been procrastinating about making a frame for a large print I wanted to get, looks like I’ve got no excuse now! Cheryl
Glad it’s helped Cheryl :)
Thank you Kristine, I mentioned previously that I love the owl, could you recommend where I’d go to have a print or canvas done. No local shops to go to where I live.vMy frame is large – 90x66cm.
cheers!
Jen
You can use the Officeworks online print store. I’ve used them several times and found them great. Let me know if you need help. I’m happy to size the image for you.
Fantastic tutorial! That owl art is to die for. And your parents bathroom is still one of my all time favourites.
Hope you’re ok down there. Straining times. xx
Thanks Anna. Yes, we are all good down here. Just busy with lots of jobs on at the moment. Hope you’re well too.
Thankyou, thankyou Kristine. You are so generous with your information and you give me hope. I am terrible with maths as well and measurements get me in a real tangle (eg I will say something is 30mm when it should be 300mm) yikes!!
I’ve taken some interesting nature pics and this is just the info I need to have a go at framing them. And the bedroom looks fabulous. You have one lucky brother :)
Ha, ha. I used to do that all the time with dimensions too but with practice I’ve finally got my head around them. It’s much harder with mm because the numbers are too darn high! The more zeros you add the more complicated things become!
I hope this helps you with framing some of your photos. Sounds like a great project!
Such a great tutorial, thank you so much Kristine.
Thanks to for offering the beautiful owl image. My step daughter will be delighted when I put it all together.
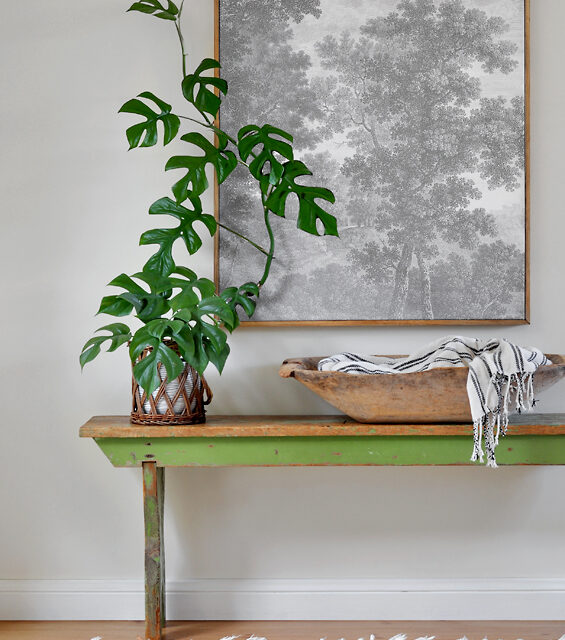
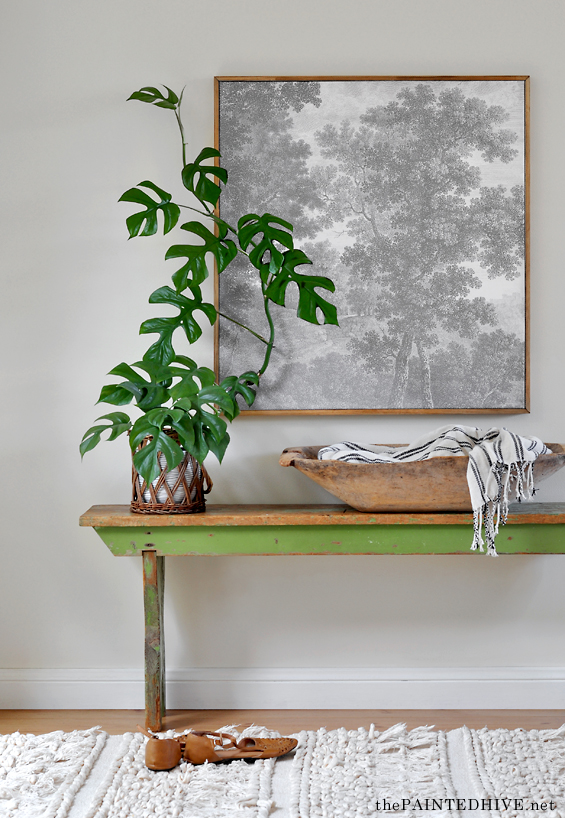
Oh, and that plant in the top image! It’s striking. Do you know what it is?
Thanks and you’re welcome. That is a Monstera Deliciosa. So easy to care for and always lush.
Your owl image goes perfectly with your room decor. Thank you for sharing the tutorial for the DIY frame. It’s extremely useful and comprehensive.
OMGosh, where the heck are you???
LOL, yes, I know. I’ve really disappeared this time! So sorry. I do have stuff to share. Just been so busy with clients over the past few months. I do plan to come back soon!
Thanks for this one! This is going to be a great accent for my upcoming renovation.
Thanks for sharing!!
I miss your fabulous content – hope you’ll be back soon!
Thanks Alix. Yep, I’ve taken a much longer than expected unplanned break to work on some new client projects! Will be back soon. Thanks for thinking of me :)
Such a detailed tutorial. It was very helpful! Thanks for sharing it and putting your efforts in it.
This was so great ! Thanks for sharing this!
Wow, this is great! Thanks for sharing! Will definetely try this this weekend!
We miss you!!!
Great idea. I’ve got to try making my own frames some time for my paintings. I really like the minimal and rustic styles of these
Wow! This is an awesome tutorial! My wife and I will use this on our remodel.
Hey Kristine! Really love the tutorial. Also wanted to mention your link for “MY HIVE” at the bottom doesn’t work.
Thanks so much for this tutorial, Kristine! These look fabulous! We are currently renovating my bedroom, and I will definitely be doing this for my posters!
Great, so glad you like them!
This was so great. Such a great tutorial, thank you so much Kristine
Hey there! Just wanted to drop by and say how much I appreciate this DIY framing tutorial. As someone who loves large-scale art but often struggles with finding affordable frames, this is a game-changer! The step-by-step instructions and the use of peel-and-stick wallpaper as the art print are genius. I can’t wait to give it a try and create some custom frames for my own artwork. Thank you so much for sharing this helpful and cost-effective solution!
Such a great tutorial and content really appreciate the efforts of you.